|
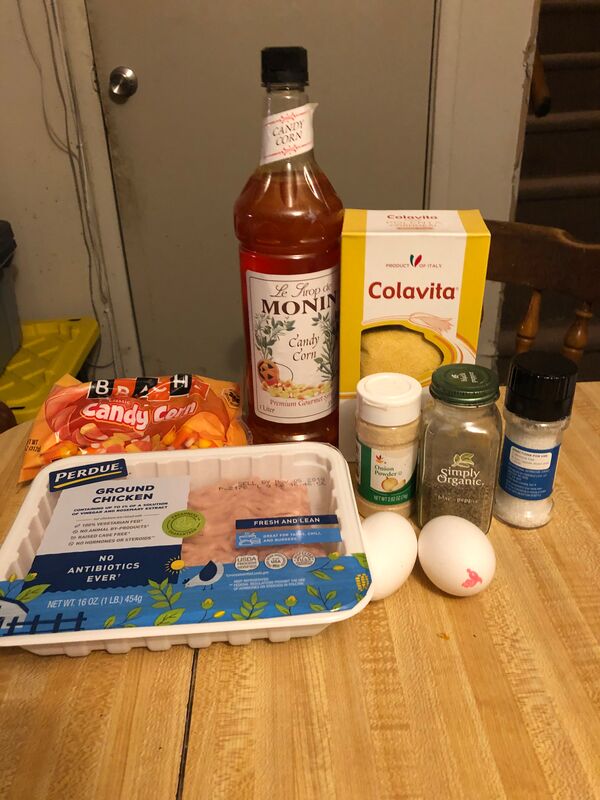
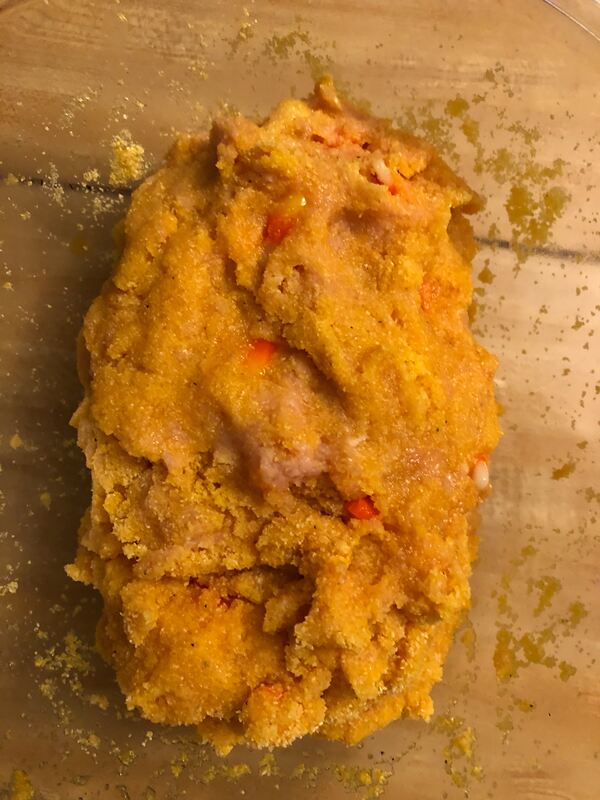
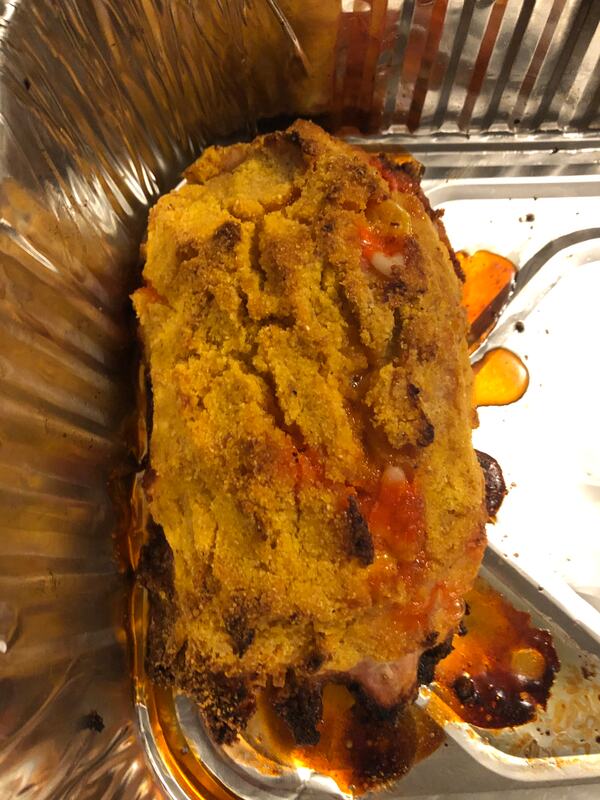
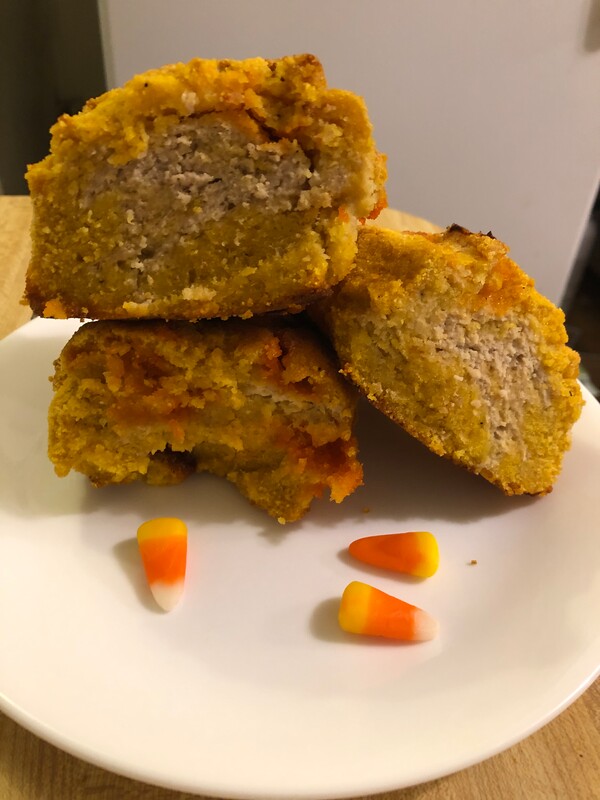
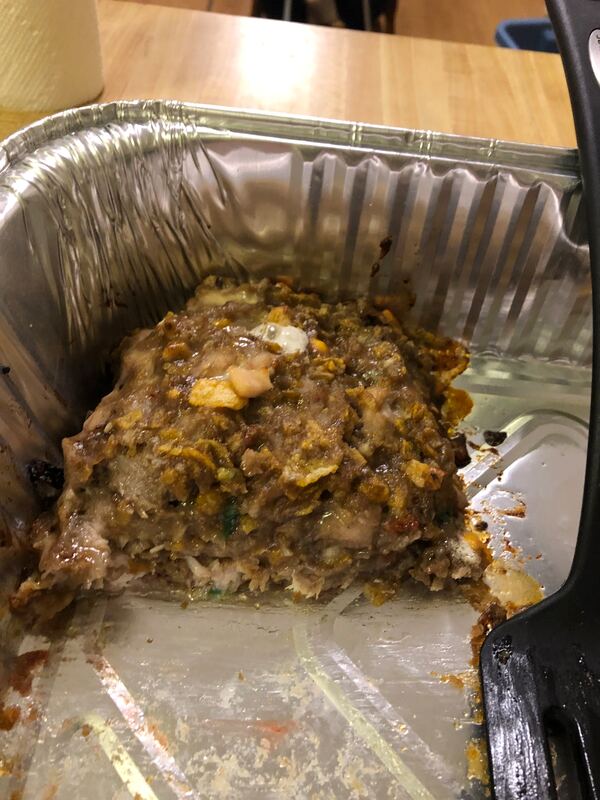
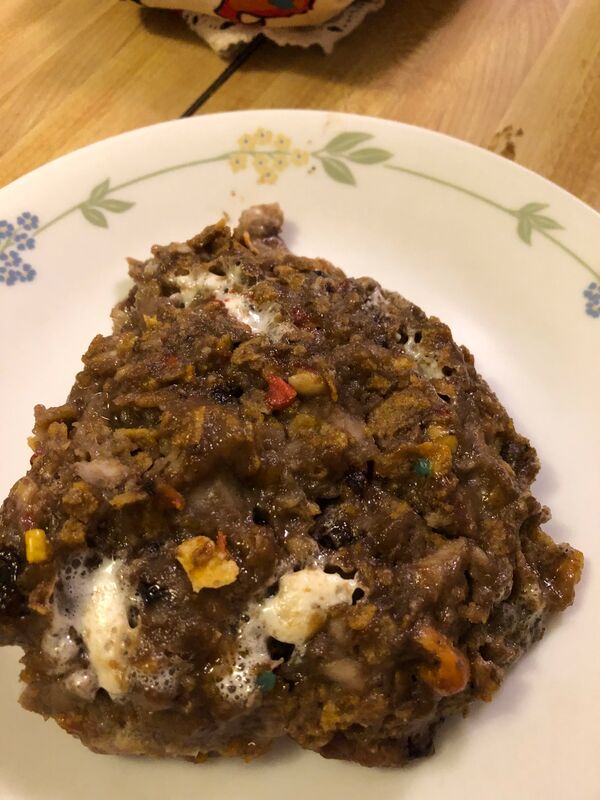
Got some leftover candy corn tonight you don't know what to do with? Put it in a meatloaf and have it for dinner- the chicken pairs well with the cloyingly, sweet candy corn! I used to hate candy corn as a kid- it wasn't chocolate, so why should it be considered candy?Plus it's not even a goddamn vegetable, though I'm sure humans would be eating a hell of lot more vegetables if it were! But why the change as an adult? A lot more open-mindedness when it comes to food. Personally, I believe if you buy food, you should try as much as you can to eat all of it, even if it's something that's pretty much pure sugar and food dyes. Though, I probably won't buy another bag of candy corn again. I think I'm starting to lose my tastebuds with age and some things are just too sweet for me now. But why put candy corn in a chicken meatloaf? Chickens eat corn(the real type, not the candy), so pairing them with candy corn kind of makes sense in a twisted sort of way. I didn't feel like making candy corn bread just for this recipe, so I did the next best thing- put polenta(corn flour) in it to hold the meatloaf together. The addition of polenta brings a hint of cornbread taste to this dish. Plus polenta absorbs liquids(namely the candy corn syrup) well. I loved the fact the outside of the meatloaf crisped up well. It was as if I was eating really thick slabs of fried chicken, albeit laced with candy corn! Candy Corn Chicken Meatloaf Ingredients 2 beaten and whisked eggs Pinch of onion powder 1/2 cup candy corn 1/2 cup Monin Candy Corn Syrup Pinch of salt Pinch of black pepper 2 cups raw polenta 1 pound ground chicken Instructions
2 Comments
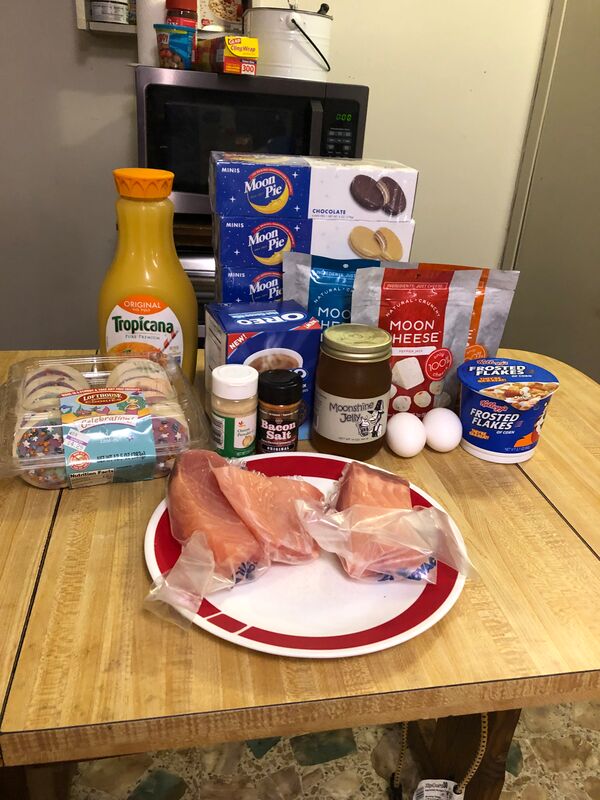
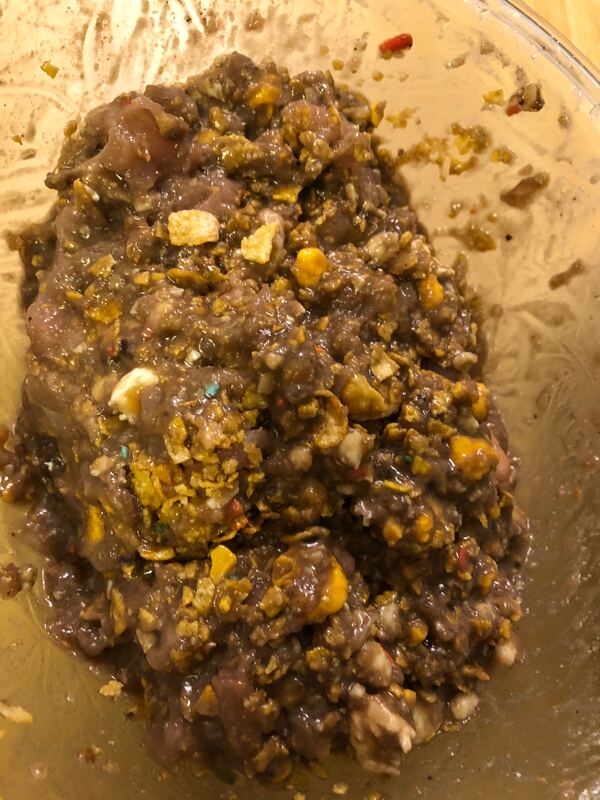
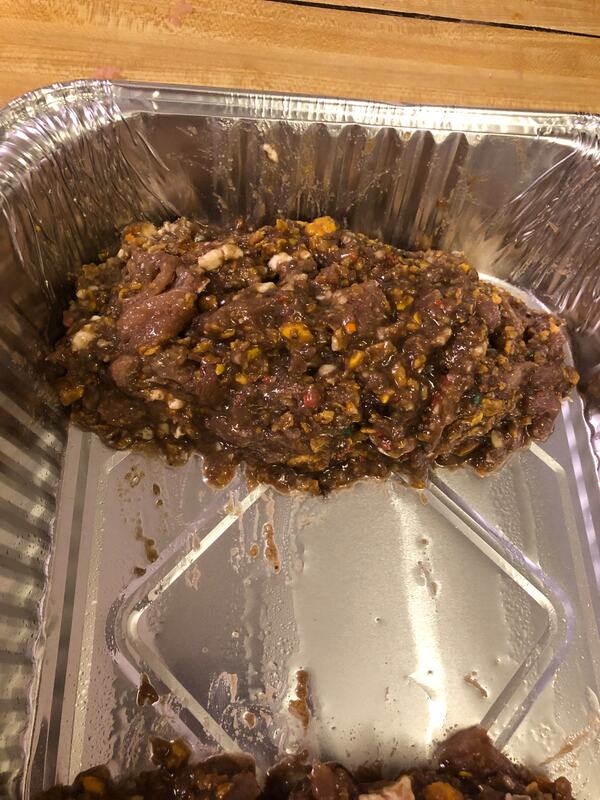
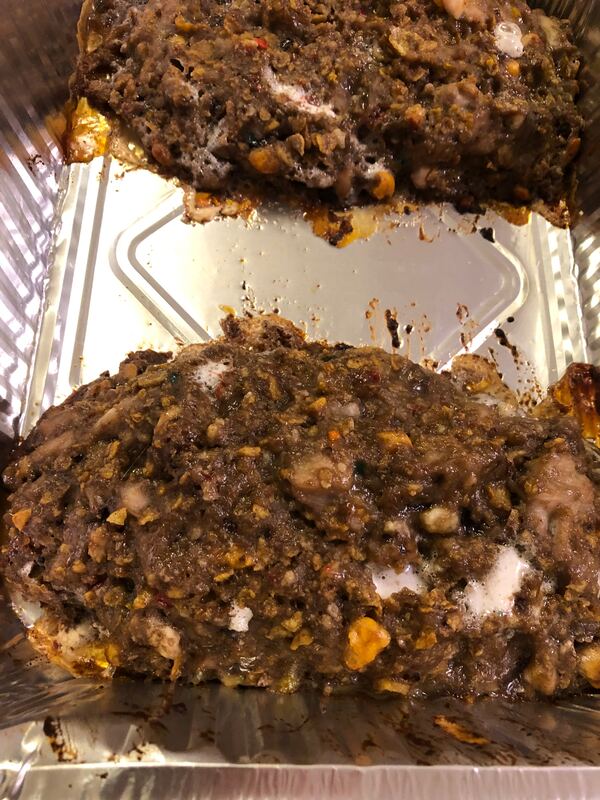
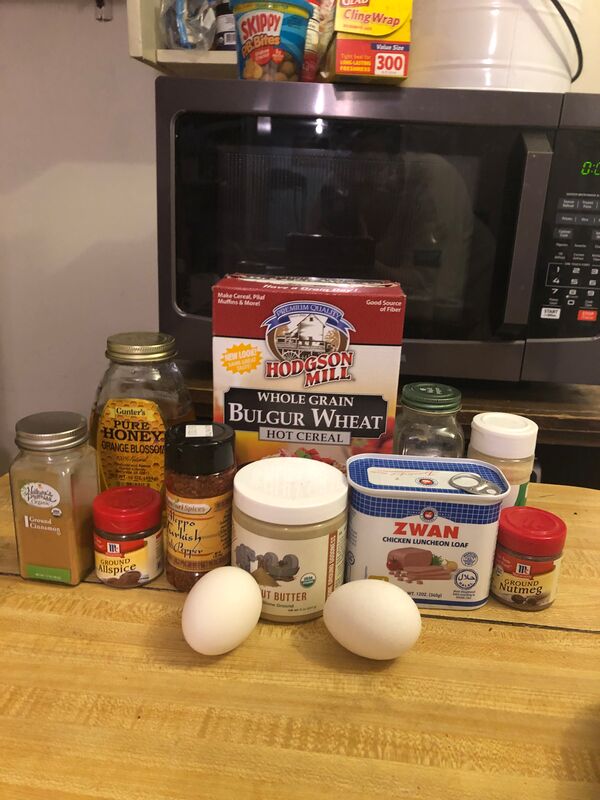
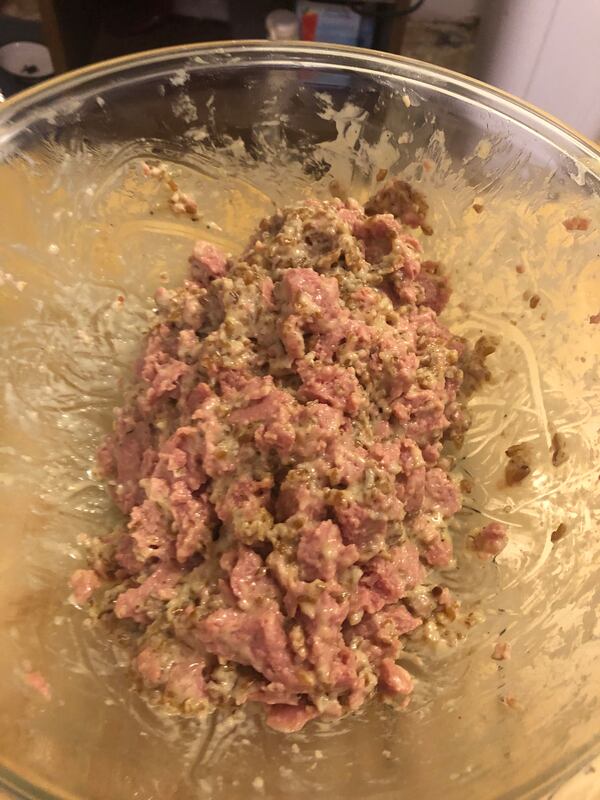
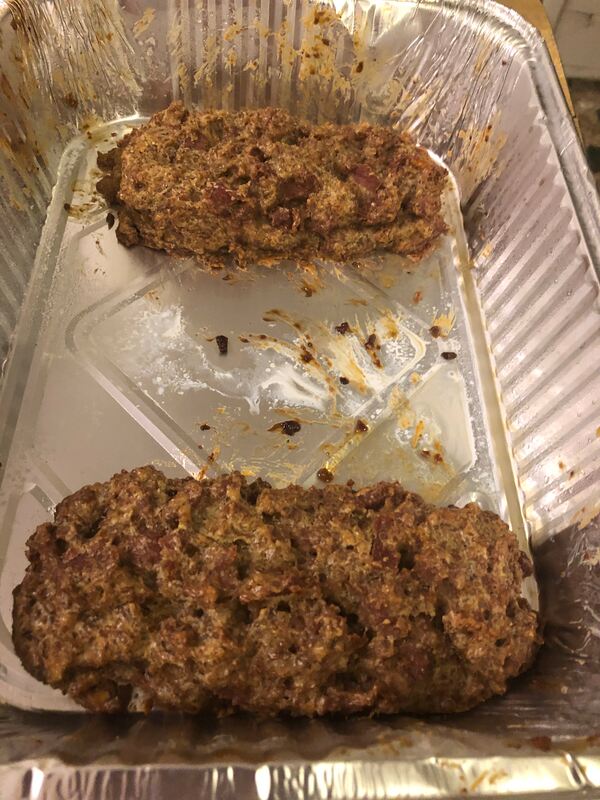
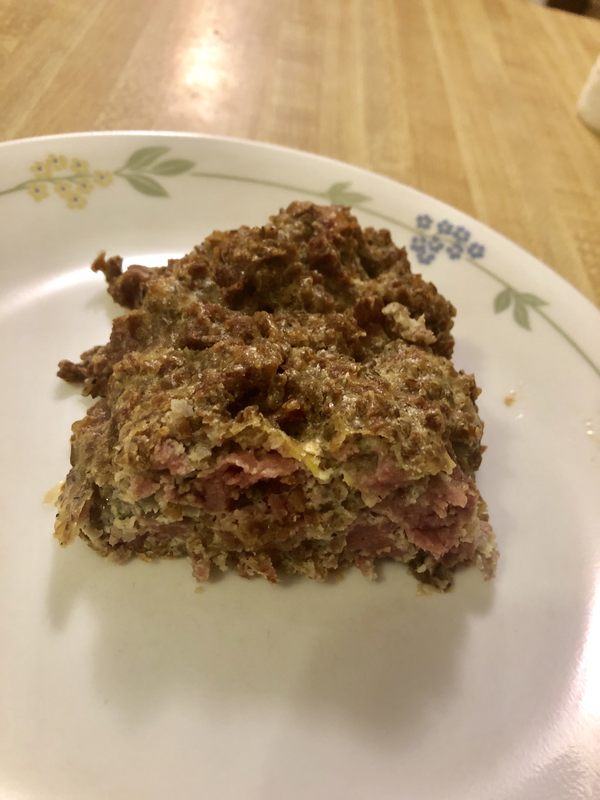
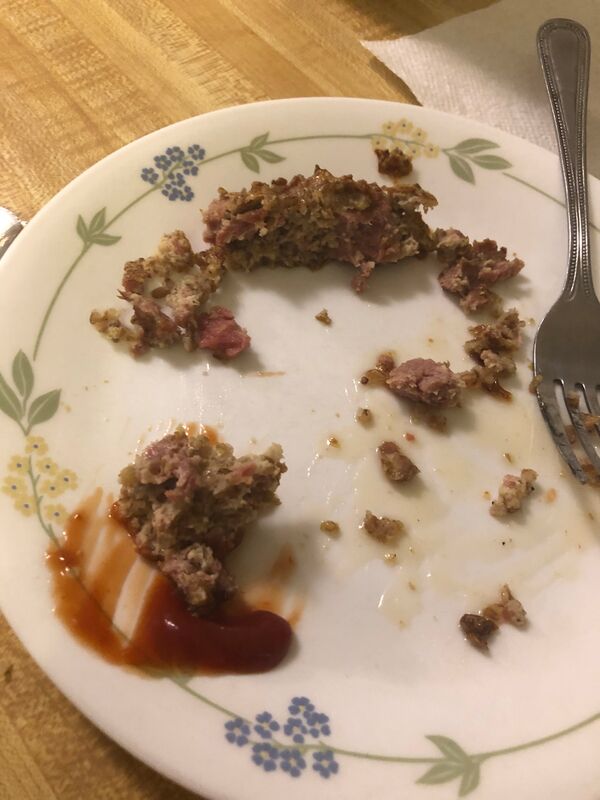
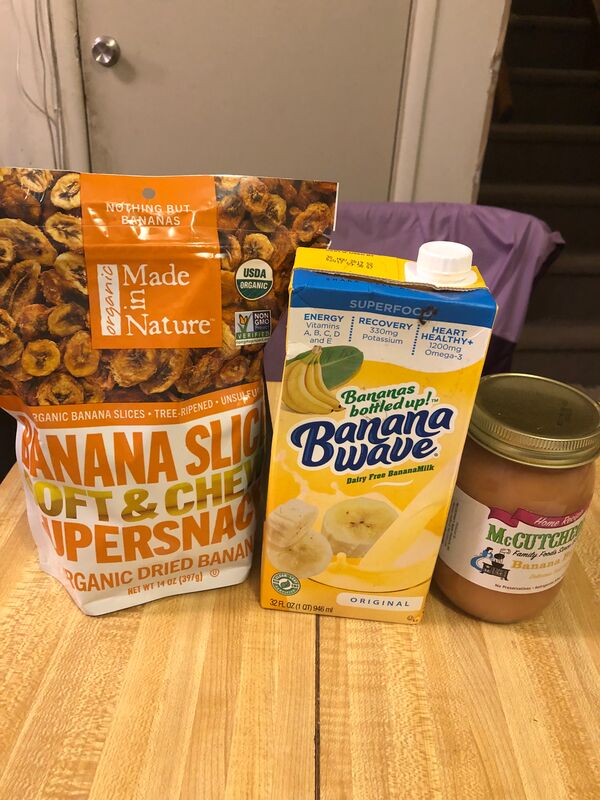
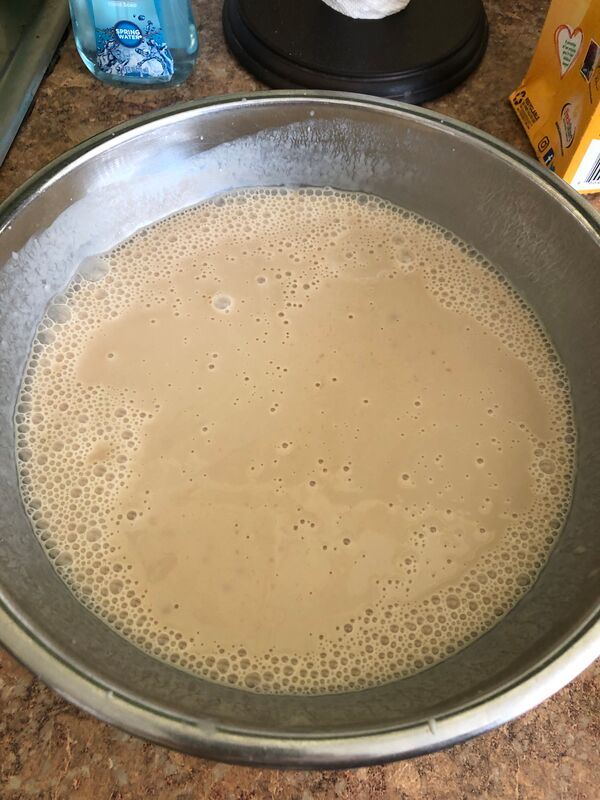
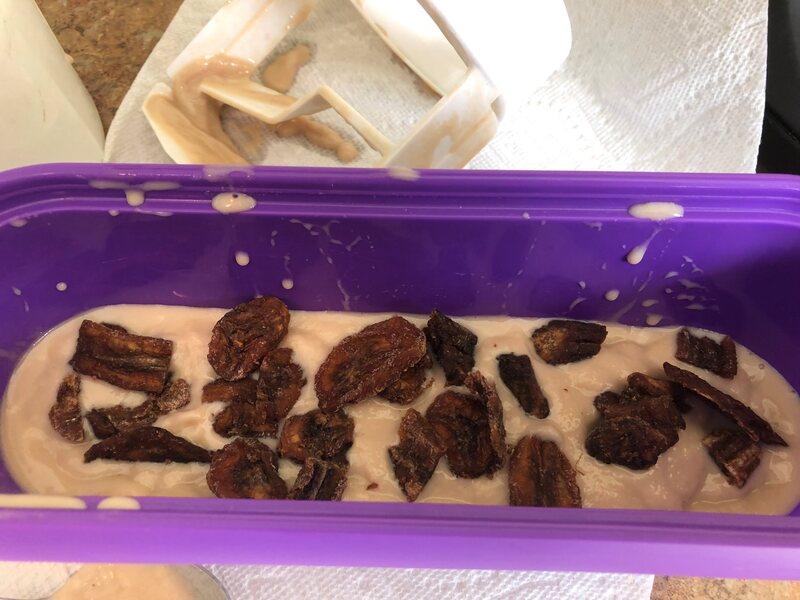
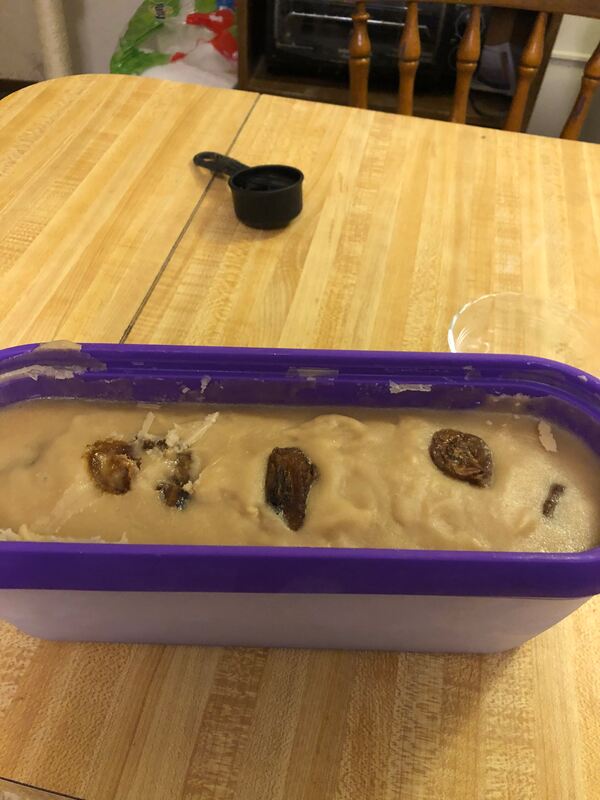
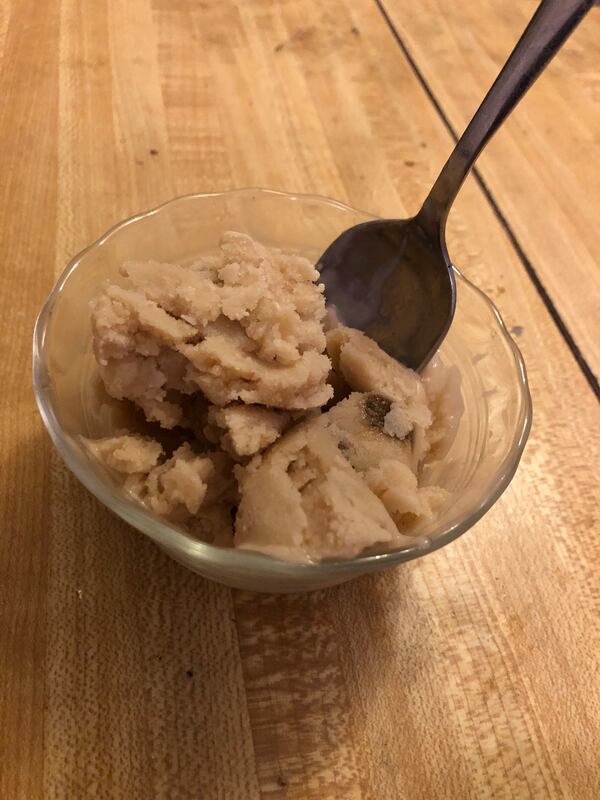
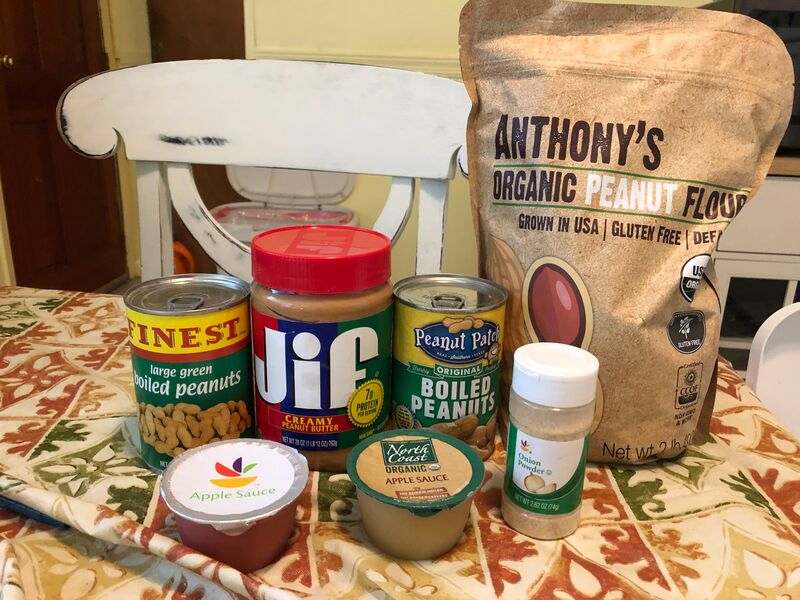
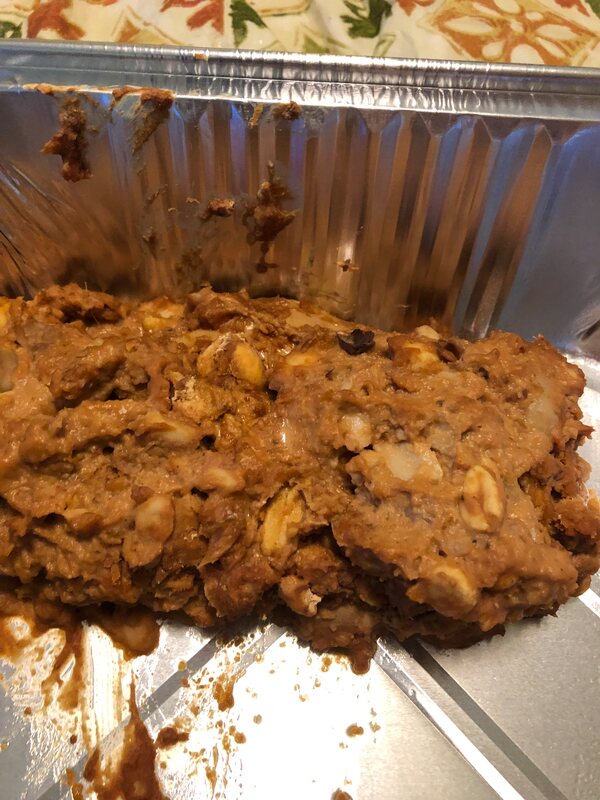
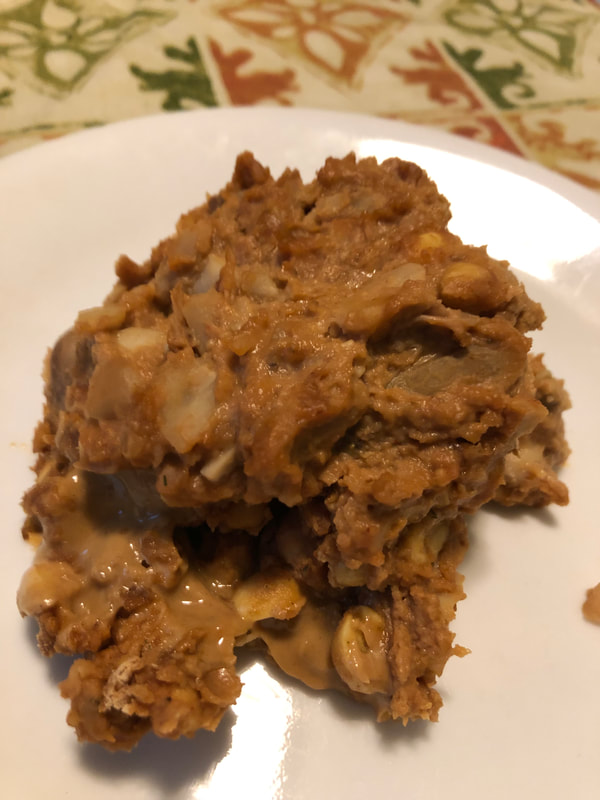
In this video, you'll learn 5 ways to use baru nuts, a rare type of nut found in the Brazilian savanna(I incorrectly say the Amazon in the video but it's not the same thing): 1. A nut butter 2. Baru nut milk 3. Baru nut ice cream using the nut milk 4. Cheese made from baru nut milk pulp 5. Baru nut ice cream cake All of these recipes(except for the cake) are vegan! You're probably wondering right now, "What does it taste like, anyway!?" Good question. It tastes like a dry almond, basically, though others claim it's a hybrid between cashews and peanuts. You may notice this video is quite long, at a little under 12 minutes. I haven't made a video that long in almost 4 years and I had doubts about whether to even bother putting this video up considering baru nut milk, like many nut milks, don't lend themselves to making creamy ice cream. Initially, I tried following the conventional methods for softening hard ice cream, namely leaving the open tub out for 10 minutes and using a spoon and knife that have been run under hot water, but it took me an additional 25 minutes to scoop just 1/2 a cup of ice cream. Then my sister told me to put the ice cream in the microwave, which is what she does all the time. I had my doubts about this method because I've always envisioned ice cream just melting into a puddle for even a second in the microwave. But apparently the newer microwaves on the market have a "soften mode" for frozen desserts. After lots of testing, I came to the conclusion that this ice cream needs to be softened in the microwave on soften mode for 2 minutes, 15 seconds. Trust me, after that time period, the ice cream will still be a block of ice but if you put just enough elbow grease in it, it's doable to scoop it out with an ice cream scooper. Yesterday, though, I had a breakthrough. When I went to scoop the ice cream after I softened it in the microwave, I scooped a huge chunk out. On my birthday, I buy myself an ice cream cake from a local ice cream store. You can have two flavors in your cake but if you only want one, the layers go like this: Bottom layer: ice cream On top of that: Cookie crunchies On top of the crunchies: layer of whipped cream To top the whipped cream: sprinkles I'm telling you this because I realized if I make the ice cream look like a deconstructed ice cream cake, I'll be more likely to eat it because nobody(including myself) wants to have an arm workout with their ice cream. Apart from the whipped cream, I had everything else. Once I bought some Cool Whip, this ice cream tasted even better! Granted, I had a lot of brain freeze just eating the block of ice cream but it was worth it. Sure I could've thrown the ice cream away but to me, that's disrespectful to the farmers in Brazil who toil so hard to grow the 80-foot trees baru nuts come from. I'd like to think as the years go on what with climate change, people will become less likely to throw out perfectly good food, even hard ice cream that can be turned into an ice cream cake. Apart from the less than desirable texture of the ice cream, it looks like some sort of chocolate ice cream that tastes very nutty. But I need to backtrack to the three recipes that are necessary to even make this ice cream: the nut butter, the milk, and the pulp resulting from the milk(which, while you don't need it for this ice cream, you really shouldn't throw out because it can be made perfectly edible). The Nut Butter Of the 5 recipes, the best one is definitely the nut butter(but the cake comes in a close 2nd). It tastes like a mix of chunky cashew, peanut, and almond butters. This is the only recipe I'll plan on repeating for the surplus baru nuts I have. To me, just eating plain baru nuts isn't very enticing. I'm a sucker for a nut butter and jelly sandwich, though! The Nut Milk When I made these recipes, I overestimated how many nuts needed to be soaked in water by a lot- 2 cups, to be precise. My blender can only fit 6 cups total and 1/4 of nut milk is just the nuts- the rest is water and other stuff, like sweeteners. I didn't throw out the extra soaked nuts, though. I turned them into milk off camera, but I used them for other things, like mac and cheese and my morning oatmeal. Of course, I drank some too. As for the pulp that I ended up with, I saved some of it to make a baru nut pulp bread off camera. Strangely enough, the milk tasted like the kind you get from a cow, at least once you put in the maple syrup. Otherwise, it's just bland. The Rest of the Nut Pulp There was a lot of pulp resulting from making the milk. I used most of the pulp to make vegan cheese. Some parts ended up hard but still edible nonetheless while most of it was just plain crumbly. It tasted nutty obviously and cheesy from the nutritional yeast I put in. The crumbly bits tasted like either really thin cottage cheese or dry Parmesan cheese. You can spread some of this cheese onto some Triscuits or you can use them as the cheese for homemade pizza. The cheese doesn't melt, though. My dad didn't try the cheese because he was full but he did try the milk and ice cream. To him, the milk and the ice cream tasted nutty. HELPFUL LINKS: Salted Baru Nuts: barukas.com/products/barukas-with-sea-salt Unsalted Baru Nuts: barukas.com/products/baruka-nuts Baru Nut Trail Mix: barukas.com/products/barukas-trail-mix Baru Nut Butter Ingredients 6 oz. salted baru nuts(see HELPFUL LINKS) 2 tbsp melted coconut oil Pinch of cinnamon 3/4 tsp. vanilla extract Instructions 1. In a small food processor, grind up the salted nuts for 5-10 minutes, or until really fine in consistency. 2. Scrape down the edges of the bowl. 3. Add 1 tbsp. of melted coconut oil. Process again until the contents in the food processor don't move around anymore. 4. Add the rest of the melted coconut oil, cinnamon, and vanilla extract. Process again until you end up with a creamy nut butter. 5. Reserve the nut butter for now. Baru Nut Milk Ingredients 13-16 oz. unsalted baru nuts(see HELPFUL LINKS) Enough water to submerge the nuts for soaking(I used 1 3/4 cups) plus an additional 3-4 cups of water 1 tsp. vanilla extract 2 tbsp. chopped dates Maple syrup to taste Instructions 1. In a large saucepot, soak the nuts in enough water to submerge them overnight, for at least 8 hours. 2. Using a colander with a bowl underneath, drain the nuts. Discard the water. 3. Place 12 oz. soaked nuts in a blender along with 3-4 cups of water. Some of the nuts will float while others will sink to the bottom. 4. On pulse mode, blend the nuts and water. If the mixture is too watery, add more soaked nuts and blend on pulse mode again. 5. Add the vanilla extract and dates. 6. Blend on pulse mode for at least 1 minute. 7. Taste the milk. If it's too bland, add maple syrup. 8. Blend on pulse mode again. 9. Repeat steps 7 and 8 until the milk is sweet enough for your liking. 10. With a large bowl underneath, strain the milk through a cheesecloth or nut milk strainer. Squeeze out as much milk as you can. The solids are your nut pulp, which you should reserve for now. Baru Nut Pulp Cheese Ingredients Baru nut milk pulp(see above) 3 tbsp nutritional yeast 1 1/2 tbsp. coconut oil 1-2 tbsp. lemon juice Pinch of garlic powder Pinch of cayenne or Aleppo pepper Pinch of salt Instructions 1. In a large bowl, combine all ingredients until you get a firm mixture. While you're mixing all the ingredients up, break up the coconut oil. 2. Chill the cheese in the fridge overnight, or for at least an hour. 3. Serve with Triscuits or use in place of Parmesan cheese for whatever you like. Baru Nut Milk Ice Cream Makes 1 quart Ingredients Baru Nut Milk(see above) 2 tbsp. baru nut butter(see above) Maple syrup to taste(optional) 1/4 cup baru nut trail mix(see HELPFUL LINKS) Instructions For Making the Ice Cream 1. Mix the nut butter into the milk. 2. Taste the mixture. If it's not sweet enough, add maple syrup until the ice cream mixture is sweet enough. 3. Put the ice cream mixture in the fridge to let it chill for 30-60 minutes. 4. Turn your ice cream maker on and pour the chilled ice cream mixture in. Let the ice cream churn for 11-12 minutes. 5. Add in the trail mix. Let the ice cream churn for another 3-4 minutes. 6. Turn the ice cream maker off. Scoop the ice cream halfway into a quart-sized ice cream tub. 7. Top that ice cream with more trail mix. Cover the trail mix with the rest of the ice cream. Top the ice cream with more trail mix. 8. Let the ice cream set in the freezer overnight, or at least 4 hours. For Scooping the Ice Cream 1. Take the lid off the ice cream tub and place tub in microwave. 2. Set the microwave to soften ice cream mode. Soften the ice cream in the microwave for 2 minutes, 15 seconds. 3. With an ice cream scooper and a lot of elbow grease, scoop out the ice cream. It's normal for it to look like shaved ice. Baru Nut Milk Ice Cream Cake Ingredients A slice of softened baru nut milk ice cream Oreo crumbs Cool Whip Sprinkles Instructions 1. Top a slice of the ice cream with some Oreo crumbs, then Cool Whip, and finally, the sprinkles. To commemorate the 50th anniversary of the first lunar landing, this moonfish meatloaf is moon-themed, with Moon Pies, Moon Cheese, and even moonshine in it, along with some foods the astronauts had in space! Why didn't I think of including moon cakes!? I mean, sure, this meatloaf had a lot of ingredients in it to the point it was almost overflowing the bowl but still. Ok, so I got that off my chest, now on to the rest of this post. Anniversaries as significant as man landing on the moon are once in a lifetime. So that idea of making a shark meatloaf in honor of the upcoming Shark Week? That's gonna have to wait another year. Meatloaves made from fish, with the exception of canned tuna and salmon, need a lot of fillers and binders to hold it together. This moonfish meatloaf was no exception. They're basically fillets you have to crumble up into a ground meat-consistency. Of course, you could put them in a food processor but then they might end up looking like cat food. Note that the ingredients that don't start with the word "moon" in this recipe(besides the onion powder and eggs) are not the only things the astronauts on Apollo 11 had to eat while in space. There was a huge menu they had and I obviously couldn't include them all in one meatloaf. I just included the ones I already had on hand or could easily procure. Though butterscotch pudding or grape punch would've made the recipe even more interesting than it already is... So what does moonfish taste like, anyway? Two words: buttery whitefish. It's actually become one of my favorite types of fish to eat since it's so soft. But alas, if you want to find them for sale offline, you're going to have to go to Hawaii or Fiji, which is where they're usually found. This strange arrangement of ingredients harmonized quite well and one wouldn't think that when associating chocolate with fish. I remember having some dark chocolate with anchovies as part of a dare at my day job and let me tell you, that was disgusting! I don't think of many types of food pairings as gross, but this pair definitely was. Dark chocolate isn't very sweet to begin with, so perhaps milk chocolate or even white chocolate would've better counteracted the anchovies' innate saltiness. My dad didn't try this meatloaf because it had chocolate and moonshine in it. HELPFUL LINKS: Moonshine Jelly: www.amazon.com/Temperance-Tavern-Country-Foods-Moonshine/dp/B074PKF51R/ref=sr_1_3?keywords=moonshine+jelly&qid=1564254009&rnid=2941120011& Variety Mini Moon Pies: www.amazon.com/Moon-Pie-Minis-Chocolate-Strawberry/dp/B00ZKEZQAU/ref=sr_1_3?keywords=mini+moon+pies&qid=1564254199& Moonfish: www.exoticmeatmarkets.com/product-p/moonfish201.htm You will need: Meatloaf Ingredients: Pinch of onion powder 2 beaten and whisked eggs 1/4 cup orange juice(food on Apollo 11) 1/4 cup moonshine jelly(see HELPFUL LINKS) 1 packet hot cocoa(food on Apollo 11, though not of the Oreo variety I had) Pinch of bacon salt(they had bacon on Apollo 11) 5 mini Moon Pies(see HELPFUL LINKS) 4 oz. Moon Cheese 2 sugar cookies(food on Apollo 11, thought not the frosted kind I had) 1 pound moonfish(see HELPFUL LINKS) 1 cup Frosted Flakes cereal(food on Apollo 11) Instructions: 1. Put the first 7 ingredients into a large bowl. 2. Crumble up the Moon Pies, Moon Cheese, sugar cookies, and Frosted Flakes before putting them all in the large bowl. 3. Cut the moonfish up into the smallest pieces you can. 4. Then with your hands, crumble the moonfish up into a ground meat consistency. Put the crumbled fish in the large bowl. 5. Mix all of the ingredients in the large bowl up until you get a firm mixture. 6. Spray a lasagna pan with nonsitck cooking spray. 7. Form 2 loaves. 8. Bake the meatloaves in a 350℉ oven for 20-30 minutes. We turned a well-known dish from the Middle East, kibbeh, and turned it into a meatloaf, except we used some Zwan Chicken Luncheon Meat, a brand of halal luncheon meat commonly eaten in many African and Caribbean nations. I first found Zwan Luncheon Meat at my local supermarket when they started selling more international foods and it looked interesting, considering I never knew Muslims had their own halal version of spam. If luncheon meats weren't so salty, I really do believe more people would use them as the meat in meatloaf. A Dutch company actually makes this product, though I don't remember if the can said "Product of Lebanon", but anyhow, I discovered a really common dish of said country, kibbeh, which is commonly made with bulgur and beef, goat, lamb, or camel meat(i've never tried camel meat before though it would be interesting to make some chocolate or caramel using camel hump fat and camel milk powder...). Speaking of bulgur, it's quite the interesting grain. To make 2 servings, you only need 1/2 a cup of bulgur and 1 cup water. The bulgur practically doubles in size when it's cooking, so when measured, it's really 1 cup cooked bulgur! But I put in some breadcrumbs just to make sure the mixture would hold together. You're probably wondering about what Zwan chicken luncheon meat is like. Well, for starters, the can is so easy to open. In the past, I've had problems opening up canned corned beef, which usually comes with a key and if you don't open the can correctly, the meat is stuck in the can. There's no key needed to open up a can of Zwan luncheon meat! As for the meat itself, it's very thick. I'd say it's even thicker than spam. When it comes to taste, it tastes like as if you put a bunch of frankfurters in a food processor and turned them into a really thick puree! Trust me, it tastes better than its description. The bulgur on the outside makes the meatloaf crispy, which contrasts well with the softness of the luncheon meat inside the loaf. Speaking of contrasts, I initially thought this meatloaf would go well with honey but once I realized the meatloaf tasted like frankfurters, I tried dipping it in ketchup instead. That's a much better pairing. I mean, nobody ever puts honey on top of a hot dog! That sounds kinda gross actually, and that says a lot coming from a guy who likes eating weird shit(not literal shit, although there is a fancy type of coffee made from some animal's actual 💩). My dad didn't try this meatloaf simply because he ate a heavy dinner beforehand. I swear, he's coming up with better and better excuses to not try my food. HELPFUL LINKS: Pine Nut Butter: www.amazon.com/Dastony-Wild-Pine-Nut-Butter/dp/B07BKS15LN/ Aleppo Chili Pepper: www.amazon.com/Aleppo-Turkish-Pepper-Zamouri-Spices/dp/B00562WN1Q/ Zwan Chicken Luncheon Meatloaf: www.amazon.com/Zwan-Luncheon-Halal-Chicken-Ounce/dp/B00AR170NC/ Ingredients: Pinch of onion powder 2 beaten and whisked eggs 1/2 cup pine nut butter(see HELPFUL LINKS) Pinch of Aleppo Chili Pepper(see HELPFUL LINKS) Pinch of cardamom(or cinnamon + nutmeg) Pinch of allspice Pinch of black pepper 1/2 cup cooked bulgur wheat 2 tsp. plain breadcrumbs 12 oz. Zwan Chicken Luncheon Meat(see HELPFUL LINKS) Serve with either ketchup or honey Instructions: 1. Put all ingredients in a large bowl. Crumble up the luncheon meat into a ground meat consistency. 2. Mix all the ingredients up until you get a firm mixture. 3. Spray a lasagna pan with nonstick cooking spray. 4. Form 2 loaves from the mixture. 5. Bake the meatloaves in a 350℉ oven for an hour. It's normal for the inside of the meatloaves to be pink, but it's nothing to worry about since the meat is already cooked when it's sold in the can. 6. Serve with either ketchup or honey on the side to counteract to saltiness of the luncheon meat. Each of the 3 ingredients in this vegan banana ice cream comes from bananas, including the milk. Now that's bananas! I discovering new ingredients so when I found this carton of Banana Wave Milk(I don't remember where), I just knew I had to make an ice cream out of it. Now just putting banana milk into an ice cream maker is possible, but I wanted to jazz up this ice cream a bit, so I mixed banana butter and banana milk together to make it even creamier. I'm also a big sucker for chunky ice creams, so I used dried banana pieces too. This has to be the easiest ice cream I've ever made and that's a good thing considering my sister, her husband, and her 2 kids under the age of 7 just moved in. I filmed this recipe on one of the rare occasions they weren't home but going forward, expect most of the filming will be in my basement apartment. But still expect children's voices in the background- apparently, you're not supposed to tell a 6-year old boy to shut up, much less a 2-year old. Listen, I'm gonna be honest with you, I anticipated needing a lot of elbow grease to scoop out banana milk ice cream, but I was pleasantly surprised having been proven wrong about this. You wouldn't even believe this is vegan. It tastes like bananas, obviously, with chewy, dried bananas pieces. Considering this is a one-note ice cream, I recommend putting a some sort of flavored coconut butter on top like this. Why coconut butter? It has coconut oil in it, which is the key ingredient to a conventional magic shell. But I really wanted to keep the sundae vegan, so the kind of magic shell you'd find in the supermarkets is no good since there's milk in it. Heck, even my dad wanted a second helping because it was that good and he's far from vegan! HELPFUL LINKS: Banana Wave Milk: https://www.bananawave.com/products/ Banana Butter: https://www.amazon.com/McCutcheon%60s-Banana-Butter/dp/B01N65WKNK/ Dried Banana Pieces: https://www.amazon.com/Made-Nature-Organic-Dried-Bananas/dp/B06XTF7N69/ref=sr_1_3? You will need: For the ice cream: 32 oz. Banana Wave Milk(see HELPFUL LINKS) 18 oz. banana butter(see HELPFUL LINKS) Dried banana pieces(see HELPFUL LINKS) 1. In a large bowl, combine banana milk and banana butter. It's ok if banana butter clumps float to the bottom of the bowl. You won't see them in the final result. 2. Pour the mixture into an ice cream maker. Churn the ice cream for 11 minutes. 3. Add 6-10 dried banana pieces in. Let the ice cream churn for another 2-3 minutes. 4. Turn the ice cream maker off. Scoop half of the ice cream into an ice cream tub. 5. Top that ice cream with however many banana pieces you like before covering them up with the rest of the ice cream. 6. Let the ice cream harden in the freezer overnight, or for at least 4 hours. This meatloaf is (mostly) made with peanuts, and no, I'm not talking of the packaging kind- seriously, that'd be disgusting! There are many things you can use besides meat(whether it be from actual slaughtered animals or grown in a lab) to make a meatloaf like:
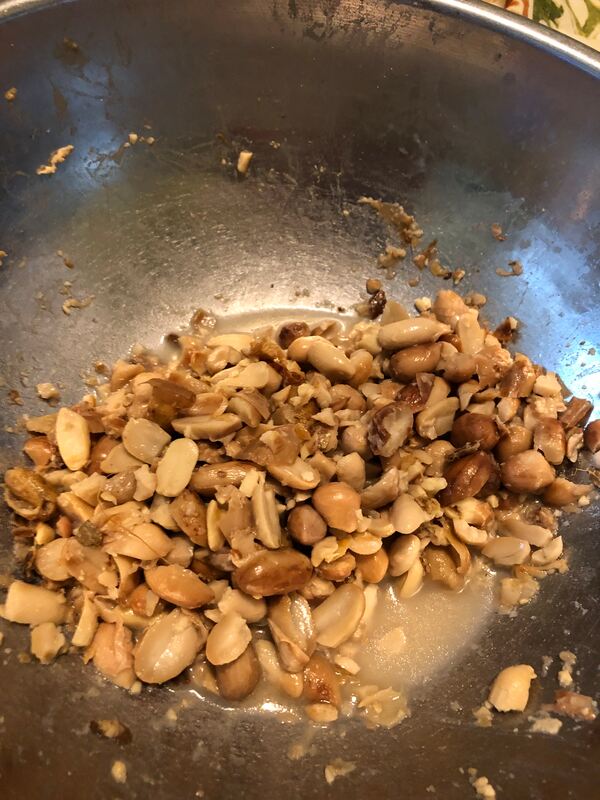
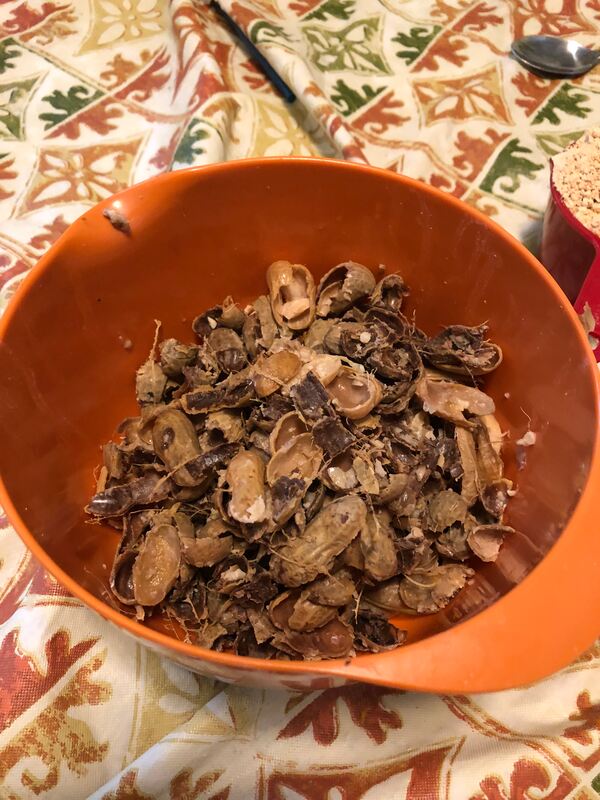
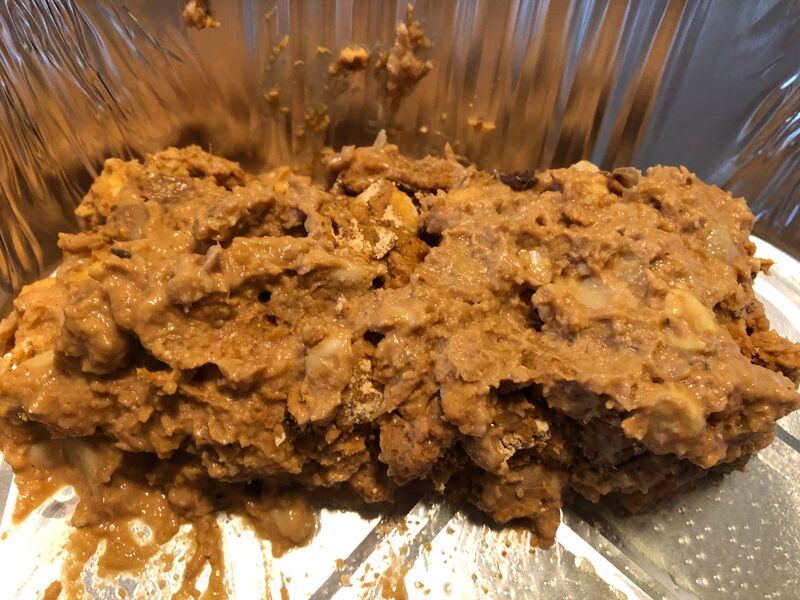
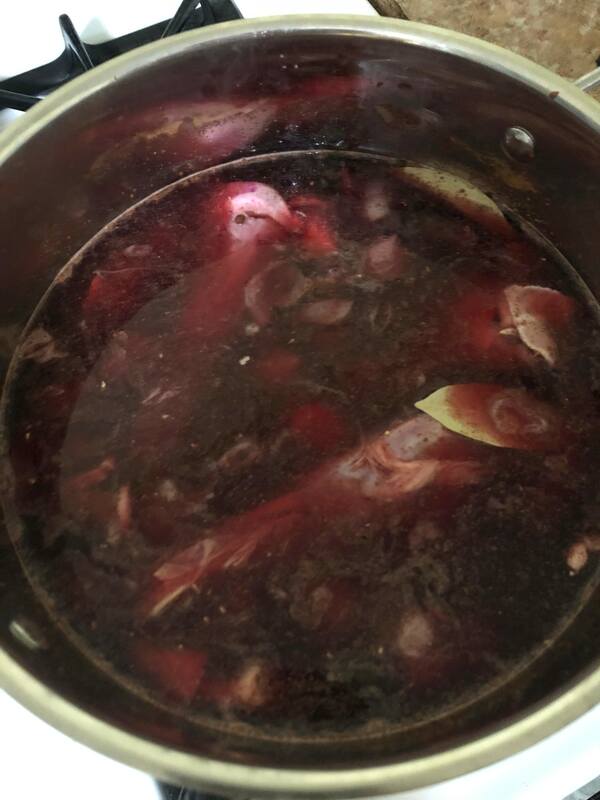
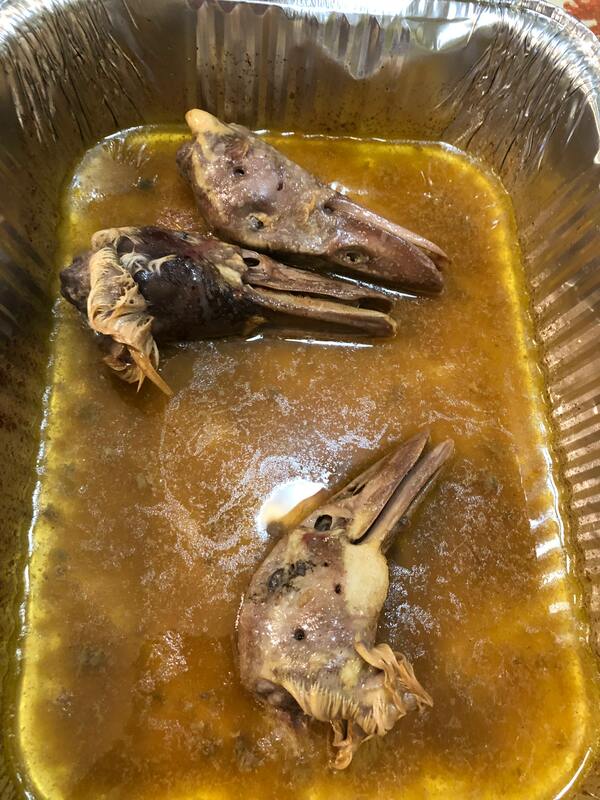
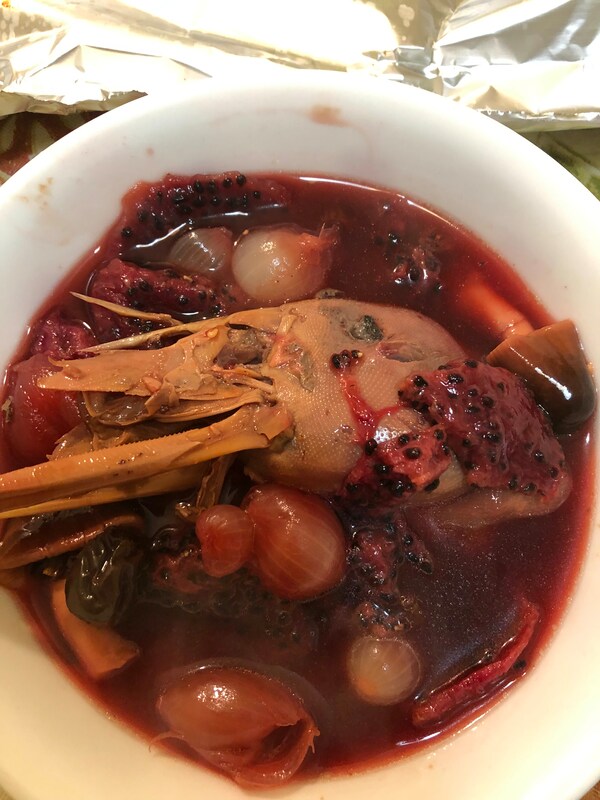
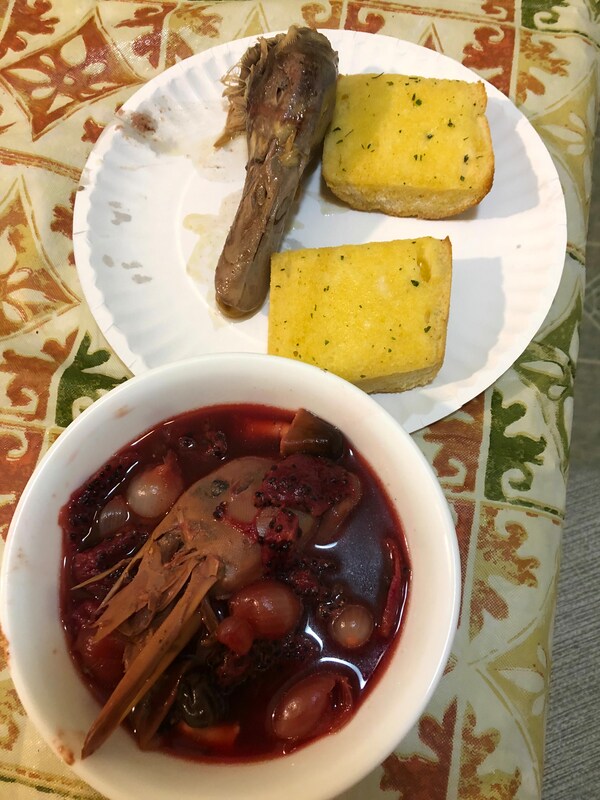
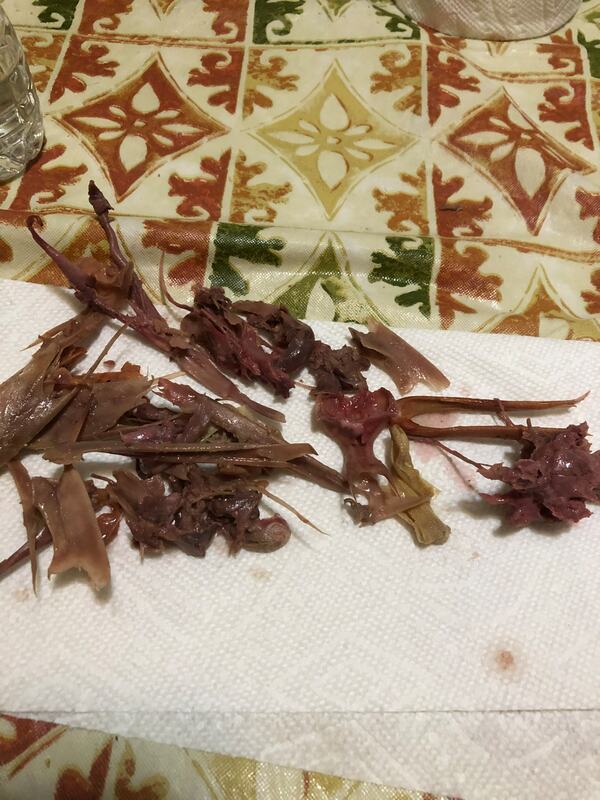
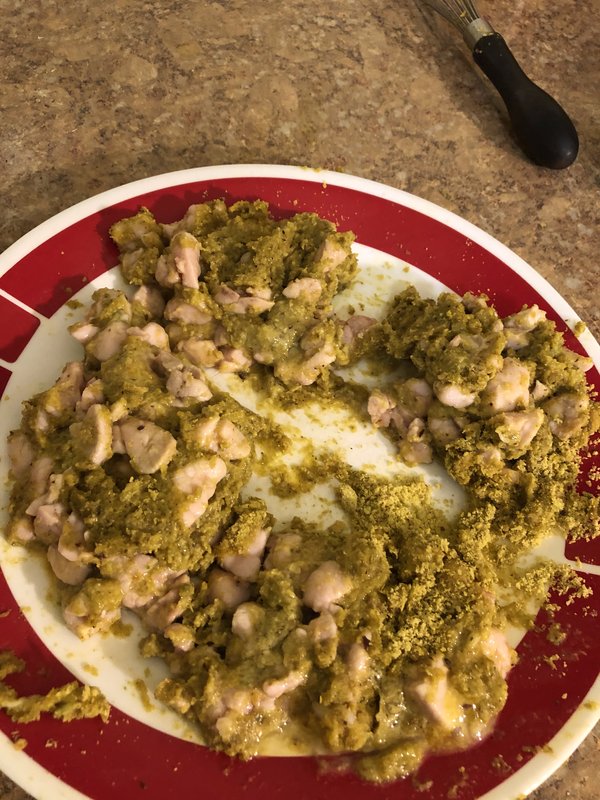
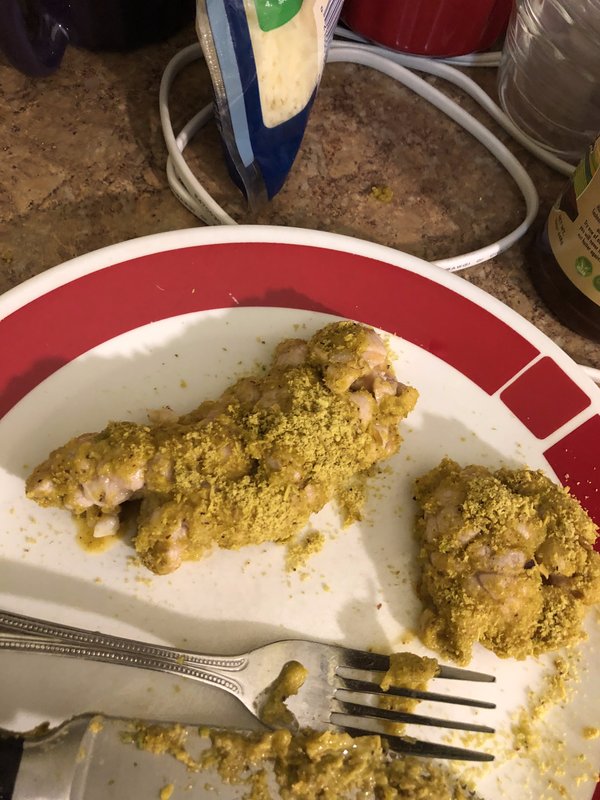
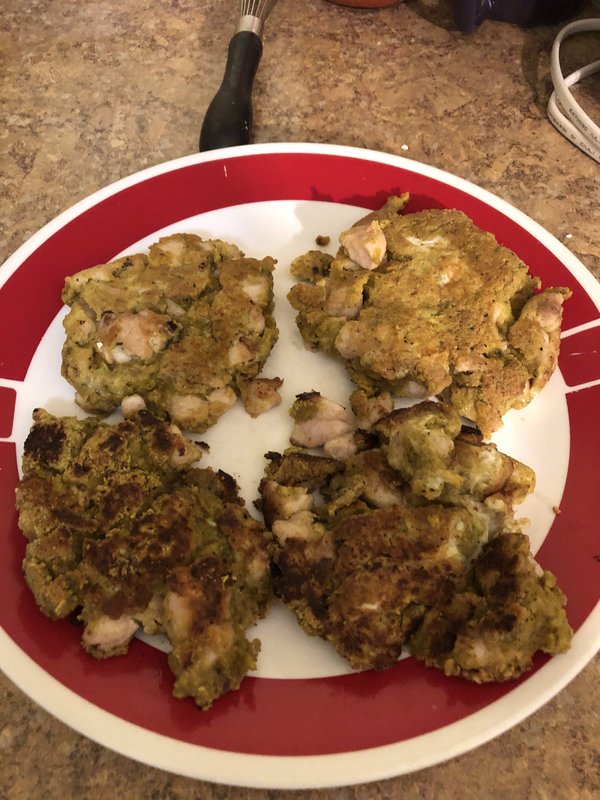
I first encountered boiled peanuts at Walmart. It looked weird, so I bought a can. Then I bought another on Amazon. And after that, I realized I didn't buy enough cans of boiled peanuts to make a pound of meatloaf because it turns out, the edible peanuts inside the shells are really 40% of the actual peanuts. Luckily, I had some already seasoned peanuts in my cabinet, so I was able to eke out enough servings for 4 meals. Boiled peanuts are commonly eaten as a snack down South, especially in Georgia and Alabama. But they're salty AF, which is why it's better to use one of those cheap peanut butter brands like Jif or Skippy and not an unsweetened version, because the former has sugar in it and while that's normally a bad thing, it isn't with this recipe! It helps to season it with Cajun seasoning to to get the real authentic Southern experience, but it will suffice if you only have chili powder on you like yours truly. The prep is worse than the actual event of making of the "meatloaves" in terms of time required. I can say the same thing about colonoscopies, actually, but at least with this recipe, I'm doing this because I want to and not because my gastroenterologist says I have to(I have had 3 done in my short lifetime and it's not fun shitting your brains out on the 🚽, which is why I hate Gatorade). Sorry for the unappealing image I just put in your head. I'll tell you this much, if you're going to make a grain-free bread, I highly recommend using peanut or pistachio flour because they're really good at holding things like meatloaves together. The "meatloaves" tasted like...peanuts, duh! Specifically, a lot of creamy peanut butter, softened boiled peanuts, a hint of chili powder, and lots of dill pickles from the seasoned, roasted peanuts I used to bulk up the recipe. My dad tasted peanut butter, which he liked, given he's apt to eat a PB&J sandwich three times a week but he said the peanuts themselves were bland, presumably the boiled kind. Sadly, he spit out the meatloaf. He didn't like the aftertaste, which I'm guessing was the dill pickle seasoning. HELPFUL LINK: Peanut Flour: amzn.to/2VA30DV You will need: 16-32 oz. canned, boiled peanuts Pinch of onion powder Pinch of chili powder or Cajun seasoning 2/3 cup applesauce 1/2 cup creamy peanut butter(highly recommend Jif or Skippy, not unsweetened peanut butter) 1 cup peanut flour(see HELPFUL LINK) To prepare the peanut(this should take about 45-50 minutes per pound of boiled peanuts): 1. Shell each and every peanut by cracking them in half with either bare hands or a nut cracker. The greener peanuts are harder to crack than the tanner peanuts. 2. Extract the nuts inside the peanuts and place in a large bowl. Dispose of the shells- they're inedible. 3. If you only get a shell with no peanuts inside, just squirt the juices out from the shell and into the large bowl before disposing of the shell. 4. Do not shell any blackened peanuts, they're rotten, so just dispose of them! For the "meatloaf": 1. Add the rest of the ingredients to the bowl with the shelled peanuts and mix all the ingredients up until you get a firm, rectangular mixture. 2. Spray a lasagna pan with nonstick cooking spray. 3. Form 2 loaves from the "meatloaf" mixture in the lasagna pan. 4. Bake the "meatloaves" in a 300℉ oven for 10-20 minutes. You don't want to leave them in too long at a higher temperature because then the peanut butter will start to melt and all you'll be left with are some seasoned peanuts. Celebrate the final season of Game of Thrones with some duck head stew! Yea, you read that right, actual duck heads. Because after all, heads get cut off on that show a lot, so this is kind of a morbid tribute to that. Now where in the world would one procure duck heads? An Asian supermarket, of course, particularly one of the smaller supermarkets that isn't a big Asian supermarket chain, like Super FL Mart on Long Island. The best thing is that 6 duck heads cost $2, or about 33 cents a head. I cooked the duck heads two ways to hedge my bets in case one of the methods failed, both boiled and simmered in a stew, as well as roasted in an oven. Fortunately, both methods of cooking the duck heads were successful. So okay, now to eating it. Surprisingly, there's a lot of meat on a duck head, more than on a chicken head, which is slightly easier to find. Ducks have bigger brains than chickens. In fact, all you have to do is crack open the duck head to access it. There's two ways of eating the brains:
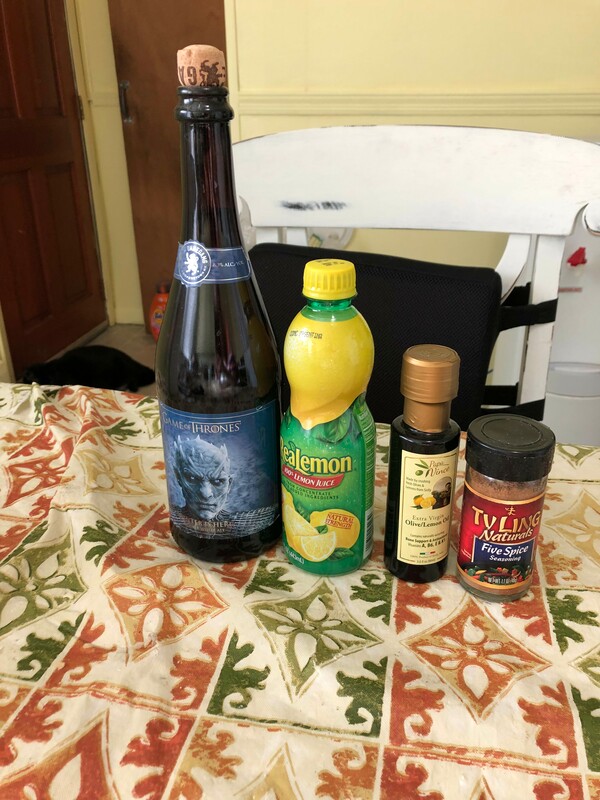
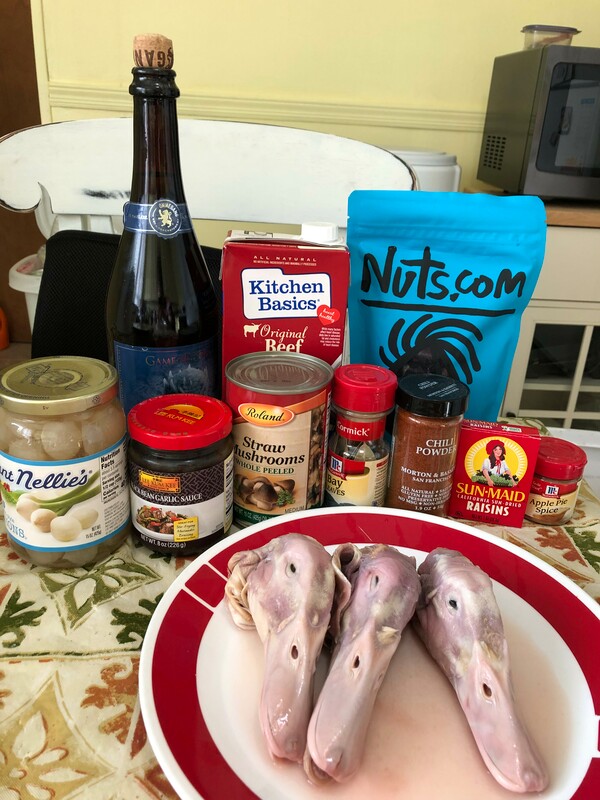
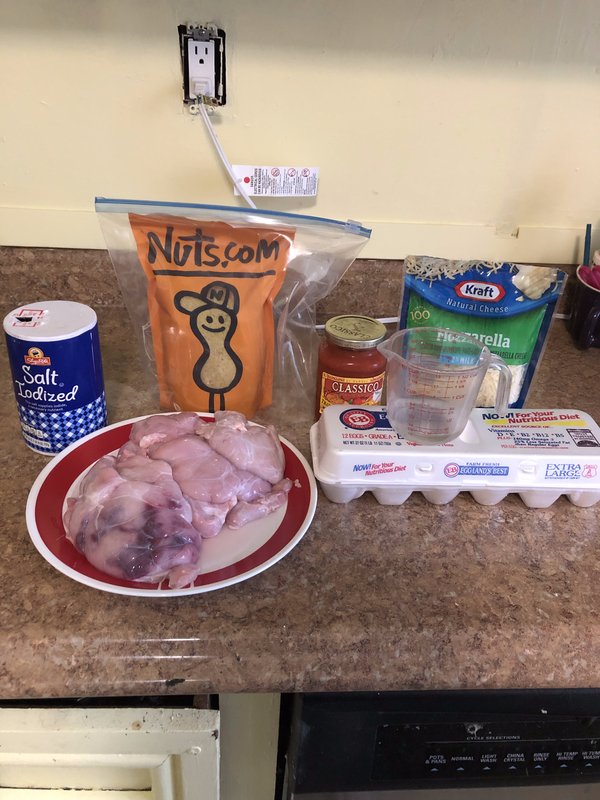
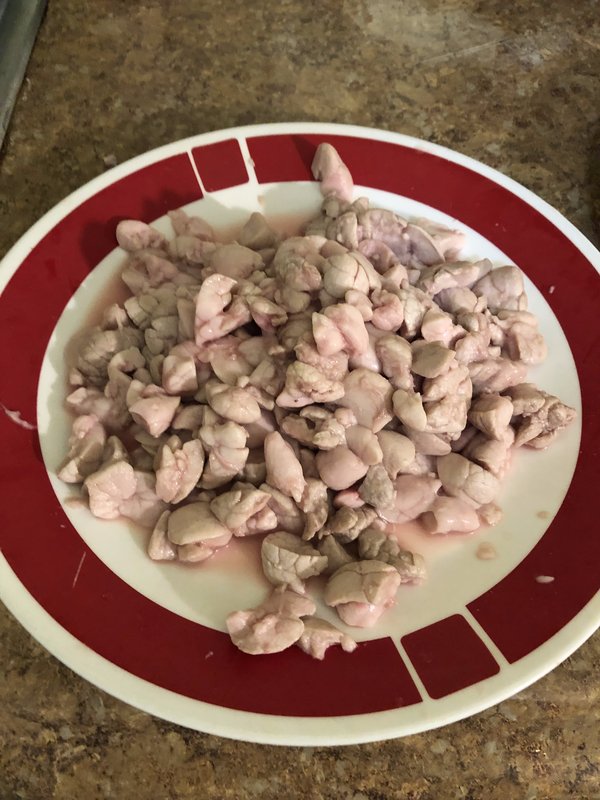
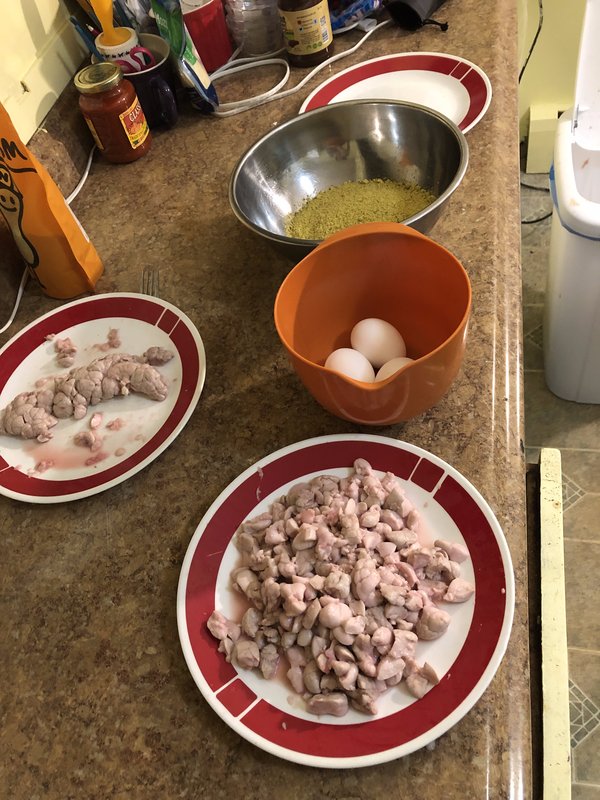
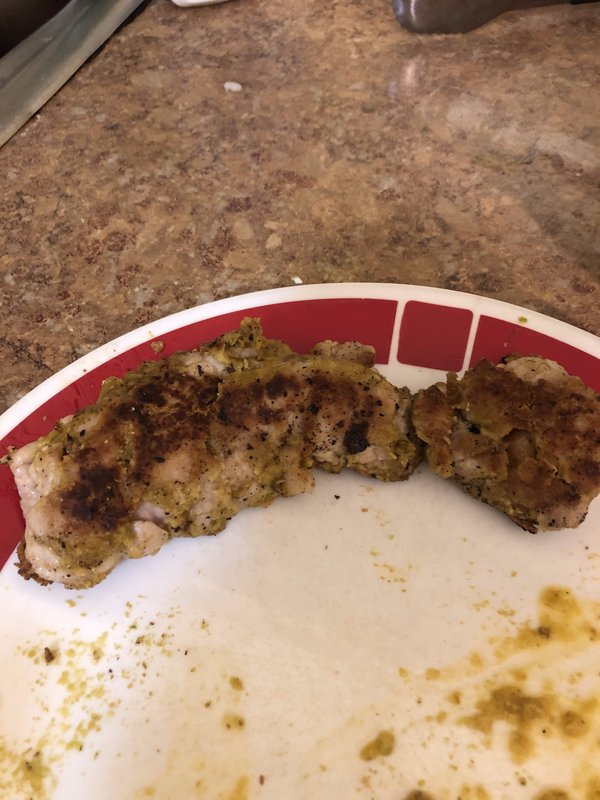
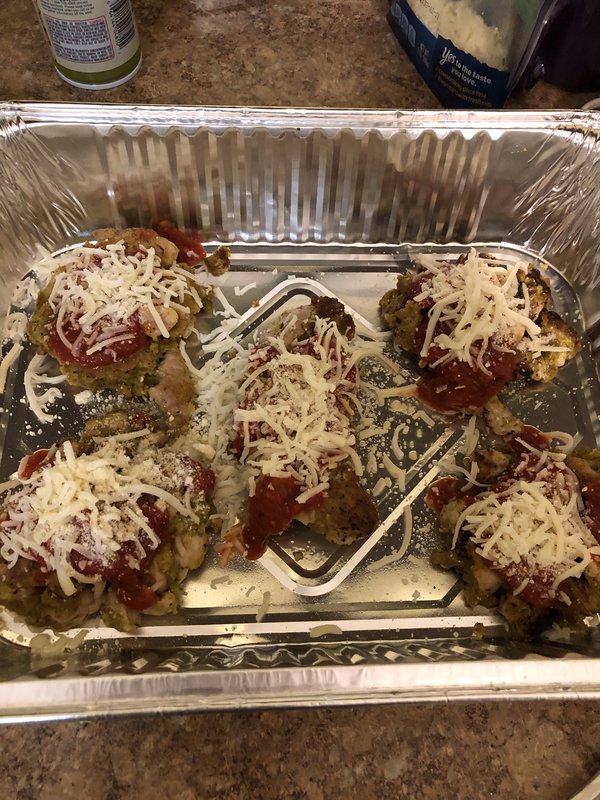
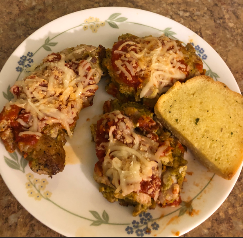
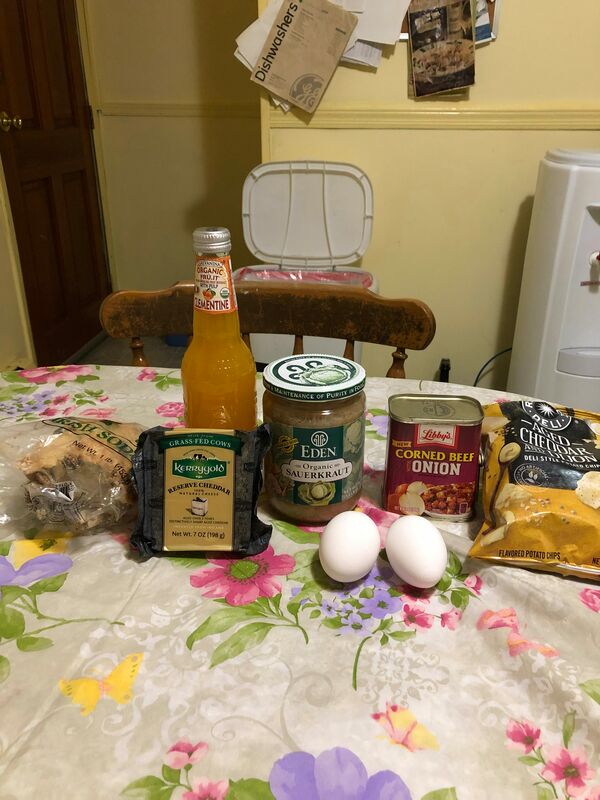
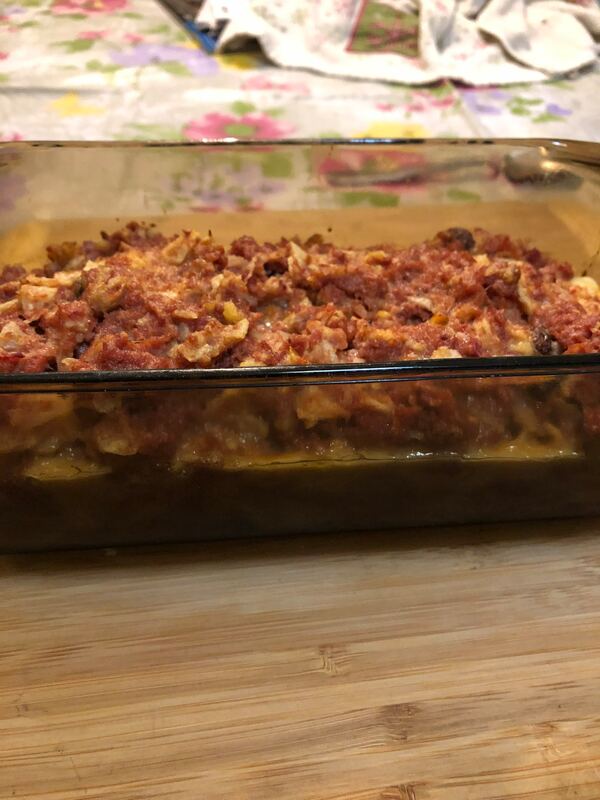
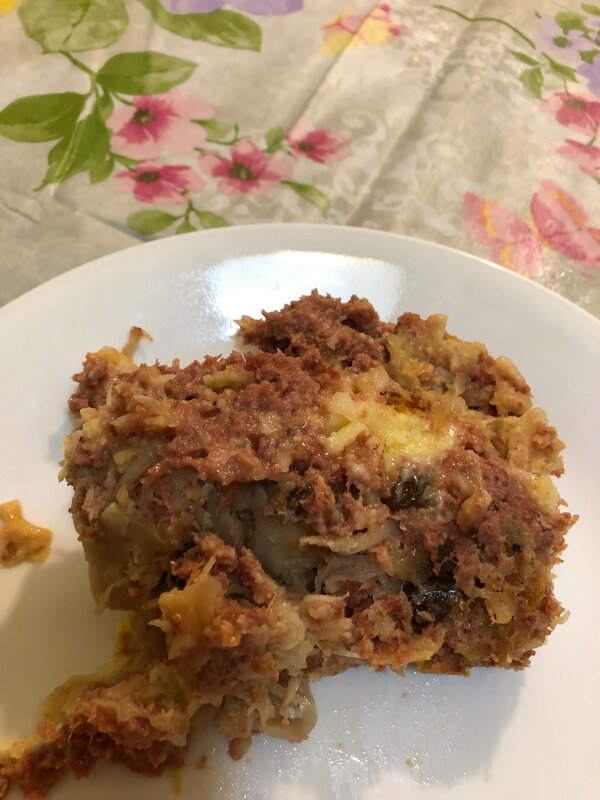
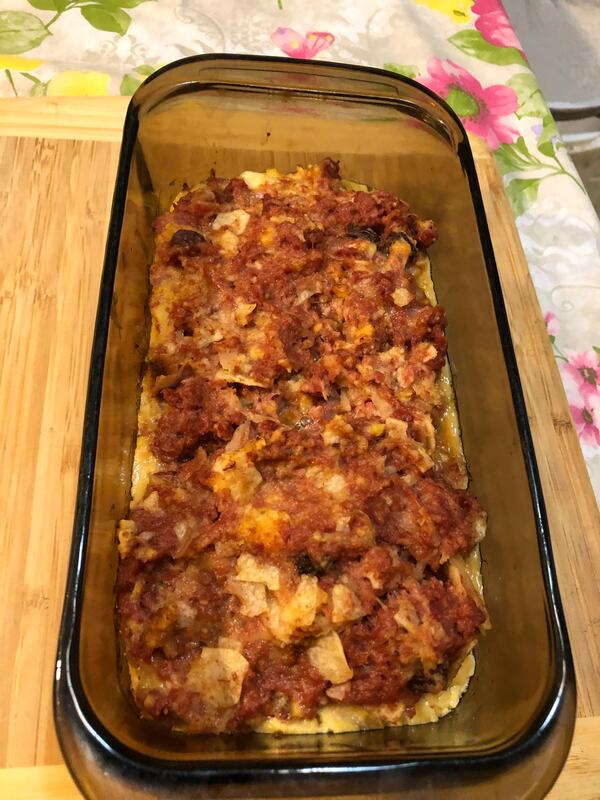
Yea, my dad didn't approve of me eating animal brains. In fact, in the video, he signaled off-camera for me not to eat it. I listened to him, only when we were filming. When it was time to eat leftovers, though, I'd gulp down the brains when he wasn't looking or when he wasn't in the room. He's always afraid I'll get mad cow disease or something. It's true cow brains as food are off limits because they carry mad cow disease, but that doesn't apply to brains from other species It's called mad-cow disease, not mad-duck disease, mad-pig disease, mad-goat disease, mad-lamb disease, etc. You may be thinking that eating the cerebral matter from animals is an exotic thing not done in America, but that's false. In fact, canned pork brains are sold in Southern supermarkets and there's a dish in the Midwest called a fried brain sandwich, created from that region's German immigrants. Sure, you have better options in terms of eating healthy meat since a serving of pork brain has 3,500 mg of cholesterol. The brains from ducks are a lot smaller, so you don't need to worry about cholesterol. As for duck eyes, they're not as juicy as the peepers from a chicken. In fact, they don't have much taste, with the texture of a dried out, flattened olive. Duck meat itself tastes like a fattier version of chicken. So how about the other ingredients that didn't come from a duck. I didn't put any beans in the stew because I replaced that with a different kind of ingredient: dragon fruit, and yes it's a fruit, not a legume, but it's very hard to find in its fresh form, so I ordered the dried version online instead. It tasted like sweet yet bland with the consistency of a potato chip. But surprisingly after cooking it in the stew, it rehydrated itself from all the liquids it was cooking in. Speaking of liquids, I used a Game of Thrones-themed beer that I bought two years ago but never opened(beer stays good for quite a while if left uncorked) that's now out of production, so I'd recommend you use white ale instead, as that's the type of beer it was. The label on the bottle said the beer tasted like a lot of things but the only I got from it was a hint of honey. The vegetables I used were onions and mushrooms, 2 common types of veggies that were grown and consumed in the Middle Ages, which is the period Game of Thrones takes place in. I also kept the spices simple for this recipe, using cinnamon, allspice, and Chinese five spice. For obvious reasons, I stated above, my dad did not try this recipe. HELPFUL LINK: Dried Dragon Fruit: https://nuts.com/driedfruit/dragonfruit.html You will need: Roasted duck head ingredients: 3 duck heads 1 cup Game of Thrones-themed beer or white ale 1/4 cup lemon juice 1/2 cup lemon olive oil Pinch of Chinese five-spice Pinch of curry powder Water BBQ sauce Stew Ingredients : 3 duck heads 4-8 oz. dried dragonfruit(see HELPFUL LINK) 15 oz. canned mushrooms, drained 15 oz. canned Holland-style onions, drained 2 cups beef stock 2 cups Game of Thrones-themed beer or white ale 2 oz. or 2 little packets of raisins 1-2 bay leaves 1 tsp. black bean garlic sauce Pinch of chili powder Pinch of apple pie spice Serve with garlic bread(highly recommended if you're going to consume the brains, as they're very salty) Preparation for all duck heads: 1. In a large bowl, soak the duck heads in enough water to submerge them for at least 6 hours. This is so the bloody taste is removed. For the roasted duck heads: 1. Place 3 duck heads inside a lasagna pan. 2. Combine the beer, lemon juice, olive oil, and both spices to form a marinade. 3. Pour marinade over the duck heads. 4. Cover the lasagna pan with aluminum foil and marinate the duck heads in a fridge for an hour. 5. Spoon the marinade on top of the heads. Pour water on top of the heads so they don't burn while cooking in the oven. 6. Drizzle BBQ sauce on top of the heads. 7. Put the foil back on top of the lasagna pan and roast the duck heads in a 400℉ oven for 10 minutes. 8. Flip the duck heads over onto their sides and roast for another 10 minutes at the same temperature, or until the internal temperature of the heads reaches at least 165℉. For the stew: 1. Place the duck heads, mushrooms, and onions into a large saucepot. 2. Pour the beer and beef stock into the saucepot. Then, add the raisins, bay leaves, and black bean garlic sauce. 3. Stir the black bean garlic sauce into the stew before adding the chili powder and apple pie spice. Mix all the ingredients together. 4. Turn the stove on and bring the stew to a boil. Put the lid on the saucepot and let the stew simmer for 30 minutes. 5. Remove and discard the bay leaves. 6. Serve everything with garlic bread. To (morbidly) commemorate the 10-year anniversary since my mom's passing from pancreatic cancer, I made a chicken parmesan recipe(my mom made me this when I was a kid) except the chicken is replaced with veal sweetbreads(cow pancreas) and the breading is pistachio flour, as pistachio was my mom's favorite flavor of ice cream! I can't believe it's been a full decade since my mom died from cancer. It almost seems like yesterday I was 2 months from graduating high school, sitting on the bed that came out of my living room couch watching Wheel of Fortune when my dad got the dreaded phone call that my mom died in the hospice facility she was staying in after only 2 days since being placed there. She was only 54. My mom was the kindest, sweetest, most selfless person I've ever known. She advocated for me when I was in school. I've eaten a lot of animal organs by this point on this channel to commemorate different times in my life: The Chicago Cubs finally breaking their century-long curse and winning the World Series: Goat Meatloaf To celebrate my top surgery: The Melon-Coated Chicken Breasts To celebrate my hysterectomy and oophorectomy: The chocolate pig uterus and quail eggs (Probably in 12-18 months from now)To celebrate my bottom surgery: Some sort of recipe involving bull penis and buffalo testicles. 😳 I think I've said enough about that by this point. Seriously, if Fear Factor was a matter of individuals playing and not pairs, I'd totally ace the eating weird shit portion. Anything with swimming or diving, not so much. So what does sweetbread taste like, anyway? It has the consistency of scallops with a hint of sweetness to it. The way I cooked this recipe, it honestly looks like a breaded veal or chicken cutlet on the inside. The great thing about this recipe is that if you screw up like I did and end up with broken pieces of sweetbread, you can put them back together with some egg and pistachio flour, which is both expensive($25 a pound) and very heavy. This is an intermediate-level recipe, I'd say, but a pretty long one. It took me over 4 hours from start to finish, but that's par for the course when it comes to cooking offal, with most of that time being a matter of just soaking the organ(s) you plan to cook in some water to get rid of any bloody taste. My dad is normally not into eating animal organs but he made and exception for this recipe since it's in honor of his late wife. He said it tasted cooked. Not very helpful but at least he didn't spit out the sweetbreads. HELPFUL LINKS: Veal Sweetbreads: https://www.dartagnan.com/veal-sweetbreads/product/ZVEAFRA013-1.html?dwvar_ZVEAFRA013-1_freshFrozenWeight=frozen-ZVEAFRA013#q=sweetbread&start=1 Pistachio Flour: https://nuts.com/nuts/pistachios/flour.html Ingredients: 2 lbs. veal sweetbreads(see HELPFUL LINKS above) Enough water to soak the sweetbreads White vinegar Salt Enough water to submerge the sweetbreads for blanching Bowl of cold water 3 beaten and whisked eggs 1 lb. pistachio flour(see HELPFUL LINKS above) Olive oil for frying 15 oz. jar of pizza sauce Shredded mozzarella cheese Parmesan cheese Serve with garlic bread For the preparation: 1. Soak the sweetbreads for at least 2 hours in water. 2. Take the soaked sweetbreads out of the water and into a large saucepot. Submerge the sweetbreads with water. Add white vinegar and salt. Combine all ingredients. 3. Bring the sweetbreads to a boil. Simmer the sweetbreads on low heat for 10 minutes. 4. Remove the sweetbreads from the water and with tongs, place into a bowl of ice cold water. Let the sweetbreads soak in the water for 20 minutes, or you are able to touch them with bare hands without burning yourself. 5. To remove the membrane, pllace sweetbreads onto a plate and gently flatten the sweetbreads with another plate to place on top of them. If you end up breaking these fragile sweetbreads, you'll still be able to reconstruct them during the breading process. For preparing breading stations: 1. Place 3 beaten and whisked eggs in a medium-size bowl. 2. Pour the pistachio flour into a large bowl. 3. Place a plate to the left of the medium-size bowl and another plate to the right of the large bowl. For breading broken sweetbreads: 1.Grab a handful of broken sweetbreads and place them in the whisked eggs. 2. Transfer the egg-soaked sweetbreads into the flour and coat the egg in the flour. Pistachio flour is heavy enough that it will act as a glue. 3. Place the breaded sweetbreads to the adjacent plate and flatten them into a patty shape. 4. Repeat steps 1-3 for all broken sweetbreads. 5. Cut each patty in half so transferring it to the frying pan is easier. For breading intact sweetbreads: 1. Coat each sweetbread in the egg and then transfer it to the flour. 2. Coat each sweetbread in the flour and place onto the adjacent plate. For frying the sweetbreads: 1. Pour olive oil into a frying pan and spread the oil throughout the pan. 2. Heat the oil up. Place the sweetbread patties into the pan. 3. Press down on each sweetbread, broken or intact, with the back of a spatula. Cook the sweetbreads for 30-60 seconds. 4. Flip the sweebreads over and cook for an additional 30-60 seconds on the other side. Assembly: 1. Spray 2 lasagna pans with nonstick cooking spray. Place each fried sweetbread into the lasagna pans. 2. Coat all of the sweetbreads with pizza sauce. 3. Top the pizza sauce with the mozzarella and then the Parmesan. 4. Bake the sweetbreads in a 350℉ oven for 3-5 minutes to melt the cheese. 5. Serve with garlic bread. For storage: 1. Store in an airtight container in the fridge for up to 5 days. 2. To reheat the sweetbreads, place on a microwave-safe plate and microwave on high for 30 seconds. Who needs a plate of food for St. Patrick's Day when you could just combine all of those ingredients into one delicious meatloaf! I'm baaack! For some strange reason I had a can of corned beef with onion in my kitchen and after scanning through the hundreds of videos I've made through this channel, I've realized I've never made a St. Patrick's Day meatloaf before, though I have made a corned beef meatloaf before. It was a New York Reuben Meatloaf and that was 3 1/2 years ago, way before I came out. I do recall my dad saying something about the corned beef smelling like dog food then. Making a meatloaf out of canned luncheon meats is the easiest type of meatloaf you can make if you're strapped for time, though it's definitely not one of the healthiest what with the salt and all. But hey, at least all that cheese counterbalances with the saltiness of the canned meat! I put in a ton of cheese into this meatloaf only because I find slicing a block of cheese into thin slices a pain in the ass, so I just used chunks instead. This meatloaf tasted very cheesy and you can detect the cabbage in it. It had a very soft texture to it. Now normally you open up a can of luncheon meat like Spam with a screw. The only problem is if you stop in the middle of unscrewing the can, the screw will be detached and all of the power tools in the world will make getting the meat out a struggle. Hence you're screwed. Luckily when I screwed up, I unscrewed just enough of the can to scoop the contents out of it, but needless to say I was very pissed at myself and frustrated. Despite my dad not liking the last corned beef meatloaf I made over three years ago, he said this meatloaf was a winner! You will need: For the cooking equipment: A large bowl A loaf pan Nonstick cooking spray For the meatloaf: 2 beaten and whisked eggs 1/2 cup clementine drink or jam(you could use any beer instead) 1/2 cup chopped cabbage or sauerkraut 1 cup Irish soda bread 4 oz. potato chips 12 oz. canned corned beef with onion Irish white cheddar cheese 1. Put the first 3 ingredients into the large bowl. Crumble up the soda bread and crush the potato chips before putting them into the large bowl. 2. Add the corned beef to the large bowl. Mix all the ingredients up until you get a firm meatloaf mixture. 3. Spray a loaf pan with nonstick cooking spray. Put half the meatloaf mixture into the loaf pan. Top the mixture in the pan with however much Irish cheese you like and cover the cheese with the rest of the meatloaf mixture. 4. Bake the meatloaf in a 350 degree Fahrenheit oven for 20-25 minutes. |
Archives
October 2019
Categories
All
|




 RSS Feed