|
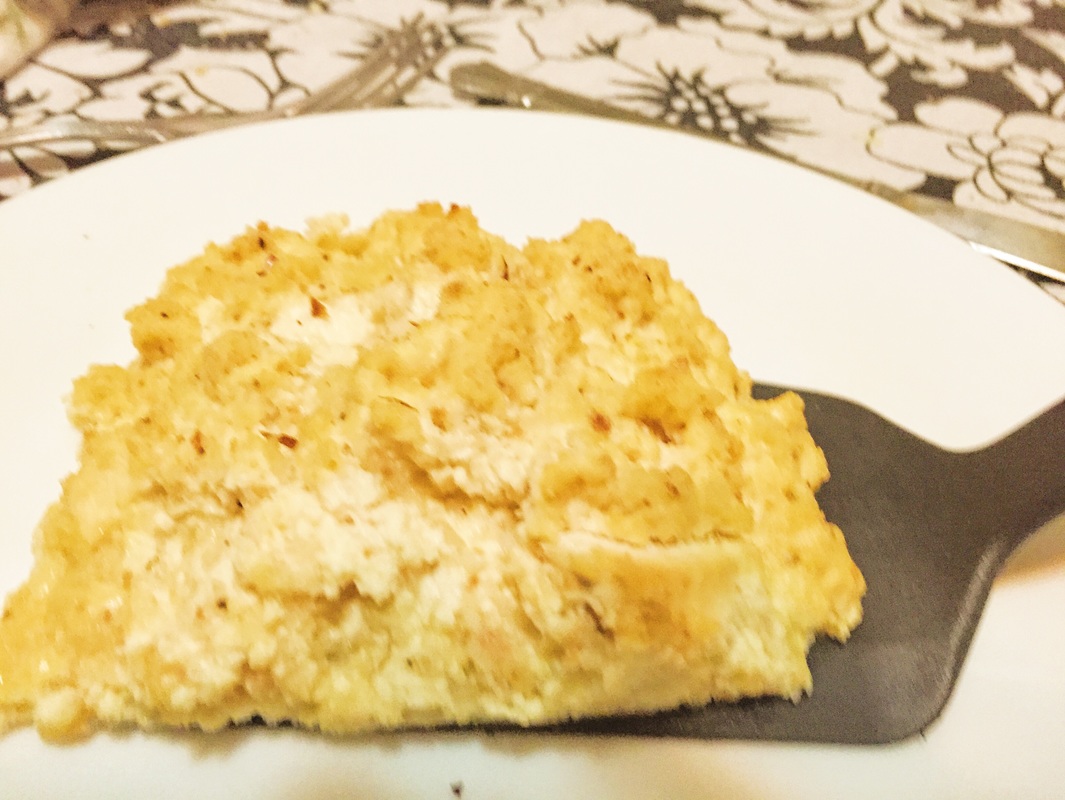
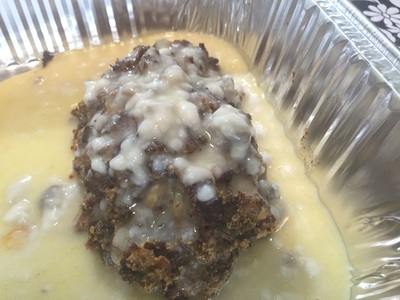
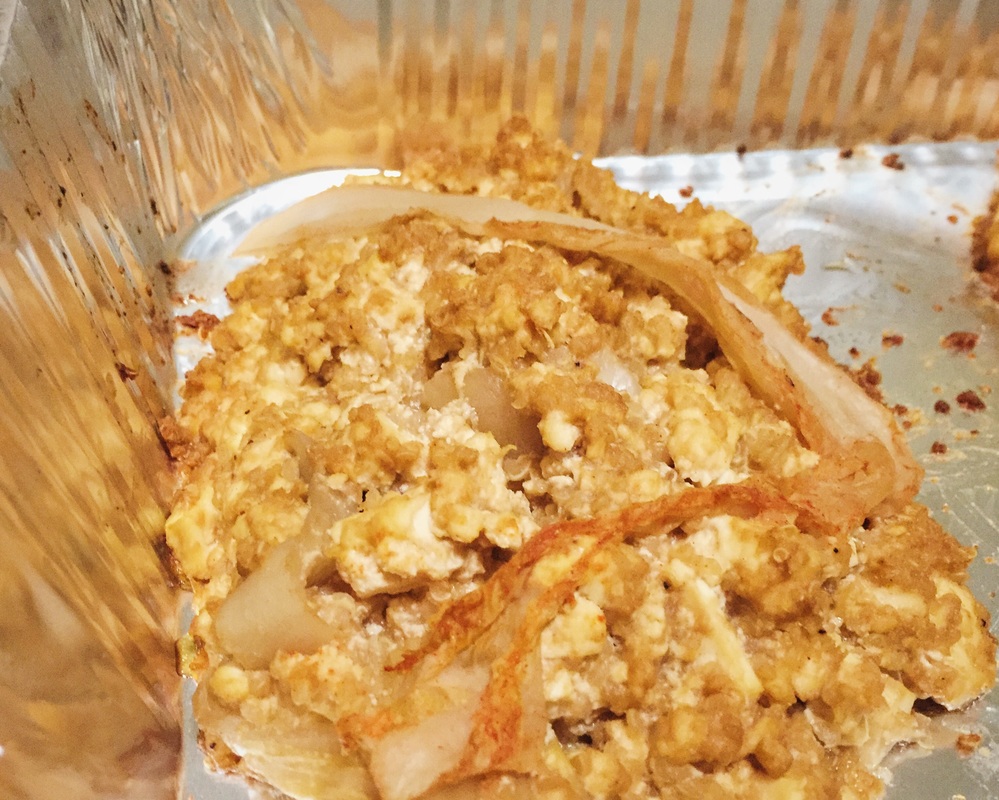
This is the last recipe of January's theme of the month- champagne. I'm kind of glad it's over because I've gotten a lot of questions about why I'm so obsessed with champagne. I'm not- it's just the theme of the month on my channel. Yet people on the Internet don't get the picture. It's stupid to be honest. I'm not even going to mention certain trolls who have used expletives in their comments of my videos. Listen, if all you have to say to me is something negative, YOU WILL BE BLOCKED FROM COMMENTING EVER AGAIN ON MY CHANNEL!! I'm not tolerating that bullcrap on all the work I do anymore. Those all caps letters are on purpose, by the way. Anyways, about the actual meatloaf. It reminded me of the matzo brie my mom used to make every Passover in that it tasted better with maple syrup on it and it was eggy on the edges(I didn't take photos of that but I probably should've) because I used a different type of tofu this time(not of my own free will, mind you. This is what happens when you let your dad go grocery shopping for you.). Also, I guess the sparkling white grape juice in the meatloaf wasn't sweet enough. You might be wondering why I put olive oil in my crumbled up champagne bread this time. The bread at the time of filming was two weeks old and stale, so the only use for it was to grate the hard loaf against a cheese grater(which is really effective, by the way). The crumbs were still dry, so I figured putting some moisture and seasonings in it wouldn't hurt. You will need: For the cooking equipment: A lasagna pan Nonstick cooking spray For the meatloaf: 2/3 tbsp. of onion powder 2 beaten and whisked eggs 1/2 cup of sparkling white grape juice or actual champagne 1 cup of "champagne" breadcrumbs 1 tbsp. of olive oil Pinch of salt Pinch of black pepper 12 ounces of chopped, drained extra firm tofu Maple syrup to top the meatloaf when it's done(optional) 1. Put the onion powder, eggs, and sparkling white grape juice into a large bowl. 2. Put the "champagne" breadcrumbs in a small bowl. Pour the olive oil in, along a pinch of salt and black pepper. Mix together to distribute the oil and spices evenly among the breadcrumb mixture. Put the breadcrumb mixture into the large bowl. 3. Add the tofu to the large bowl. 4. Mix all the ingredients together until you get a firm, consistent mixture. 5. Spray a lasagna pan with nonstick cooking spray. 6. Form 2 loaves from the meatloaf mixture. 7. Bake in a 350 degree Fahrenheit oven for 40-45 minutes. 8. Top with maple syrup for more flavor with your meatloaf(optional) 9. Bon appetit!
1 Comment
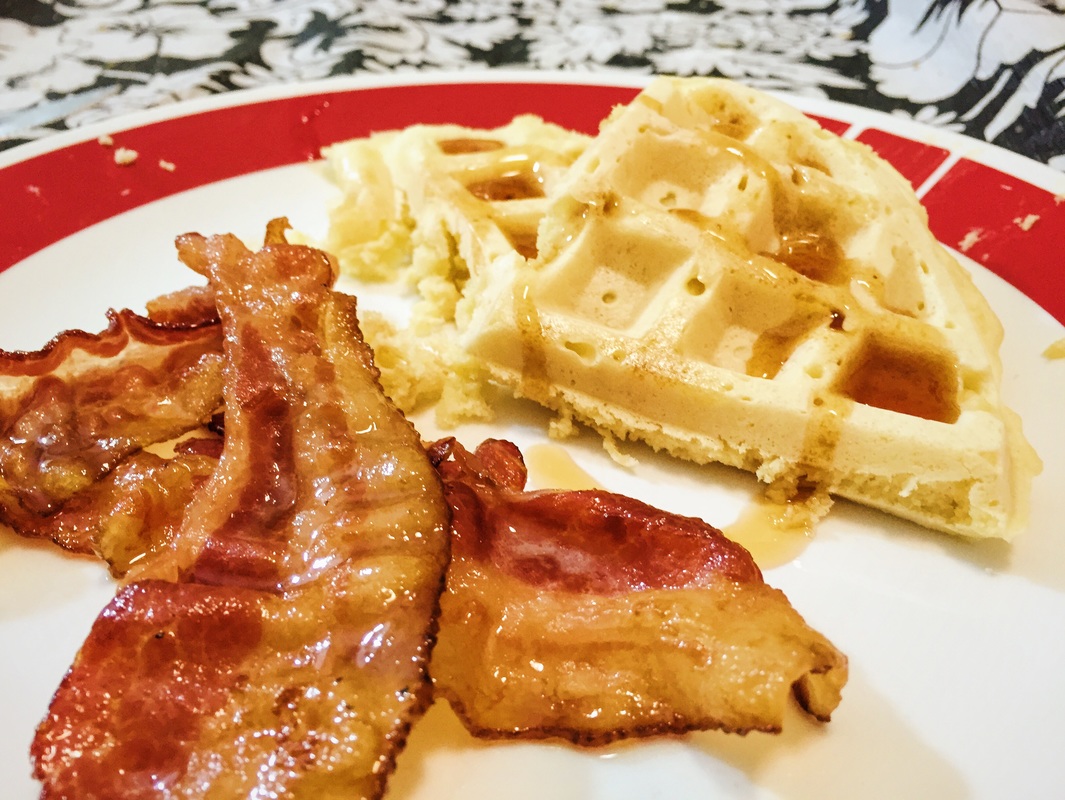
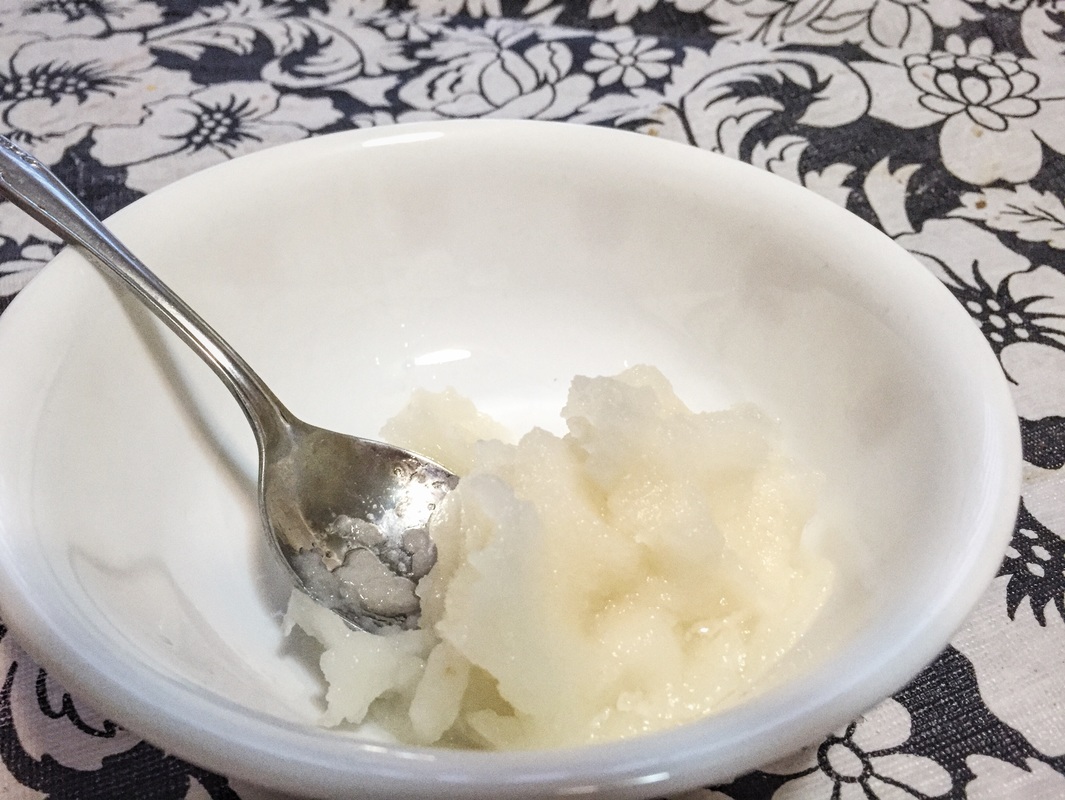
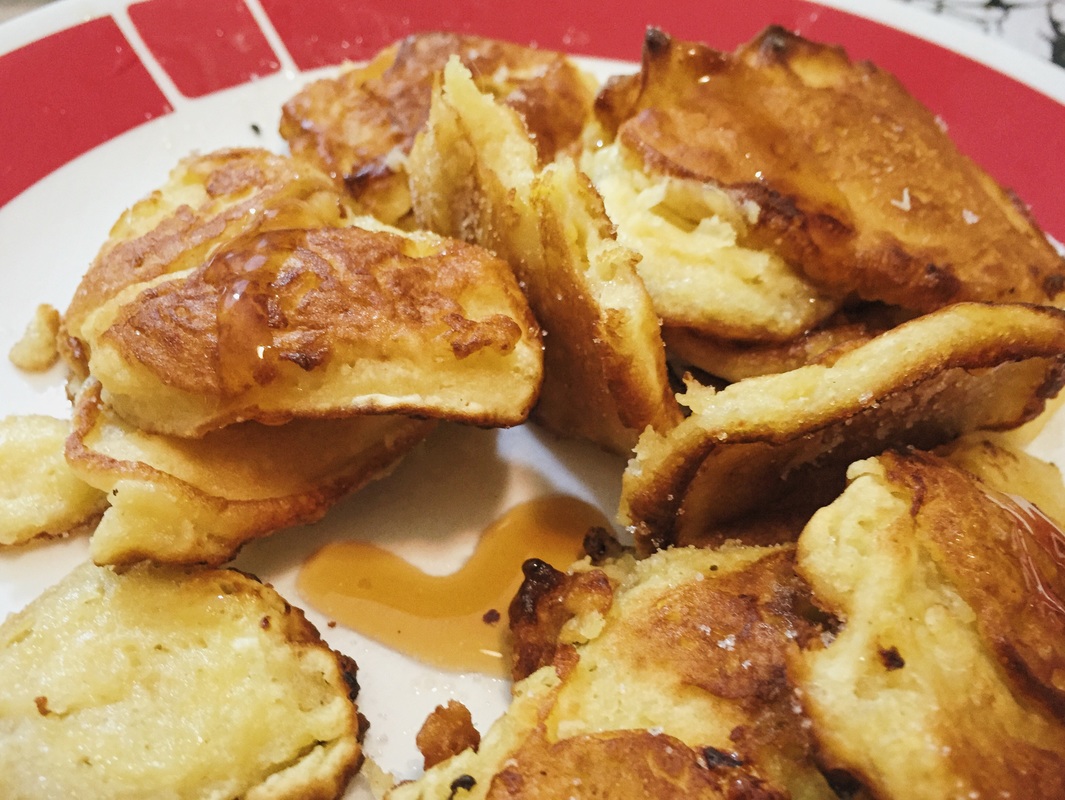
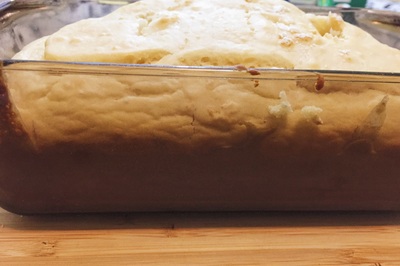
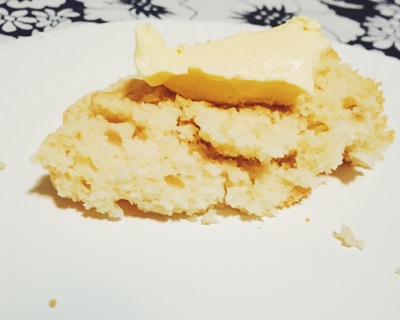
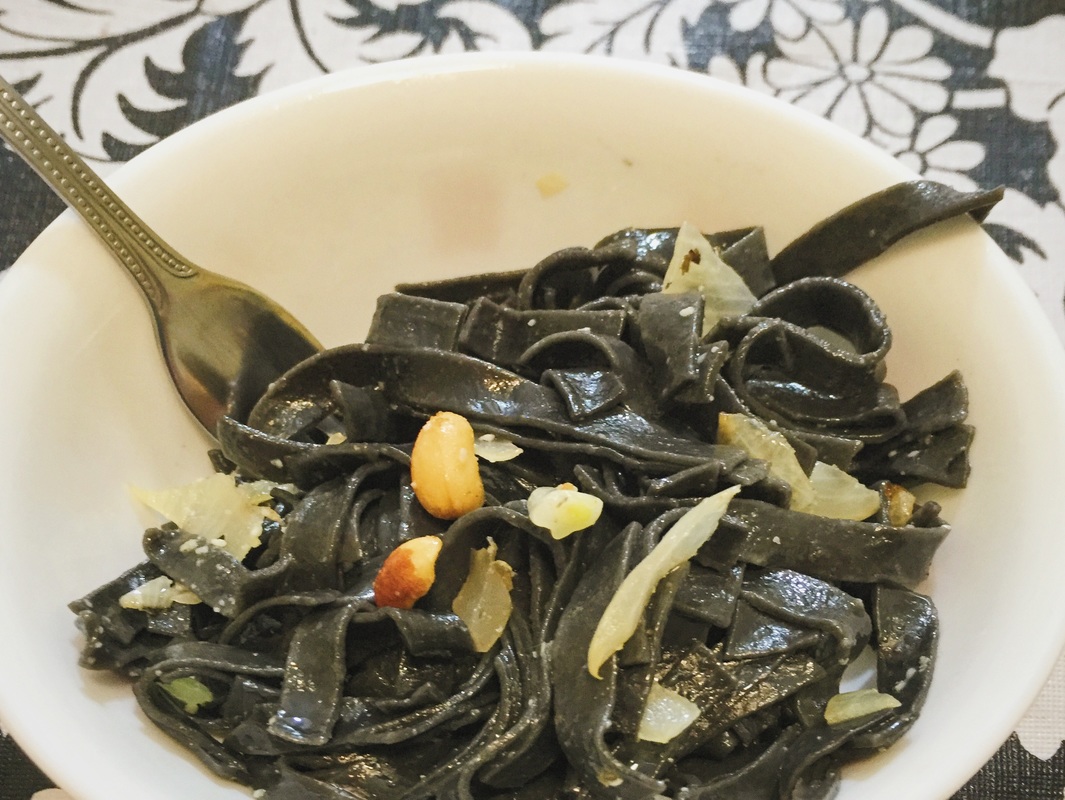
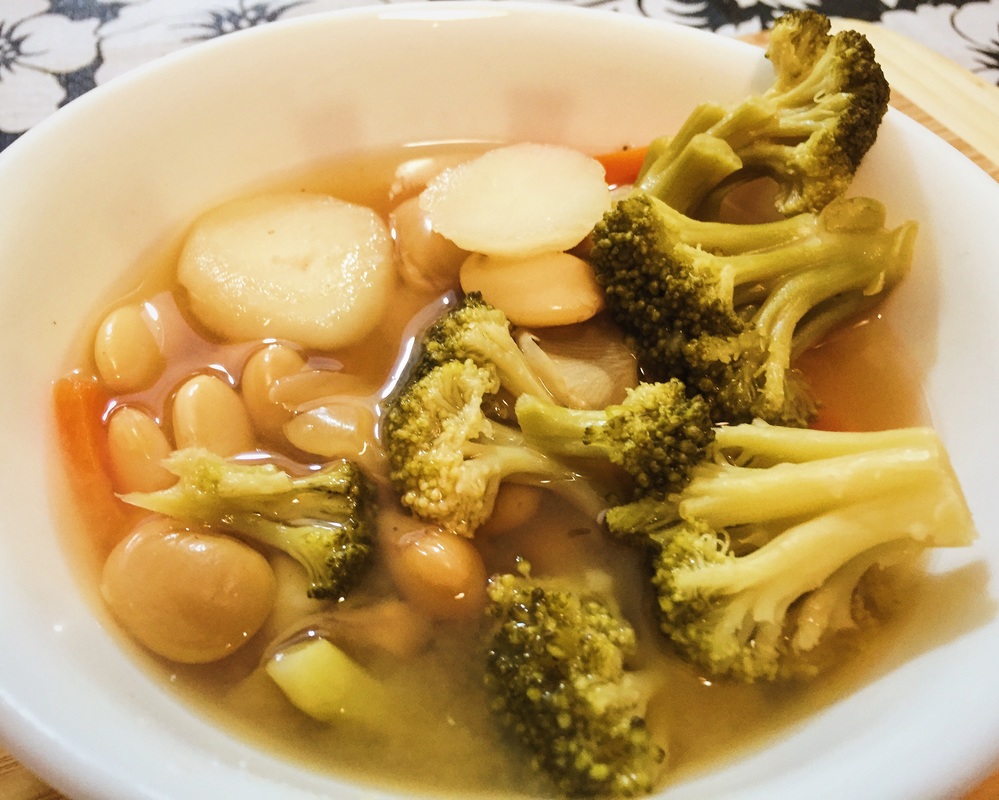
You might be wondering why the part of the title is called Champagne-candied Bacon when I used sparkling white grape juice in part of the recipe. The champagne vinegar I also used comes from real champagne, hence in my mind the word champagne doesn't need quotation marks around it, although you trolls out there on the Internet might disagree. It's ironic that one of the best meals I made for my dad(according to him) was this combination of bacon and waffles, considering I'm the Meatloaf Princess. But then again that might have been his stomach talking since he didn't eat before we started recording this video(lesson learned: let camerman eat before recording). I thought this was going to be a quick video but alas, it wasn't. But hey, the reward at the end of this proverbial rainbow was a delicious breakfast for dinner. My dad said candying the bacon was complicated. It's not that complicated- although it may be a high maintenance recipe considering you need to remove the bacon from the oven at some point in the recipe every 2 minutes to continually baste it. But it's not like I'm doing 50 different steps. If anything, candying the bacon is repetitive. I got my inspiration for the bacon part of this video from http://www.chirplikeacricket.com/goodies/candied-bacon/. The recipe in that link candied the bacon with two different juices, but it's the same concept- baste bacon in a liquid combination consisting of black pepper, light brown sugar, a vinegar, and a liquid. Up until this video, the last time I had waffles from a waffle maker was when my mom was still around, which was almost 7 years ago. She stopped using the waffle maker after one time because it was a pain in the rear to clean. Luckily for me, the waffle maker I got has non-stick waffle plates for easy cleaning. Although I was a tad concerned that the waffles would end up tasting like dishwasher soap since I used that during the initial cleaning of the waffle maker when the manual suggested just using a damp cloth to clean around the edges. Thankfully, the waffles didn't taste like soap. Although I should've used less batter in one batch, since the batter overflowed from the waffle iron. But that's a lesson learned. Inspiration for the waffles from http://bravetart.com/recipes/ChampagneWaffles Now who says you can't have champagne for breakfast!? You will need: For the cooking equipment: Parchment paper A baking sheet or cookie tray 2 forks A pastry brush A medium bowl A large bowl A sifter A waffle maker(no waffle maker, no waffles. Sorry.) For the bacon: 9 slices of bacon(or however many you can fit on a baking sheet) 4 tbsp. of champagne vinegar(or rice vinegar if you can't find champagne vinegar) 3/4 cup of light brown sugar 1/2 cup of sparkling white grape juice Pinch of black pepper For the waffles: 1 cup of all-purpose flour 1/4 tsp. of salt 1 tbsp. of granulated sugar 2 tbsp. of baking powder 1 beaten egg 1/2 cup of sparkling white grape juice 2 tbsp. of melted butter Maple syrup to pour on top of the waffles(optional) Bacon steps: 1. Place 9 strips of bacon(or as many as you can fit) onto a baking sheet lined with parchment paper. The parchment paper will absorb all the bacon grease and liquids. 2. Cook in a 350 degree Fahrenheit oven for 10 minutes on each side. After the bacon is cooked on one side, use 2 forks to flip the slices over. 3. After the bacon has been cooked on both sides, put the champagne vinegar, light brown sugar, sparkling white grape juice, and black pepper into a medium bowl. This is the candying liquid for the bacon. 4. Mix all the ingredients together so that the light brown sugar dissolves and all you have left is a brown liquid(tastes better than it sounds). 5. Dip a pastry brush into the medium bowl and baste the bacon strips with the liquid. Return tray to oven for 2 minutes. 6. Repeat this basting process 1 more time. There will have been a total of 4 rounds of basting, 2 rounds on each side. 7. After the bacon has been basted and cooked twice, flip the strips over using two forks. Baste again and return tray to oven. 8. Repeat this basting process 1 more time. The bacon should now be nice and crispy at this point. 9. Bon appetit! For the waffles: 1. Put the dry ingredients(the flour, salt, sugar, and baking powder) into a medium bowl. 2. Mix the dry ingredients together. 3. Pour the contents of the medium bowl into a sifter, with a large bowl underneath the sifter. Sift the dry ingredients from the sifter into the large bowl. 4. Put the wet ingredients(egg, juice, and butter) into the large bowl. 5. Mix all the ingredients together until you get a smooth waffle batter with no lumps or powder in it. 6. Warm up your waffle maker according to the machine's instructions. 7. Once your waffle maker is warmed up, open the waffle maker and pour the batter onto the bottom iron. Close the lid of the waffle maker. Cook according to your machine's instructions. Mine only took 5 minutes to make. Note: a little overflowing of the batter is normal but if you get a lot, then you have used too much batter for one batch like I did. In that case, you should probably not fill the bottom iron completely with the batter and make two batches of waffles. 8. Pour maple syrup on top of waffles and serve with candied bacon(optional). 9. Bon appetit! There is almost 2 feet of snow outside where I am(stupid blizzard) but I still wanted to make sorbet anyway. Frozen desserts are timeless, in my opinion, even if it is frozen outside. I was really afraid my home would lose electricity due to the blizzard and the sorbet would meet a fate similar to that of Frosty the Snowman- melting. But thank goodness the frozen dessert gods were in my favor this time because the loss of electricity never happened! I figured using white sparkling grape juice(the "champagne") would taste really sweet and delicious- and it is! This is also my first time using my ice cream maker(don't worry, it makes sorbets too) since I got it for Christmas. My dad it was so incredibly easy to make your own sorbet- and he's right! The bowl where the frozen dessert in question is churned had to be frozen for 16-24 hours in the freezer before using it for the first time but the wait was worth it. Inspiration for this recipe from http://www.simplyrecipes.com/recipes/champagne_sorbet/, which used grapefruit juice and half the amount of the champagne I used. But I figured, why muddle the flavors of sparkling white grape juice even more by adding another juice into the mix? I also didn't have light corn syrup but I did have honey on hand, which is a good substitute for light corn syrup. As for zesting the lemon, there are tutorials online on how to do it(that's how I learned) but I grated the lemon against a cheese grater to get the zest. Did you know a cheese grater can also grate stale bread to turn it into breadcrumbs and turn cauliflower into a paleo-friendly rice substitute? I didn't until this recipe- and that's your kitchen hack for the day! Of course, if you don't have an ice cream maker, you're pretty much out of luck for this recipe- you need the ice cream maker. I used the Cuisinart brand, not that ball where you put ice, rock salt, and your liquid in, and you shake it up vigorously. Even though I did have rock salt on hand...but that ice cream ball maker is for kids, in my opinion. At least it teaches them how ice cream/sorbets are made. I bought a strainer at a fancy cooking store for a failed macaron recipe but it turns out it strains more than just flour- it strains lemon zest too! The holes in a colander would be too big to just strain out the zest. You will need: For the cooking equipment: An ice cream maker(duh!) A medium-to-large saucepan A large bowl A strainer(to strain the lemon zest) A 1-quart ice cream tub to store the sorbet For the sorbet: Makes 1 quart 3 cups of champagne or white sparkling grape juice, divided into two- 1 1/2 cup portions 1 cup of granulated sugar 1 tbsp. of honey 1 tsp. of lemon zest 1/4 cup of lemon juice 1. Put 1 1/2 cups of "champagne", sugar, honey, and lemon zest in the saucepan. 2. Bring mixture in saucepan to a boil. 3. Once the mixture is boiling, continue boiling it until all the granulated sugar dissolves. You can tell when the sugar is dissolved when you no longer see any white powder(the sugar) in the bottom of the saucepan. The sugar boils away sooner than you think. 4. Remove saucepan from heat. Pour contents of saucepan into strainer and back into the large bowl to strain out all the lemon zest. At the end of the straining process, you should only end up with only a liquid. 5. Add the other 1 1/2 cups of "champagne" and lemon juice into the large bowl with the liquid. Mix everything in the bowl together. 6. Cover bowl with plastic wrap and let it chill in the refrigerator overnight. 7. Once the liquid is chilled, churn the mixture into ice cream maker, according to the ice cream maker's manual. According to my ice cream maker's manual, you're supposed to turn the assembled machine on and then pour the mixture into the machine. Then you let it churn for no longer than 20 minutes or until the mixture is turned into the slushy, icy consistency of a sorbet. Again, YMMV(that's Internet-speak for "Your Mileage May Vary"). 8. Put the sorbet into a 1-quart ice cream tub. Close the tub and let the sorbet freeze in the freezer for at least 6 hours. 9. Bon appetit! In the span of this channel's existence, which is almost 9 months, we have reached over 100 subscribers!!! Thank you!! In honor of reaching the triple-digit subscriber mark, I made a meatloaf for you based on a recipe from 100 years ago, in 1916. Inspiration for this recipe is from http://www.recipelink.com/msgbrd/board_1/2012/AUG/10449.html. I didn't want to deal with meatloaf drippings or frying bacon as part of the gravy, so I substituted the drippings with melted butter, which really makes this dish indulgent(read: unhealthy). Plus the source recipe didn't have any spices to speak of. When I tasted the can of cream of mushroom soup I bought, it was really bland. That's why I added salt and black pepper to the meatloaf. But nothing more exotic than that, since i assume most Americans 100 years ago didn't have easy access to stuff like turmeric(which colors Trix cereal now, can you believe that?) or cayenne pepper. Sadly I have no living relatives who were alive in 1916 so I couldn't ask my family. It's just an educated guess. Not only is the meatloaf delicious but I found joy in a different editing style for this video. You don't hear my voice because "talkie" movies(where you hear actual people talking) didn't exist until 1927, I believe. Obviously the video is in black and white since it would be another 30-40 years before any sort of movie or TV show was in color. I especially love the Silent Era effects in iMovie, which is the editing software I use. The thumbnail maybe mostly in color but the actual video isn't so please don't be alarmed. Of course, this won't be a regular editing style for future videos. I really like talking to you all. Plus food in color is so much more appetizing than black and white-tinged food. You will need: For the cooking equipment: A lasagna pan Nonstick cooking spray For the actual meatloaf: 1/2 a sautéed onion 1 beaten and whisked egg 1/2 cup of Cream of Mushroom Soup 1 cup of breadcrumbs Pinch of salt Pinch of black pepper 1 pound of 93% ground beef For the gravy: The rest of the 10 ounce can of Cream of Mushroom Soup 3 tbsp. of melted butter(I melted my butter in the microwave for 20 seconds) 1/4 cup of water 1. Put all meatloaf ingredients into a large bowl. 2. Mix the ingredients up so that everything is distributed evenly among the mixture. 3. Spray a loaf pan with nonstick cooking spray. 4. Form 2 loaves from the meatloaf mixture. 5. Bake in a 350 degree Fahrenheit oven for 60-65 minutes or until the internal temperature of the meatloaf reaches 160 degrees Fahrenheit. 6. While the meatloaf is cooking, put all gravy ingredients into a small bowl. Mix the gravy ingredients up until you get a gravy with a consistent texture. Don't worry about any white lumps you see, that's just part of the soup. 7. When the meatloaf is done cooking, pour the gravy on top of the meatloaf. 8. Serve with carrots and more gravy for dipping the meatloaf in(that's why I did anyway). Bon appetit! This video was supposed to be called "2 Ways to Fry Champagne" but one of the two ways didn't work out well. The second way to fry "champagne"(sparkling white grape juice) you will never see was using as part of a batter to dip fries in. I only had enough all-purpose flour for one of the two methods and I chose the tastier method. The batter for the fries was a mixture of the "champagne" and some almond flour(which I bought at the supermarket for the "champagne" macaron recipe video coming up soon). Spoiler alert: the fries didn't taste very good, so it's best if this French fry recipe never sees the light of day on the Internet. Life pro tip: Have some sort of flour on hand, even if the final recipe doesn't work out. As for the fried "champagne", I envisioned the final product to look like that crazy deep-fried soda you would find at a state fair, except I don't have a deep-fryer(and I don't plan on getting one in the near future), so the recipe turned out 2-Dimensional instead of 3-Dimensional, but it still tasted good nevertheless. Apparently, I unknowingly made "champagne" pancakes, but I'm still calling it fried "champagne", since this is the closest thing you will get to actual fried "champagne" without a deep fryer. Besides, the addition of sugar on top of the fried "champagne" makes it look like some deep-fried, state fair creation. Although, I put maple syrup on top of it(it was the only type of syrup I had on hand and I didn't plan on making a champagne syrup just for this recipe). I said at the end of this video that, making fried "champagne" is slightly healthier than deep-frying it and I emphasize the word "slightly". This is by no means a healthy recipe, but if you don't want to feel the physical guilt of ingesting something deep-fried, then this recipe is for you. You will need: For the cooking utensils: A small bowl A large bowl A frying pan A spatula For the fried "champagne": 1 beaten egg 2/3 cups of champagne or white sparkling grape juice("champagne") 1 tbsp. of granulated sugar 1 cup of all-purpose flour Pinch of salt Pinch of baking powder Canola oil for frying More sugar for topping the fried "champagne" Maple syrup to top the fried "champagne"(optional) 1. Pour the beaten egg, "champagne", and teaspoon of granulated sugar into a large bowl. Mix all the ingredients together. The sugar should dissolve in this mixture. 2. Pour the flour, salt, and baking powder into a small bowl. Mix all the ingredients together. 3. Pour the flour mixture into the large bowl. Mix everything in the small bowl together until you get a pancake-like batter. 4. Pour canola oil into a frying pan on the stovetop. Heat the oil up. 5. Once the oil is heated up, pour the batter into the frying pan, ideally in circles that are separated from each other(that is, you don't end up with one giant pancake). Let it cook on one side for 30 seconds. 6. After 30 seconds, flip the fried "champagne" over using a spatula. Let it cook for 30 seconds on the other side. 7. Once it's done frying, put the fried "champagne" onto a plate. 8. Repeat steps 4-7 for the second batch left over in the large bowl. 9. Top the fried "champagne" with sugar. Toss the sugar and fried "champagne" together to distribute the sugar evenly among everything on the plate. 10.(Optional) Top the fried "champagne" with maple syrup. Bon appetit! When you watch the video of this bread being made, you might think I seem a bit angry. I wasn't not angry at you, the loyal viewers and subscribers. I was annoyed by my cameraman(my dad) and the long wait I had at the doctor's office just before recording this video(which is a whole 'nother can of worms that I won't go into further detail), but my dad forgot to press the record button on the first take, so I had to throw out the dry ingredients. So what you see is what actually got recorded, which is the second take. But all that frustration paid off with a satisfying loaf of bread with the consistency of a biscuit and the faint taste of grapes from the "champagne"(sparkling white grape juice). It's really good when topped with butter. Personally, I like putting cookie butter on top of my breads(but peanut butter is awesome too). My dad was surprised by the short amount of time it took for the bread to cook- only 40 minutes in the oven, which is shorter than it takes to cook almost all of my meatloaf recipes(even the tofu ones). I got my inspiration for this recipe from http://www.abreadaday.com/champagne-bread/ and their bread looked darker than mine. Maybe that's because they edited the photo but then again they used actual champagne, not carbonated grape juice. Either way, my take on this recipe turned out really delicious- plus it won't get you drunk! In a sense, this bread is family-friendly. Hooray! You will need: For the cooking equipment: A large bowl A loaf pan A baking sheet Nonstick cooking spray A whisk A spoon For the bread: 3 cups of all-purpose flour 4 1/2 tsp. of baking powder 3 tbsp. of granulated sugar 1/2 tsp. of salt 3 tbsp. of slightly cooled, melted butter(I melted my butter in the microwave for 20 seconds) 12 ounces of champagne or sparkling white grape juice 1. Put the first four ingredients(the dry ingredients) into a large bowl. Whisk the dry ingredients together. 2. Pour the butter and "champagne" into the large bowl. Mix all the ingredients together using a spoon, until you get a firm dough. The dough will be done mixing when it is harder to stir it around. 3. Spray a loaf pan with nonstick cooking spray on the bottom and sides so the loaf doesn't stick to the pan. 4. Pour the dough into the loaf pan. 5. Bake the bread in a 350 degree Fahrenheit oven for 40-45 minutes, or until the dough is fully cooked. You can tell when it is done when you stick a butter knife through the loaf and it comes out clean. 6. Top with jelly, butter, or eat it plain. Bon appetit! When I think of a way to make a pasta recipe based on the featured ingredient of the month(which, this month, is champagne), I think of two different methods to combine the featured ingredient and a pasta dish: 1. Make the pasta from scratch and put the featured ingredient in the pasta batter. 2. Boil some premade pasta in the featured ingredient if it happens to be a liquid. As you can tell, I chose option 2 for this recipe, and squid ink fettucine is what I had in my pantry. In my research for this recipe, I found a recipe from http://bigblackdogs.net/champagne-pasta/ that happened to cook pasta using option 2, except they used pecans instead of peanuts, which is what I also had in my pantry. In the link for the pasta, they recommended toasting the peanuts in the microwave for 25 minutes! That's way too much for any ingredient you put in the microwave, so I decided to just toast the peanuts for 1 minute and it sufficed. Remember I said there was going to be one recipe this month using actual champagne? Well this is the recipe. When I tasted the champagne-soaked pasta, it tasted exactly like sparkling white grape juice. How uncanny. Most people I know put tomato sauce on top of their pasta but I do not recommend doing that for this recipe- it'll just overpower any champagne flavor to the pasta. Besides, the pasta is nice and moist as it is from being cooked in champagne. This recipe is a good date night recipe since it is so fancy, what with the usage of the champagne. Maybe whenever I find a boyfriend again, I can cook this for him. :( I thought the champagne was going to boil out in the cooking process, but at some point(after 8 minutes) you realize the pasta might get overcooked(I used a type of pasta that cooks in just 3 minutes), so it's probably best to just drain the champagne using a colander, just like how you drain water from pasta. You'll still get the champagne flavor, provided you do not pour tomato sauce on top of the pasta. You will need: For the cooking equipment: 2 large saucepans(you could only use one and put the parboiled pasta into a bowl or onto a plate while you're washing out your sole saucepan) A large bowl A frying pan A spatula A colander for draining 2 spoons for tossing the pasta(I only used 1 in the video, but you really should use two spoons for tossing pasta) For the dish: You will need: 1/2 cup of peanuts Enough water to fill a saucepan almost to the top 2 1/2 cups of squid ink pasta(or any premade pasta, really) 750 ml of champagne Olive oil 1 diced onion Pinch of paprika Pinch of parsley Pinch of black pepper Pinch of garlic powder Pinch of basil Pinch of oregano Parmesan cheese to taste 1. Toast the peanuts in the microwave for 1 minute. Set peanuts to the side for now. 2. Fill a saucepan with enough water to fill it almost to the top and bring water to a boil. 3. Once the water is boiling, put the pasta in the boiling water and parboil it(partially cook it) for 1 minute(or 1/3 of however long it takes to usually cook your pasta). 4. Drain out water using a colander. Let the pasta sit in the colander to cool off for now. 5. Pour the champagne into another saucepan. Bring champagne to a boil on the stove. 6. Once the champagne is boiling, put the parboiled pasta into the saucepan. Boil the pasta for 7-8 minutes. 7. Once the pasta is done cooking, drain out champagne using a colander. Pour pasta into a large bowl. 8. Pour olive oil into a frying pan. Heat up the oil. Once the oil is heated up, pour the diced onions into the frying pan. Sautee for a few seconds first. 9. Put all spices into the frying pan. Stir the spices around with the diced onions and continue sauteeing until the onions are translucent. 10. Top the pasta with the sauteed onions, toasted peanuts, and Parmesan cheese. Toss the pasta using two spoons to distribute the garnishes into the pasta. 11. Serve with garlic bread if you wish. Bon appetit! You may be wondering why I have been posting so many videos to YouTube within the past couple of days- I'm starting a new day job soon and I just want to get my queue of videos I have recorded but not uploaded over and done with. But just because I'm starting my new day job doesn't mean I'll stop posting videos. You''ll see at least 2 new videos on my channel every week, when they will be posted will be dependent on my work schedule, but it will probably be on the weekends. A few weeks ago, I told my dad about a crazy idea for a stew with orange juice in it and he said it would taste too sweet. So I decided to use sparkling white grape juice as the "champagne" for this recipe, although you could use real champagne in place of the juice, if you are so inclined. But real champagne is expensive. The stew was hearty but its appearance reminded me of the dim sum soup my dad gets from a Chinese takeout place. To be fair, the vegetables I used came from a frozen vegetable bag that said "good for Asian recipes". It doesn't taste like Chinese takeout though. You get a strong hint of grape flavor from the juice. Plus it's good with some crispy wonton strips or some garlic bread. As for the turkey stock, it was leftover from the stock I used for my eggnog stew. You will need: For the cooking equipment: A large saucepan A small bowl For the stew: 5 cups of vegetables(I used broccoli, carrots, and water chestnuts) 2 1/2 cups of butter beans 2 cups of turkey stock 12 ounces of champagne or sparkling white grape juice Pinch of onion powder Pinch of marjoram Pinch of black pepper Pinch of salt For the thickener: 1/4 cup of water 1 tsp. of sugar 1 tbsp. of lemon juice 2 tbsp. of all-purpose flour 1. Put all stew ingredients into a large saucepan. 2. Bring the stew to a boil on the stove. Once it's boiling, cover it and reduce it to a simmer. Let the stew simmer for 45 minutes. 3. While the stew is simmering, you can make the thickener. Just put all thickener into a small bowl(like a cereal bowl). Mix all the ingredients together. 4. When the stew is done simmering, turn the stove off. 5. Pour the thickener into the stew. Mix the thickener into the stew using a spoon. 6. Bring it to a boil again. Once it's boiling, cover it and reduce it to a simmer. Let the stew simmer for an additional 3 minutes. 7. Once the stew is done simmering a second time, remove the cover from the saucepan and let it cool down for 5-10 minutes before serving. 8. Serve with wonton strips or garlic bread. Bon appetit! As I have progressed through my life, I have noticed a trend in almost all modern supermarkets: a prevalence of international foods for sale, particularly food that wasn't in most mainstream American stores until as early as 2011, like kimchi, cookie butter, and quinoa. So i decided to satirize this trend of everybody wanting new international foods in the form of a meatloaf, and it's a vegan one at that. It was delicious except I made one mistake in the video: I shouldn't have topped the meatloaf with more kimchi on the outside of them- I can only take so much kimchi in my mouth before I get a sour aftertaste, especially since kimchi isn't normally used in recipes requiring cooking in an oven. Kimchi is usually served cold, so it may look sacriliegous to cook the kimchi, so if I offended anybody in love with Korean foods, I'm sorry. Had I not decorated the outside of the meatloaf with kimchi, it would've turned out fine. But you live and you learn. So I'm not going to say in the recipe to decorate the meatloafs with kimchi. You will need: For the cooking equipment: A large bowl A lasagna pan Nonstick cooking spray For the meatloaf: 1/2 tbsp. of onion powder 2/3 cups of unsweetened applesauce 4-5 pieces of kimchi 1/2 cup of creamy cookie butter Pinch of cayenne pepper Pinch of cinnamon Pinch of black pepper Pinch of salt 1 cup of cooked quinoa 1 pound of chopped, drained, crumbled up, extra firm tofu 1. Put all ingredients in a large bowl. 2. Mix up all the ingredients so that all the ingredients are distributed evenly among the mixture, and that it holds a loaf shape. 3. Spray a lasagna pan with nonstick cooking spray. 4. Form 2 loaves. 5. Bake in a 350 degree Fahrenheit oven for 40-45 minutes. 6. Bon appetit! With the new year, I have decided to make more videos featuring other types of recipes besides meatloaf. Don't get me wrong, I love meatloaf and you'll still be seeing meatloaf videos at least once a month. But I will be making other types of food videos. This channel is going to be focused more on what crazy culinary experiments I can make that actually taste good, which is why I changed my channel banner to the mix between a mad scientist's laboratory and a kitchen(through the magic of Picmonkey.com). I liked doing the avocado recipes last year, so i have decided each month will feature a different ingredient made in numerous different ways(always in a meatloaf, of course, but other ways too). With my new grill, waffle maker, and ice cream maker, I will be showing you new types of recipes as well. Of course, unlike the avocado recipes, not all of the recipes based on the featured ingredient will be inside a meatloaf ultimately, like my stews, fries, and ice creams. Those are all self-contained recipes. This month's themed ingredient is champagne! It seems the only time we even mention this ingredient is during New Year's Eve/Day, and at weddings, and January is the perfect month to feature champagne. There is a slight problem with acquiring champagne, however: it's expensive, like where I live it's $8.99 a bottle at a liquor store(the supermarkets don't carry alcoholic champagne). Keep in mind I'm doing at least 7 champagne recipes this month, so the costs add up, which is why only one of my champagne videos will feature actual champagne. Two other videos will feature champagne vinegar(which is $5.99 a bottle at Whole Foods), and the rest will use sparkling white grape juice fruit cocktail(which is $3.50 a bottle at a supermarket) instead. With that being said, all videos from now on on this channel will be under the "Meatloaf Princess" banner. So no more "French Fry Princess", which may have confused some of you anyway. I want to do some collab videos with other food channels on YouTube this year so if you're interested in that opportunity, feel free to message me and I'll see what we can do. A new year brings new beginnings, which I'm doing with this channel, and I look forward to sharing my recipes with all of you! :) |
Archives
October 2019
Categories
All
|
 RSS Feed