|
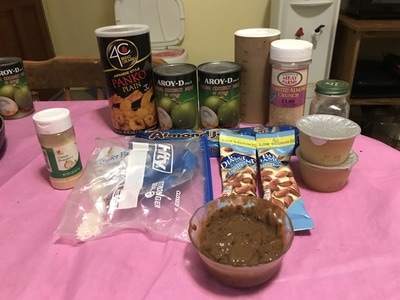
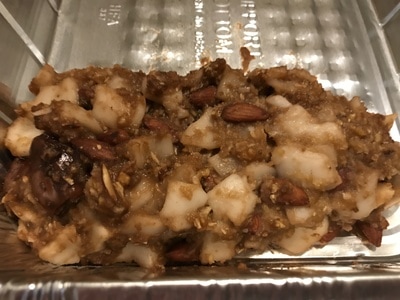
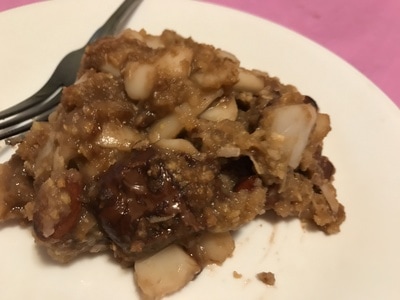
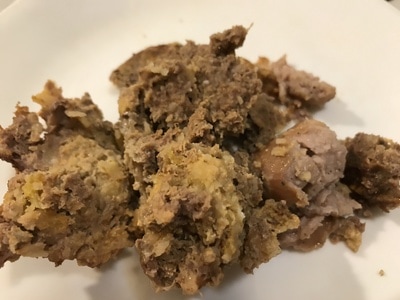
Well, the can did say "young coconut meat", and the first thing that comes to my mind as the Meatloaf Princess is, drumroll please...meatloaf! This is a meatloaf made with young coconut meat, along with all the other flavors you'd find in an Almond Joy candy bar- chocolate and almonds. This idea must be so unusual because I couldn't find a single source online that cooked with young coconut meat in a recipe other than the traditional Filipino dessert Buko. The directions on that recipe said to cook it for an hour, but the only caveat is that the young coconut meat is protected by the pie crust on top of it, which doesn't translate at all to a meatloaf recipe. Some recipes of Buko only cook the pie crust and the not the young coconut meat, and I'm not looking to eat a raw meatloaf, even if it's perfectly safe to do so- you can eat the young coconut meat from the can! So I had to do a little experiment myself- I thought 60 minutes would be way too much time in the oven for young coconut meat, so I only cooked it for 13 minutes, fearing the meat would turn into water in the oven. Technically, the coconut meat's already safe to eat raw, but this is just enough time to cook the meatloaf. If it weren't for the Almond Joy bars being made with milk products, this would've been a vegan meatloaf, as I used unsweetened applesauce in lieu of eggs. If I used eggs, that would require the meatloaf needing to be in the oven for a longer period of time just so that the egg can be cooked. Young coconut meat is a really good alternative to meat to use in a vegan meatloaf, along with other things like:
Coconuts are very versatile- here are some of the ways you can cook with it:
That's a lot of ways to use a coconut! Seriously, how come nobody's thought of using young coconut meat as an actual meat substitute!? Yes, coconuts can be very hard to crack open and deconstruct, but young coconut meat also comes in a can and all you gotta do is drain the water and syrup it's been preserved in. I actually had a perfect storm of ingredients to make an Almond Joy meatloaf- not only did I have some Almond Joy pudding(which is a thing but it tastes artificial) and almond ice cream topping I got from a local grocery store that's known for its meats. There are a lot seasoned almond items in the supermarket today, but if you plan on replicating this recipe, get lightly salted almonds, not the ones that have funky flavors like:
None of those flavors mix with Almond Joy candy bars. Out of all those options, I'd only try the latter of the five because I don't like spicy foods and I absolutely hate wasabi(it deceives you by making you think it tastes good until it punches your tastebuds with an unbearable spiciness). So the big question is, how does young coconut meat taste? It has the consistency of canned peaches but tastes slightly like a coconut should. It's very slippery too. My dad thought this meatloaf would be better suited toward dessert and not dinner. HELPFUL LINKS: Almond ice cream topping: www.harborsweets.com/product/sweet-sloops-ice-cream-topping/almond-butter-crunch-toffee Almond Joy pudding: https://www.amazon.com/Almond-Joy-Instant-Pudding-3-52/dp/B00NAN0SMY/ref=sr_1_1_a_it?ie=UTF8&qid=1496079377&sr=8-1& Young coconut meat: https://www.amazon.com/Young-Coconut-Meat-Syrup-15oz/dp/B00I3DA2C2/ref=sr_1_2_a_it?ie=UTF8&qid=1496073404&sr=8-2& You will need: For the cooking equipment: A large bowl A colander A medium bowl Lasagna pan Nonstick cooking spray For the meatloaf: 2/3 tbsp. onion powder 2/3 cups unsweetened applesauce 2 tbsp. shredded coocnut 3 oz. lightly salted almonds 7 chopped up, fun-size Almond Joy bars 1/2 cup Almond Joy pudding(see HELPFUL LINKS) 8 oz. almond ice cream topping(see HELPFUL LINKS)(I only had 6 oz. so the other 2 oz. were plain panko breadcrumbs) Pinch of salt Pinch of black pepper 2- 15 oz. cans young coconut meat in syrup(see HELPFUL LINKS) 1. Put the first 9 ingredients into a large bowl. To prepare the young coconut meat: 1. Open the cans then drain the water and syrup out in a colander. Transfer the meat to a medium bowl. 2. Either cut up the meat into strips or crumble up the meat by poking the meat on the fleshy side. Ideally you want the meat to somewhat resemble ground meat. 3. Put the crumbled up and/or chopped meat into the large bowl. Note: Each 15 oz. can only yields 6.3 oz. young coconut meat once the liquid is drained 2. Mix all the ingredients up until you get a firm mixture. 3. Spray a lasagna pan with nonstick cooking spray. Form 2 loaves from the mixture. 4. Bake in a 350 degree Fahrenheit oven for 10-20 minutes. Bon appetit!
0 Comments
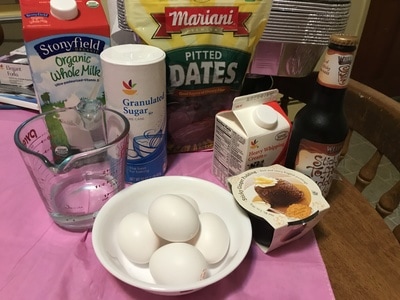
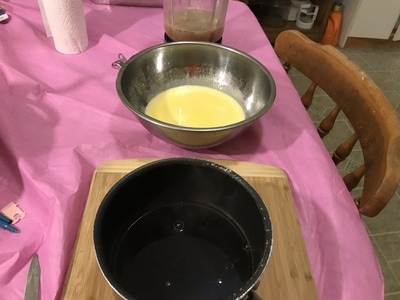
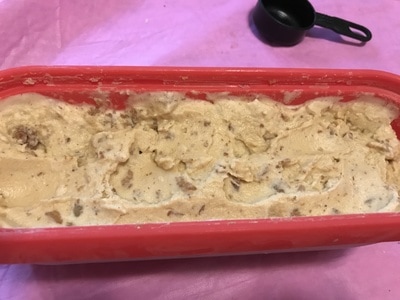
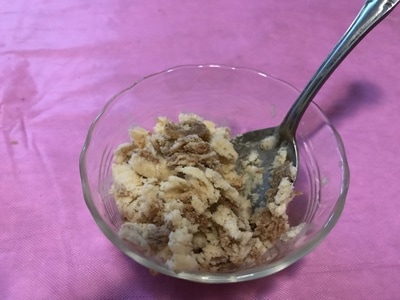
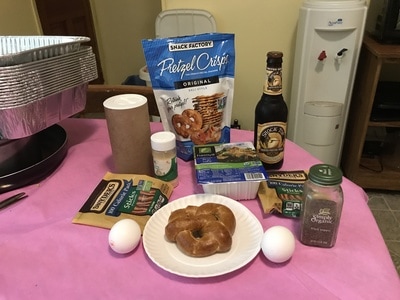
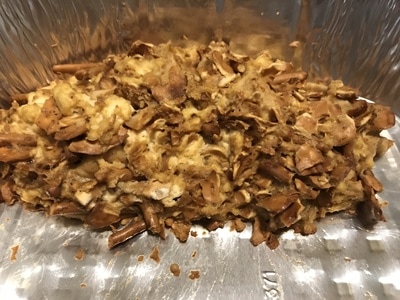
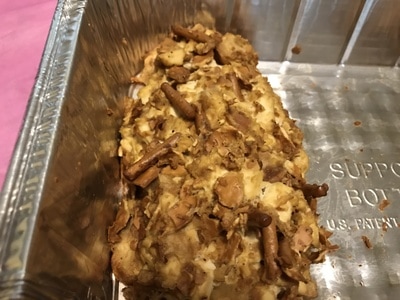
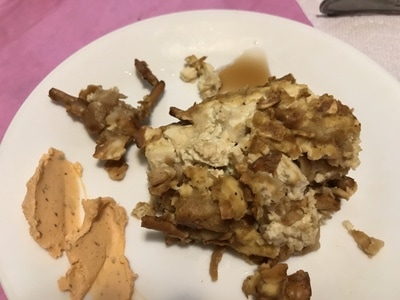
We're back at it with the sticky toffee pudding beer, only this time we're using it in an ice cream chock full of dates and sticky toffee pudding pieces! This ice cream gave me a pretty good case of brain freeze to the point of my tongue perceiving the ice cream to be tangy and not sweet enough. But I remedied the latter by having a date or two with the ice cream. If you don't want to end up with a tangy, fizzy tongue, I advise you leave the ice cream out at room temperature for 5-10 minutes with the lid off and that way you won't have that issue. Plus, the ice cream will be easier to scoop! The ice cream was a pretty involved recipe, though it originally wasn't meant to be. The day before I recorded this video, I happened to look on the Wikipedia page for sticky toffee pudding and it said it's made with dates. I thought to myself that this ice cream needed to have a date ice cream base to make it more authentic to the traditional recipe. Making the custard for the ice cream is actually harder than including the dates, which only involves chopping them up and cooking them in water for 5 minutes before blending them with some more water to get a date puree. Speaking of the custard, when I was making it, I ended up with a lot of solid egg pieces and I anticipated not having much ice cream as the end product. But luckily, I was proven wrong because I actually ended up with more than a quart of ice cream. Sadly I didn't have a 2nd ice cream tub, so I discarded the extra ice cream. When you scoop ice cream into a tub, you don't want it to the top because otherwise the tub will overflow during the freezing process! You should leave a little room at the top for that reason. This recipe has beer in it, so my dad didn't try the ice cream. HELPFUL LINK: Sticky Toffee Pudding:: https://www.amazon.com/Mr-Kipling-Sticky-Toffee-Pudding/dp/B012OUULD4/ref=sr_1_2_s_it?s=grocery&ie=UTF8&qid=1495983374&sr=1-2& You will need: For the cooking equipment: A small bowl A medium saucepot A large saucepot A candy thermometer A strainer A large bowl Aluminum foil A small saucepot A blender An ice cream maker An ice cream tub For the ice cream: 5 eggs 1/4-1/2 cup granulated sugar 1 cup whole milk 1 cup heavy whipping cream 15 dates, chopped up into thirds 1/2 cup water An additional 1 cup water 12 oz. sticky toffee pudding ale 5 oz. sticky toffee pudding(see HELPFUL LINK) To make the custard: 1. Crack 5 eggs into a small bowl, one at a time. DO NOT WHISK THE EGGS! Only put the egg yolks into a large bowl. Discard the egg whites. 2. Add the granulated sugar into the large bowl. Mix the egg yolks and sugar together until you get a yellow mixture. 3. Pour the whole milk and heavy whipping cream into a medium saucepot. Put the stove on at low heat. Stir the mixture until it develops a "skin" on top. Once the "skin" has developed, turn the stove off. 4. Remove saucepot from heat and spoon the milk mixture into the egg yolk mixture. Do not pour it all in at once- otherwise you'll end up with scrambled eggs! After spooning in the milk mixture each time, stir the egg yolk and milk mixtures together. Repeat until all the milk mixture has been mixed in with the egg yolk mixture and you have a pale yellow mixture. This is your custard. 5. Transfer your custard into a large saucepot. Attach a candy thermometer to the large saucepot. Put the saucepot on the stove on low heat. Heat the custard until it reaches 180 degrees Fahrenheit. Do not stir the custard! Stirring it will cause the custard temperature to drop. 6. Once the custard reaches 170 degrees, turn the stove off and remove it from heat immediately. Pour the custard through a strainer with a large bowl underneath. Dispose of the solids in the strainer immediately, otherwise they'll turn into scrambled eggs! 7. Pour aluminum foil over the large bowl and chill it in the fridge for now. To make the date puree: 1. While the custard is chilling, put the chopped up dates and 1/2 cup water into a small saucepot. 2. Turn the stove on medium heat and let the dates cook in the water for 5 minutes to soften the dates during the blending process. If the water starts to bubble, just stir it, but if the water starts to boil, turn the flame off immediately and move it to a cool burner! 3. After 5 minutes or the water boils(whichever happens first), move the saucepot to a cool burner and let it cool down for 10-20 minutes. 4. Once the date mixture has cooled down, pour that an an additional cup of water into a blender. Blend for 1 minute. To reduce the beer: 1. Pour the beer into a medium saucepot. Put the saucepot on the stove on low heat and let the beer reduce until there's only 8 ounces left. Reducing the beer cooks some of the alcohol out, which will enable the ice cream to freeze. To make the ice cream: 1. Take the custard in the large bowl out and mix in the reduced beer and date puree. Put aluminum foil over the large bowl and let the beer mixture chill in the fridge for 8-24 hours. 2. Turn your ice cream maker on and pour the chilled date beer custard into the bowl of the machine. Let the ice cream churn according to your ice cream maker's instructions. My machine said to churn for 11 minutes. 3. Break apart some pieces of sticky toffee pudding(2.5 ounces worth) and add them into the ice cream maker as its churning. Let the ice cream churn for an additional 3-4 minutes(or according to the manual). 5. Turn the ice cream maker off, detach the bowl, and scoop half the ice cream into an ice cream tub. Top the ice cream with pieces of the rest of the sticky toffee pudding including the toffee sauce on the bottom of the pudding. Cover the sticky toffee pudding pieces and toffee sauce with the rest of the ice cream. 6. Put the lid on the ice cream tub and let it freeze in the freezer for 4 hours, or overnight. 7. Bon appetit! If you're really in love with pretzels, then you're going to love this meatloaf because it's full of it, with three types of pretzels and even pretzel-flavored beer! Pretzels on their own taste bland unless they're seasoned, so this meatloaf was kind of dry and bland. But if you dip pieces of the meatloaf in beer cheese sauce(mustard will work too) or maple syrup, well then the dish is elevated to a whole new level! I'm not a pretzel fanatic myself but when ever I happen to see a flavored beer at the supermarket that I just have to buy, one of the things I want to make is a meatloaf that has the same flavor as the beer itself, whether it be s'mores, sticky toffee pudding, chocolate caramel coconut(the Samoas Girl Scout cookie flavor), or pretzel. When I dipped the meatloaf into some maple syrup, it brought back memories of my mom's matzo brei that she made every passover, surprisingly. I didn't use traditional hard pretzels as the binder for the meatloaf because they don't crush very well without a food processor. But pretzel crisps, which are really thin pretzels, do! Because of the presence of beer in the meatloaf, my dad didn't partake in it. You will need: For the cooking equipment: A large bowl A lasagna pan Nonstick cooking spray For the meatloaf: 2/3 tbsp. onion powder 2 beaten and whisked eggs 1/2 cup pretzel beer 1 soft pretzel, broken apart into small pieces 2 oz. broken apart pretzel sticks Pinch of salt Pinch of black pepper 1 cup's worth of crushed pretzel crisps 1 pound chopped, drained, firm tofu Serve with beer cheese sauce and/or maple syrup 1. Put all meatloaf ingredients into a large bowl. Mix all the ingredients up until you get a firm meatloaf mixture. 2. Spray a lasagna pan w/ nonstick cooking spray. Form 2 loaves from the meatloaf mixture. 3. Bake in a 350 degree Fahrenheit oven for 40-45 minutes. Dip it in beer cheese sauce and/or maple syrup to make it more flavorful. 4. Bon appetit! If you want to use up leftover veggies, rice, protein sources, and beer, make a stir-fry- it's just like Chinese takeout without the takeout part! In this recipe, the beer is pretzel-flavored! Here's the method to my madness when thinking of this recipe: I bought a 6-pack of pretzel-flavored beer and I'm going to use it in the following types of recipes in the near future:
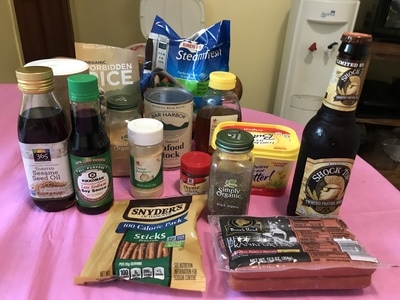
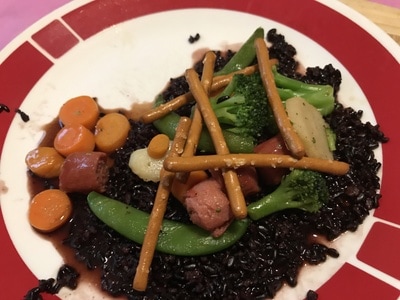
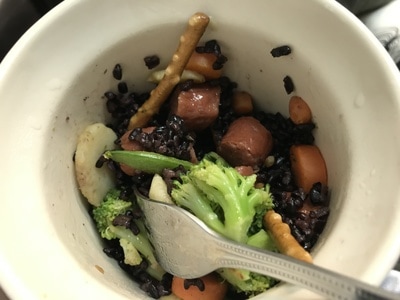
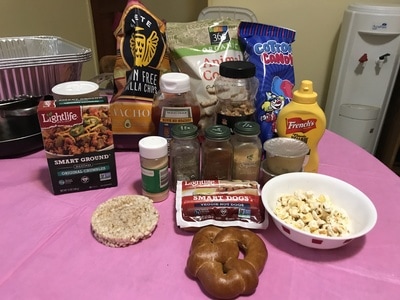
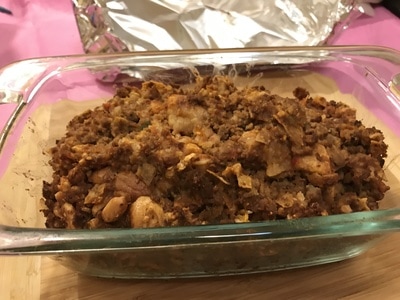
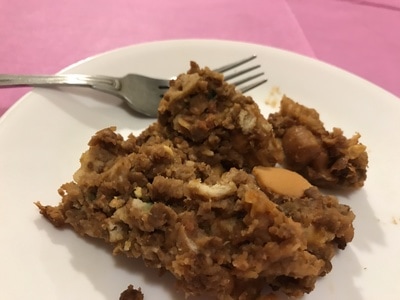
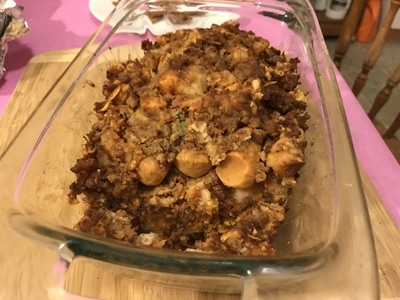
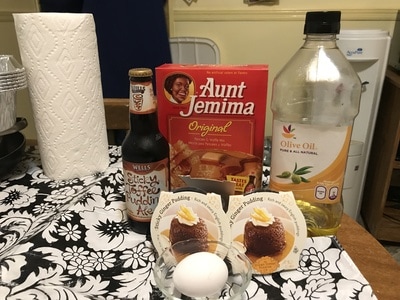
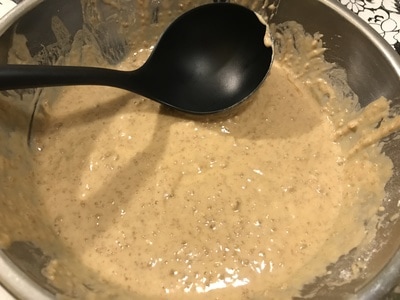
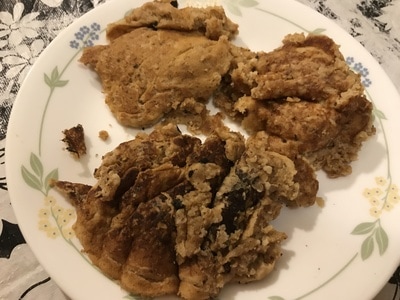
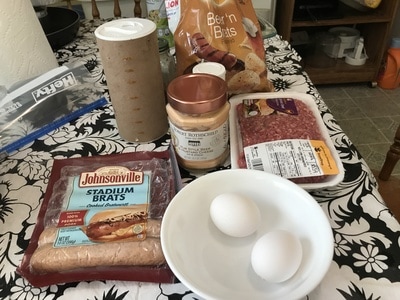
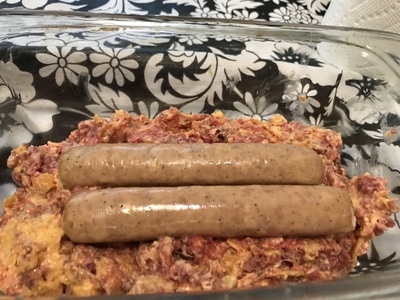
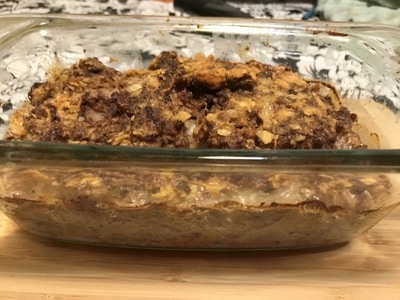
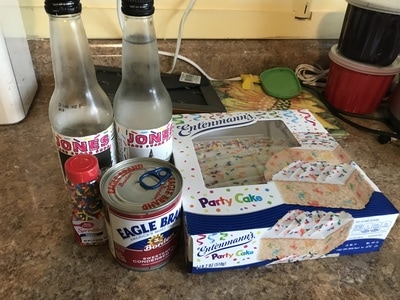
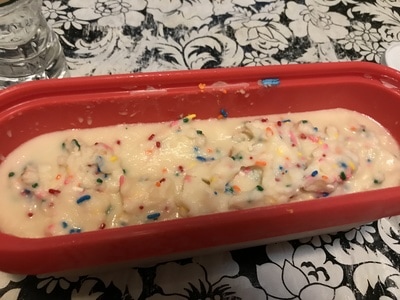
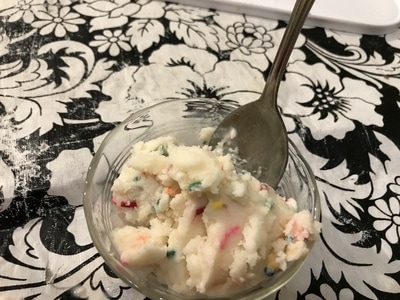
Normally, I'd use a bottle of beer in a beer bread recipe, but I realized you can get pretzel bread in most supermarkets these days, so making a pretzel beer bread would kind of be pointless. I had some black rice in the pantry that I needed to use so I searched for a beer rice recipe- lo and behold, it actually exists! What else goes with rice in a stir-fry? An assortment of veggies, some sort of sauce, and a protein source(doesn't have to be meat). At one point I was going to marinate some cod that I have in the freezer in some sort of beer marinade, but that requires thawing the filet out overnight before marinating for some period of time. That's a pain in the rear, so I used frankfurters- my dad loves hot dogs. Frankfurters kind of fits this stir-fry because the first two foods that come to one's mind when they think of baseball season are pretzels and hot dogs. I had fermented black bean paste that I was going to use in the sauce, but every recipe that used it that I found called for only 1-2 tbsp. since it's so strong and I have a 6 tbsp bag. Normally I'd use the paste and save the rest as a topping for my morning grits(or cream of wheat, or buckwheat, or oatmeal). But here's the rub: I've never tried black bean paste before so I don't even know if I'm going to like the stuff. Besides, I had some soy sauce and honey on me and that was an easier option to make the sauce. As for the black bean paste, I think I'll use it with some ramen that I have(not for a video though). It turns out pretzel sticks soften when they're placed in the fridge overnight and reheated in the microwave. But, at least to me, that's OK, because pretzels can also be soft as well! I initially thought frozen vegetables couldn't be cooked without a microwave but this stir-fry has proved me wrong in the best way possible! This recipe has beer in it in more ways than one, so my dad didn't try this recipe. You will need: Makes 4 servings For the cooking equipment: A large saucepot with lid A small saucepot A wooden spoon A frying pan A spatula For the beer rice: 1 cup uncooked rice that's NOT INSTANT(I used black rice since that's what I had) 15 oz. seafood stock(but any type of stock will do) 3/4 cup pretzel beer 1/2 cup melted butter Pinch of thyme Pinch of onion powder For the sauce: 1/2 cup soy sauce 3/4 cup pretzel beer 1/2 cup honey Pinch of garlic powder For the stir-fry: Sesame seed oil for frying 10 oz. mix of frozen carrots, snow peas, broccoli, and water chestnuts 4 chopped up, cooked frankfurters(or any type of protein) Pretzel sticks for garnish To make the beer rice: 1. Put all beer rice ingredients into a large saucepot. Mix all the ingredients up. Bring saucepot to a boil on stovetop. 2. Reduce the heat to a simmer. Cover saucepot with lid. Let the rice simmer for 30-40 minutes or until all the liquid has fully dissolved(this took me 45 minutes). To make the sauce: 1. Put all sauce ingredients into a small saucepot. Mix all the ingredients up. Put the burner on medium-high heat. 2. Stir the sauce as it's cooking, until it coats the back of a wooden spoon. If the sauce starts to rise up suddenly due to the beer, TURN THE BURNER OFF IMMEDIATELY! Then keep stirring until it's coated the back of a wooden spoon. To stir-fry: 1. Pour sesame seed oil into a frying pan and spread the oil throughout the pan. Heat the oil up by turning the burner on. 2. Once the oil is heated up, put the frozen vegetables into the frying pan. Or if your pan is kind of small like mine was, do two batches and just place 5 oz. for each batch. Cook the veggies by moving them and turning them over within the pan for 4 minutes. 3. Add the chopped, cooked frankfurters(or protein source) after 4 minutes. If you're making 2 batches, place 2 chopped up franks in each batch. Move everything and turn them over within the pan for an additional minute. Plating: 1. Place rice on a plate, then the stir-fry components on top of the rice, and lastly a little bit of the sauce. Garnish with pretzel sticks. Bon appetit! My inspiration for this recipe was the sad news that the Ringling Barnum & Bailey Circus is shutting down for good after 146 years! Their last show is next Sunday and it's going to be on Facebook Live. The downfall of the Ringling Barnum & Bailey Circus was their treatment of the animals that performed in the circus, most notably the elephants. When they stopped using elephants in the circus, ticket sales declined drastically. Due to their numerous complaints by animal activist groups, I've decided to be a bit cheeky and make this meatloaf vegan, so no animals were harmed in the making of this meatloaf. It's sad to think that when future generations of think of the word "circus", they'll think of Washington politics and not actual family-friendly entertainment that was wholesome. I remembered going to the circus when I was 7, but it wasn't the one that's closing down next weekend, it was some smaller promotion. Still, I recall sitting on the ground in the front row of the gym at a local junior high school seeing actual elephants and eating animal crackers. I also leaving the show early since the clowns freaked me out(they still do to this day and if Kaboom cereal was still made, I would've used it in this meatloaf). Another fond memory I have of the circus is the Kidsongs VHS tape called "A Day at the Circus" that I watched as a kid(and like all the other old Kidsongs shows, is on YouTube for your viewing pleasure today). It's sad that the circus in the sense in that video is soon to be obsolete. Like all my other videos, I've learned something- in this case that cotton candy and vegan franks are disgusting. I went to a friend's birthday party when I was 9 and I recall them having a cotton candy machine, but not being allowed to eat cotton candy by my mom because of its zero nutritional value. Well my mom was right and I didn't miss much by not eating cotton candy for all these years- it's like eating a sweet pillow, which is an extremely off-putting texture to me when it comes to food. I(like most human beings) don't eat pillows, therefore I don't eat cotton candy. As for the vegan franks, they tasted too artificial, to the point where they tasted too much like a meat-based frankfurter and it was almost like eating a basketball(which most humans don't eat either). It didn't help the franks were rubbery in texture too. Apart from the disgusting "franks", which I chucked after the meatloaf was done cooking, this meatloaf has a lot of filler from the pretzels, chips, and crackers in it. But the ketchup and mustard made this meatloaf delicious! My dad liked the meatloaf, even though he couldn't put his finger on what he was tasting. You will need: For the cooking equipment: A large bowl A loaf pan Nonstick cooking spray Aluminum foil A baking tray(optional) For the meatloaf: 2/3 tbsp. onion powder 2/3 cups applesauce 1/4 cup peanuts 1 funnel cake(or caramel rice cake, if you're lazy like me- they're pretty much the same circular shape), crumbled into small pieces 1 cup popcorn 1 soft pretzel, crumbled into small pieces 1 oz. cotton candy, broken into smaller pieces Pinch of garlic powder Pinch of paprika Pinch of black pepper Pinch of salt 1/2 cup's worth of crushed vegan nacho tortilla chips 1/2 cup's worth of crushed animal crackers 12 oz. vegan ground beef 2-3 vegan franks(optional) 1. Put all the ingredients except the vegan franks into a large bowl. Mix all the ingredients up until you get a firm meatloaf mixture. 2. Spray the inside of a loaf pan with nonstick cooking spray. 3. Put half the meatloaf mixture into the loaf pan. Top that meatloaf mixture with the vegan franks and top the franks with the rest of the meatloaf mixture. 4. Cover the pan with aluminum foil and place onto a baking tray(optional). Bake the meatloaf in a 375 degree Fahrenheit oven for 60-65 minutes. 5. Bon appetit! One of the ways I cook with flavored beer is by making pancakes. The beer I used was sticky toffee pudding-flavored(which is a thing) and there's even actual sticky toffee pudding in the pancakes. Of course, putting the pudding into the batter and then having to break them up so they blend in with the batter requires a lot of elbow grease, along with a spoon and fork. These pancakes are sweet enough on their own so no maple syrup is needed(though it probably would've made the pictures a lot prettier instead of it looking like fried chicken from a distance). Flipping pancakes over was harder than I thought- you let them cook too long on one side and they burn but on the flip side, if you don't cook them long enough, then all you're really doing is flipping liquid batter over. But then again I don't normally cook pancakes. My mom(R.I.P.) always cooked pancakes for me every weekend. I would put baking raisins(which are basically soggy raisins) in the batter or dried tropical fruit. When my mom's memory was on the decline, I had to write what I wanted her to make me. The last thing I wrote for my mom to make was double chocolate chip pancakes. Sadly, she never got to make those for me as she passed away soon after I wrote that reminder. My dad was slightly better at flipping the pancakes over. I made 6 batches of pancakes, or about 18-21 pancakes, which was enough for 4 days' worth of breakfast. The pancakes definitely tasted like ginger, but that was from the sticky toffee pudding(not the beer). Ginger isn't a key ingredient in a traditional sticky toffee pudding, which is a dessert of British origin. HELPFUL LINK: Sticky Toffee Pudding: https://www.amazon.com/Mr-Kipling-Sticky-Toffee-Pudding/dp/B012OUULD4/ref=sr_1_2_a_it?ie=UTF8&qid=1494697971&sr=8-2& You will need: For the cooking equipment: A large bowl A fork and spoon A fryin pan A soupladle A spatula For the pancakes: 2 cups pancake mix 11 oz. Sticky Toffee Pudding Beer 1 egg 1 tbsp. olive oil 10 oz. sticky toffee pudding(see HELPFUL LINK) Olive oil for frying Makes 18-21 pancakes 1. Put the pancake mix, beer, egg, olive oil, and sticky toffee pudding in a large bowl. Mix all the ingredients up until you get a pancake batter that isn't liquidy. Break up the sticky toffee pudding in the batter with a fork and spoon. Incorporate the broken up pudding into the batter. Make sure there are no lumps in the pancake batter from the pancake mix! 2. If the pancake batter is too liquidy, add 1 tbsp. pancake mix into the batter and incorporate the additional pancake mix. Once the pancake batter isn't liquidy, let it rest for 1-2 minutes. 3. Pour olive oil into a frying pan. Turn the stove on to heat the oil up. 4. When the oil is heated up, pour slightly less than 1/4 cup batter for each pancake into the frying pan with a soup ladle. Break up the pancakes with a spatula to separate them. 5. Let the pancakes cook for 30-45 seconds. Then flip them over with a spatula. Let the pancakes cook on the other side for 30-45 seconds before removing them from the frying pan and putting them onto a plate. 6. Repeat steps 4 and 5 for the remaining pancake batter you have. Bon appetit! With baseball season well underway, this is the perfect meatloaf to have while watching America's favorite pastime, because the combination of beer and bratwurst is a timeless American food combo! If I ever have flavored potato chips(I'm not talking about sour cream and onion chips here, people)- I gotta turn it into a meatloaf. Potato chips are great binders in a meatloaf because they crush up easily to the point where they're just as small as breadcrumbs. Plus, you don't even need a food processor to crush the chips- all you need is your fist and a Ziploc bag! This meatloaf definitely tasted cheesy from the beer cheese dip(another timeless combination) and salty from the bratwurst. Beery not so much. A Beer & Brats potato chip definitely has a beery, malty note in its taste though, along with cheese. The dip may have melted in the oven during the cooking process, but it's mustardy flavor definitely lived on in the finished product. If you have seen my other beef meatloaf videos, I usually use 93% ground beef, but the leanest ground beef my local supermarket had at the time I went shopping was 90%, which is why you should not cut into the meatloaf immediately after cooking. You don't want the fat and juices oozing out the meatloaf, as much as it looks cool, because then you'll end up with a dry meatloaf and even I don't enjoy dry meatloaves! My dad said the meatloaf was beefy and cheesy, but not beery. HELPFUL LINKS: Beer Cheese Dip: https://www.amazon.com/Resident-Chef-Gourmet-Beer-Cheddar/dp/B06XC82DCK/ref=sr_tnr_p_1_6523482011_1_s_it?s=grocery&ie=UTF8&qid=1494171037&sr=1-1& Beer & Brats Potato Chips: https://www.amazon.com/Brats-Flavored-Potato-Chips-2-75oz/dp/B06XFVDHBQ/ref=sr_1_1_a_it?ie=UTF8&qid=1494171081&sr=8-1& You will need: For the cooking equipment: A large bowl Nonstick cooking spray A loaf pan For the meatloaf: 2/3 tbsp. onion powder 2 beaten and whisked eggs 1/2 cup beer cheese dip(see HELPFUL LINKS) Pinch of salt Pinch of black pepper 1 cup crushed Beer & Brats Potato Chips(see HELPFUL LINKS) 1 lb. 90% ground beef 2 bratwurst links, whole 1. Put the first 7 ingredients into a large bowl. Mix all the ingredients up until you get a firm mixture. 2. Spray a loaf pan with nonstick cooking spray. 3. Put half the meatloaf mixture into the loaf pan. Top the mixture in the loaf pan with the bratwurst links. Cover the bratwurst links with the rest of the meatloaf mixture. 4. Bake in a 350 degree Fahrenheit oven for 60-65 minutes, or until the internal temperature reaches 160 degrees Fahrenheit. Let the meatloaf rest at room temperature for 10 minutes to ensure the juices seep into the meat. 5. Bon appetit! This is the second of two recipes using birthday cake soda to celebrate this channel's 2nd birthday! Instead of making a traditional ice cream, why not make a sherbet using sweetened condensed milk and birthday cake soda, along with all the other colorful parts of a birthday cake? You might be wondering: what is a sherbet? A sherbet is like ice cream, only with less fat. There used to be a time back in the '90s and '00s when low-fat foods were trendy and the only frozen desserts you saw in the supermarket that came in pints and quarts were traditional ice cream, sherbets, sorbets(which are water or soda-based), and frozen yogurts. Nowadays, "fat is your friend", so you'll find instead traditional ice creams, nondairy ice creams, frozen Greek yogurts, and gelatos(which have more fat than traditional ice cream). A sherbet, to me, is easier to make, as opposed to a traditional ice cream, which requires milk, sugar, salt, and sometimes egg yolks. I didn't make this a sorbet because then I wouldn't be able to put crumbled up birthday cake pieces in it. This sherbet definitely tasted like birthday cake. It looked frozen solid, but it's extremely easy to scoop. The only downsides to this dessert are extreme brain freeze(soda freezes at 28 degrees Fahrenheit, as opposed to 32 for water) and it melting quickly. My dad enjoyed the sherbet, though he probably would've gotten brain freeze too if he ate a lot of the sherbet! HELPFUL LINKS: Birthday Cake Soda: https://www.jonessoda.com/collections/jones-beverages/products/limited-edition-birthday-cake-soda-12-pk Birthday Cake Kisses: https://www.amazon.com/Hersheys-Kisses-Birthday-Cake-Flavor/dp/B01MEHO9VN/ref=sr_1_2_a_it?ie=UTF8&qid=1493741143&sr=8-2& You will need: For the cooking equipment: A large bowl An ice cream maker An ice cream tub For the sherbet: 14 oz. sweetened condensed milk, chilled for 24 hours in the fridge 20 oz. birthday cake soda, chilled(see HELPFUL LINKS) 1 slice party cake or generic birthday cake 1.75 oz. rainbow sprinkles 7 unwrapped Birthday Cake Kisses(see HELPFUL LINKS) 1. In a large bowl, mix the condensed milk and soda up until the milk is no longer sitting at the bottom. 2. Turn the ice cream maker on. Pour the soda mixture into the bowl of the ice cream maker. Churn according to your ice cream maker manual's instructions(mine said to churn for 11 minutes). 3. Separate the frosting from the cake of the birthday cake slice. Crumble up the frosting, as well as the cake until the cake has the consistency of breadcrumbs. 4. After the initial churning period, pour the sprinkles and crumbled up birthday cake into the ice cream maker. Let the sherbet churn for an additional 3-4 minutes. 5. Turn the ice cream maker off and scoop half of the sherbet into an ice cream tub. Top the sherbet with the unwrapped birthday cake kisses. Cover the kisses with the rest of the sherbet. You need to work quickly to transfer the sherbet into the tub, as it melts quickly! 6. Put the lid on the tub and freeze the sherbet overnight, or for at least 4 hours. Bon appetit! |
Archives
October 2019
Categories
All
|
 RSS Feed