|
I have exciting news for you all for this coming month of September. First off, it turns out I won't be in my local newspaper until September 13, supposedly. Maybe more people look for meatloaf recipes around the fall and winter. If that's the case, then those are now my 2 favorite seasons! We are only 1 subscriber away from 50 subscribers. I have a special meatloaf video planned for you all. But I can't reveal anything until someone becomes subscriber number 50. We couldn't have done this channel without the support from all you current subscribers, so let me say thank you from the bottom of my meatloaf heart! Secondly, the videos in the month of September will be a bit different. September on this channel is dedicated to the finalists of Lay's "Do Us a Flavor" contest(the US contest anyway; I think there's a Canadian version going on at the same time). Those flavors will be turned into 2 dishes: hot pockets and meatloaf. This is the general plan for each flavor. 1. West Coast Truffle Fries- I will make a hot pocket with french fries, black truffle oil, Parmesan-Romano cheese, and garlic powder, all rapped up in a modified crescent dough that is drizzled with melted butter and parsley. The meatloaf will have West Coast Truffle Fries potato chips, french fries, black truffle oil, Parmesan-Romano cheese, and 1 hot pocket of said flavor- all inside a tofu meatloaf. 2. Southern Biscuits and Gravy- A hot pocket with Chicken Apple sausage gravy made from scratch, inside a modified biscuit dough that is drizzled with melted butter, salt, and pepper. The meat in the meatloaf will be Chicken Apple sausages, and other ingredients include crumbled up biscuits, salt, pepper, sausage gravy, and Southern Biscuits and Gravy potato chips. 3. Greektown Gyro- This one is a bit different in that the hot pocket I'm making will have deli roast beef coated with homemade tzatziki sauce, wrapped inside a pita pocket that is baked for maybe 5 minutes at most. The meat in the meatloaf will be lamb. I'm using all components of the pita pocket except for the roast beef and there will also be crumbled up pita pockets, tzatziki sauce, and Greektown Gyro potato chips. 4. New York Reuben- This is the only hot pocket in which I'm making the dough from scratch. It will be a hot pocket made from rye flour. The meat will be corned beef, with some sauerkraut and Russian dressing. The meat in the meatloaf will be corned beef, with the rye hot pocket, sauerkraut, Russian dressing, and New York Reuben potato chips. All this talk of food makes me hungry, so that's pretty much it for this blog post. I hope you're as excited as I am about September!
0 Comments
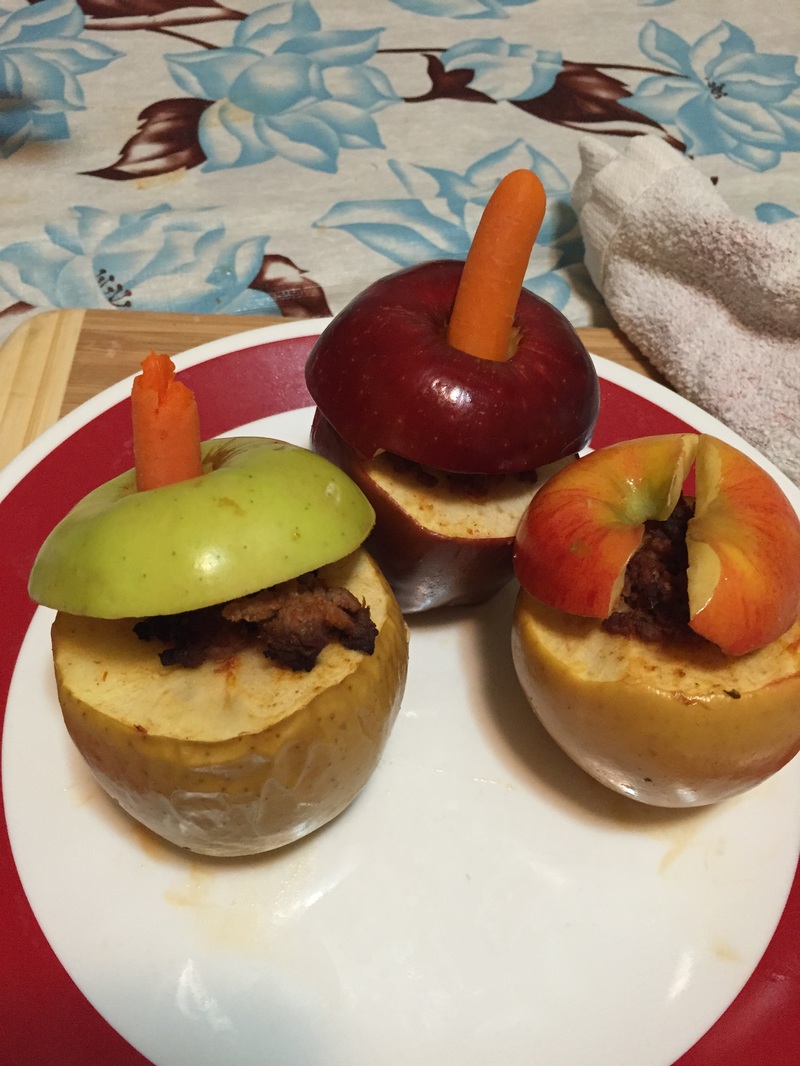
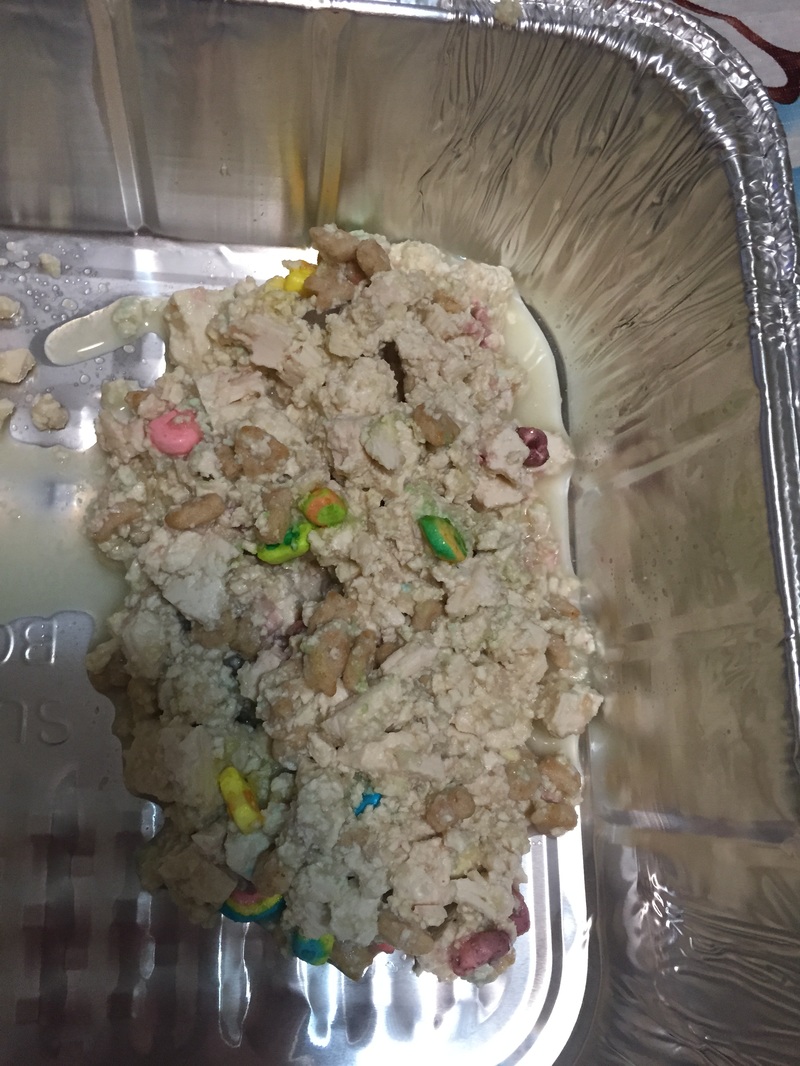
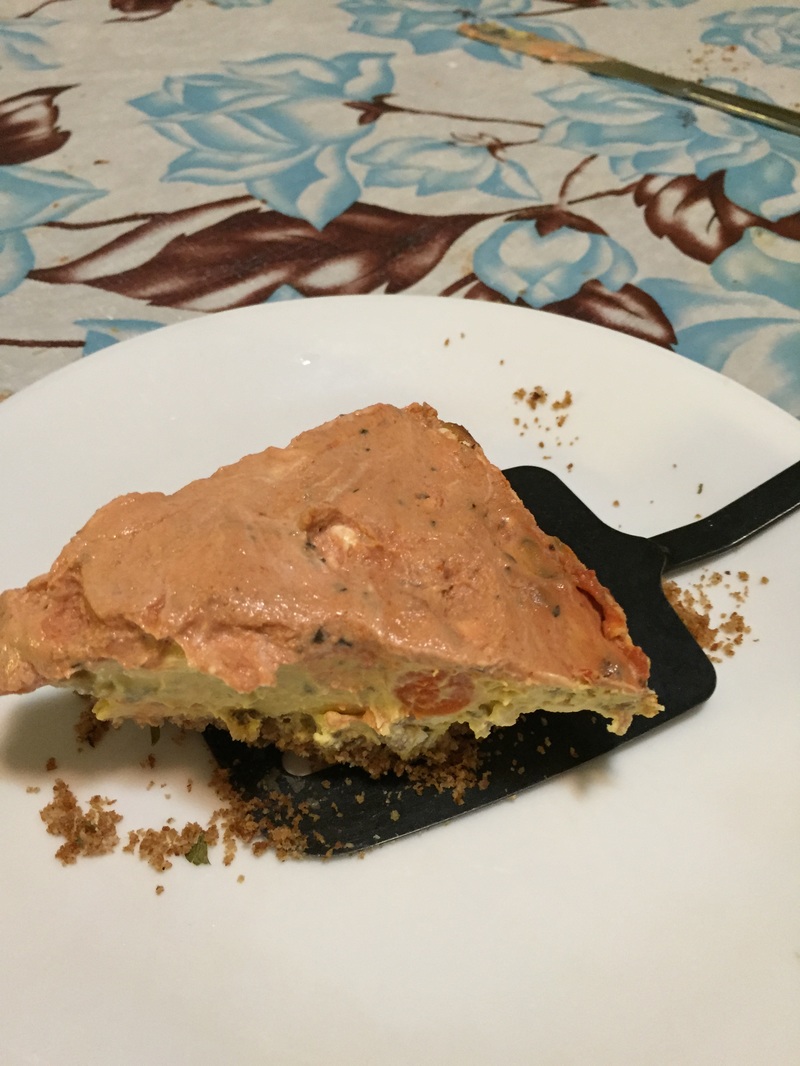
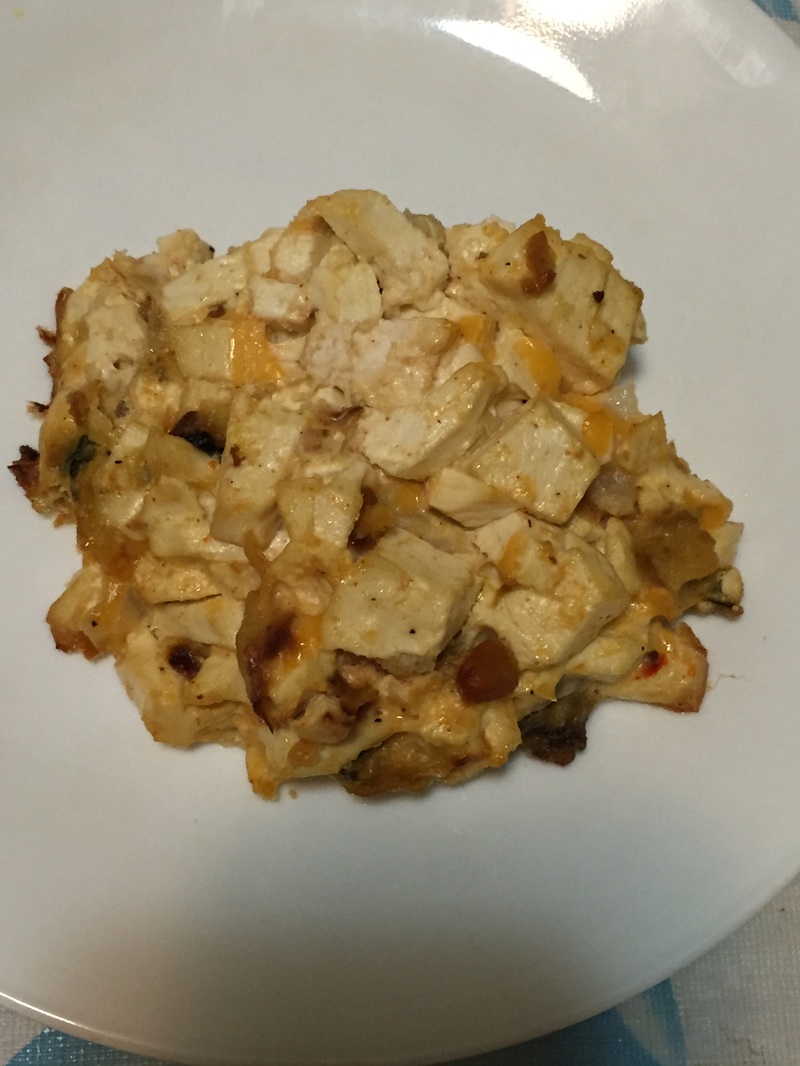
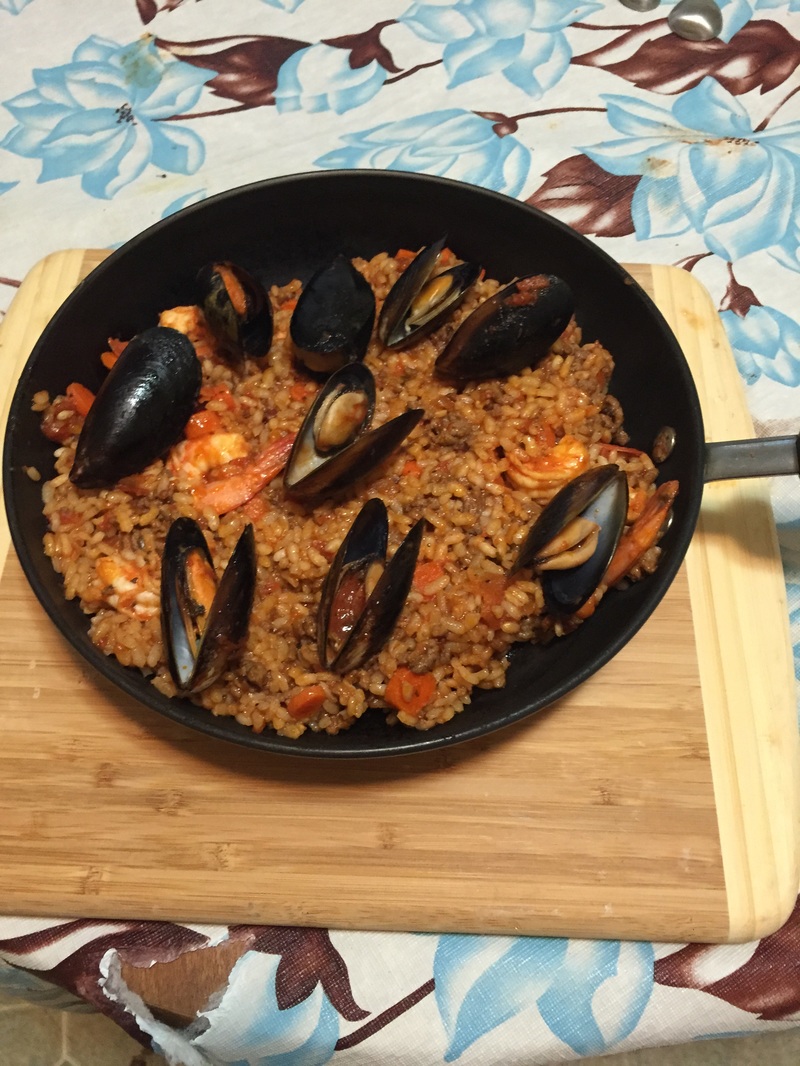
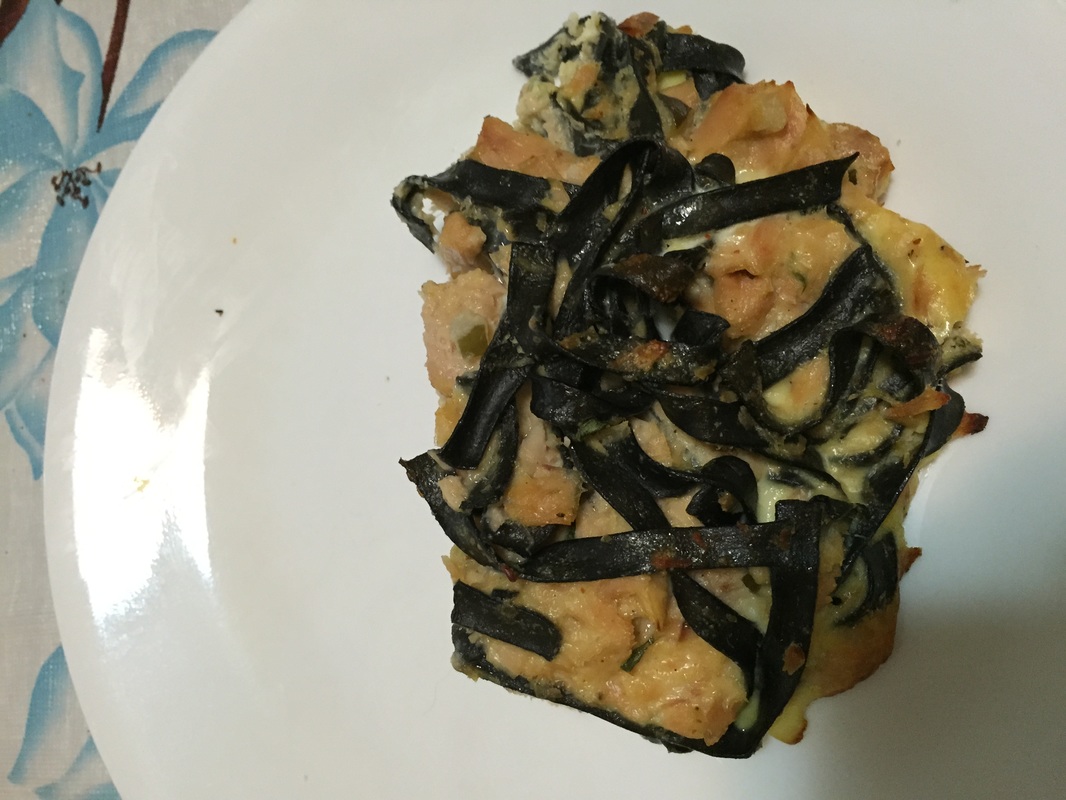
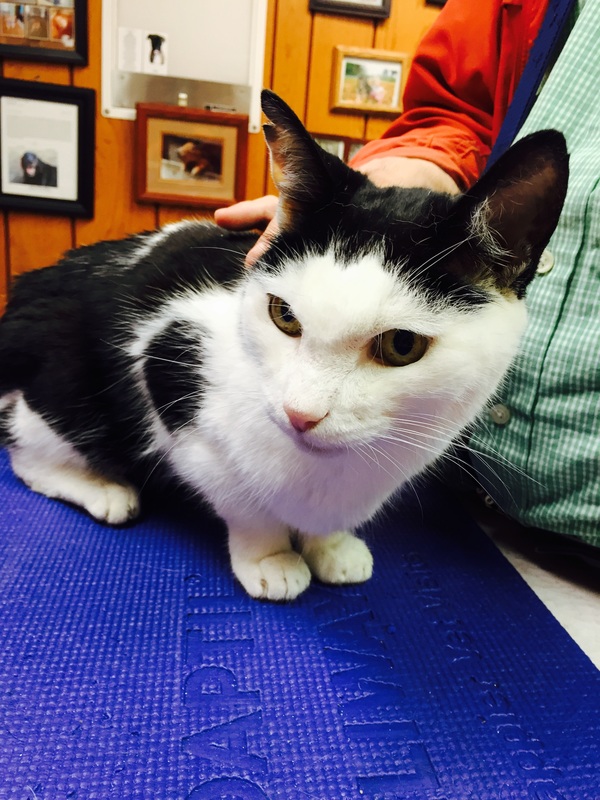
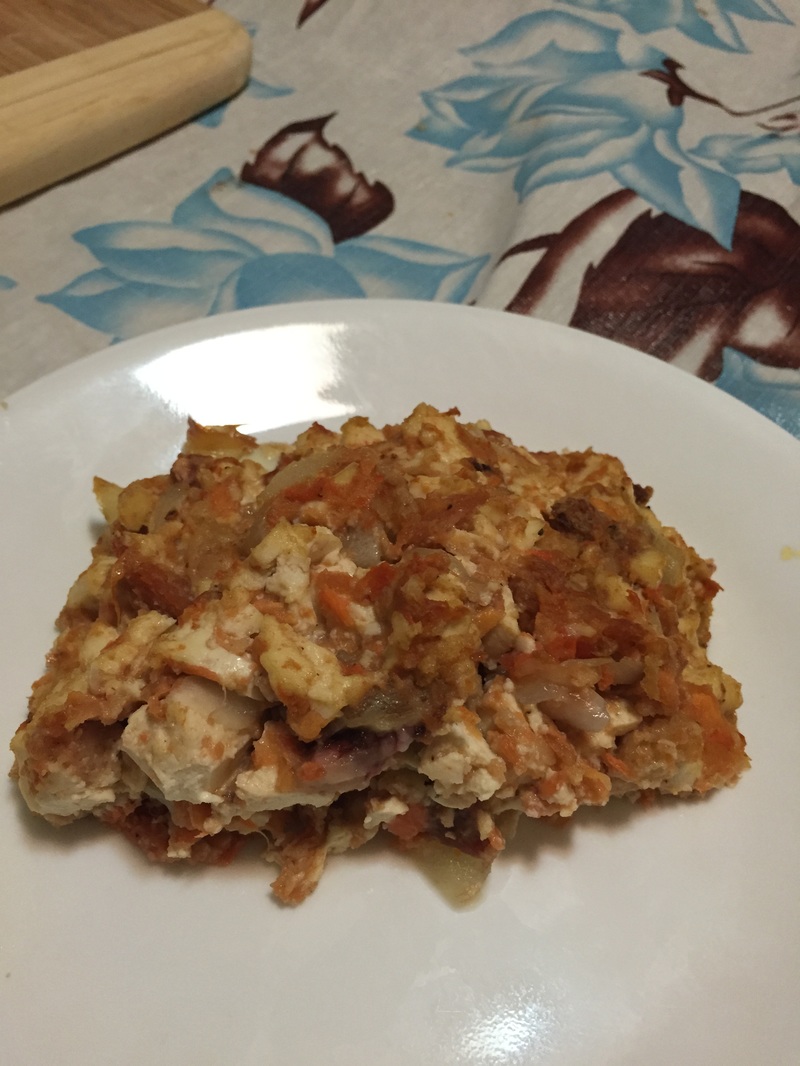
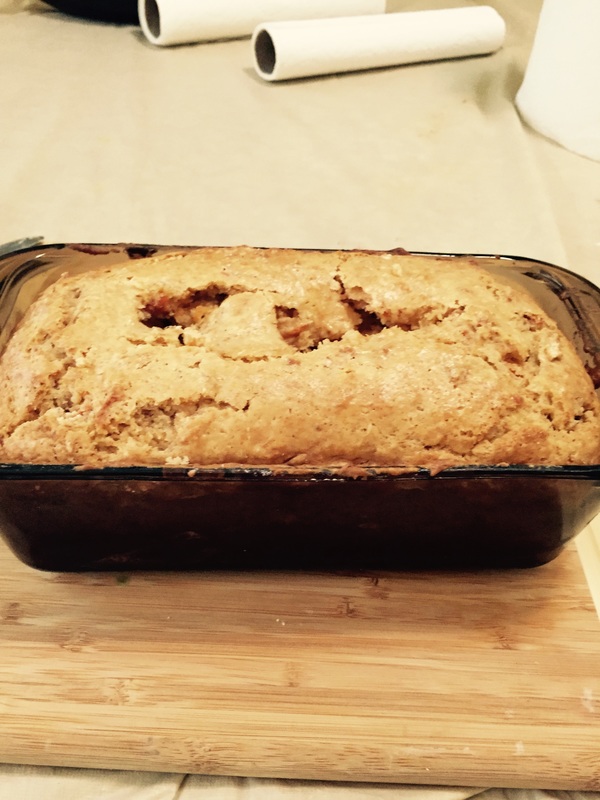
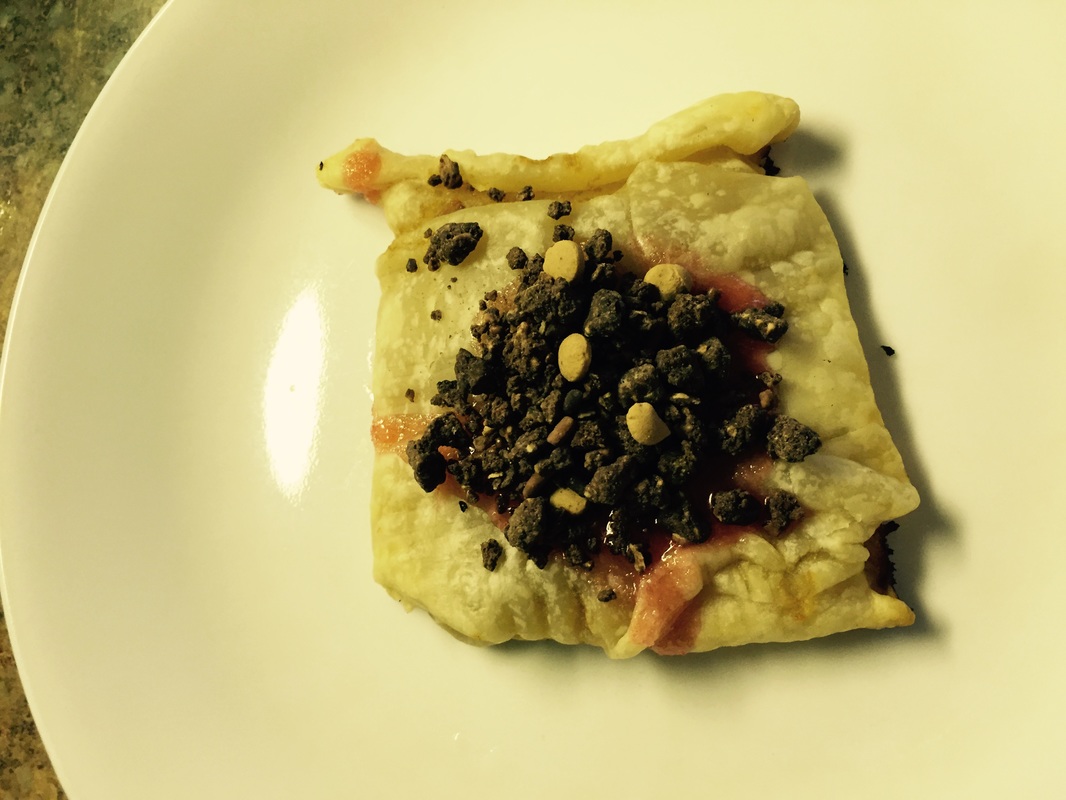
Fall is coming(doesn't roll off the tone like the phrase "winter is coming" from Game of Thrones) and one of the things I think of is baked apples. The last time I had a baked apple was at a Jewish restaurant five years ago that shall remain nameless. Spoiler alert: it wasn't that great. Of course, I had to combine meatloaf with baked apples so here is the recipe below. Special note: I am supposedly being featured in my local newspaper tomorrow and if I am, I will try to scan a PDF file of it or something(my local newspaper is protected by the dreaded paywall). It will be on this website so be on the look out for it. You will need: For the cooking vessels: 1 lasagna pan A large bowl Nonstick cooking spray A small bowl An apple corer(or a sharp knife) For the edible stuff: The sauce: 1 cup of tomato sauce 1 tbsp. of ketchup 1 tbsp. of Worcestershire sauce 1 tsp. of light brown sugar The filling: The sauce(see items needed above) 8 ounces of browned 92% ground beef 1/4 cup of breadcrumbs The rest of the ingredients: 3 thin, cooked, baby carrots Some lemon juice Some orange juice 3 apples of your choice(I used 1 jazz apple, 1 granny smith apple, and 1 red delicious apple) 1. Mix the sauce ingredients together in a small bowl. 2. Pour the sauce ingredients to a large bowl with the browned ground beef. 3. Add the breadcrumbs to the large bowl. 4. Mix all the ingredients up so that the beef is coated in the sauce and breadcrumbs. 5. Cut the tops of each of the apples you will be using. 6. Core the tops that have been cut off by sticking the stem inside the corer before coring. 7. Stick a baby carrot in the hole made by the corer in the apple top. 8. Core the bottom part of each of the apples you will be using all the way to the bottom. 9. Coat the bottom apple parts with lemon juice on the exterior and interior(the hole where the core used to be) to slow down the browning process. 10. Spray a lasagna pan with nonstick cooking spray. 11. Put the apples in the lasagna pan. 12. Fill the interior of the cored apples with the filling and sauce 13. Pour some orange juice over the filled apples so that the beef doesn't dry out during the baking process. 14. Bake in a 350 degree Fahrenheit preheated oven for 40-45 minutes. 15. Stick the tops with the carrots in the center on top of the baked apples for garnish. 16. Bon appetit! I noticed a month or two ago a picture on Instagram of somebody with ice cubes and water in a bowl of cereal, which got my creative juices flowing to make the no-bake meatloaf. It's late August and my A/C in the kitchen is mediocre at best. When I make my videos, I have to turn the A/C off to improve the audio quality for my videos because the A/C makes noise. I found a safe egg substitute in the form of unsweetened applesauce. The rule of thumb is: 1 egg = 1/3 cups unsweetened applesauce. To me, unsweetened applesauce tastes sweet, which is weird. I could eat that applesauce out of the jar if I had the applesauce munchies! Not surprisingly, the meatloaf turned out cold, watery and bland, so you might want to have something crunchy to go along with this meatloaf, like cereal. At least the marshmallows made some of the meatloaf tolerable at best. I didn't use sauteed onions because refrigerating them only overpowers the cereal flavor of the meatloaf. You will need: For the cooking vessels: Just a lasagna pan For the actual meatloaf: 2/3 cups of unsweetened applesauce 1 cup of cereal(I used Lucky Charms cereal, as the picture on Instagram used Lucky Charms) 1 pound of chopped, drained, firm tofu Pinch of salt 5-6 ice cubes 1. Wash your hands! :) 2. Put the first four ingredients in a large bowl. 3. Mix the ingredients up, like with your hands. 4. Form 2 loaves in a lasagna pan(you don't need nonstick cooking spray for this recipe) 5. Put the ice cubes inside the loaves. 6. Put the loaves in the refrigerator for an hour to let the ice melt and for the meatloaf to set. 7. If there are any solid ice cubes left at the time of serving, remove them from the meatloaf before eating. 8. Bon appetit! I saw a recipe of a Nacho Cheesecake on the Food Network website, along with a video by Sorted, a YouTube channel, about said cheesecake. They're two different recipes though. These were the inspirations for my savory meatloaf cheesecake. Because I wanted cheesecake for dinner, that's why! But this recipe is by far, the one that is the most time consuming of all the recipes I have made- it took me almost 24 hours before I had a finished product. Here are the reasons I used the cream cheese flavors I did in my recipe: Chive and Onion: In most of my meatloaf recipes, I have onions in them. Bacon: People(when I say people, I mean most people who make meatloaf videos to post on YouTube and the Internet in general) love to top their meatloaf with bacon for some reason. I don't. Garden Vegetable: I love having a traditional meatloaf with some carrots on the side, which this flavor has. But it also has bell peppers, which I hate but people love to put them into whatever meatloaf they're making. I didn't taste any bell peppers in the finished product, which was good. You will need: For the cooking vessels: A 9-inch pie pan A baking sheet or cookie tray A large bowl A medium bowl A small bowl Nonstick cooking spray For the crust: 1 3/4 cups of breadcrumbs of your choice 1/3 cups of melted butter For the cheesecake: 3 8-ounce cartons of cream cheese(I used 1 Chive & Onion carton, 1 Bacon carton, and 1 Garden Vegetable carton; see notes about the flavors above) 2 tbsp. of all purpose flour 1/2 cup of honey BBQ mustard sauce(I didn't have regular honey mustard so this had to do; it imparts a spicy BBQ flavor to the cheesecake- and it's common for people to put honey and/or BBQ sauce in their meatloaf) Some paprika Some cayenne pepper Some black pepper Some salt 4 beaten and whisked eggs 7 chopped, cooked baby carrots 8-9 ounces of browned ground beef For the topping: 1 cup of tomato sauce 1 cup of full-fat sour cream Some Worcestershire sauce Some ketchup Some light brown sugar 1. Mix the melted butter and breadcrumbs in a large bowl to form a crust. 2. Spray the pie pan with nonstick cooking spray, including the edges. 3. Pour the crust into the pie pan. Smooth the crust out with the back of a large spoon. Set pie pan aside for now. 4. In a large bowl, add the cream cheeses, honey mustard BBQ sauce, paprika, cayenne pepper, salt, and black pepper. The cream cheeses will be hard to take out of the cartons, even if you leave them out for 10 minutes at room temperature, like I did. 5. Mix all the ingredients in the large bowl together. Use an electric mixer for this step if you have one. I didn't have one so I had to use "elbow grease". 6. Add the beaten and whisked eggs, carrots, and ground beef to the large bowl. 7. Mix all the ingredients in the large bowl together again. It will be easier to mix manually because of the eggs, but you still need to put a little "elbow grease" into the mixing. 8. Pour the cheesecake mixture on top of the crust. Smooth the cheesecake layer out with the back of a spoon. 9. Bake in a 325 degree Fahrenheit oven for 50-60 minutes. While the cheesecake is baking, make the topping: 1. Put all topping ingredients in a medium bowl and then mix until you get a creamy, orange sauce. 10. After the 50-60 minutes, take the cheesecake out of the oven but don't shut the oven off yet. 11. Pour the orange topping on top of the cheesecake. Make sure the topping covers the entire cheesecake. 12. Put the cheesecake back in the oven for 10 more minutes. 13. After the 10 minutes is up, take the cheesecake out of the oven. Shut the oven off. 14. Let the cheesecake rest at room temperature for 70 minutes. 15. After the 70 minutes, place the cheesecake in a refrigerator to let it set overnight. 16. Bon appetit! A few weeks ago, I found a video on YouTube "POPSUGAR Food" made about replicating Sonic's Extreme Tater Tots item that was recently discontinued. I had some zucchini fries in the freezer that I bought at Trader Joe's and I decided to make a tofu meatloaf where it's Extreme Tater Tots substituted with Zucchini Fries. The Extreme Tater Tots had ranch dressing, onions, cheddar cheese, chili, and pickled jalapenos on top of the tater tots. I don't normally like to eat jalapenos but I wanted to stick to the Extreme Tater Tots recipe as best as I could. Plus I couldn't find pickled jalapenos so canned jalapenos had to do. You will need: For the cooking vessels: A lasagna pan Nonstick cooking spray For the actual meatloaf, you will need: 1/2 a sauteed onion 2 beaten and whisked eggs 1/4 cup of shredded cheddar cheese 1/2 cup of ranch dressing 1/4 cup of vegetarian chili(I think the Extreme Tater Tots used a meat-based chili but i wanted to keep my meatloaf vegetarian) 4 jalapeno slices(you can use fresh jalapenos but I used the type that come in a can) 1 1/3 cups of cooked zucchini fries(I bought mine at Trader Joe's, but if you don't have a Trader Joe's nearby or can't find premade zucchini fries, check out this link I found on Amazon: http://www.amazon.com/Dominex-Breaded-Zucchini-Fries-Pound/dp/B00V2LO82M/ref=sr_1_1?s=grocery&ie=UTF8&qid=1440084765&sr=1-1) Pinch of salt and black pepper 1 pound of chopped, drained, firm tofu 1. Wash your hands! 2. Add the first 5 ingredients to a large bowl. 3. Break the zucchini fries into smaller pieces using your hands. Put the zucchini fries in the large bowl. 4. Add the salt, black pepper, and tofu to the large bowl. 5. Mix(combine) all the ingredients. 6. Spray a lasagna pan with nonstick cooking spray. 7. Form 2 loaves from the meatloaf mixture in the lasagna pan. 8. Bake in a 350 degree Fahrenheit preheated oven for 40-45 minutes. 9. Bon appetit! A few weeks ago, I took a cooking class called "Spectacular Spanish Paella" at Sur La Table, which is a cooking supply store where I live that also holds cooking classes. This store isn't like the other cooking supply store I remember going to with my mom as a kid. It was called "Lectures Housewares" and it's been long out of business(this was probably in the late '90s). Goods for sale at Lectures Housewares were much cheaper than the wares you can find at Sur La Table(they didn't hold cooking classes, but that's probably because the whole "foodie" revolution and Instagram wasn't even born yet), even when accounting for inflation rates to convert late '90s dollars to 2015 dollars. I think Sur La Table is a symptom of the gentrification(read: upscale stores) that's run rampant in the mall where it's located at. It was a good class. I learned a lot, including the fact that bell peppers are still disgusting to me, whether they are raw or cooked. Ironically, I'd rather eat a jalapeno than eat a bell pepper and the former on the Scoville scale(it measures the spiciness of peppers) is around 5,000 Scoville units. A bell pepper is zero Scoville units. A paella is the national dish of Spain and usually has fish, meat, vegetables, sofrito, and bomba rice. You will need: For the cooking vessels: A frying pan or paella pan(a paella pan is a frying pan with 2 short handles on the edges instead of 1 really long one; I bought one but it was way too big for my stove; that pan was the smallest Sur La Table had. :( ) A loaf pan(if your frying pan isn't oven-safe like mine. I don't even know what that means- my dad just told me I can't put it in the oven) A small pot A large bowl A medium bowl For the paella: 2 cups of chicken broth 6 ounces of cooked ground beef For the marinade: 1 cup of tomato sauce Some Worcestershire sauce Some ketchup Some light brown sugar Some breadcrumbs(I used whole wheat breadcrumbs but you can use whatever type you want) The rest of the paella: 7 pink, uncooked shrimp(you can easily find those at any supermarket) 3/4 cup of bomba rice(it's a rice used when making paellas, you can find it at http://www.amazon.com/Santo-Tomas-Bomba-Rice-Pound/dp/B0046CERZ2/ref=sr_1_2?ie=UTF8&qid=1440000333&sr=8-2) Some olive oil 3/4 cups of white cooking wine 1/2 cup of sofrito(a sauce used when making paella; Goya sells sofrito at most supermarkets but I used a more upscale brand, you can find it at http://www.amazon.com/Matiz-Valenciano-Sofrito-12-3-Ounce/dp/B009RJPZU0/ref=sr_1_3?s=grocery&ie=UTF8&qid=1440000574&sr=1-3) 1 saffron thread Some paprika Some cayenne pepper Some salt 7 cooked, chopped baby carrots Optional: 7 cooked mussels(I bought mine frozen from a supermarket that I microwaved as the paella was cooking in the oven) 1. Put the chicken broth in the small pot. Bring it to a boil. Then reduce it to a simmer. 2. While the broth is boiling/simmering, make the marinade, by putting all the marinade ingredients in a small bowl and mixing the ingredients up. 3. Put half of the marinade in a large bowl with the cooked beef. Mix the marinade and beef together. 4. Put the rest of the marinade in a medium bowl with the shrimp. Mix the marinade and shrimp together. 5. Put olive oil in a frying pan. When the oil is heated up a bit, add the bomba rice. Coat the rice with the olive oil. 6. Take the frying pan off the stove(shut the stove off first) and add the cooking wine. Put the stove back on with the frying pan on top of the flame(or the area where you heat food if you're using an electric stove). This step is for your own safety!! 7. Coat the rice with the wine until the wine is absorbed into the rice. 8. Put the beef into the frying pan. Spread the beef around the frying pan. 9. Add the sofrito, saffron, paprika, cayenne pepper, and salt to the frying pan. Stir all those ingredients together. 10. Ladle the simmered chicken broth into the frying pan. Again, you should take the frying pan off the stove(shut the stove off first), then add the broth. After that, put the stove back on with the frying pan on top of the flame(or electric stove). This step is also for your own safety!! 11. Bring the contents of the frying pan to a boil. Then reduce the heat to let it simmer for 8 minutes. 12. After the 8 minutes, as the paella is still simmering, top the paella with the carrots and shrimp. 13. Shut the stove off. If you have an oven-safe frying pan, skip this step. If not, pour the paella into a loaf pan. 14. Put the paella into a 425 degree Fahrenheit oven for 10 minutes. 15. After 10 minutes, taste the rice. If it isn't fully cooked, add 1 tbsp. of water to the paella. Then put it back into the oven until the rice is fully cooked. It took another 10 minutes for me after I put the water into the paella. 16. When the rice is fully cooked, let it rest for 5 minutes. 17 Traditionally, paella is served from a pan, preferably a paella pan but if you don't have that, a frying pan will do. Put the paella in the pan if you want to keep the dish somewhat traditional. 18. If you have cooked mussels, add them to the frying pan. 19. Bon appetit! Top image: My "Chandlerman" Meatloaf, not Chandler the Cat! Bottom image: An actual picture of Chandler the Cat. This was the only appropriate image of him at his final visit to the vet. I think you can fill in the rest of what ensued that day. It has taken me a bit of grieving to upload this video to YouTube and to write this blog post but now I'm ready. My cat Chandler passed away on August 7, 2015 at the age of 11 due to intestinal cancer. Well, technically he was put to sleep, but I'll used the term "passed away" for those not familiar with the "put to sleep" euphemism. His Biography(Warning: Wall of text below) Chandler was born (presumably) on March 19, 2004. He lived in a home with an old lady and 40 other cats! When the old lady died, all the cats were taken to animal shelters. In 2006, my mom(who is also now deceased) naively thought Emily needed a feline friend(this was before Cameron was adopted and Jordan was even born), so she took us to a local no-kill animal shelter. The people at the shelter said Emily needed a male cat because according to them, multiple female cats fight(whether that is true I do not know from personal experience since Emily is still the only female cat I've ever had). A 3-month old kitten named Bella scratched my mom, so kittens were out of the question. My dad saw a good looking black and white cat tuxedo cat. The shelter named him Chandler and he was 2 years old at the time. Maybe he was named after the character from Friends named Chandler(that character was a white guy with black hair) or maybe his namesake was the city of Chandler, Arizona(I don't even live in that city's time zone; that's all I'll say about my location). Nevertheless, he's the only cat my family has had that actually liked the name a cat was given(Cameron was originally known as "Freud", Emily was originally known as "Precious", and Jordan didn't have a name, just a nickname- "the Purring Machine"). I was initially set on an 11 month old kitten named Greg(that is also the name of my nephew) but my parents liked Chandler. I gave in and my family took him home. However, Emily hated Chandler from the start until the day he passed away. Chandler was so scared he hid under my parents' bed for a month. So much for male and female cats getting along. By the way, all my cats were fixed at the time of their introduction to my family(except for Jordan but that was because he was too young to be neutered at the time), so it wasn't sexual tension between the two of them, just hatred. My family adopted Cameron the following year and Cameron and Chandler were best buddies. The two of them slept together and groomed each other. I even joked that they were a gay couple. My dad would always reply "NO, THEY'RE BEST BUDDIES!". They were also partners in crime, tormenting Emily by chasing her and fighting with her. Jordan came to my family in January 2009 as a 3-month old kitten. My mom's final wish was to adopt a kitten. Cats have a go-to human they like to hang out with. Chandler's go-to human was my mom. In April 2009, my mom passed away from pancreatic cancer and Chandler was devastated. I still recall Chandler on my mom's chest on the foldaway bed in the couch watching Jeopardy! and Wheel of Fortune with me every weekday night at 7 PM and 7:30 PM. After my mom passed away, Chandler started hanging out with my dad, which creeped him out a bit since he heard a story of a cat that hung out with elderly patients who were dying. But he got used to it. I also recall my dad and I having an endless argument about Chandler's appearance. To me he looked like a cow from the side because of black spots on white fur but my dad said he was wearing a tuxedo(albeit without the requisite bow tie). Fast forward to July 2015. This is when Chandler's health started to decline. My dad and I took Chandler for his annual checkup at the veterinarian and when they weighed him, he only weighed 6 pounds(he was 12 pounds the previous July). He was also frequently vomiting up anything he ate. The vet took a blood test and it turns out he had an overactive thyroid. Chandler got his thyroid medication in the form of a liquid put into his wet food. After 3 weeks, he stopped taking his medication. Then he stopped eating his favorite treats and ceased being the social, talkative cat that he once was. It also didn't help that Chandler fell off a 7-foot counter and landed on his leg and not his feet, like cats are supposed to do. It turns out he just bruised a bone. But that warranted an emergency visit to the vet for x-rays. Chandler's final appointment was on August 7. When the vet weighed him, he was only 5.4 pounds, so he lost a pound in a matter of weeks, which is very bad for a kitty. At the end he was practically a furry skeleton who wasn't really aware of his surroundings. We almost took him back home but then my dad kind of convinced me we needed to put him to sleep. He only had a couple of weeks left anyway. It was the humane thing to do, albeit very painful for the humans. Cameron was devastated Chandler was gone. So was Jordan. But Emily, on the other hand, was so happy she became less stressed and her fur became smoother. She also became more social. The last time she was this social was 10 years ago. I never thought cats could be glad another cat died. So that's the story of Chandler's life. And all I have of him besides my memories of him is a piece of his fur, a clay mold of his paw print and the words "Chandler- 2004-2015"(I don't feel comfortable sharing that image on the Internet. Sorry.), and a card from the vet expressing their condolences. TL:DR: Chandler was a true feline gentleman. Of course, being the Meatloaf Princess, I came up with a meatloaf to honor Chandler. The recipe is below. I call this my "Chandlerman" meatloaf because that's one of the nicknames my family had for him. Other nicknames included "Senior Commander", "Big Baby", and "Big Boy". Normally I wear a dress in my videos but this was a somber occasion that warranted black clothing and somber music. As you may notice, there are exactly 11 ingredients in this recipe(even including the salt and black pepper). 11 is the number of years Chandler lived. You will need: For the cooking vessels: A lasagna pan Nonstick cooking spray For the actual meatloaf, you will need: 2 beaten and whisked eggs 1 cup of cooked squid ink pasta(it was the only black colored ingredient I could find, plus it symbolizes Chandler's black fur)(You can get this ingredient at http://www.deandeluca.com/pantry/pasta/filotea-squid-ink-pasta) 1/2 cup of tartar sauce(symbolizes Chandler's white fur; it turns out tartar sauce is more of an off-white color but tartar sauce goes good with fish, so I ran with it) 1/4 tsp. of parsley(symbolizes Chandler's green eyes) 1/4 tsp. of cinnamon(symbolizes Chandler's sweet personality) 1/4 tsp. of cayenne pepper(symbolizes Chandler's loud meows- I equate loud with spicy) 1/4 tsp. of garlic(symbolizes the bad breath cats naturally have) 1/2 tbsp. of onion powder(I didn't use sauteed onions in this recipe because to me, tuna and onion don't mix; this amount of onion powder is the equivalent to 1/2 a raw onion) Pinch of salt and black pepper(to me it's standard for any meat-based meatloaf) A little under two 5-ounce cans of tuna(Chandler loved tuna; the other cats love it too so we give some to them in the recipe video)(Note: normally I use 1 pound of a meat when I make a meatloaf but tuna has mercury in it, so it's not good to eat it in excessive amounts) 1. Wash your hands! :) 2. Put all ingredients in a large bowl. 3. Mix all the ingredients together to distribute the ingredients evenly among the mixture. This is going to be very hard since the pasta has a tendency to clump up. So you might need to use your hands for this one. 4. Spray a lasagna pan with nonstick cooking spray. 5. Form 1 loaf(there was only enough ingredients for 1 loaf) 6. Bake in a 350 degree Fahrenheit preheated oven for 30-40 minutes(technically canned tuna is already cooked, but the raw egg isn't; fish in general doesn't take that long to bake in the oven anyway). 7. Bon appetit! This blog post has 2 videos in it for condensing purposes. The top is one is the recipe. The bottom one is a memorial video I made of Chandler based on all the pictures and most of the videos on my iPhone of him(except for one where I was petting Chandler but Donald Trump was in the background on CNN talking about "They're bringing drugs, they're bringing crime, they're rapists..."(you can fill in the rest of his rant. *Facepalm*)) I was dreading editing this recipe's video because off camera, I realized the meatloaf was bland. However, my cat Cameron saved the day by being such a rude kitty around the 1:50 mark of my video. It was 33 seconds of "aww!" If you make this recipe, please add whatever spices you want to make the meatloaf taste better. Or maybe the meatloaf tasted bland because I used a different brand of tofu. I added more onions to my meatloaf than usual and it turns out mamey fruit and onions don't mix. You will need: For the cooking vessels: A lasagna pan Nonstick cooking spray For the actual meatloaf, you will need: 1/2 a sauteed onion 2 eggs 1 crumbled up Mamey Pop Tart 1/2 cup of Mamey Coulis 1/4 of a ripe mamey 1 cup of crumbled Mamey Bread Pinch of salt and black pepper 1 pound of chopped, drained firm tofu 1. Wash your hands! :) 2. Put the sauteed onion in a large bowl. 3. Beat and whisk 2 eggs. Put the whisked eggs in the large bowl. 4. Put the rest of the meatloaf ingredients into the large bowl. 5. Mix the contents of the large bowl to distribute the ingredients evenly among the mixture. 6. Spray a lasagna pan with nonstick cooking spray. 7. Form 2 loaves from the meatloaf mixture. 8. Bake in a 350 degree Fahrenheit preheated oven for 40-45 minutes. 9. Bon appetit! You can turn any type of fruit or vegetable into a bread. The easiest and quickest way to do that is to make a quick bread, which uses baking powder and/or baking soda in place of yeast. But I didn't think I could find a recipe to make a mamey quick bread until I stumbled onto this link: http://www.bryannebitestheworld.com/mamey-zapote-bread/. Thank you Bryanne Bites the World! You may be wondering why this bread has holes in it. The loaf around the edges cooked but not the middle of it. I don't know why so I just removed the raw dough from the loaf. You will need: For the cooking vessels: A large bowl A medium bowl A loaf pan Nonstick cooking spray Baking sheet or cookie tray For the actual bread, you will need: 1 ripe mamey fruit 1 cup of sour cream(preferably full fat) 3/4 cup of butter 2 eggs 2 tsp. of vanilla extract 2 1/2 cups of all purpose flour 1 1/2 cups of granulated sugar 1/4 tsp. of salt 2 tbsp. of baking powder 1. Extract the mamey fruit inside using a knife or your fingers. 2. Put the sour cream, butter, eggs, vanilla extract, and mamey fruit into a medium bowl. 3. Mix the ingredients up using a large spoon. 4. Set this bowl of wet ingredients aside. 5. Put the last four ingredients into a large bowl. 6. Mix these dry ingredients up using a large spoon. All of the dry ingredients are white so it's kind of hard to tell when you are done mixing them up. But do your best. 7. Put the wet ingredients into the bowl with the dry ingredients. 8. Mix all the ingredients up until you get a sticky dough using a spoon. At some point, using the spoon won't help. At this point. flour your hands. Then knead the dough to distribute all the ingredients evenly. 9. Spray a loaf pan with nonstick cooking spray. Make sure you spay the edges of the loaf pan as well. 10. Pour the dough into the loaf pan. 11. Smooth the top of the dough using a spoon. 12. Bake in a 350 degree F oven for 45-60 minutes. 13. Let the loaf rest for 20 minutes. 14. Bon appetit! You can practically make any Pop Tarts you want using any type of fruit(even vegetables, but that would be kind of gross), even exotic ones like the mamey. I used my mamey coulis for the filling, so check out the recipe to that. You will need: For the cooking vessels: A pizza cutter A fork A baking sheet or cookie tray Nonstick cooking spray A spatula A rolling pin or wine/beer bottle A medium bowl For the actual Pop Tarts, you will need: 1 store bought, refrigerated pie crust 5 tbsp. of the mamey coulis For the icing, you will need: 1 cup of granulated sugar 1 tbsp. of milk 1 tsp. of vanilla extract Some pink food coloring Sprinkles to put on top of the pop tarts 1. Unroll the pie crust and flatten out the edges. 2. Cut a large rectangle from the pie crust using a pizza cutter. 3. Set the edges of the pie crust aside. 4. Cut the rectangle into 8 smaller rectangles. 5. Put 1 tbsp. of mamey coulis each on 4 of the rectangles. 6. Top the coulis-topped rectangles with the other rectangles. 7. Crimp the edges of each Pop Tart using a fork. Don't worry if any of the coulis oozes out. 8. Spray baking sheet or cookie tray with nonstick cooking spray. 9. Put each of the Pop Tarts onto the baking sheet using a spatula. 10. Form the set aside pie crust into 1 ball. 11. Flatten the ball using a rolling pin or wine/beer bottle 12. Repeat step 2. 13. Discard the remaining pie crust edges. 14. Cut rectangle in half. 15. Put 1 tbsp. of mamey coulis on 1 of the smaller rectangles. 16. Repeat steps 6, 7, and 9. 17. Bake in a 400 degree Fahrenheit preheated oven for 8-10 minutes. 18. Let the Pop Tarts cool for 10 minutes. For the icing: 1. Mix the sugar, milk, vanilla extract, and pink food coloring in a medium bowl until you get a pink icing. 19. Pour icing onto each Pop Tart 20. Decorated each Pop Tart with sprinkles. 21. Let the icing and sprinkles harden on the Pop Tarts for 5 minutes. 22. Bon appetit! |
Archives
October 2019
Categories
All
|
 RSS Feed