|
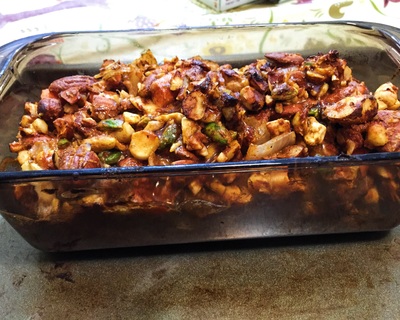
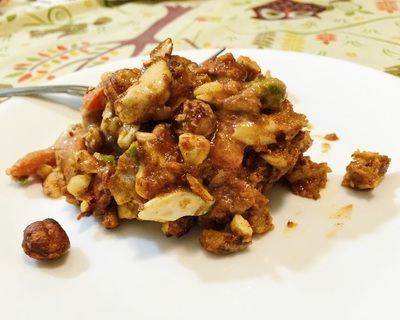
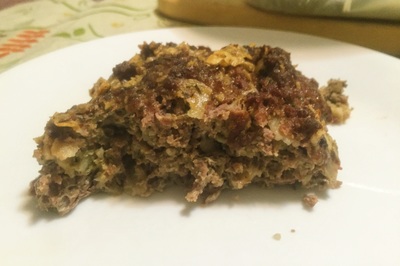
You might be wondering why didn't I just make a loaf entirely out of Brazil nuts if the theme of most of the recipes for this past month was Brazil nuts? Simple: I don't want to get selenium poisoning. If you eat too many Brazil nuts, that can happen to you. Did you know that just 1 Brazil nut has 4 times the amount of selenium your body needs a day? That would be pretty bad if you ate dozens of them at one time, like if I had made a loaf solely of Brazil nuts. But I did want to highlight the Brazil nut flavor, so I added in Brazil nut butter to the nut loaf and I drizzled Brazil nut oil on top of the loaf when it was done cooking. But now you might be wondering why I didn't put the oil into the loaf itself or better yet, why I chose to sautee the 1/2 an onion with olive oil instead? Brazil nut oil is NOT a cooking oil, meaning you shouldn't expose it to high temperatures, since it has a low flash point. But that doesn't mean you can't use Brazil nut oil in your food. It just means it's better used as a salad dressing or topping than an oil for frying or baking. The loaf was obviously nutty and I finally managed to get my dad to go on camera to try the loaf but he spit it out after he was done being on camera. :( Apparently he doesn't like nuts but he does like peanut butter and jelly sandwiches. You're going to need a food processor to grind the nuts- your fist won't do this time. When the food processor cooperates, it makes for an amazing cooking device as it gets the job done. But some nuts will grind more easily than others. HELPFUL LINKS: Mixed nuts(raw, no shell): https://nuts.com/nuts/mixednuts/organic-raw.html Brazil nut butter: http://www.rejuvenative.com/products/Brazil-Nut-Butter.html Brazil nut oil: https://imlakeshorganics.com/products/brazil-nut-oil/ Makes 4-5 servings. You will need: For the cooking equipment: A large bowl A food processor A loaf pan Nonstick cooking spray The mixed nuts roster: Almonds Brazil nuts(the captain of the dish) Cashews Hazelnuts Macadamia nuts Pecans Pistachios Walnuts For the loaf: 1/2 an onion sautéed in olive oil 12 chopped up baby carrots 1 pound of raw, shelled mixed nuts that include Brazil nuts(see HELPFUL LINKS) 7 ounces of pizza or tomato sauce 2 tbsp. of honey 1/2 cup of Brazil nut butter(see HELPFUL LINKS) 1 tbsp. of soy sauce or Braggs amigos 1 tsp. of garlic powder 1 tsp. of cinnamon 1 tsp. of allspice Pinch of black pepper Pinch of salt Brazil nut oil to drizzle on top of the nut loaf 1. Put the sauteed onion and chopped up baby carrots into the large bowl. 2. Grind the nuts 1 cup at a time in the food processor by pressing the pulse button 6-8 times per cup. Don't grind the nuts too much, otherwise you'll end up with a nut butter! 3. Put all of the ground up nuts into the large bowl. 4. Add the next 9 ingredients to the large bowl. 5. Mix all of the ingredients together until you get a loaf shape. 6. Spray a loaf pan with nonstick cooking spray 7. Put the mixture into the loaf pan. 8. Bake in a 400 degree Fahrenheit oven for 20 minutes, or until the nut loaf is brown. 9. When the nut loaf is done cooking, drizzle the top of it with Brazil nut oil. Bon appetit!
1 Comment
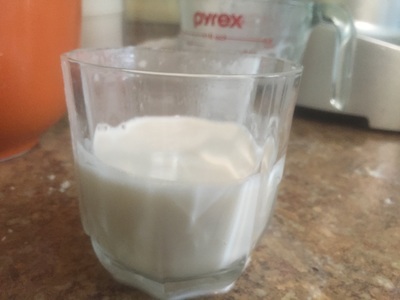
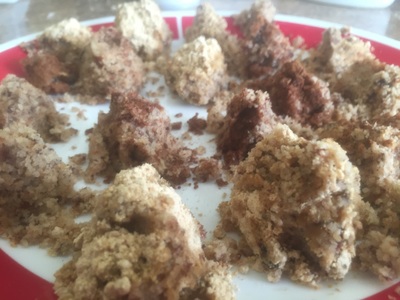
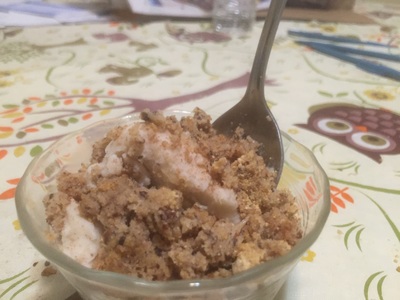
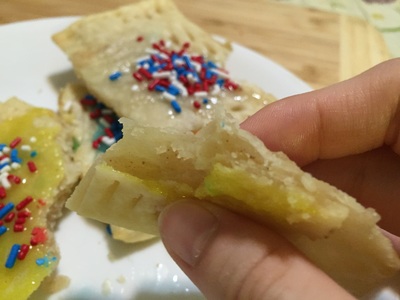
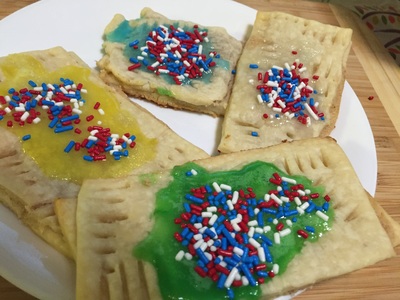
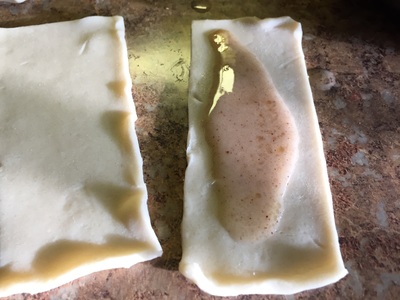
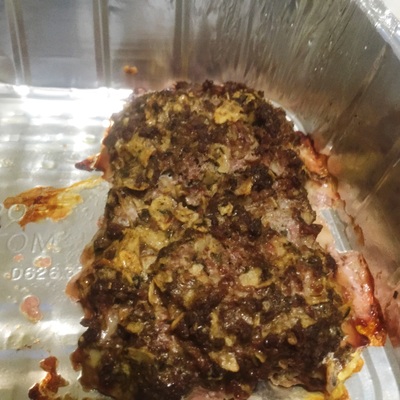
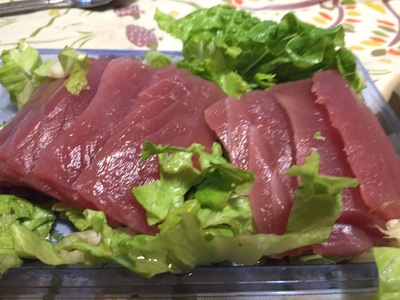
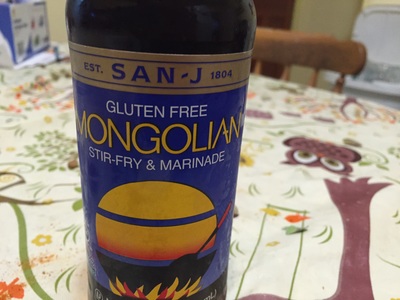
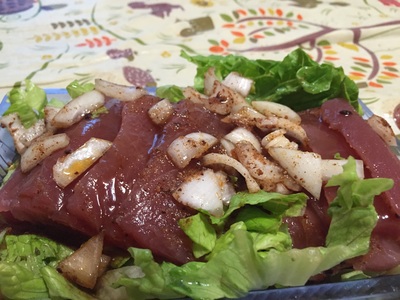
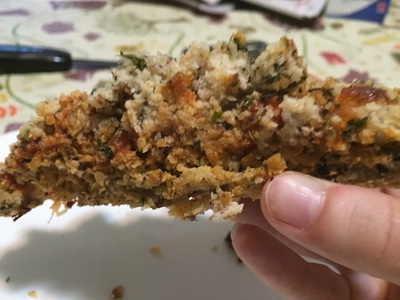
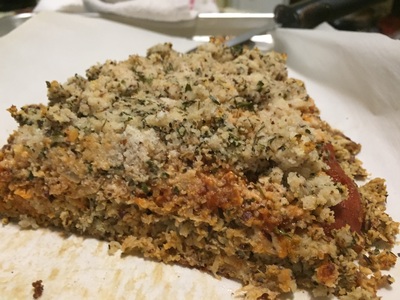
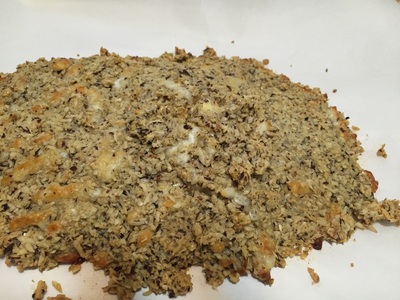
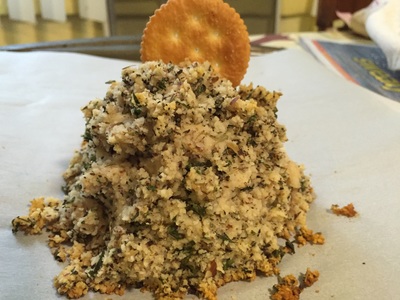
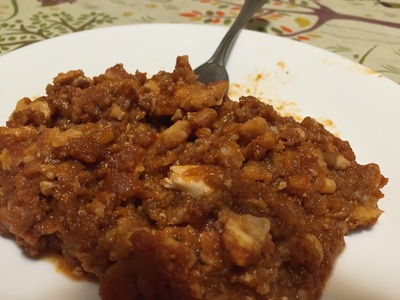
I didn't realize making this ice cream was such a monumental task until I edited the video of me actually making the three components of the sundae(the milk, the balls, and the ice cream itself). This video clocks in at 11 minutes and 53 seconds, which is almost 30 seconds shorter than the longest video on my channel(the Tofu Meatloaf Birthday Cakes). But it was so cool being able to turn(soaked) nuts into vegan milk that actually looks like cow's milk! Of course, you can't just put a bunch of nuts in a blender with some water and a vanilla bean, and hope it turns into milk. You have to strain the solids(the nut pulp) from the liquid(the actual milk), using a nut milk bag. See HELPFUL LINKS below on where to purchase a nut milk bag. This will be probably be the closest thing I get to actually milking a cow. I went to a local farm when I was kindergarten and when my class got to see the cows, they smelled horrible, so I looked away from them in the photo of me next to them. Straining the nut milk is almost like milking a cow- you squeeze up then down(and if you're thinking of something sexual from this sentence I just wrote, then get your mind out of the gutter!). I didn't want to discard of the nut pulp because I knew there were ways to cook with it, so I stumbled upon this YouTube video from Nadia's Healthy Kitchen(her channel is at https://www.youtube.com/user/NadiasHealthyKitchen): https://www.youtube.com/watch?v=vst55OXB9fo. The video used almond pulp instead of Brazil nut pulp, but you could use Nadia's recipe for almost any type of nut. Unlike Nadia, I didn't have any cocoa powder on hand, so I used peanut butter powder instead. This ice cream sundae recipe I made produces 1 quart of ice cream! That's enough for 12 half-cup servings! I only finished the ice cream last night. My dad tried the ice cream off camera and he didn't like it, so I didn't record him in this video because he would've spat out the ice cream. He said it was too nutty. The pulp balls are good for 7 days. Inspirations for this recipe: https://elanaspantry.com/brazil-nut-milk/, https://www.youtube.com/watch?v=vst55OXB9fo, and http://learnrawfood.com/recipes/comments/brazil-nut_vanilla_ice_cream/#.V8H2go72TNk. HELPFUL LINKS: Nut milk bag: https://www.amazon.com/Pro-Quality-Nut-Milk-Bag/dp/B00KLT6X9W/ref=sr_1_4?s=kitchen&ie=UTF8&qid=1472328897&sr=1-4& 1-quart ice cream tub: https://www.amazon.com/Tovolo-Glide---Scoop-Ice-Cream/dp/B00CBFZWHS/ref=sr_1_1?ie=UTF8&qid=1472329105&sr=8-1& Brazil nuts: https://nuts.com/nuts/brazilnuts/raw-noshell.html Vanilla bean: https://nuts.com/cookingbaking/beans/vanilla.html Brazil nut butter: http://www.rejuvenative.com/products/Brazil-Nut-Butter.html You will need: For the cooking equipment: For the Brazil nut milk: A large bowl Aluminum foil A colander A medium bowl A blender(preferably a Vitamix) A nut milk bag(see HELPFUL LINKS) A 2-cup measuring cup For the Brazil nut pulp balls: A medium bowl A lasagna pan 2 small bowls A large plate For the ice cream: A large bowl An ice cream maker(I use a Cuisinart brand maker) An ice cream tub(see HELPFUL LINKS) For the ingredients: For the Brazil nut milk(makes 4 cups of Brazil nut milk): 2 1/2 cups of raw, shelled Brazil nuts(see HELPFUL LINKS) 1 vanilla bean(see HELPFUL LINKS) Water to cover the Brazil nuts and vanilla bean 4 cups of water to make the actual nut milk For the Brazil nut pulp balls(makes 20-30 balls): Brazil nut pulp separated from the Brazil nut milk 4 dates(like Nadia used) or 6 ounces of a combination of raisins and Zante currants 2 tbsp. of nut butter(I used peanut butter because I was low on Brazil nut butter) 1 tsp. of vanilla extract 1/4 tsp. of salt 1/4 cup of raw, shelled Brazil nuts 1/4 cup of fig preserves(or any fruit spread) For the ice cream: 4 cups of Brazil nut milk 1 tbsp. of vanilla extract 1/4 tsp. of salt 1 cup of honey 3/4 cup of Brazil nut butter(see HELPFUL LINKS) Brazil nut pulp balls For the Brazil nut milk: 1. In a large bowl, cover the vanilla bean and Brazil nuts with enough water to cover them. The nuts will float to the surface but that's normal. 2. Cover the large bowl with aluminum foil and put the large bowl in the fridge overnight, or for at least 8 hours, to let the nuts and bean soak. 3. Drain the liquid from the bean and nuts with a colander. Put the drained bean and nuts back into the large bowl. 4. Put the drained nuts and bean, and the 4 cups of water into the blender. 5. Put the lid on the blender and blend for 1 minute, or until creamy. 6. Put the nut milk bag over the 2-cup measuring cup. Pour the creamy mixture from the blender through the nut milk bag. 7. Let the milk leak into the measuring cup by squeezing the bag from top to bottom. Squeeze out as much milk as possible. 8. Put the milk and pulp(the solids that are in the nut milk bag) into separate bowls. I used a large bowl for the milk and a medium bowl for the pulp. 9. Sweeten with something like chocolate syrup if you want to drink it. Bon appetit! For the Brazil nut pulp balls: 1. Put the pulp and dates(or mixture of Zante currants and raisins) into the food processor bowl. Put the lid on the bowl and process the two until you get a crumbly mixture. 2. Add the nut butter, vanilla extract, and salt. Put the lid on the bowl and process everything. 3. Add the Brazil nuts and preserves. Put the lid on the bowl and process everything until you get a slightly sticky mixture. 4. Form little balls out of the mixture. This step took me 40 minutes. You can do this by using your hands. Put the balls into a lasagna pan. 5. Let the balls harden in the fridge for 30-60 minutes. 6. Put cinnamon and peanut butter powder into separate small bowls. Coat each ball in either the cinnamon or peanut butter powder. Bon appetit! For the ice cream: 1. Pour the Brazil nut milk into a clean blender. Add the next 4 ice cream ingredients. Put a lid on the blender and blend until the contents are creamy and mixed. 2. Pour the ice cream mixture into a large bowl. Chill the ice cream mixture in the fridge for at least 2 hours but no longer than 2 days. 3. Turn on your ice cream maker and pour the ice cream mixture into the bowl that's part of the ice cream maker. DO NOT OVERFLOW THE BOWL OF THE ICE CREAM MAKER!! 4. Follow the directions on how to make ice cream according to your ice cream maker manual's instructions. For mine, I churned it for 15 minutes. 5. After churning for 15 minutes, I crumbled the pulp balls to the size of chocolate chips and then put them into the ice cream maker. DO NOT OVERFLOW THE BOWL OF THE ICE CREAM MAKER WITH PULP BALLS! Let the ice cream churn for an additional 5 minutes(or whatever your manual says). 6. Remove the lid when the ice cream mixture is done churning. Put half of the ice cream into an ice cream tub. Top the ice cream with more nut pulp balls(crumbling them is recommended). Cover the pulp balls with the rest of the ice cream. 7. Put the lid on the ice cream tub and put the ice cream into the freezer overnight, or for at least 2 hours, depending on how hard you want your ice cream. 8. Top with crumbled up pulp balls. Bon appetit! If there can be such a thing as peanut butter filled-Pop Tarts in the supermarkets, then there definitely can be such a thing as Brazil nut butter-filled ones! Of course, Brazil nuts are a lot more expensive than peanuts(One 8-ounce jar from the site where I bought the butter is $25, compared to $2.99 for double the amount of peanut butter!), so it's pretty certain they'll never be mass-produced for sale. But nothing stops you from making your own Pop Tarts at home, especially those filled with Brazil nut butter! I've been having this problem lately with making Pop Tarts- I put a lot of filling in it and the end result turns out to be that said filling isn't noticeable both visibly and taste-wise. But hey, at least these Pop Tarts look ugly and maybe even decent! You can always count on premade pie crusts to be perfect for making homemade Pop Tarts- they're soft yet flaky, just like any Pop Tart you'd buy. HELPFUL LINKS: Brazil Nut Butter: http://www.rejuvenative.com/products/Brazil-Nut-Butter.html Blue, yellow, and green food coloring: http://www.amazon.com/Wilton-Set-8-Icing-Colors/dp/B0000CFMU7/ref=sr_1_2?srs=2603741011&ie=UTF8&qid=1464643598&sr=8-2& You will need: For the cooking equipment: A pizza cutter A large bowl A rolling pin A fork 2 lasagna pans Nonstick cooking spray 4 small bowls Toothpicks Gloves to protect your hands from staining For the pop tarts: 2 premade pie crusts For the filling: 4 ounces of Brazil nut butter(see HELPFUL LINK) Honey to taste For the icing: 1/4 cup of granulated sugar for each of 4 colors 1 tbsp. of milk for each of 4 colors Blue food coloring(see HELPFUL LINK) Yellow food coloring(see HELPFUL LINK) Green food coloring(see HELPFUL LINK) Sprinkles(I used red, white, and blue sprinkles) For the crusts: 1. Roll out 1 pie crust. 2. Cut the out the edges of the pie crust. Form the cut-out edges into a ball. 3. Using a pizza cutter, cut the remaining pie crust into 6 pieces, preferably squares or rectangles. Ideally, you want the pieces to be all uniform size, but if they aren't, just match crust pieces of similar size. Otherwise, trim the larger of the two pieces in a pair using a pizza cutter to be the size of the smaller piece. 4. Flatten the ball made from the cut-out edges of the pie crust using a rolling pin. Cut the flattened pie crust into 4 pieces using a pizza cutter. 5. Repeat steps 1-4 for the 2nd pie crust. For the filling: 6. If the Brazil nut butter is oily on top and there's a solid piece on the bottom of the jar, mix the oil and solids together with a spoon until you get the consistency of peanut butter. 7. Mix the mixed up Brazil nut butter and honey in a large bowl. 8. Put 1 tsp. of filling onto half of the smaller pieces you have. Top the piece that has filling on it with a similar sized piece. 9. Put 1 tbsp. of filling onto half of the larger pieces you have. Top the piece that has filling on it with a similar sized piece. 10. Crimp the edges of each completed pop tart with the back of a fork. 11. Spray 2 lasagna pans with nonstick cooking spray. 12. Put the Pop Tarts into the lasagna pans. 13. Bake in a 400 degree Fahrenheit oven for 8-10 minutes. 14. Once the pop tarts are done baking, let them cool off at room temperature for 10 minutes. For the icing and sprinkles: 15. Put 1/4 cup of granulated sugar into each of 4 bowls. 16. Put 1 tbsp. of milk into each of 4 bowls. Mix the sugar and milk together in each bowl. 17. Dip a toothpick into some blue food coloring and add the food coloring to the icing mixture by sticking the end of the toothpick with food coloring into the icing mixture to get the food coloring into the mixture. Remove toothpick when the food coloring is in the icing mixture! Wear gloves for this step so you don't stain your hands! 18. Repeat step 17 for the yellow and green food coloring. For the white food coloring, skip step 17. 19. Top 2 Pop Tarts with white icing, 2 Pop Tarts with blue food coloring, 2 Pop Tarts with yellow food coloring, and 3 Pop Tarts with green food coloring. 20. Pour sprinkles onto the icing of all the Pop Tarts. Let the icing and sprinkles harden for 10 minutes. 21. Bon appetit! Lay's just doesn't know when to stop when it comes to experimenting with new potato chip flavors- now they have a flavor called Brazilian Picanha, which is the best cut of beef available in Brazil. But the chips are also flavored with Chimuchurri, which is an Argentine sauce that's olive green in color. Taste test of the chips: They reminded me of the Southern Biscuits and Gravy potato chips made last year. I guess the human tongue can only differentiate so much from all the flavors in the world to the point where flavors of different foods taste very similar. But I liked the Southern Biscuits and Gravy chips, therefore, I like the Brazilian Picanha chips as well. Taste test of this meatloaf: Not spicy but dried out. I put 1/2 cup of chimichurri sauce like I usually put 1/2 cup of a sauce or liquid into my meatloaf recipes. I think I should sauteeing actual onions from now on, since those provide moisture to meatloaf recipes, rather than using onion powder. I'm actually kind of embarrassed that the meatloaf was dry- I've made several dozen meatloaf recipes on this channel and somehow this one didn't work out this time. But eating the meatloaf with ketchup really helps! This meatloaf is part of my theme this month of Brazil-based recipes, but this one is the only one that doesn't include Brazil nuts. You will need: For the cooking equipment: A large bowl A lasagna pan Nonstick cooking spray For the meatloaf: 2/3 tbsp. of onion powder or 1/2 a sauteed onion 2 beaten and whisked eggs 1/2 cup of chimichurri sauce Pinch of parsley Pinch of garlic powder Pinch of salt Pinch of black pepper 1 cup of crushed up Brazilian Picanha potato chips(I used a Ziploc bag to crush them up) 1 pound of 93% ground beef 1. Mix all ingredients in a large bowl but be careful not the overmix the mixture- that will dry out the meatloaf! 2. Spray a lasagna pan with nonstick cooking spray. 3. Form 2 loaves from the meatloaf mixture. 4. Bake the meatloaves in a 350 degree Fahrenheit oven for 60-65 minutes, or until the internal temperature reaches 160 degrees Fahrenheit. Let the meatloaves rest after they're done at room temperature for 5-10 minutes. 5. Bon appetit! I saw videos of people making recipes based off of the popular phone app Pokemon Go- but they were all dessert recipes. So I wanted to jump in on the bandwagon too(it's called tent pole programming in the YouTube world), only using a play on words. If there weren't so many Pokemon(there are 151 in the app but 720 were created!), I would make a meatloaf based off of each Pokemon. But that isn't feasible. Math lesson: "Poke" + "Mongo" = "Pokemon Go!" The "poke" is a a traditional Hawaiian side dish made from raw ahi tuna and the "mongo" is the Mongolian sauce, which actually exists(the taste of the sauce is a spicier version of soy sauce with a little hint of apple cider in it). This is a spicy dish but the Mongolian sauce probably isn't the culprit- I think it's the cayenne pepper I used. It has a Scoville unit(measurement of spiciness of peppers) of 90,000, whereas red peppers have a Scoville unit of 0. But I absolutely hate bell peppers! So a little milk would be useful to have with this poke recipe. Before making this recipe, I've never had sashimi(raw fish like ahi tuna) and I don't plan on eating sashimi again for a very long time. Raw ahi tuna is pretty tasteless and slimy, but it goes well with wonton strips. Full disclosure: I tried playing Pokemon Go on my phone but when the app said you have to actually go outside and play it to catch the Pokemon, I deleted the app out of laziness and the fear of being sucked into the game when I have better things to do than catch virtual creatures. The game is practically the only thing my coworkers at my day job talk about! Inspiration for this recipe from http://www.food.com/recipe/maui-ahi-poke-90880. Serves 1 Total cooking time: Less than an hour HELPFUL LINK: Mongolian Sauce: https://www.amazon.com/San-J-Sauce-Mongolian-Gluten-Ounce/dp/B00DOOJ3GQ/ref=sr_1_2_a_it?ie=UTF8&qid=1471120245&sr=8-2& You will need: For the cooking equipment: A small bowl For the poke: 7 ounces of raw, sushi-grade ahi tuna on a bed of lettuce 1/4 of a raw, chopped onion 2 tbsp. of pineapple juice 1 tsp. of garlic powder 1/4 tsp. of cayenne pepper or crushed red pepper flakes 1/4 tsp. of sesame oil 2 tsp. of cinnamon or ginger(I used cinnamon because I also hate ginger. But ginger is very good at curing nausea) Mongolian sauce to taste(see HELPFUL LINK) Serve with wonton strips(optional) 1. Mix the onion, pineapple juice, garlic powder, cayenne pepper or crushed red pepper flakes, sesame oil, and cinnamon or ginger in a small bowl. 2. Chill the marinade in the fridge for 30 minutes. 3. Pour the marinade on top of the ahi tuna. 4. Pour the Mongolian sauce on top of the ahi tuna next. Serve with wonton strips(optional). 5. Bon appetit! In the past, I've normally separated complex recipes that require to be made in more than one recipe into more than one video but I don't have as much as time as I used to to make more than one video in iMovie. This pizza is essentially three recipes in one: the cheese, the crust, and the actual pizza. The only thing premade(but still paleo-friendly and organic) is the pizza sauce. :) Since the 2016 Olympics is in Rio de Janeiro, Brazil this time, I decided to use the most Brazilian ingredient possible: Brazil nuts, which are also native to Venezuela, Colombia, eastern Peru, eastern Bolivia, and the Guianas. I've read of the side effects of eating too many Brazil nuts in one sitting- bloating, vomiting, diarrhea, and even selenium poisoning! Maybe I shouldn't have told you that! But it's my duty to inform you of the unpleasant side effects of the ingredients I show you how to use. Personally(YMMV), I felt really full afterwards and had looser stools(if only they were of the kind you sit down on...), but that's about it. I think this is the driest pizza I've ever made or had, but dryness can be overcome with either using tomato sauce as a dip or drizzling the pizza with olive oil. Brazil nut cheese can be best described in these words: kind of like salty ricotta cheese with the crumbliness of feta cheese. This may be one occasion where fresh herbs are better than the dried kind you can keep in your pantry for years- I think that's why the pizza was so dry. I just don't like to waste extra ingredients though. :( Brazil nut flour looks exactly like Brazil nut cheese, oddly enough. Maybe the flour was made the same way- through a food processor... Benefits of this pizza: grain-free, vegetarian, paleo-diet friendly. Sounds like the healthiest thing I've ever made on this channel- or the fattiest(but in good fats, not bad). No, I haven't turned over a new leaf with my channel or my cooking! There are still plenty of unhealthy recipes yet to come! HELPFUL LINKS: Raw, shelled Brazil nuts: https://nuts.com/nuts/brazilnuts/organic.html Brazil nut flour: http://www.sincerelynuts.com/nuts/brazil-nuts/brazil-nut-flour-- Here are the recipes: Brazil Nut Cheese For the cooking equipment: A large bowl Aluminum foil A medium bowl A colander A food processor(sorry, Ziploc bags won't do the trick this time) A clean kitchen towel A baking tray Parchment paper For the cheese: 1 1/3 cups of raw, shelled Brazil nuts Enough water to cover the Brazil nuts in the large bowl An additional 1/4 cup of water 1/4 cup of lemon juice 3 tbsp. of olive oil 1 tsp. of salt Garlic powder 2 tbsp. of basil(preferably fresh) 2 tbsp. of parsley(preferably fresh) 1 tbsp. of thyme(preferably fresh) Black pepper 1 tbsp. of olive oil for drizzling on top of the cheese 1. Put the Brazil nuts in a large bowl. Pour enough water in the large bowl to cover the Brazil nuts(at least 2 cups, but probably more). 2. Cover aluminum foil over the top of the large bowl and let the nuts soak in the fridge overnight. 3. Drain the soaked nuts through a colander. Then put the soaked nuts into a medium bowl. 4. Put the Brazil nuts into the food processor, along with the additional 1/4 cup of water, lemon juice, olive oil, salt, and garlic powder. 5. Put the lid on the food processor and process the nut mixture using the pulse setting. Pulse for 8 minutes or until the mixture is creamy. At some point, the mixture is going to stop moving around the food processor, so: 1. Unplug the food processor first! 2. Take the lid off the food processor. 3. Get a spoon and push the mixture that's hanging around the edges back towards the center of the food processor bowl. 4. Put the lid on the food processor, plug the food processor back in, and pulse again. 6. Clean your large bowl and put the kitchen towel over the large bowl. 7. Spoon the cheese mixture onto the lined kitchen towel. Watch out from falling blades from the food processor bowl! 8. Take the edges of the kitchen towel and twist them to form a cheese ball(if you don't know what I'm talking about, watch the video below). 9. Untwist the kitchen towel and put the cheese ball into the large bowl. 10. In a medium bowl, mix the basil, parsley, thyme, and black pepper together. 11. Put the mixed herbs into the large bowl with the cheese ball and coat the cheese ball in the herbs. 12. Line a baking tray with parchment paper. Put the cheese ball onto the lined baking tray. 13. Bake in a 300 degree Fahrenheit oven for 30 minutes. Check it often so it doesn't burn! 14. Drizzle with 1 tbsp. of olive oil. Serve with crackers or use for your pizza. Bon appetit! Brazil Nut Flour Crust For the cooking equipment: A large bowl A small bowl Parchment paper A baking tray For the crust: 2 cups of Brazil nut flour(see helpful link above) 1/2 tsp. of salt 1/4 tsp. of baking powder Garlic powder Black pepper Oregano 2 beaten and whisked eggs 1 tbsp. of olive oil 1/2 cup of shredded mozzarella cheese 1. Mix the first 5 ingredients in a large bowl. 2. Mix the beaten and whisked eggs with olive oil in a small bowl. Pour that mixture in with the dry ingredients that are in the large bowl. 3. Mix all ingredients in the large bowl together. If you want a cheesy crust, add the mozzarella cheese before mixing all the pizza crust ingredients together. Either way, mix until you get a cohesive dough. 4. Line a baking tray with parchment paper. Then pour the dough onto the parchment paper. 5. Flatten the dough with your hands as much as you can. 6. Bake in a 375 degree Fahrenheit oven for 12-15 minutes, or until the crust is golden. 7. Bon appetit! Brazil Nut Pizza For the cooking equipment: Parchment paper A baking tray For the pizza: Brazil Nut Flour Crust(see recipe above) Brazil Nut cheese(see recipe above) Pizza sauce Tomato sauce for dipping the pizza(optional) Olive oil to drizzle on the pizza(optional) 1. Put the Brazil Nut Flour Crust onto a baking tray lined with parchment paper, if it's not already there. 2. Pour pizza sauce onto the crust but make sure you leave 1 inch uncovered. This will serve as the crust for the pizza. 3. Pour as much Brazil nut cheese as you can on top of the sauce. There will be some cheese left over! 4. Bake in a 375 degree Fahrenheit oven for 12-15 minutes. 5. Serve with tomato sauce for dipping or olive oil for drizzling. Bon appetit! The first time I ever ate from a charcuterie board was when I was in college going to out lunch on campus with one of my many now ex-boyfriends. There was an upscale cafe in one of the newer buildings and they had cheese, crackers, and grapes on the platter. The cheese on the board was disgusting so I only ate the grapes and crackers. Separately, I've had many dry sausages that would normally be found on a charcuterie board and they too are disgusting. But what exactly is a charcuterie board? Well, it's a fancy wooden board in which you put sausages, cheeses, jellies, pates(but that's basically liver and I HATE liver, so I used hummus instead. But I'm not particularly fond of hummus either), and crackers on it, usually for a fancy party. You can also put other things on it like grapes or sun-dried tomatoes(both of which I forgot to put in this recipe). A couple of weeks ago, while shopping for meat at my local supermarket, I saw ground chorizo for sale. I knew I had to turn it into some sort of meatloaf! Now if you've seen my other sausage meatloaf videos, you may notice almost all of them were flops in terms of the meatloaves actually holding their shape together. I thought to myself, "Well, if the casings are already removed and the meat has been ground already, then surely if I use crushed crackers, it will actually stay together?" Wrong! Maybe it's because I crushed the focaccia chips by hand in a Ziploc bag rather than in an actual food processor. I don't know. But one thing I do know for sure is that it wasn't salty, unlike my previous sausage meatloaf flops! However, it was spicy, and I suggest you eat this meatloaf with a glass of milk if by some chance you make my recipe for yourself. You will need: For the cooking equipment: A large bowl A lasagna pan Nonstick cooking spray For the meatloaf: 2/3 tbsp. of onion powder 2/3 cup of unsweetened applesauce 6 ounces of mozzarella cheese 1/2 cup of red currant jelly 1/4 cup of everything-seasoned hummus(as in everything bagels) Pinch of salt Pinch of black pepper 1 1/2 cups of crushed focaccia chips(using either a Ziploc bag or a food processor) 16 ounces of ground chorizo sausage(see note) 1. Put all ingredients into a large bowl. Mix all ingredients up until you get a firm, cohesive meatloaf mixture. 2. Spray a lasagna pan with nonstick cooking spray. 3. Form 2 loaves in the lasagna pan from the meatloaf mixture. 4. Bake in a 350 degree Fahrenheit oven for 14-16 minutes. 5. Bon appetit! Note: You can either buy ground chorizo sausage or: 1. Get chorizo sausages. 2. Remove the casings from the sausages. 3. Crumble the meat up. |
Archives
October 2019
Categories
All
|

 RSS Feed