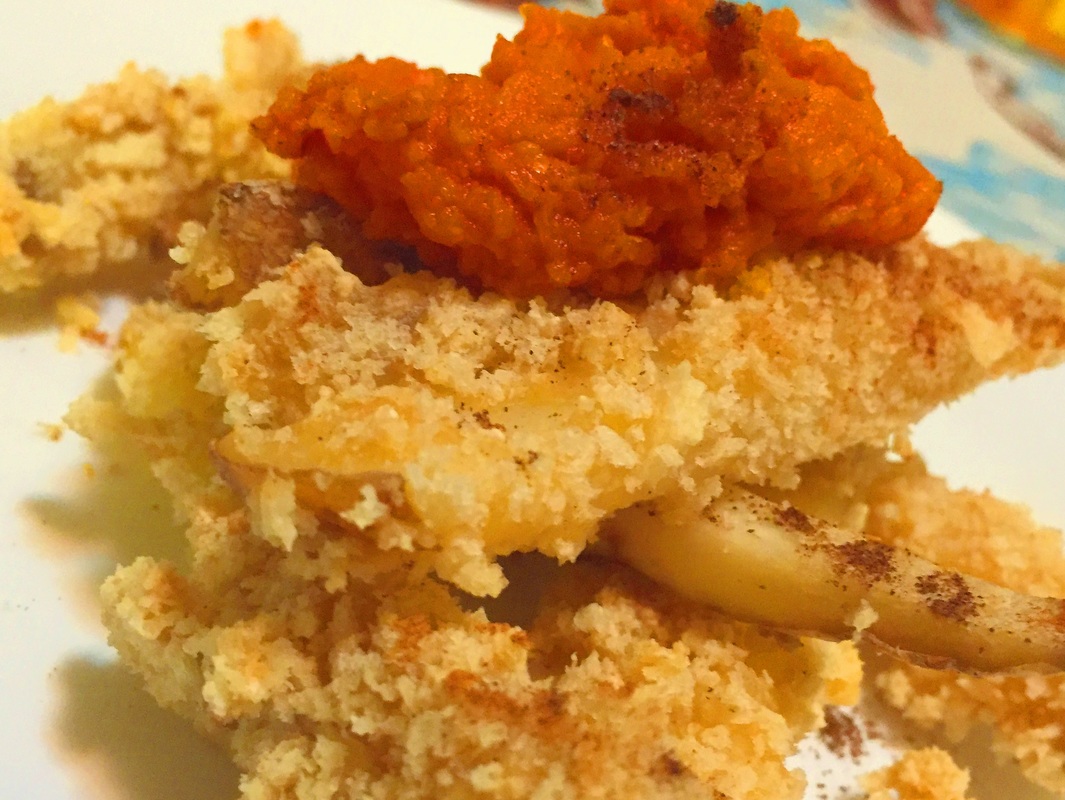
 You may be wondering why I made a crazy French fry creation instead of a crazy meatloaf creation. This recipe will be featured in a future meatloaf recipe. But I want to expand my culinary knowledge to beyond meatloaf and baked goods like the breads, pop tarts, hot pockets, pastas, and cereal I have made in the past. I have learned that as time goes on, there's a natural need to branch out the content on your YouTube channel beyond what your original idea was. Be on the lookout for further details in the coming days in my "October Announcements" video. Future French fry creations may or may not be an ingredient in a subsequent meatloaf. I plan on making a second show on the Meatloaf Princess channel about making crazy French fry creations. The working title is "French Fry Princess". Rest assured, I still will be making meatloaf creations as well. But why fries? I got my inspiration from the wide variety of syrups available on the Internet(ex. cucumber syrup, bacon syrup). These type of syrups are usually used by bartenders in making alcoholic cocktails and sometimes by baristas in making coffee drinks. I get my inspiration from the weirdest places. Apparently pumpkin beer is a thing and so is the fact you can only by beer in six-packs at a supermarket(even though I only need one or two bottles for this recipe). Yes I am old enough to drink beer legally but due to the medications I am on, it is not advised to drink alcohol, which is why I only drink wine on my birthday and holidays. According to my dad(who is not a chef), I probably shouldn't be cooking with alcohol either. He thought this recipe would get me drunk! That's the most ridiculous thing I have ever heard. Even my grandma agrees. Alcohol cooks out(usually) in high temperatures, which is why it is safe to give a kid a bowl of Penne a la Vodka. A couple of weeks ago, I learned this whole pumpkin spice craze this time of year is associated with "basic" white girls, like myself apparently. I couldn't find a baked beer-battered fries recipe online. The closest thing I found to it was a baked beer-battered onion rings recipe. But I think I know why people don't make baked beer-battered fries: it's a messy and time-consuming process to dip the naked fries in beer batter and coat them with panko breadcrumbs. The beer batter has a lot in common with the pinata I(read: my mom) had to make for my 8th grade Spanish class: paper mache and beer batter sticks to your fingers. But why baked beer-battered fries instead of fried fries? I don't have a deep fryer at home and I didn't think at the time of pan frying the fries. Plus baked food is healthier than fried food. For this recipe anyway, you can't have loaded fries(a dish of French fries with toppings) without canned pumpkin. Spoiler alert: canned pumpkin is bland without spices. So are panko breadcrumbs. Cinnamon/allspice and potatoes aren't a very good food combination without some sort of sugar like ketchup or honey. You will need: For the cooking vessels: 2 lasagna pans Nonstick cooking spray A large bowl 2 medium bowls A cutting board A pastry brush For the fries: 2 potatoes 1 cup of pumpkin beer 1 1/2 cups of all-purpose flour 1 cup of panko breadcrumbs 1 tsp. of salt 1 tbsp. of cinnamon 1/2 tbsp. of allspice 2-3 tbsp. of canned pumpkin A dollop of honey 1. Wash the dirt off the potatoes in a sink. Brush any remaining dirt off using a pastry brush. 2. (if you have a potato peeler or don't want potato skin on your fries) Peel the potato 3. On a cutting board, cut the potato in half lengthwise. 4. Cut the half potato lengthwise into fries. 5. Put the fries in a large bowl. 6. Repeat steps 2-5 for the second potato. 7. In a medium bowl, combine flour and beer. Stir until you get a pancake-like batter. 8. Dip the fries in the beer batter. 9. In a second medium bowl, combine panko breadcrumbs, salt, cinnamon, and allspice. Mix ingredients together. 10. Coat battered fries in breadcrumb mixture. 11. Spray lasagna pans with nonstick cooking spray. 12. Put the battered and breaded fries in a lasagna pan, forming one layer of fries. 13. Once all the fries are battered and breaded, season with salt, cinnamon, and allspice. 14. Bake in a 375 degree Fahrenheit preheated oven for 10-15 minutes. 15. Turn the fries over. Bake for an additional 10-15 minutes. 16. Arrange fries on a plate. Top with canned pumpkin, cinnamon, allspice, and honey. 17. Bon appetit!
0 Comments
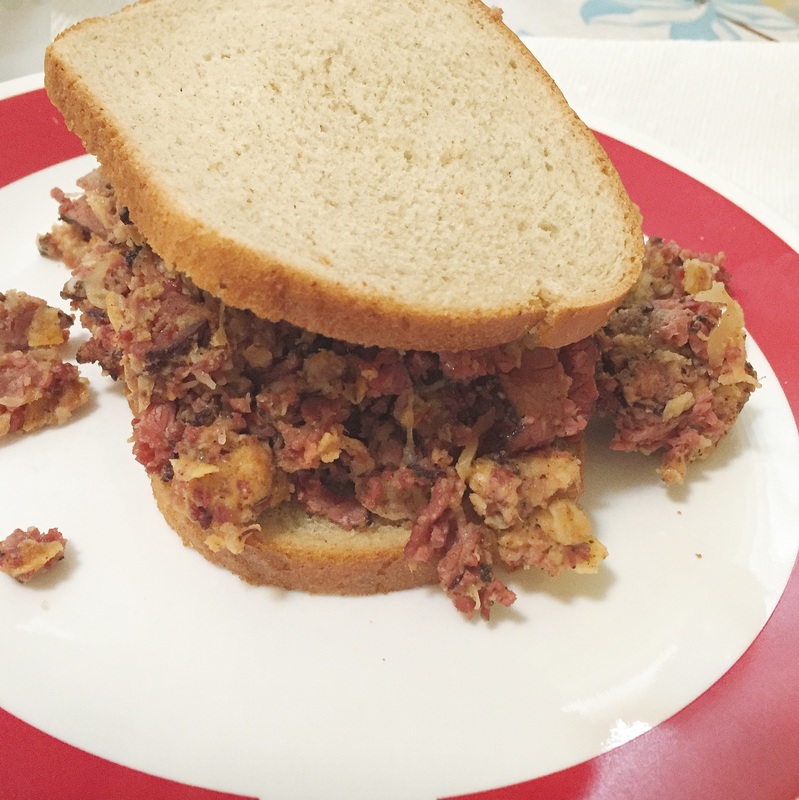
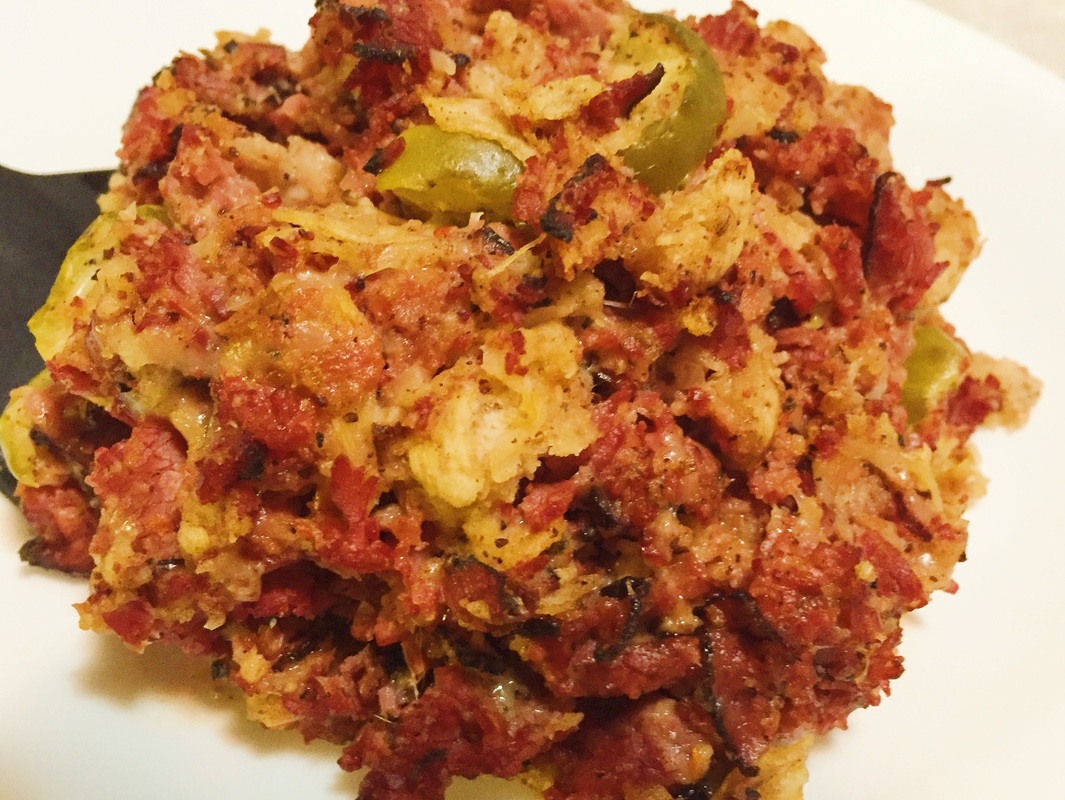
Left image: New York Reuben Meatloaf sandwich on rye bread. Right image: New York Reuben Meatloaf I always wondered why nobody has put a meatloaf recipe on the Internet that solely uses cold cuts as the meat in the meatloaf. But now I know why: because cold cuts are salty, and that makes for one salty meatloaf. I never said my meatloaf creations were healthy. They may not be on the same caloric level as the food in Epic Meal Time but even I wouldn't eat meatloaf every day. There's a reason why it's considered a comfort food! My YouTube channel is all about performing crazy culinary experiments by making food that hasn't been made before. I get my inspiration from "normal" recipes I find online and I adapt the recipe to my tastes. The New York Reuben Potato chips: They look like BBQ potato chips but when I tasted them, I tasted all the elements of a classic Reuben sandwich: pickles, smoked meat, Russian dressing, sauerkraut, and rye bread. Rating: 4 out of 5 meatloaves. All of the finalists in Lay's "Do Us a Flavor" contest were tasty this year but my favorite was the West Coast Truffle Fries. My least favorite was the Southern Biscuits and Gravy(it tasted like chicken stuffing). The key to this meatloaf is thick cut pastrami. If you use thin cut pastrami, the meatloaf won't hold it's shape as well. Some people make meatloaf sandwiches from leftover meatloaf and I made a meatloaf sandwich. See above for it. The bread I used was rye bread. I think my (Jewish) mom would've been very proud of me and if she were here today, she would love it(along with all my other meatloaf creations). My (Jewish) grandma loved the meatloaf as well and my dad said if he hadn't eaten so much meat in the previous week, he would've had some. And you all know by now he is a bit of a "meatloaf traditionalist". You will need: For the cooking vessels: A lasagna pan Nonstick cooking spray For the actual meatloaf: 1/2 tbsp. of onion powder 1/2 cup of unsweetened applesauce 1/2 cup of shredded Swiss cheese 1/2 cup of Russian dressing 2-3 tbsp. of sauerkraut 4-5 dill pickles 1/2 tbsp. of paprika 1 tsp. of caraway seeds 2 crumbled slices of rye bread 1 New York Reuben Hot Pocket 1 cup of smashed potato chips 1 pound of thick cut pastrami 1. Wash your hands! :) 2. Put the first 9 ingredients in a large bowl. 3. Crumble up the Hot Pocket with your hands and put the crumbled Hot Pocket into the large bowl. 4. Get some potato chips, put them in a Ziploc bag, and smash them up with your fist or a hammer. Repeat until you have 1 cup of smashed potato chips. 5. Tear the pastrami with your hands. Put the torn up pastrami into the large bowl. 6. Mix up all the ingredients using your hands to distribute all the ingredients evenly among the mixture. 7. Spray lasagna pan with nonstick cooking spray. 8. Form 2 loaves from the meatloaf mixture. 9. Bake in a 350 degree Fahrenheit preheated oven for 15-20 minutes(this is not a typo- cold cuts are already edible to begin with and if you put them into the oven for too long, the cold cuts become dry and rubbery) 10. Bon appetit! 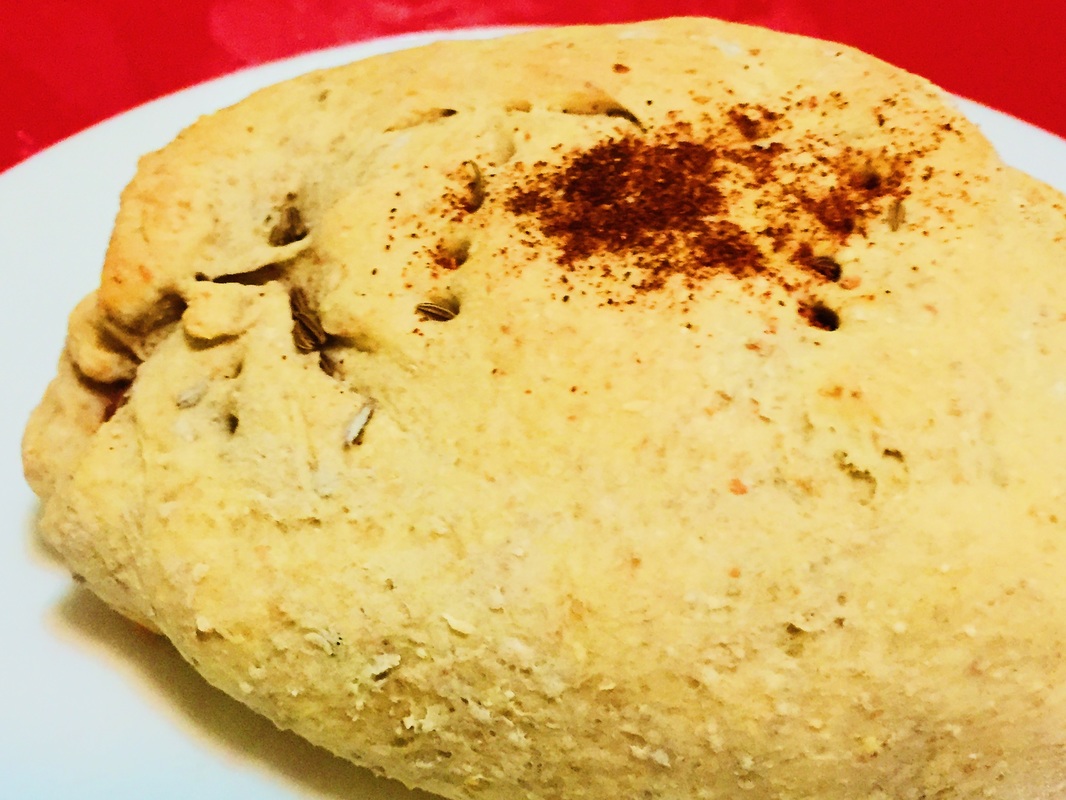 Of all the hot pockets I made this month, I think this one was my favorite, not because I live within driving distance from New York City or because I live in New York State, but because I made it with lots of elbow grease and love(ok, now I sound like SpongeBob Squarepants now when he professes his love for Krabby Patties). It's the only Hot Pocket I made from scratch, plus my grandma raved about it. She was so amazed I could fit all those ingredients inside one hot pocket. My dad wasn't much of a fan of this recipe, probably because I used canned corned beef instead of the type you get at the deli that is (hopefully) fresh. He said it smelled like dog food! Trust me, it tastes better than it smells. Plus my cats love the smell of canned meats so they thought this recipe was for them. Sorry! I think my recipe is truly unique because I had a hard time finding any recipe regarding a hot pocket made with rye flour. It hasn't been done before. I did consider using 100% rye flour instead of a mixture of all-purpose flour and rye flour but when I looked at recipes to make rye bread using 100% rye flour but that recipe was too time-consuming, as it called for letting the dough rise overnight for 16-18 hours! Ain't nobody got time for that(pardon my grammar)! But I did find a video on YouTube of a lady named Noreen from "Noreen's Kitchen" making a Reuben pizza crust using a mixture of rye flour and all-purpose flour. I followed all of her steps up until the point where she flattens the dough to form a pizza crust. That's where our two recipes diverge. I can guarantee you this: this recipe isn't for people who a gluten-sensitive/allergic to gluten or have celiac disease, as I used vital wheat gluten to make handling the dough easier. I can also guarantee you that this hot pocket is delicious if you're into Reuben sandwiches. And you don't mind the smell of canned corned beef. You will need: For the cooking vessels: A large bowl A medium bowl A benchscraper A lasagna pan Nonstick cooking spray A countertop or cutting board A rolling pin or beer bottle For the hot pockets, you will need: 1 cup of very warm water 2 packets(0.5 oz.) of instant dry yeast 1 tbsp. of granulated sugar 1 tbsp. of olive oil 1 1/2 cups of all-purpose flour 1/2 cup of rye flour 1 tsp. of salt 1 tbsp. of caraway seeds 1 tbsp. of vital wheat gluten An additional 2-3 tbsp. of rye flour if the dough gets sticky One 12-ounce can of corned beef 3/4 cup of sauerkraut 3/4 cup of shredded swiss cheese 6 tbsp. of Russian dressing 3 tbsp. of paprika An additional tbsp. of caraway seeds 1. Add the first 4 ingredients to a large bowl. 2. Stir the ingredients around with your finger so the yeast can feed on the sugar. 3. Keep stirring as you add the next 5 ingredients into the bowl, one ingredient at a time. 4. Mix up all the ingredients using your hands until you get a dough ball. 5. If the dough ball is sticky, add the additional 2-3 tbsp. of rye flour. 6. Using your benchscraper, get the dough ball out of the bowl and onto a floured surface. 7. Knead the dough ball for 5-10 minutes until the dough ball is no longer sticky. 8. Spray medium bowl with nonstick cooking spray. 9. Put dough ball in medium bowl. 10. Spray dough ball with nonstick cooking spray so the dough ball doesn't dry out. 11. Cover the dough ball in bowl with plastic wrap. 12. Put medium bowl in a warm place(like under a light at room temperature) for 10 minutes so the dough can rise a bit. 13. After 10 minutes, put the risen dough ball on a floured surface. 14. To cut the dough into 6 pieces, first cut the dough into thirds. Then cut each third in half. 15. Set 5 of the 6 dough pieces aside for now. 16. Put one dough piece on a floured surface. Flatten it using a rolling pin. 17. Remove the corned beef from the can. Divide the corned beef into 6 pieces. 18. Put each sixth of corned beef(about 2 ounces of corned beef) onto half of the flattened dough. 19. Put 2-3 tbsp. of sauerkraut, 2-3 tbsp. of shredded swiss cheese, and 1 tbsp. of Russian dressing on top of the corned beef, in that order. 20. Fold the hot pocket lengthwise, with the dough that's not covered with anything wrapped around the filling, making sure no parts of the filling stick out. 21. To let steam vent out of the hot pockets, poke 2-3 holes in each hot pocket, using a fork. 22. Spray lasagna pan with nonstick cooking spray. 23. Put hot pocket in lasagna pan. 24. Repeat steps 16-21 and 23 five more times for the remaining dough pieces. 25. Sprinkle 1/2 tbsp. of paprika on each hot pocket. 26. Sprinkle an additional tbsp. of caraway seeds onto all six hot pockets(so each hot pocket is covered with 1/6 tbsp. of caraway seeds). 27. Bake in a 400 degree Fahrenheit oven for 15-20 minutes, or until the dough is fully cooked(that is, you can poke the hot pocket using a fork and there is no dough residue on the fork). 28. If you're not going to eat all the hot pockets in one sitting, let the ones you're not eating today cool down for 30 minutes. Then place each hot pocket in a plastic bag and put the plastic bags in a freezer until you want them. To defrost, let hot pockets sit at room temperature for 3-4 hours. Then reheat in microwave for a minute. 29. Bon appetit! 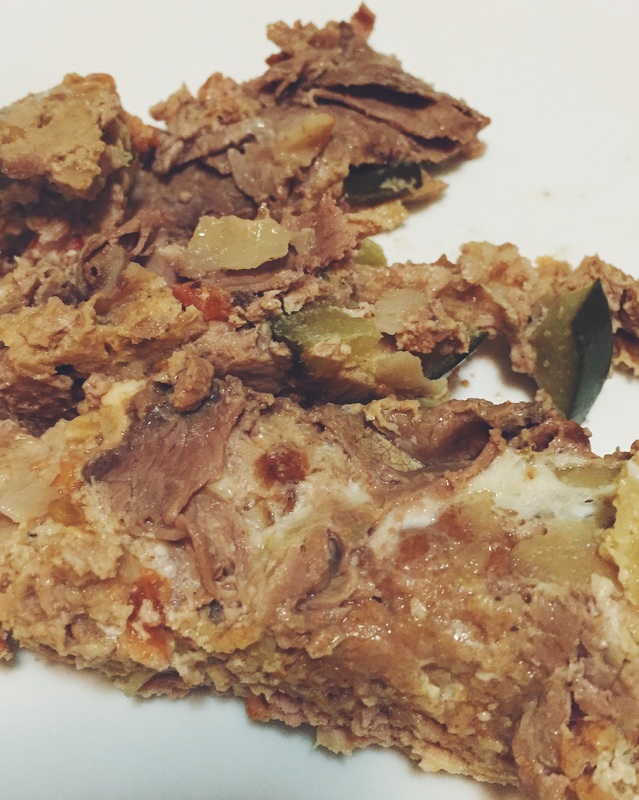 This is the first time I have made a meatloaf using ground lamb. Actually this was my first time eating any sort of lamb. I am an adventurous eater. My dad, not so much. It is the meat that takes the longest to cook- 90 minutes. Technically it varies from oven to oven but you want the internal temperature to be at least 160 degrees Fahrenheit. I told a white lie in the video. I only cooked the meatloaf for 65 minutes on the day of recording. The ends of the meatloaf were fully cooked, which is what you see in the image above. The center, however, was still pink in the middle, and pink meat of any sort means the meat is raw. If you eat raw meat, you get sick. That's why they don't make sushi with meat, I think... So I put the raw parts of the meatloaf in the refrigerator overnight. Then the next day, I put that meatloaf back in the oven for another 30 minutes at 350 degrees Fahrenheit. It was fully cooked finally! When I am working with a different type of meat for the first time, I research how to cook it online. I researched lamb meatloaf recipes and I got conflicting directions. One recipe said to bake the meatloaf at 350 degrees Fahrenheit for 1 hour for 1.5 pounds of lamb. Another recipe said to bake the meatloaf at 350 degrees Fahrenheit for 90 minutes for 2.5 pounds of lamb. I naively thought that the lamb would fully cook in the hour since I was only using 1 pound of it. Apparently, the cooking time doesn't vary depending on the amount of the lamb you're cooking. Although I saw an inforgraphic yesterday on how to cook turkeys(the whole ones, not ground turkey). An unstuffed 8 pound turkey takes 3 hours to cook, whereas a 24 pound turkey takes 5 hours. Seriously, don't they sell Thanksgiving turkeys that are smaller, like if you're not serving many people!? **end Public Service Announcement** But in all seriousness, this meatloaf is based on the Greektown Gyro potato chips for the Lay's Do Us a Flavor Contest. Since I have heard negative reviews about this flavor of potato chip on the Internet, I tried it off camera, in case it tasted so horrible I had to 86 them from the meatloaf. They actually tasted good. The chips had a meaty taste to them, in addition to a cucumber taste and a hint of feta. Rating: 4 out of 5 meatloaves The tomatoes and cucumbers provided plenty of moisture for the meatloaf, in addition to the tzatziki sauce. This is the second stuffed meatloaf I made. I felt like stuffing a meatloaf and to me(a non-Greek), deli roast beef looks like gyro meat, so I figure it makes sense to use it in a gyro meatloaf. I also used chicken eggs as a meatloaf binder. So, in conclusion, lambs, cows, and chickens died for this meatloaf. Now I feel like a carnivore! Here is the recipe: You will need: For the cooking vessels: A loaf pan Nonstick cooking spray For the meatloaf: 1/2 tbsp. of onion powder or 1/2 a diced, sauteed onion(I used the former, as I was too lazy that day to sautee an onion) 2 beaten and whisked eggs 1 diced tomato 1 diced cucumber 1/2 cup of feta cheese 1/2 cup of tzatziki sauce 1 tsp. of garlic powder Pinch of salt Pinch of black pepper 1 no-bake gyro pocket 1 1/2 crumbled pita pockets(I say 1 1/2 because when I put 2 pita pockets in the bowl, it would cause the large bowl to overflow, which is definitely a sign you're putting way too much stuff in your meatloaf. Plus the meatloaf would taste really heavy) 15-20 Greektown Gyro potato chips(or you could regular potato chips, since this flavor of potato chip probably won't become a regular mainstay in the chips section), or 1 cup of crumbled potato chips 1 pound of ground lamb 1/4 pound of deli roast beef 1. Wash your hands, especially since you're handling raw meat in this recipe. 2. Put first 9 ingredients in a large bowl. 3. Crumble the gyro pocket into pieces but do not put the lettuce in the bowl! Lettuce and ovens don't mix. Put the crumbled gyro in the bowl. 4. Crumble the potato chips by putting them in a sealed plastic bag. Crush them with your fist or a hammer. Put the crumbled potato chips in the bowl. 5. Add the ground lamb to the bowl. 6. Mix the ingredients together so that all of them are distributed evenly among the meatloaf mixture. 7. Spray a loaf pan with nonstick cooking spray. 8. Put half of the meatloaf mixture into the loaf pan. 9. Top the bottom layer with the deli roast beef. 10. Cover the deli roast beef with the remaining meatloaf mixture. 11. Bake in a 350 degree Fahrenheit preheated oven for 90 minutes, or until the internal temperature of the meatloaf reaches at least 160 degrees Fahrenehit. 12. Let the meatloaf rest at room temperature for 10 minutes so all the juices in the meatloaf can be absorbed in the meatloaf. 13. Make sure none of the meatloaf is pink! 14. Bon appetit! 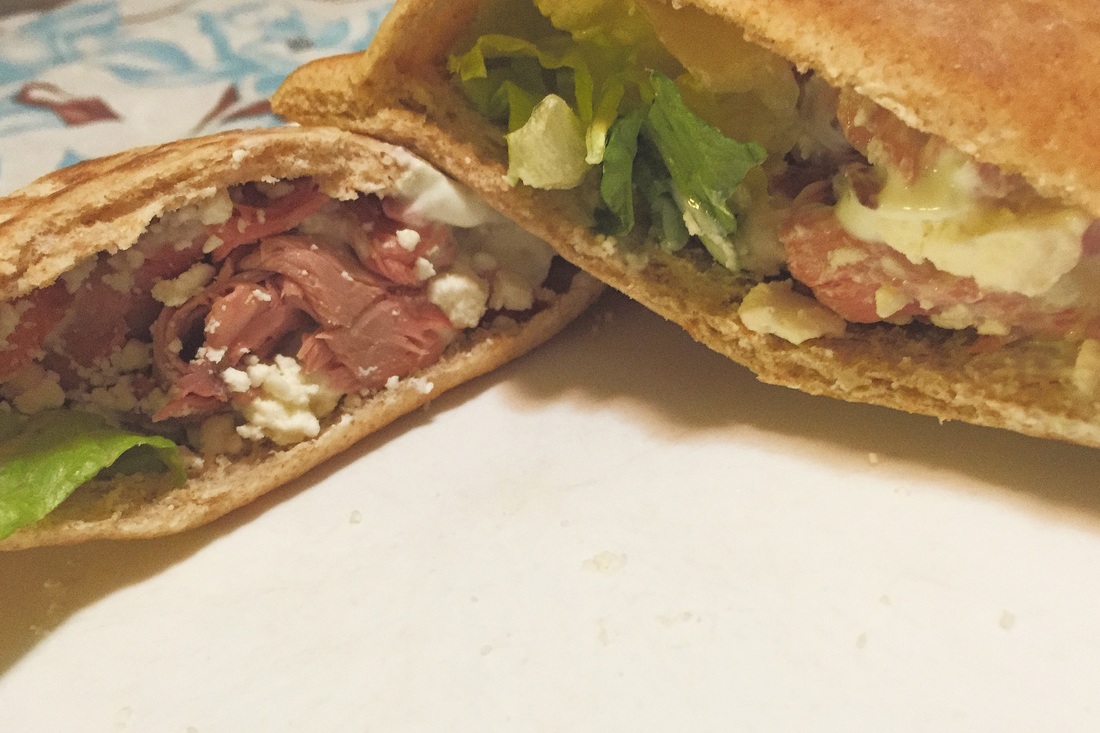 You might be wondering why this gyro recipe is "no-bake". It's because I used deli roast beef inside the gyro pocket. I was too lazy to put my oven on and my A/C in the kitchen is broken. Most of you have never heard of a no-bake gyro. Technically, most cold cut sandwiches are no-bake and so are those Jello dessert kits that let you make cheesecake without baking. This is probably easier to make than meatloaf, considering all you do is make some sauce, cut some tomatoes, and stuff everything else into the pita pocket. Because of the simplicity of this recipe, the video is a bit under 2 and a half minutes, but this might be a good thing considering us humans now have a shorter attention span than a goldfish. Surprisingly, the last time I ordered anything from the deli counter was six years ago when my mom was around. I still remember my mom waiting in line at the supermarket and me roaming around the two or three aisles closest to the deli department. I even remember my mom using cookie cutters to shape bologna so I would eat protein at school when I was 7 and I still had baby teeth! This was when those self-serve kiosks weren't around. You know, the machines nowadays at the deli department where in lieu of waiting in line, you place your order into the self-serve kiosks using a touchscreen and after placing the order, you get a number. Then you are free to go grocery shopping as you please until your number is called over the loudspeakers. You don't even have to interact with the deli workers either. Your order is in a bin with your number on it. Although sometimes I wonder if any random person could just steal a random order from the bin... This may sound mundane but I thought it was the coolest thing ever. My dad, on the other hand, prefers to wait in line for 20 minutes just to place his order. I guess he likes queuing up. Anyways, here's the recipe. You will need: 1-2 tomatoes for 6 pita pockets Pita pockets(depending on how many sandwiches you want to make) Romaine lettuce(the amount is up to you) 2-3 tbsp. of feta cheese per pita pocket 3-4 slices of deli roast beef per pita pocket 2-3 tbsp. of tzatziki sauce per pita pocket 1. Cut the tomato into 6-8 slices. Set aside. 2. Open your pita pocket and fill it up with the cut tomatoes and the rest of the ingredients. 3. Repeat x number of times(x being how many sandwiches you want to make; what can I say, I'm an algebra nerd. I got my dad's gift for math. I can do long division in my head as I'm driving! My sister on the other hand...) 4. Bon appetit! 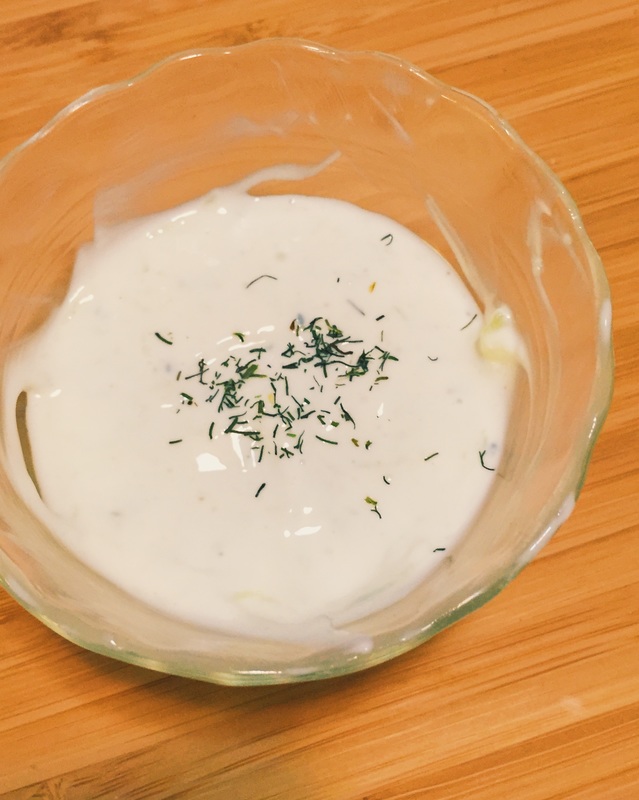 As I was editing my video, I didn't think it would be very impressive. After all, YouTube videos on making tzatziki sauce have been made thousands of times. But today I learned a new trick to edit my videos. A lot of cooking channels tell the viewer the ingredients they'll need in the beginning of the video. Except for mine(save for the #1 Meatloaf). I was rereading the notes I made on making an animated ingredients list when I was at the last One-on-One session at the Apple store for iMovie. The instructor said the only way that was possible in iMovie was to make a Keynote(Apple version of PowerPoint) slide with the ingredients on them. Then, add animated effects using the "Build In" feature that animates the text as it appears on the screen. I realized enabling the effects was only possible if you keep pressing the "enter/return" button. Which got me thinking of recording myself pressing the enter button several times. I found this Mac app called "Screencast-O-Matic". There's a free version and a Pro version that only costs $15 a year. The Pro version removes the app's watermark from your video. I used this app to record this simple screen recording, it's only 10 seconds long. Then I made an Mp4 file of the video, which I then imported in my iMovie project and voila, an animated ingredients list! I call it the "Ingredients Show". It's the closest thing I'll get to the animated ingredients list Epic Meal Time has on their "Handle It" videos. Enough about the technology. The tzatziki sauce tasted really good. But then again, I've never had tzatziki sauce until I made it. One of my favorite activities I like to do when I'm not cooking or editing videos is attend my local Toastmasters public speaking club. After the club's weekly meeting, I walked over to a restaurant that's basically just Chipotle for Greek/Mediterranean foods to have lunch. I had their tzatziki sauce with my platter and it tasted just like the tzatziki sauce in the video. I thought my tzatziki sauce was as good as that made by a Greek restaurant. So I'm pretty proud of myself. You will need: Cooking tools: A cheese grater Ingredients: 2 cups of plain Greek yogurt(although I should try making tzatziki sauce with other yogurt flavors. Strawberry tzatziki sauce, anyone?) 1 cucumber 2 tbsp. of lemon juice 1/2 tsp. of salt Garlic powder and dill weed to taste 1. Cut the cucumber in half. 2. Deseed the cucumber by using the edge of a knife to remove the parts of the cucumber with the seeds. 3. Grate the remaining cucumber on a cheese grater over a large bowl until you get something that resembles cucumber jelly. You will not see any cucumber fall into the bowl. It just sticks to the grater. But it turns out the grated cucumber is inside the cheese grater. It's like a magic trick! 4. We don't want a watery sauce, so add salt to the cucumber. 5. Stir the salt and cucumber together. 6. Set aside for 10-15 minutes at room temperature. 7. Put the Greek yogurt in a second large bowl. 8. Add the lemon juice and garlic powder. You can taste the sauce as you're making it to see how much garlic you want in your sauce. 9. Mix the yogurt, lemon juice, and garlic powder up until all the ingredients are distributed evenly among the sauce. 10. After the 10-15 minutes, put the salt/cucumber mixture into the yogurt sauce. 11. Mix the two together until the salt/cucumber is fully incorporated into the yogurt sauce. 12. Add the dill weed to the sauce. 13. Mix the dill weed into the sauce. Taste the sauce as you're going along to determine how much dill weed you want. 14. Garnish with more dill weed. 15. Bon appetit! 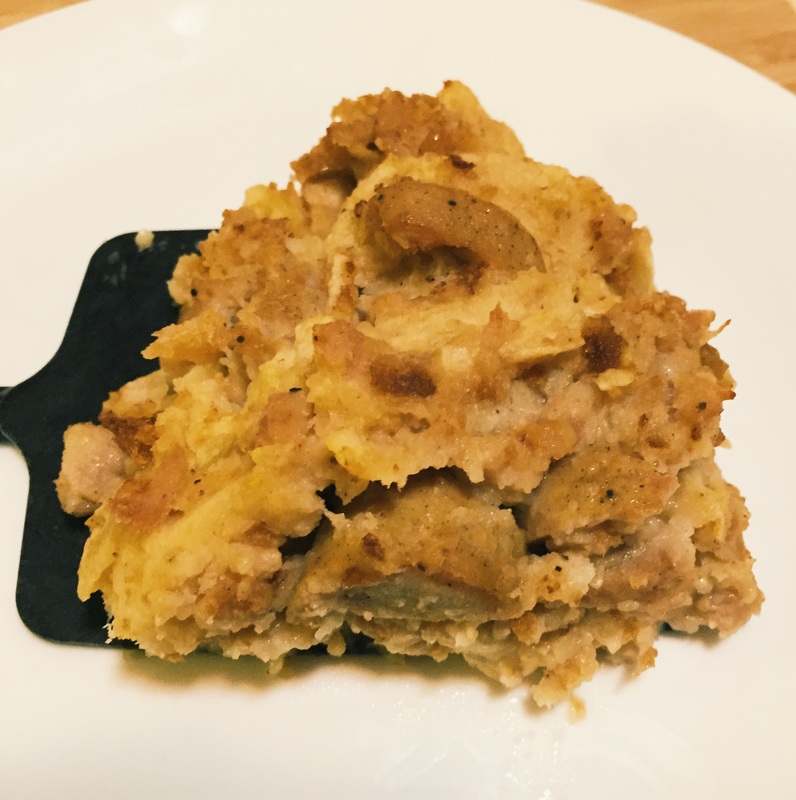 Like I said in the video, I should've had biscuits and gravy at the Cracker Barrel when I went to Florida a few years ago. I have no frame of reference for what an authentic biscuits and gravy dish is supposed to taste like. But I still have my creative liberties when it comes to my recipe development. The last time I made a meatloaf out of some sort of sausage/frankfurter, the meatloaf didn't hold it's shape very well. So this time, I cut the sausage links into half-inch wide pieces and then I crumbled them up with my hands to make it look like ground meat even though we all know it's just meat with preservatives in it. The taste test for Lay's Southern Biscuits and Gravy potato chips: When I first smelled the potato chips, I had no idea what it smelled like. When I tried a potato chip, first I tasted butter(which is sort of accurate considering lots of people put butter on their biscuits), then it tasted like frankfurters, which typically don't belong in biscuits and gravy. I guess Lay's was going for a sausage taste. Last time I checked, frankfurters weren't authentic sausages. The aftertaste reminded me of chicken stuffing, like the type you eat at Thanksgiving. Neither stuffing nor Thanksgiving has anything to do with biscuits and gravy. However, the potato chips tasted good. I'll probably finish the bag too. Hence, I give it a 3.5 out of 5 meatloafs. I used the chips in my meatloaf and it tasted good. However, the chicken apple sausages plus the actual biscuits in the meatloaf reminded me of apple pie! You will need: For the cooking tools: A lasagna pan Nonstick cooking spray For the actual meatloaf: 2/3 cups of unsweetened applesauce 1/2 cup of sausage gravy of your choice(I used Pumpkin Spice Gravy) 2 crumbled up biscuits 1 Biscuits & Gravy hot pocket Pinch of salt Pinch of black pepper 3/4 cups of smashed Lay's Southern Biscuits & Gravy potato chips 12 ounces of chicken sausage(about 4 links; I used 2 chicken apple sausage links and 2 pumpkin spice chicken sausage links) 1. Wash your hands! :) 2. Put the first 3 ingredients in a large bowl. 3. Crumble the hot pocket into smaller pieces. 4. Add the salt and black pepper 5. Smash the potato chips by putting them in a plastic bag, sealing the bag, and smashing them into smaller pieces using your fist or a hammer. 6. Put the smashed potato chips in the bowl. 7. Cut all the sausage links into half-inch wide pieces. 8. Crumble those pieces using your hands to get a consistency like that of ground beef. 9. Put the crumbled sausage links in the bowl. 10. Mix all the ingredients together. 11. Spray a lasagna pan with nonstick cooking spray. 12. Form 2 loaves from the meatloaf mixture. 13. Bake in a 350 degree Fahrenheit oven for 30-35 minutes. 14. Bon appetit! 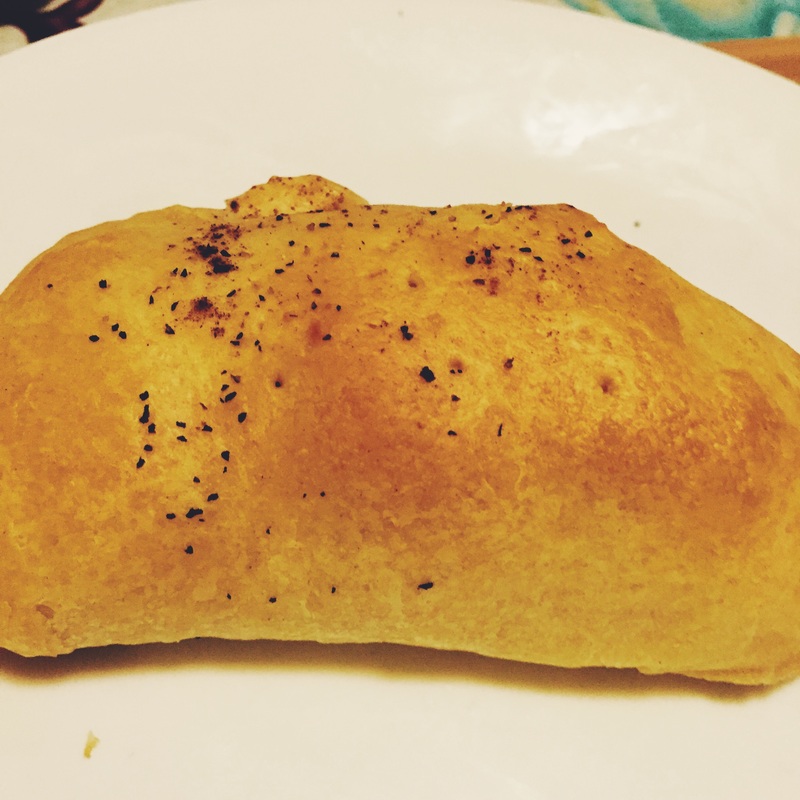 Finally, a piece of food I made that actually looks good enough to eat. Thanks, VSCOcam iPhone app! In keeping with this month's theme about Lay's Do Us a Flavor contest, I made a biscuits and gravy hot pocket. The gravy is the Pumpkin Spice Gravy I used in a previous video along with the sausages I used to make said gravy. The biscuit dough is just the type you get from a can at the supermarket. Up until this recipe, I have never worked with biscuit dough. I thought it would be easy to flatten out with a rolling pin. It flattened but it was really hard to work with in terms of shaping it into anything other than a biscuit. You definitely need a dry surface to flatten and form the biscuits on, otherwise your job will be a lot harder. I felt like I was playing some sort of wrestling game with an inanimate object(the biscuit dough). That's why I had to slap the Hot Pocket- I was not only frustrated but I just wanted the Hot Pocket to hold its shape. Slapping the Hot Pocket is optional. It turned out that some of the Hot Pockets ending up looking like calzones. It was impossible for me to fold the biscuit dough lengthwise due to the shape of the chicken sausage pieces. So I had to fold it from the top to the bottom, hence the calzone shape. I tried a different technique this time. I fully cooked all the Hot Pockets and the ones I didn't eat I just put in the freezer. When I wanted to eat them, I would let the Hot Pocket(s) thaw out at room temperature for 4 hours. Then you heat them up in the microwave for a minute, the way nature intended Hot Pockets to be cooked. Unless your using them in a meatloaf. In that case, the oven heat is only going to heat them up anyway. In the video, I used two lasagna pans. Let me explain my logic. I didn't want to make 8 Hot Pockets because it was already hard to shape 1, let alone 8. So I made 5 Hot Pockets and I used a second lasagna pan to bake 3 biscuits. I don't believe in wasting perfectly good food, like extra biscuit dough. Biscuits also go really well with some jelly on top of them. Those biscuits were used in the photo I took of the Pumpkin Spice Gravy. Because gravy looks pretty sad without something to pour it on, if you don't have a gravy boat. You will need: For the cooking vessels: A countertop or wooden board A rolling pin or beer bottle 2 lasagna pans Nonstick cooking spray For the Hot Pockets: 1 can of biscuit dough 1-2 chicken sausage links cut into half-inch wide pieces(I used pumpkin spice sausage but you could use whatever flavor you want) 10 tbsp. of some sort of gravy(I used Pumpkin Spice Gravy) Pinch of salt 5 tsp. of black pepper 5 tsp. of cinnamon 1. Open the can of the biscuit dough, as per the instructions on the can. 2. Take the biscuit dough out of the can. 3. The biscuit dough should break apart into 8 different circular pieces. 4. Flatten one of the circular pieces on a countertop or wooden board using a rolling pin or beer bottle. This is going to be tricky, as the dough will have a tendency to stick to the rolling pin. In that case, just separate the dough from the rolling pin and continue flattening. 5. Once your dough is flattened, put 4-5 half-inch pieces of chicken sausage on the bottom half of the flattened dough. 6. Pour 2 tbsp. of your gravy on top of the chicken sausage pieces. 7. Fold the dough from the top down. Make sure you fold it so that no chicken sausage pieces are sticking out or falling out. 8. Poke the Hot Pocket with a fork to let the steam out as it's baking The dough is going to rise and you don't want exploding Hot Pockets in the oven. 9. Spray one lasagna pan with nonstick cooking spray. 10. Put the Hot Pocket in the lasagna pan, making sure the Hot Pocket doesn't fall apart as you're doing that. 11. Repeat steps 4-10 five more times. Steps 12-13 are optional: 12. Spray the second lasagna pan with nonstick cooking spray. 13. Put 3 of the raw biscuits into that lasagna pan to make biscuits. 14. Sprinkle the Hot Pockets with the salt, black pepper, and cinnamon. 15. Bake both the biscuits and the Hot Pockets in the oven at 350 degrees Fahrenheit for 14-17 minutes. 16. Bon appetit! I finished editing the next video, "Biscuits & Gravy" Hot Pockets. However, I am not uploading it today because that would be insensitive to the tragedy that happened 14 years ago to this day. I think this day is more important than just some stupid hot pocket I made.
Plus, I have loved ones involved in that tragedy. One of my uncles(I have 4) was scheduled to be on the flight that crashed in Shanksville, Pennsylvania. He did not take that flight that day and he is still here. In a sense, his daughter saved his life. She was 5 years old at the time and she wanted her daddy to eat breakfast with her. So he cancelled his flight and had breakfast with his daughter. But to think he was scheduled to be on one of those ill-fated flights still resonates with me. Children can be unexpected lifesavers in the most mysterious ways. My youngest cousin was born on September 11, 2001 around 7 AM. So today is his 14th birthday. That is the only happy thing to come out of that day. But it must be hard for him to both celebrate his birthday and to know that nearly 3,000 people perished that day. . Videos will be uploaded again starting tomorrow but today, just be thankful for the family and friends you have. Hey, maybe you can have meatloaf for dinner with your family tonight! You'll never run out of meatloaf ideas with the Meatloaf Princess. 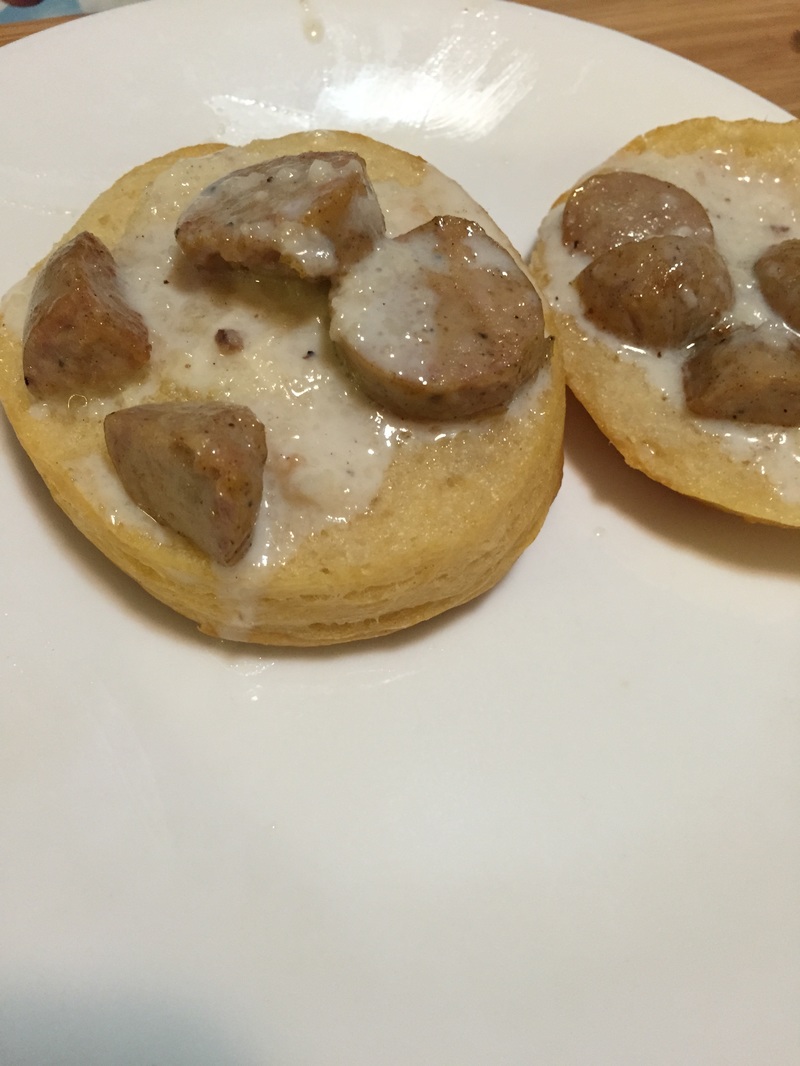 Every time fall comes around, you tend to see a plethora of products at the supermarket that are pumpkin-spiced flavored, whether they be cereal, hummus(eww!), or chicken sausages. I found pumpkin-spice chicken sausages(apparently that's a thing now. Spoiler alert: you only taste a hint of cinnamon in the sausages) at my local supermarket and I was planning to make biscuits and gravy anyway, in honor of Lay's Do Us a Flavor contest, so why not? Maybe this will be the video that goes viral. A YouTuber can only dream... Some facts about chicken sausages:
You will need: A skillet pan A spatula A whisk For the gravy: 3 pumpkin spice chicken sausages 2 tbsp. of extra virgin olive oil 2 tbsp. of all-purpose flour 2 cups of milk(I used fat-free milk, but you will get a creamier gravy if you use a milk with fat in it) Pinch of salt 2 tbsp. of black pepper 2 tbsp. of cinnamon Optional: Biscuits to pour the gravy on top of 1. Cut the sausages into small pieces 2. Pour the olive oil into the skillet pan. 3. Heat the skillet pan up on the stove. 4. Once the pan is heated up, add the sausage pieces into the pan. 5. Brown the sausages by coating flipping them over with a spatula. Watch out for splashing hot oil due to the moisture in the sausages!! 6. Remove the sausages from the skillet pan once they are cooked. DO NOT WASH YOUR SKILLET PAN! You need the fat from the chicken sausages and the oil to make the gravy. 7. Add the flour into the pan. Whisk the fat/oil mixture and flour until you get a thick sauce, which is known as a roux. 8. Continue whisking for 30-60 seconds. 9. Add 1/2 cup of milk into the pan, while whisking at the same time. Be very careful of splashing hot liquids!! 10. Make sure there are no flour lumps in the gravy. 11. Add another 1/2 cup of milk into the pan. Whisk. 12. Add the salt, black pepper, and cinnamon to the gravy. Whisk the ingredients together. 13. Add the remaining cup of milk into the pan. Whisk for 30-60 seconds. 14. Let the gravy simmer at a low heat for 5 minutes. 15. Pour the gravy onto some biscuits(optional). Bon appetit! |
Archives
October 2019
Categories
All
|
 RSS Feed