|
You might be wondering why in the world would I eat insects, let alone make a bread out of them. Actually, you wouldn't be surprised I have cooked and ate insects if you've seen most of my previous recipes(ex. chocolate pigs feet, chicken liver meatloaf). It was only a matter of time before I started featuring insects on this channel, and rather than just going with the gateway insect when it comes to beginning to practice entomophagy(the consumption of insects by humans), crickets, I decided to dive head in and eat locusts that have been boiled and dehydrated to form a powder.
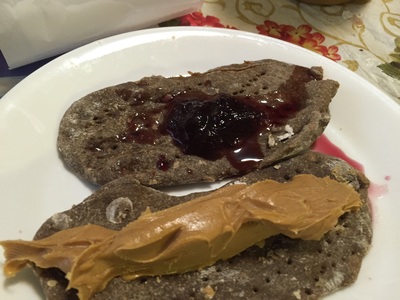
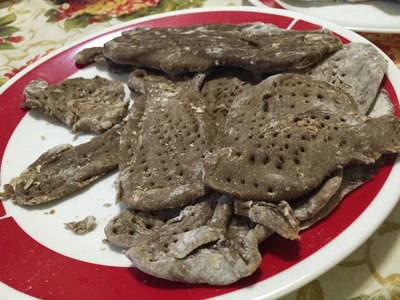
I specifically used locusts in this recipe because this week is Passover and the 8th plague of Passover was the swarm of locusts that devoured the crops in Ancient Egypt. Basically, I have eaten the plague! That sound really disgusting, even though the end product I ended up with wasn't that bad. Just like with regular matzo, you wouldn't want to eat this locust matzo plain because it is bland without anything on it. But it's so tasty when you put something like peanut butter, jelly, or butter on top of it. The matzo has a smell and taste that is a cross between nuts and coffee(or plain lettuce). You can also turn this locust matzo into matzo brie, which is matzo and egg fried together. As a Jew, I remember my mom making matzo brie for me every Passover. Then after she passed away, my grandma made matzo brie. Then my grandma moved to North Carolina. So I'm continuing on the family tradition of making matzo brie, albeit with locust matzo. If my grandma was still living at home, I probably would've pranked her by telling her I made chocolate matzo. Then when she tastes it and realizes instantly that this matzo tastes nothing like chocolate, I would then reveal to her that the matzo was made from locusts. At this point, she probably would've freaked out and said I was a little stinker. Unfortunately, since my dad is the cameraman for this channel, he was obviously in on the secret of the matzo, so he said flat out that he wouldn't consent to eating this matzo. I seem to be the only person in my family that's an adventurous eater. Western civilization(i.e. North America and Europe) needs to get their act together and start eating insects for the sake of the future of planet Earth, because cows fart so much methane that it's contributing to climate change. Plus insects take up less resources like water. But apparently the general population needs to be gently pushed into eating insects, which is why there are several startups that make energy bars and cookies with cricket flour that are masked with chocolate and peanut butter. Most people are too chicken(no pun intended) to cook with or eat insects like earthworms, scorpions, and silkworm pupa(which are some of the other insect powders that you can buy on www.thailandunique.com, the sourceo f the locust powder I used. Now I didn't know what to expect when I first opened the bag of locust powder, which is why I filmed myself opening the bag on camera. As I was mixing together the dough, it wasn't forming a stable dough(it was liquidy), so I wondered whether this going to be a failed recipe. That same thought crossed my mind when I was kneading the dough. Maybe it was my ego speaking but with enough patience and persistence, you can successfully knead any dough. It just takes a lot of time- and flour. It took longer to knead the dough than to actually cook the matzo. Matzo needs to be baked for a short amount of time(3-4 minutes) at a very high temperature(475 degrees Fahrenheit), which will turn your oven into a hot kitchen that is not unlike conditions you would see in a professional kitchen in the middle of a dinner service. I was definitely sweating throughout the recording of this video. It also didn't help matters that my kitchen has no air conditioner(yet). The color of the locust powder(a slightly lighter hue than cocoa powder) made it look like I was kneading s**t on my kitchen counter! Yes that thought crossed my mind. Normally, when I make bread, I usually use a quick bread recipe(except for that rainbow bread I made last summer- that recipe involved yeast). I don't knead dough often, so I had to remember how to do it based on previous experiences, like with the chocolate pasta. I would definitely cook insects again in the future. Once you get your biases set aside, insects don't taste horrible. They're just an acquired taste. That's all. Makes 15 thin matzo crackers HELPFUL LINK: Locust Powder- http://www.thailandunique.com/locust-flour-powder You will need: A large bowl A rolling pin A fork A baking tray Parchment paper For the matzo: At least 3-4 cups of all-purpose flour 1 1/3 cups of water(the ratio of flour to water is 2:1 and I just realized I calculated incorrectly when I made the matzo. For 2 2/3 cups of a powder, you need 1 1/3 cups of water, not 1 2/3 cups, like I used in the video. Maybe that's why I had to use so much extra flour. Sorry!) 2/3 cups(100 grams) of locust powder(see helpful link) 2 tbsp. of olive oil(to reduce the taste of the insects in the final product, use a fat or oil of some kind) Butter, peanut butter, or jelly to top the matzo(highly recommended) 1. Pour all ingredients into a large bowl. 2. Stir all the ingredients together until you get a solid, cohesive dough. 3. Flour your surface(ex. kitchen counter) with flour and pour the dough onto the surface. 4. Knead the dough until you get a firm dough ball that isn't sticky to the touch. It took me 20 minutes to fully knead the dough, but your mileage may vary. At least it's a good arm workout! 5. Break the dough into egg-sized dough balls. 6. Flour your surface and flatten each small dough ball using a rolling pin until the dough is very thin. Make sure the dough doesn't stick to the rolling pin! 7. Line a baking tray with parchment paper and put the flattened matzo dough onto the paper. The dough isn't going to expand in size during the cooking process, so it's OK to space the matzo dough pieces close together. 8. Poke holes in the flattened matzo dough with a fork so that the matzo doesn't puff up during the cooking process. 9. Bake in a 475 degree Fahrenheit preheated oven for 3-4 minutes. 10. Top the matzo with peanut butter, jelly, or butter. It will taste better. Or you can make matzo brie out of the matzo(suggested site on how to do this: http://allrecipes.com/recipe/16045/matzo-brei/. 11. Bon appetit!
2 Comments
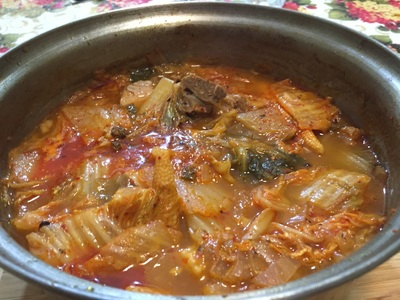
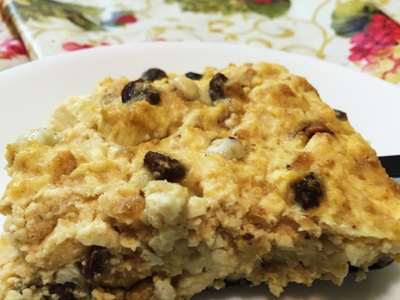
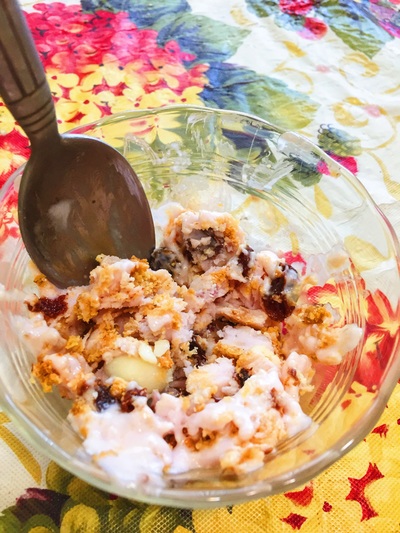
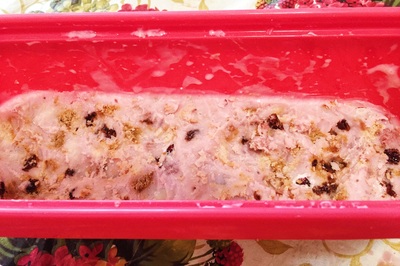
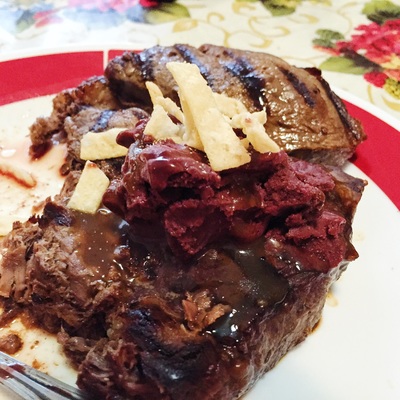
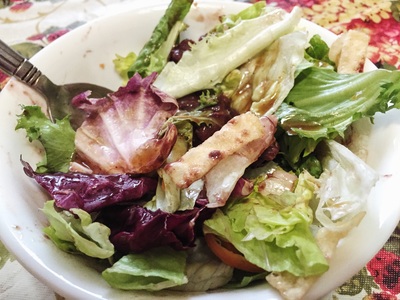
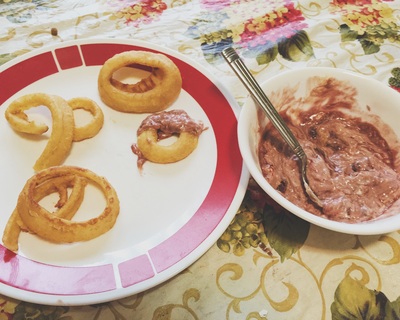
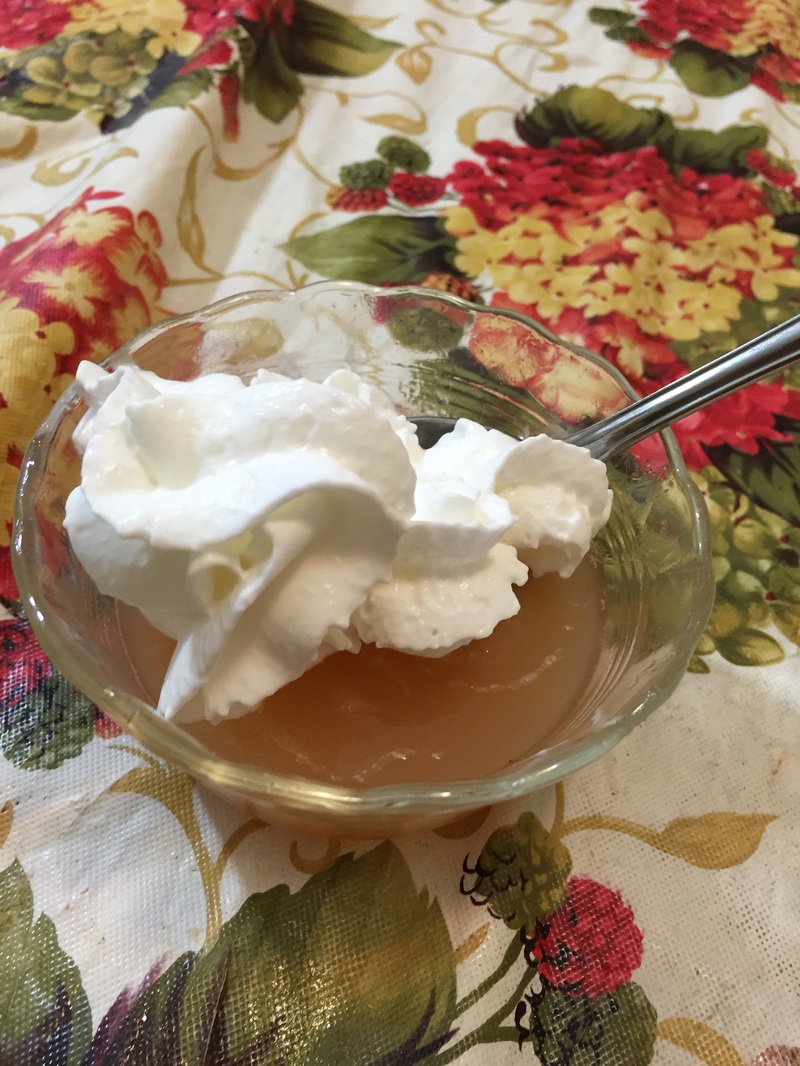
Please forgive my raspy voice in the video! I was under the weather! You might be wondering why, out of all of the parts of a pig you can eat, did I choose neck bones? That part of a pig is hard to find unless you go to a gourmet supermarket, even though it's one of the cheaper parts of a pig you can buy(I bought my pound of pork neck bones for a little over $2.00). That wasn't the part of the pig I was originally going to use though. When I went to the gourmet supermarket, I was in pursuit of pork belly, but it turns out pork belly is one of those types of meats where it's best served for occasions(like big family gatherings) where at least 6 people will eat it since the smallest pork belly available was 3 pounds(butchers can't cut the pork belly for you any smaller, apparently) and there are only 2 people in my household left. So I bought pork neck bones instead, not knowing what I was going to do with them. I did want to make a kimchi stew though and I learned in my Intro to Korean Culture class in college that the Koreans eat cold food when it's cold outside(i.e. winter) and hot food when it's hot outside(i.e. summer), unlike Western civilization, where the only time frozen desserts are trending is between the months of May-August, barring any wacky egg waffle cones in NYC that all of a sudden go viral on Instagram. My purchase of the kimchi has its own story though. I bought this particular jar of kimchi at a Korean supermarket(H Mart) that isn't even in the county I live in. It turns out you can buy pounds of kimchi there! I've never seen so much kimchi in my life at one time! The smallest amount that kimchi came in was 13 ounces, so I bought that. Even that amount of kimchi made the liquid in the stew not palatable, though the meat fills you up anyway. I didn't find perilla leaves at H Mart though, although I noticed lime leaves and sesame leaves, but those two types of leaves are similar to mint, which I loathe(unless it's in Indian food). I also used black garlic in this stew, which is basically caramelized garlic. My dad treated it like regular garlic and insisted I not use the entire bulb of garlic in the stew, for fear of the black garlic overpowering the flavor of the stew. But that didn't happen, for black garlic doesn't taste like regular garlic- it's a little sweet and a little savory. Plus, you can eat entire bulbs of it as an energizing snack(according to the bag the black garlic came in)! Yet somehow on my journey to H Mart, I forgot one ingredient in the stew: soybean paste. I probably could've found it had I looked hard enough. I didn't have miso paste either, let alone ever tried miso. To sum it up, I had no pastes whatsoever in my pantry, so i saw a suggestion online that mixed mayonnaise and tomato paste together. Guess what? I didn't have tomato paste, but I did have mashed purple yam that I bought at a small local Asian grocery(that is from the Philippines actually), so mashed purple yam it was. When I read the directions for the recipe I was (sort of) following, http://www.maangchi.com/recipe/gamjatang, I took a double take when it said to pretty much boil the stew for 2 hours. I've never boiled anything for that long, though I have simmered dishes for a lot longer than 2 hours. On several occasions, the liquid evaporated so much that I ended up needing to add an additional 4 cups of water to the pot so that my end result would actually be a stew and not just a bunch of clumped up kimchi and pork neck bones. You may have noticed in the video I used cinnamon in lieu of ginger. That's because I hate ginger. Also, you might be wondering why I actually used a red pepper paste when I have mentioned in the past that I despise red bell peppers. The reason is that the only form I will eat red peppers is in sriracha or gochujang(brown rice red pepper paste), maybe because of the fact I like most Asian ingredients(except for wasabi and ginger). The best part about the stew was the pork itself. The meat practically fell off the bone during all that boiling, and I gotta admit that that pork was the best pork I've ever tasted. It reminded me of a German pork cutlet for some reason(don't ask me why). My dad loved the pork but he hated everything else about the stew, saying it was too spicy for his liking. Makes 5 bowls of stew You will need: For the cooking equipment: A large bowl A large saucepot A colander For the stew: 1 pound of pork neck bones, soaked in cold water for 2 hours at room temperature(don't be alarmed by the red blood that ends up coloring the water) Enough water to fill a large saucepan 3/4 of a way to the top + 4 additional cups of water to add during the boiling process Cinnamon or ginger 1-2 cloves of black garlic(not bulbs) or garlic 2 tbsp. of soybean paste or 2 tbsp. of mayonnaise and 2 tbsp. of mashed purple yam(or tomato paste), or 2 tbsp. of miso paste 1 tbsp. of gochujang(Korean brown rice red pepper paste) 1/2 an onion, diced Pinch of cinnamon Pinch of salt Pinch of black pepper 15 ounces of drained sweet baby corn 13 ounces of kimchi Basil or perilla leaves Garlic bread or wonton strips to have with the stew(optional) Glass of milk to quell the spiciness(highly recommended) 1. Boil enough water to fill a saucepot 3/4 of the way to the top. Once the water is boiling, add your cinnamon or ginger and put the pork neck bones into the water. Let the meat cook in the saucepot for 5-7 minutes. 2. Drain the liquid out through a colander. You won't be needing that liquid. 3. Remove the excess fat from the pork neck bones. The fat is the pieces of the meat hanging off of the bone. There may not be that much excess fat to remove. 4. Break the bulb(s) of black garlic into cloves and remove the black stuff(the black garlic) from the skin of the bulbs. You won't be needing the skin in the stew. 5. Mix the mayonnaise and mashed purple yam(or tomato paste) together in a small bowl(if you don't have soybean paste or miso paste). 6. Clean your saucepot and fill it up with enough water 3/4 of a way to the top Boil that water. 7. Once the water is boiling, put the pork neck bones, black garlic, purple yam (or tomato paste)mixture(or soybean paste or miso paste), gochujang, 1/2 a diced onion, pinch of cinnamon, pinch of salt, and pinch of black pepper into the saucepot. Mix all the ingredients together so that the paste and garlic, along with the rest of the ingredients, are distributed evenly among the stew. 8. Lower the flame to a medium high heat and let the stew boil for 90 minutes. If you see the liquid going down a lot, add 1 cup of water at a time to fill it back up. 9. After the 90 minutes, add the baby corn, basil(or perilla leaves), and kimchi to the stew. Make sure the kimchi doesn't clump up in the saucepot. 10. Cook the stew on medium high heat for an additional 30 minutes. Again, if you see the liquid going down a lot, you can always add more. 11. Serve with garlic bread or wonton strips, and a glass of milk(highly recommended). Bon appetit! From first glance of the photo on the right, this doesn't look like a meatloaf at all. I'll admit that it got very flattened, but I think it was because I put too much lemon juice in the mixture(in terms of meatloaf liquids, I normally use 1/2 cup per 1 pound of meat or tofu, but this time I used almost 1 cup of liquid(1/3 + 1/2 = 5/6, and I did that all in my head, which amazes everybody at my day job)). But hey, they smelled like cookies when they were baking in the oven. My dad said this is more of a dessert than a dinner, even though he liked the meatloaf when he tasted it. I guess this is what you get for having a cooking channel totally unlike anything else on YouTube(or the Internet, for that matter, seriously.). The food I make usually has nothing to do with the current Instagram food trends(which as of April 16 are egg donuts, giant milkshakes meant for at least 5 people, rainbow bagels, ramen burgers, and sushi burgers), but that's because I beat to the sound of my own drum, figuratively speaking. Sure this may lessen the chances of people on the Internet ever stumbling upon this channel, but I do me and you do you(I forget the song this phrase comes on but I keep hearing it on the radio on my way to work, if you know what the song is, please do tell in the comments box below). I thought I was going to run out of all my Girl Scout cookies after this recipe, but it turns out I have 9 Savannah Smiles cookies and 5 Rah Rah Raisins cookies left, but I'm torn between 3 options: A) Pan-fry some of the cookies for a future video B) Crush all remaining cookies and make a bread out of it C) Just eat them as is. If you are actually reading this blog post and want to tell me which option you'd like me to do, please do tell in the comments box below. I was never understood throughout my childhood, adolescence, and college years by my fellow peers. But I just don't know why everybody wants to follow the trendsetters who post food they make. I mean, who gave them the right to rule the food part of the internet anyway!? Is it just because they wear makeup, have a sweet voice(for the record, my voice may be scratchy in the next one or two videos because I'm getting over a sore throat that turned into a sinus infection), and look pretty(I haven't worn makeup since I was 15, and I'm not going to put chemicals on my face just to appease other people)? Enough ranting. Here's the recipe for this meatloaf: You will need: For the cooking equipment: 1 Lasagna Pan Nonstick cooking spray Large bowl For the meatloaf: 2/3 tbsp. of onion powder 2 beaten and whisked eggs 1/2 cup of Greek-yogurt covered cranberries 1/2 cup of raisins 1 tbsp. of lemon zest 1/3 cup of lemon juice(you probably should reduce that amount to 1 tbsp. if you don't want a flattened meatloaf) 1/2 cup of strawberry Greek yogurt 1/2 cup of crushed up Savannah Smiles Girl Scout Cookies(about 8 cookies) 1/2 cup of crushed up Rah Rah Raisins Girl Scout Cookies(about 4 cookies) 1 pound of chopped, drained, crumbled up, firm tofu 1. Put all ingredients into a large bowl. 2. Mix all the ingredients together until you get a meatloaf mixture that is firm, to your liking. As Frank Sinatra once said in the song "New York, New York", "It's up to you!... 3. Spray a lasagna pan with nonstick cooking spray. 4. Form 2 loaves. 5. Bake in a 350 degree Fahrenheit preheated oven for 40-45 minutes. 6. Bon appetit! A few weeks ago, I was walking out of my local supermarket when I saw Girl Scouts at a booth selling Girl Scout Cookies! I saw an opportunity to introduce some lesser known Girl Scout Cookies, Savannah Smiles(a lemon shortbread cookie) and Rah Rah Raisins(an oatmeal raisin cookie with the addition of Greek yogurt-covered raisins) to the world by incorporating them in a couple of recipes, like this frozen yogurt recipe. You might be wondering if I was ever a Girl Scout as a kid. Yes I was, up until age 11. My fondest memory was falling on my butt at an ice rink at a sports center that has since been demolished and replaced by an LA Fitness that I was a member of when I was in college. My troop was doing a Try-It badge about ice skating. I also remember showing my troop my collection of Beanie Babies when we did a Try-It on collections, building and painting a birdhouse that I still have to this day, and buying fabric from a sewing store for a badge on sewing as a Junior Girl Scout(My mom and I hated that particular badge so much!). As for my selling skills with regard to Girl Scout Cookies, well, I sucked at it. My only sales channel was my family and my dad's coworkers(who it turns out had daughters or granddaughters who were also selling cookies). This was before you could set up an online store on an Girl Scout app(I was a scout until 2002). Girl Scout Cookies are so ubiquitous that you can find flavors of the most popular ones in products sold by other companies! Some examples include Breyer's Ice Cream(there's Samoas Ice Cream, Thin Mints Ice Cream, and possibly Tagalongs Ice Cream) and Chewy Granola Bars(flavors are Samoas and Thin Mints). I love all Girl Scout Cookies- except for one flavor: Thin Mints! Even when paired with chocolate, I still have a disdain for mint flavored food. Frankly, mint should be relegated to toothpaste. I don't like being reminded of toothpaste when I eat a cookie. It turns out Savannah Smiles cookies were introduced in 2012 and Rah Rah Raisins cookies in 2015. When I was coming up with this recipe, I knew I wanted to incorporate all the elements of the contents of the cookies, as well as the cookies themselves. I only have one box each of the two flavors of cookies, so I needed some sort of filler for my frozen yogurt. I chose strawberry Greek yogurt because the color of the box of Rah Rah Raisins was pink, just like this particular yogurt flavor. Although if you wanted to be true with the actual cookie, you could use plain or vanilla yogurt instead. Boring! Also, Rah Rah Raisins don't have cranberries in them, but that was the first thing I grabbed when I was at the supermarket. When I was making the frozen yogurt, I assembled the ice cream maker the wrong way, with the top of the churning mechanism on the bottom and not the top, where it is intended to go. So it was more difficult to put the contents of the frozen yogurt into the machine. The yogurt wasn't churning so after 11 minutes, I just decided to mix the raisins, Greek yogurt-covered cranberries, and crushed cookies together in a large bowl. Then I just poured the mixture into the ice cream tub and I let it freeze overnight. Yet I still got the same result as I would've gotten had I not screwed up my assembly of the ice cream maker- a frozen yogurt that may be hard to scoop out(but that was also the case with the Kimchi Ice Cream, when I properly assembled the ice cream maker) but is really delicious. Even my dad liked it and that's saying a lot from him considering his favorite ice cream flavor is vanilla! You will need: For the cooking equipment: A large bowl Plastic wrap An ice cream maker(it also can make sorbets and frozen yogurt, so don't get discouraged by the name of this type of machine) A 1-quart ice cream tub For the frozen yogurt: 3 cups of strawberry Greek yogurt 3/4 cups of white granulated sugar 1/3 cup of lemon juice 1 tbsp. of lemon zest 1/4 cup of raisins 1/4 cup of Greek yogurt-covered cranberries 4 crushed up Savannah Smiles cookies 4 crushed up Rah Rah Raisins cookies 1. Put the first 4 ingredients in a large bowl and mix everything together so that the juice is distributed evenly among the mixture. Make sure the mixture isn't watery! 2. Cover the large bowl with plastic wrap and let it chill in the fridge for 45 minutes. 3. Assemble your ice cream maker correctly!!! 4. Turn the ice cream maker on and pour the yogurt mixture into the maker. Let it churn for 11 minutes, or according to your ice cream maker's manual. 5. After 11 minutes, add the rest of the ingredients while the ice cream maker is churning(if you assembled your machine correctly). 6. Let the ice cream maker churn for an additional 9 minutes, or according to your ice cream maker's manual. 7. After the 9 minutes, pour and spoon out the frozen yogurt mixture into the ice cream tub. 8. Cover the lid of the ice cream tub and put the tub in the freezer for at least 2 hours or overnight. 9. If the frozen yogurt is too hard to scoop out, let it sit at room temperature for a few minutes to soften it up. 10. Bon appetit! When I tried eating my Kimchi Ice Cream for dessert at 10 PM one night, I just couldn't eat it because the ice cream wasn't sweet at all. It was more savory and spicy than sweet. So I thought that there's got to be a way to use ice cream for savory purposes. When I think of crazy food trends, I think of modernist cooking(which is basically cooking recipes in new, innovative ways- kind of like this channel). So I found this link for an ice cream salad(https://www.chefsteps.com/activities/savory-ice-cream-salad) and an ice cream salad dressing that I turned into a dip for onion rings(http://chindeep.com/2015/02/06/ice-cream-salad-dressing/). As for the idea of putting ice cream on top of a sirloin steak, that was an idea I couldn't find anything anybody else had done before, considering most people wouldn't consider ice cream on top of a salad and an ice cream dip with onion rings to be a complete meal. But I had always wanted to cook a steak at home, and I had the opportunity to do that when my extended family's original Easter plans were postponed due to several family members coming down with the flu. So it was just my dad and I at home on the Saturday before Easter 2016, eating steak that I made. But by looking at the pictures above, you may notice there is some purple stuff on top of the steak that definitely doesn't look like Kimchi Ice Cream. That's because it isn't. My original plan was to use Kimchi Ice Cream as the ice cream for this video but it went bad before I had the opportunity to use it in this video. Apparently, even kimchi goes bad, especially when it is frozen. But I did have some Acai Sorbet that I bought from Whole Foods that on its own, isn't very sweet at all either. Besides, anything purple on top of a sirloin steak would command anybody's attention. I like experimenting with recipes that have opposite flavors, like cold and hot food together on one dish(i.e. sorbet and steak). The making of the Ice Cream Dip and Ice Cream on top of a salad were the easier for the three recipes in this video. With the former, all you have to do is mix the ingredients for the dip together and the latter only involves putting ice cream on top of salad greens with some other fixings. My dad said the dip tasted more like peanut butter than acai sorbet but my taste buds would have to disagree- to me it tasted like a combination of peanut butter, apricot jam, and fruitiness from the sorbet, with the mayonnaise making the dip very creamy. It turned out the acai sorbet pairs well with the Asian flavors, even though Acai is a Brazilian fruit. In that case, one could consider the Ice Cream on a Salad to be a fusion dish, which is always all the rage in the food industry. As for the Ice Cream on top of a Sirloin Steak, that was more difficult because you can't just slap some ice cream on top of raw meat! You need to cook the meat first. This was my first time grilling steak ever(although when my mom was still around, she grilled steak on a George Foreman grill, albeit not that often). The directions I found on how to cook a sirloin steak on a George Foreman grill(http://foremangrillrecipes.com/steak-recipes/easy-sirloin-steak/) called for the steak to be grilled for 6-9 minutes for a medium steak. Well after 9 minutes, the steak was still raw and to be fair, the steak was very thick. I should've tenderized the steak first to make it less thick but my dad said it wouldn't have made a difference in terms of the cooking duration for the steak. In order to determine if a steak is fully cooked, you need to have a meat thermometer to measure the internal temperature of the steak. My original intention was for the steak to be medium, which means the center is light pink. But my dad freaked out when he saw a very pink center around the 13 minute mark(I'm assuming he thought pink steak == pink chicken, when it really isn't because the latter can get you sick, not the former). The steak at that point was 133 degees Fahrenheit internally, which made it medium rare. So he urged me to put it back on the grill for 2 more minutes, which turned the steak into a well-done steak that was brown on the inside, with an internal temperature of 162 degrees Fahrenheit! You need to watch your steak, people! A well-done steak is brown on both the inside and outside. Not ideal, but safer than eating a raw steak. Such a steak just requires more elbow grease to cut it up and more time to chew. My dad said the steak was so good, we should have a steak dinner again some time! You will need: Ice Cream Dip For the cooking utensils: A small bowl For the dip: 1/4 cup of your favorite ice cream or sorbet(I used acai sorbet), softened 2 tbsp. of apricot jam(or any jam) 2 tbsp. of creamy peanut butter 2 tbsp. of mayonnaise Onion rings or tortilla chips for dipping 1. Mix the first 4 ingredients together in a small bowl until well combined. 2. Use the onion rings or tortilla chips for dipping. Or just eat the dip out of the bowl. Either way, bon appetit! Ice Cream on top of a Salad For the cooking utensils: A small bowl For the salad: 2 cups of salad greens Wonton strips 1/4 cup of your favorite ice cream or sorbet Asian dressing to taste 1. Toss all ingredients together until the sorbet or ice cream is melted evenly among the salad. 2. Bon appetit! Ice Cream on top of a Sirloin Steak For the cooking equipment: A pastry or grill brush A George Foreman grill A meat thermometer For the steak: 1 lb. sirloin steak Olive oil Salt Black Pepper Pinch of Garlic Powder 1/4 cup of your favorite ice cream or sorbet Wonton strips(optional) Garlic powder(optional) Asian dressing to taste 1. Brush the steak with olive oil on both sides. 2. Rub the salt, black pepper, and garlic on both sides of the steak. 3. Once your grill is preheated, put your steak on the grill and close the lid of the grill. Let the steak grill 6-9 minutes for a medium steak. 4. At the 9 minute mark, remove the steak from the grill and measure the internal temperature of the steak. If it isn't at least 140 degrees Fahrenheit internally, put the steak back on the grill for another minute or two. 5. Once the steak is at least 140 degrees Fahrenheit internally, remove the steak from the grill and serve on a large plate. 6. Top steak with ice cream or sorbet, Asian dressing, garlic powder(optional), and wonton strips(optional). 7. Bon appetit! This recipe might be the smelliest one yet- when I opened the bottle of kimchi juice for the first time, I was immediately hit with the smell of garlic. My dad smelled the juice and he said it smelled horrible. That should've been an omen to what was to come when I made this disgusting jello. The taste of the jello is very sour initially and then you're hit with a spicy, burning sensation in your mouth. You try to keep eating the jello but then you realize that all the whipped cream in the world can't make this jello palatable so you dispose of all of it, along with the remaining kimchi juice. That's my experience with eating this recipe in a nutshell. I was initially panicked at first because I didn't sprinkle the gelatin into a liquid and let it rest for 3-5 minutes. So the tops of some of the small bowls with the jello in it were a bit powdery, so I drained the liquid through a colander so it wouldn't be so powdery anymore. Surprisingly, that made the jello set faster than the bowls that didn't get drained. But by the 3-hour mark in the fridge, all of the jello was set. So moral of the story: let the gelatin do its thing. It may have looked like I enjoyed eating this jello in the video, but after I stopped recording, I realized how disgusting this jello was. I gave this jello one more chance, thinking it would magically turn palatable overnight in the fridge, but alas, that was not to be. If I did learn one thing from trying this recipe is this: not all juices are tasty. This recipe is simple though- it only requires three ingredients: kimchi juice, unflavored gelatin, and whipped cream(highly recommended). I got my inspiration for this recipe from https://crystalchild.wordpress.com/2011/02/20/apple-juice-jello/. Makes 2 cups worth of jello. You will need: A small saucepan 4 small bowls Plastic wrap Colander(if necessary) For the jello: 1 1/2 cups of kimchi juice(link on where you can get so much of this stuff: http://shop.goldminenaturalfoods.com/GOLD-MINE-ORGANIC-FRESH-RAW-KIMCHI-JUICE-32-OZ/productinfo/1904%2D1900/) 1/2 cup of cold kimchi juice 1 packet of unflavored gelatin Whipped cream to go on top of the set jello(highly recommended) 1. Put 1 1/2 cups of kimchi juice into a small saucepan. Put the stove on medium heat. 2. Heat the juice until you see bubbles around the edges of the saucepan. DO NOT BOIL THE JUICE! Boiling destroys gelatin's ability to set, making the use of this ingredient null and void. 3. Lower the heat when you see bubbles around the edges. 4. Add the 1/2 cup of cold kimchi juice. 5. Sprinkle the unflavored gelatin all around the top of the juice. Stir the gelatin into the juice until it's fully dissolved, which might take a couple of minutes. 6. Pour the mixture into 4 small bowls. Make sure to put newspaper underneath the bowls when pouring. 7. If it looks like the tops of the mixture in the bowls is powdery, drain the mixture through a colander and back into a bowl. This should do the trick. 8. Cover the bowls with plastic wrap and let the jello set in the fridge for 2-3 hours. 9. Top the set jello with whipped cream. You'll probably need it. Bon appetit? A few weeks ago, I visited a local supermarket that specializes in meats, and when I say "specializes in meats", I mean that they sell animal parts(It's called Giunta's Meat Farms(not an Asian supermarket)) that you cannot find in traditional supermarkets. Here's a list:
I keep a lot of lists on my phone for potential future videos, and yes, I'd like to make videos of dishes featuring each of the above ingredients- except for veal brains because my dad won't let me eat it for fear of Mad Cow Disease, even though veal brains are perfectly safe to eat since they come from cows younger than 3 weeks old. I'd be safe to assume that you can't stomach the thought of eating a baby cow's brain and would wish it the brains would be relegated to Fear Factor(a now cancelled show featuring people eating disgusting animal parts for money). I've figured out that people make up palatable names for animal parts that are disgusting to eat. Here's a list:
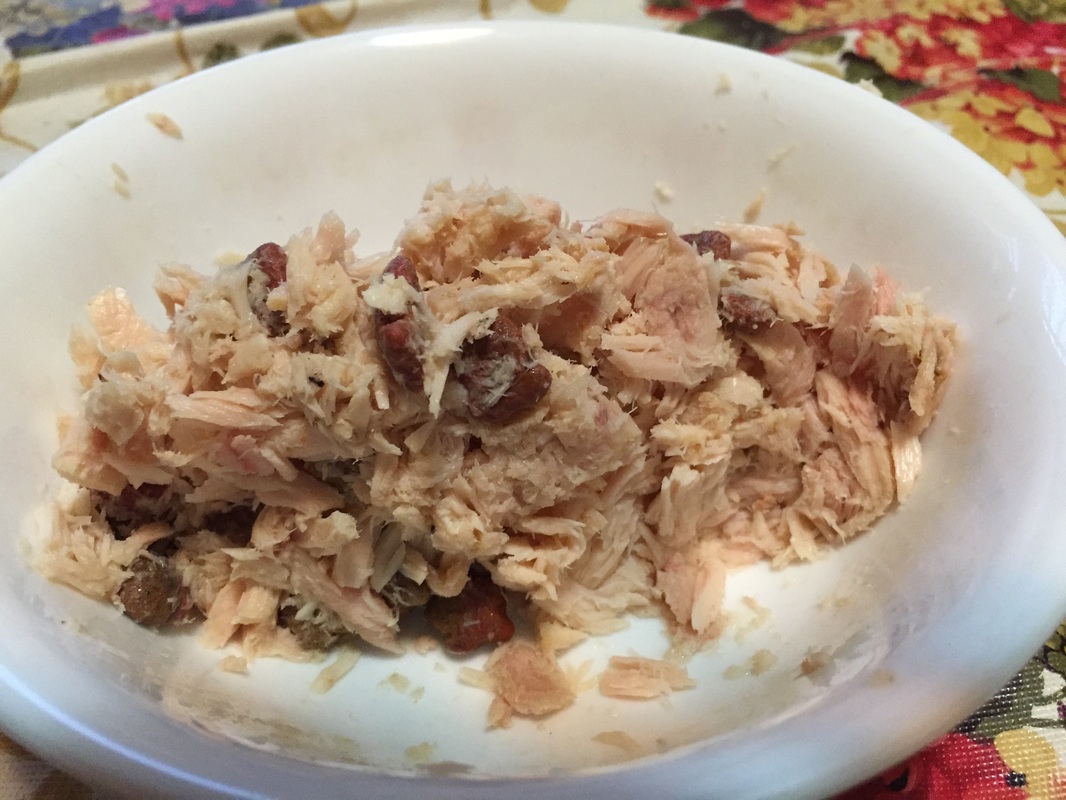
To me, none of these things sound unappetizing. But then again, my family is full of picky eaters and apparently that gene has skipped a generation in myself(but not my sister. She thought lamb broth was gross when I mentioned it to her.) The world would be a better place if people could put their biases and fears to the side and just try new foods like offal. My dad couldn't put his biases and fears to the side when I offered him some of this chicken foot soup I made, for he refused to try it. He keeps making futile efforts to turn me into a vegetarian by telling me how I would feel of space aliens ate my [insert disgusting body part I have tried]. That 's not going to turn me into a vegetarian. I admit, it was weird trimming the nails off of the chicken feet. But I would do it again if I made this soup again. Now the package didn't say if these chicken were grass-fed, so they probably have stepped in s***, which is why you should thoroughly was the chicken feet in cold water after trimming the nails. One of the many weird things about this soup was the fact that if you store it the fridge as leftovers, the soup turns into jelly due to the collagen in the bones, as well as the bones of the chicken itself. But if you don't like eating jelly with chicken feet in it, just microwave it for a minute and that jelly will turn back into liquid. Eating the chicken feet is a feat(no pun intended) in itself- the feet are mostly bone, so your mouth has to maneuver around the bones to eat the edible parts. Sometimes I wish I had a bigger saucepan- I couldn't use 4 of the 17 chicken feet I had because I didn't have enough room to fit both them and the vegetables I put in. I was planning on using carrots but my dad ate them all before I could get a foothold(no pun intended) on them. The chicken feet and vegetables really fill you up, so much so that I can't eat the liquid that's remaining. But then again I found the liquid to be very bland anyway, even with myriad of spices I put in the soup. You might be wondering why I used Japanese Pumpkin in a Jamaican dish- it's because I bought it from that small local Asian supermarket I went to and I didn't want it to go to waste. Plus, actual orange pumpkins aren't accessible where I am in April and just using pumpkin puree that came from a can in your soup will only cause the puree to dissolve during the simmering process, which is kind of what happened to the flesh from the Japanese Pumpkin that I was able to scoop out(which wasn't a lot, to be honest. The Jamaican dish I found(http://jamaicans.com/jamaicanchickenfootsoup/) used pumpkin in the recipe, which is why this dish is Jamaican. You will need: For the cooking equipment: A large bowl A large saucepan Kitchen shears For the soup: 1-2 lbs. of skinned chicken feet(a link on how to skin chicken feet: https://www.youtube.com/watch?v=Wdwwd_1wpZg) 1 Japanese pumpkin(kabocha squash) 2 Plantains 1 diced onion Enough water to fill your saucepan halfway Pinch of cayenne pepper Pinch of allspice Pinch of garlic powder Pinch of oregano Pinch of black pepper Pinch of salt 1. Trim the nails off of the skinned chicken feet using kitchen shears. I tried using a knife but that didn't work. Put the trimmed chicken feet into a large bowl. 2. Rinse the bowl of chicken feet with cold water. Remember, those feet probably stepped in s*** in their previous life. 3. Cut a Japanese pumpkin in half vertically. 4. Scoop the pulp and seeds out of the pumpkin halves. 5. If your knife is sharp enough, cut the pumpkin halves into 1-inch pieces. Otherwise, just spoon out as much flesh as you can out of the pumpkin halves. It's like removing the fruit from the inside of a mango or cantaloupe. 6. Cut the ends off of 2 plantains. 7. Make an incision on the top of each plantain and peel the skin off of the plantains. 8. Cut the plantains into 1-inch pieces. 9. Boil enough water in a saucepan to fill it up halfway. 10. Once the water is boiling, put the chicken feet and spices into the saucepan. Let the chicken feet boil for 20 minutes. 11. Add the plantains, Japanese pumpkin, and onion into the saucepan. Reduce the heat to a simmer. Let the soup simmer for 30 minutes. Stir the soup every 10 minutes. 12. Serve with wonton strips or garlic bread. Bon appetit! For as long as I can remember since I started this YouTube channel, I wanted to make a meatloaf for cats video, yet I couldn't figure out when to post the video. But I decided April Fool's Day would be a good time to upload this video. This is the first time I've made a recipe for other species, namely, cats. I've seen other recipes on the web about making a meatloaf for pets, like http://www.popsugar.com/pets/Homemade-Pet-Loaf-34073136 and http://www.food.com/recipe/rafaelos-meatloaf-for-cats-96637. But both of these recipes require you to bake the meatloaf in an oven, just like any other meatloaf recipe for humans(except for the Caviar Twinkie Meatloaf one). My cats aren't used to eating hot food, plus they hate beef and turkey. The only meats they will eat are tuna and chicken. Those two recipes in the links, theoretically, could be eaten by humans, although it would be very bland to us. I'm not so sure human beings will want to eat my meatloaf for cats- I used cat treats in it as the meatloaf binder. The amount of tuna my cats ate from this meatloaf(a little over an ounce per cat) is probably the most amount of tuna they'll get to eat in one setting, for tuna is also a treat for my cats. I should note that you should crumble up the meatloaf slices before serving it to your cat(s) since cats have small jaws. I once read somewhere that cats don't judge the food they're given based on sight. Instead, they judge food based on if it smells good to them(and cats have a much better sense of smell than people do). So to make the meatloaf more appealing to your cat(s), you should try to use dry cat treats that are the same flavor as the meat you're serving them. Come on, even people don't have chicken AND tuna in the same meal, so why would we expect our 4-legged friends that purr do!? Even I know chicken and tuna don't mix. This is a stupidly simple recipe. You will need: For the cooking equipment: A can opener A small bowl For the meatloaf: A 5-ounce can of tuna or chicken Enough dry cat treats(preferably of the same flavor as the meat) to form a loaf 1. Open your can of tuna or chicken using a can opener. If your cats are like mine, they run to the sound of the can opener being used, so this will entice them to come into the kitchen(cats do have a better sense of hearing than people too). Plus you might get a few meows out of them, even from your most silent cats. 2. Drain your opened can of tuna or chicken. 3. Combine the tuna or chicken and dry cat treats in a small bowl to form a loaf. 4. Divide the meatloaf into smaller portions, depending on how many cats you have(i have 3). I put the meatloaf slices onto little plates. Make sure to crumble the meatloaf to accommodate feline jaws. 5. Serve the crumbled up meatloaf to your cats. Bon appetit(for you cats anyway)! |
Archives
October 2019
Categories
All
|



 RSS Feed