|
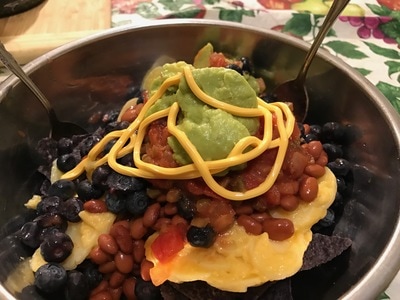
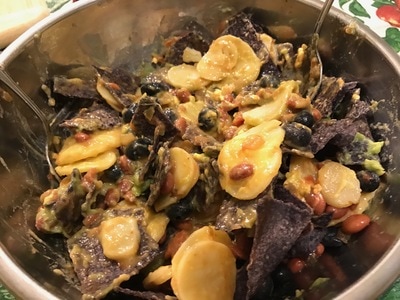
I think this video might be one of the shorter ones of mine ever- it's less than 3 minutes long! But that's because this recipe is so easy- you basically put all 7 ingredients in a bowl and mix them up. That's it. The smell and taste of these nachos reminded me of something I would get at a Chipotle! The thing that surprised me most about this recipe was that the tortilla chips lost their crunchiness with all the liquid ingredients mixed in. My dad even suggested that nachos are meant to be something you dip tortilla chips in! Yet it was still delicious and he agreed. But this recipe wasn't my idea- it was suggested by one of my subscribers(I think)- Paula C! Thank you, Paula for the great suggestion! This is actually the first video that is a viewer-requested recipe and I hope to do more of those in the future. You will need: For the cooking equipment: A large bowl For the nachos: Blue tortilla chips(which are actually purple in color) Potatoes au gratin(which is yellow but fries work too!) Pink beans(technically, pink isn't a color of the rainbow, but I think it should be a part of it) Blueberries Salsa(I used mild salsa, for I can't stand anything spicier than that) Guacamole(you guessed it- it wasn't the spicy type I used!) Cheddar spray cheese(which is orange) 1. Put all the ingredients into a large bowl. Mix them all up. 2. Bon appetit!
0 Comments
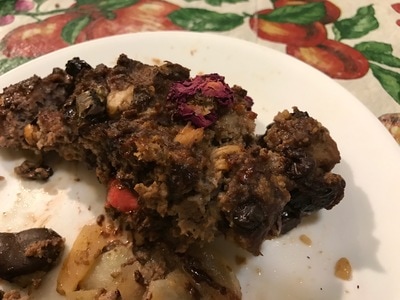
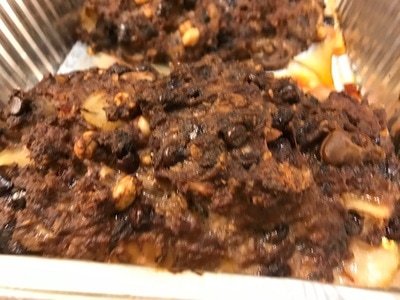
I'll repeat the warning I put in the beginning of this video again for this blog post: The following blog post is NOT political in any way whatsoever! The Meatloaf Princess doesn't reveal her political affiliation ever online. Food should never be political so please enjoy this blog post! It's sad that I feel I have to put this warning before this video which could be perceived as politically biased in one way or another, but the reality is we live in a Divided States of America in 2017. Of course, I expect lots of dislikes and people unsubscribing from my channel as soon as this video gets uploaded onto YouTube but I have no regrets making this meatloaf. I just love the variety of food that is served at any inauguration dinner, regardless what party the incoming POTUS is from. So I turned that variety into a meatloaf. You may realize I mention nothing political in this video as I make the meatloaf for you guys. That's because if I did say anything remotely political, my dad wouldn't approve and that would be the end of that video. So as far as I know, my dad doesn't read my blog posts so I can tell you guys I called this a "fancy American dinner" meatloaf as I was filming the video. So you might be wondering how I put all of these ingredients together into a meatloaf. Well here is the method behind my madness, or rather, my inspiration: the actual Inauguration menu released to the public(https://www.inaugural.senate.gov/imo/media/doc/luncheon-recipes.pdf) So here's the ingredients from each Inauguration recipe that I used in this meatloaf, course by course: Maine Lobster & Gulf Shrimp
Saffron Sauce
Peanut Crumble
Potato Dumpling
Grilled Seven Hills Angus Beef
Dark Chocolate Juniper Jus
Chocolate Souffle with Cherry Vanilla Ice Cream
Cherry Vanilla Ice Cream
Pink Cheese Sticks
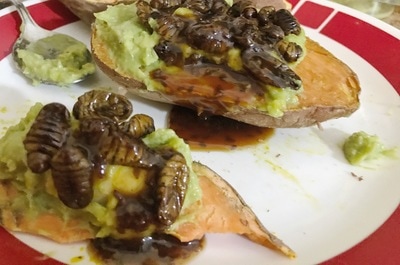
Yea, that's a lot of ingredients! So how did this meatloaf turn out? It was a mixed bag- the fava beans tasted really bitter but when you mash the beans up, the insides taste OK. It's just the outside of the beans that's bitter. I think I put too many peanuts into the meatloaf- everything else in it filled me up already. Plus I don't think beef and peanuts pair well together. Everything else tasted great! My dad said the fava beans ruined the meatloaf for him. :( He tasted the lobster and shrimp and so did I, just not during the video. The food-grade flowers were hard to chew, so they're best used in a broth before removing it. You might be wondering why I used a lobster tail and not a real live lobster to boil to death in a pot of boiling water- as much as I love meat, I don't want to be personally responsible for killing a living creature just so I can eat it as food. This is also why I don't hunt. I'd rather buy my meat already dead rather than alive and having to kill it. But surprisingly, 1 lobster tail provides a lot of meat! Speaking of lobster, I didn't realize that you're supposed to boil the water before putting lobster into the pot, but honestly, putting the lobster tail in the saucepot as it was being brought to a boil cooked the lobster tail just as well! So what is strawberry Jack cheese? It's a cheese stick that is pink in color(the strawberry powder gives the cheese stick its pink color). Strangely enough, I found this pink cheese at my local supermarket but see the HELPFUL LINKS on where you can get it online! I'd say this is the most amount of ingredients I've ever put into a meatloaf- 29 ingredients! HELPFUL LINKS: Juniper Berries: https://www.amazon.com/Spice-Hunter-Juniper-Berries-1-3-Ounce/dp/B004M1BEDA/ref=sr_1_7_s_it?s=grocery&ie=UTF8&qid=1485713848&sr=1-7& Edible Flowers: https://www.amazon.com/Pound-Dried-Rose-Buds-Petals/dp/B0019WCNPS/ref=sr_1_4_s_it?s=grocery&ie=UTF8&qid=1485713964&sr=1-4& Pink Strawberry Jack Cheese: https://www.cowcandy.com/shop/!/Pinkie-Pie-Strawberry-Jack-Cheese/p/77291596/category%3D0 You will need: For the cooking equipment: A large saucepot A seafood cracker or fork A large bowl Nonstick cooking spray A lasagna pan For the meatloaf: 1 thawed out lobster tail(I thawed the tail in a covered bowl in the fridge for 11 hours before cooking it) 8 juniper berries(see HELPFUL LINKS) 3-4 threads of saffron 1/4 cup edible flowers(see HELPFUL LINKS) Enough water to submerge the lobster tail 1 1/2 tsp. salt 2/3 tbsp. onion powder 2 beaten and whisked eggs 1/2 cup drained fava beans(or whatever type of bean you like) 1/2 cup peanuts(you can use less if you want) 1/2 cup dark chocolate chips 1/2 cup drained mushrooms 1/2 cup dried cherries 1/2 cup mashed butternut squash 1/4 cup red cooking wine 1/2 cup potatoes au gratin 1/4 cup fish stock 1/4 tsp. vanilla extract 1/4 tsp. hickory liquid smoke 1 chocolate mug cake Pinch of thyme Pinch of garlic powder Pinch of cayenne pepper Pinch of parsley Pinch of black pepper Pinch of salt 1 cup Rice Krispies 4 oz. drained shrimp 1 lb. 93% ground beef 2 strawberry Jack cheese sticks(see HELPFUL LINKS) 1. Put the first 4 meatloaf ingredients into a large saucepot. Pour enough water into the saucepot to submerge the lobster tail. 2. Bring the contents of the saucepot to a boil and cover the saucepot with a lid. 3. Once the contents of the saucepot are boiling, add 1 1/2 tsp. salt to the pot and reduce the heat to a simmer for 5-8 minutes. After cooking the lobster tail, remove it from the saucepot and discard everything else in the saucepot. 4. Put the next 23 ingredients into a large bowl. 5. Remove the meat from the lobster tail either with a seafood cracker(which I didn't have at the time) or a fork and your hands. The meat should be soft and white. Put the meat into the large bowl and discard the rest of the lobster tail. 6. Mix all the ingredients up until you get a firm mixture. 7. Spray a lasagna pan with nonstick cooking spray. 8. Form 2 loaves using 1/2 the meatloaf mixture. 9. Top each loaf with 1 stick of strawberry Jack cheese. Cover the cheese stick with some more meatloaf mixture for each loaf. 10. Bake in a 350 degree Fahrenheit oven for 60-65 minutes, or until the internal temperature of the meatloaf reaches 160 degrees Fahrenheit. 11. Bon appetit! Burns Night is coming up in Scotland on the 25th, so I figure I make a haggis meatloaf because when it comes to food, the first thing most people think of when they think of Scotland is haggis. When reading the ingredients of what comprises of haggis, most people may be disgusted:
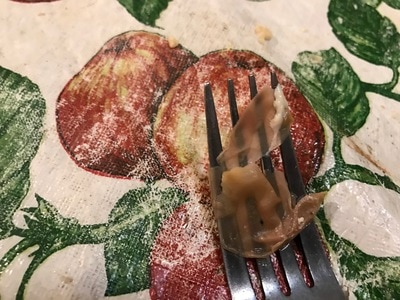
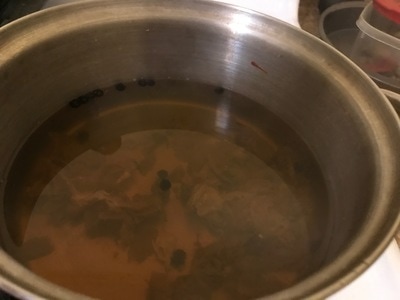
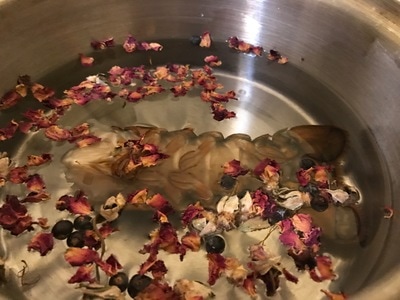
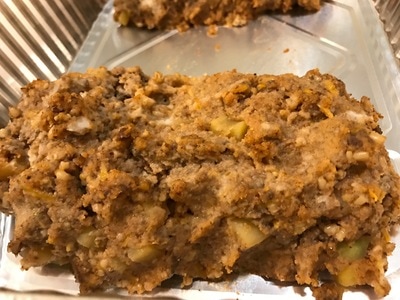
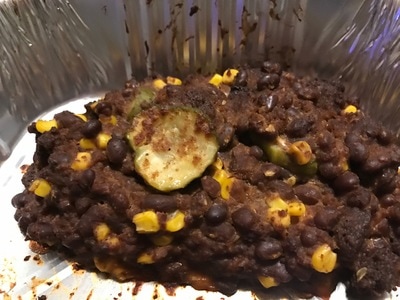
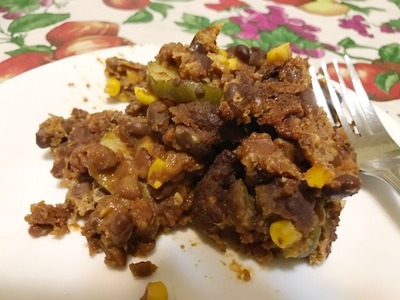
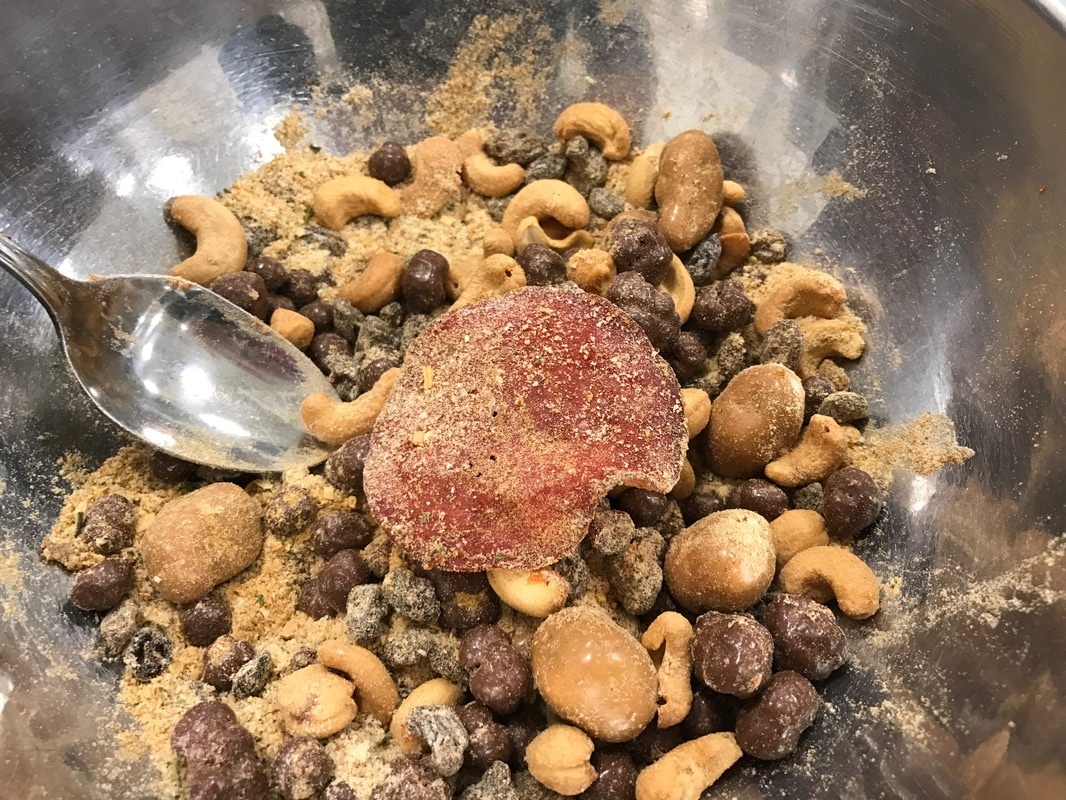
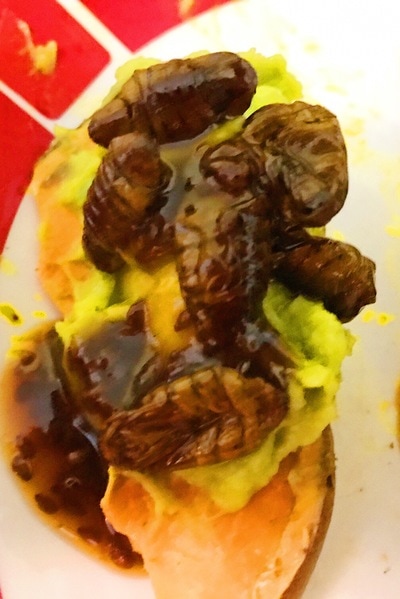
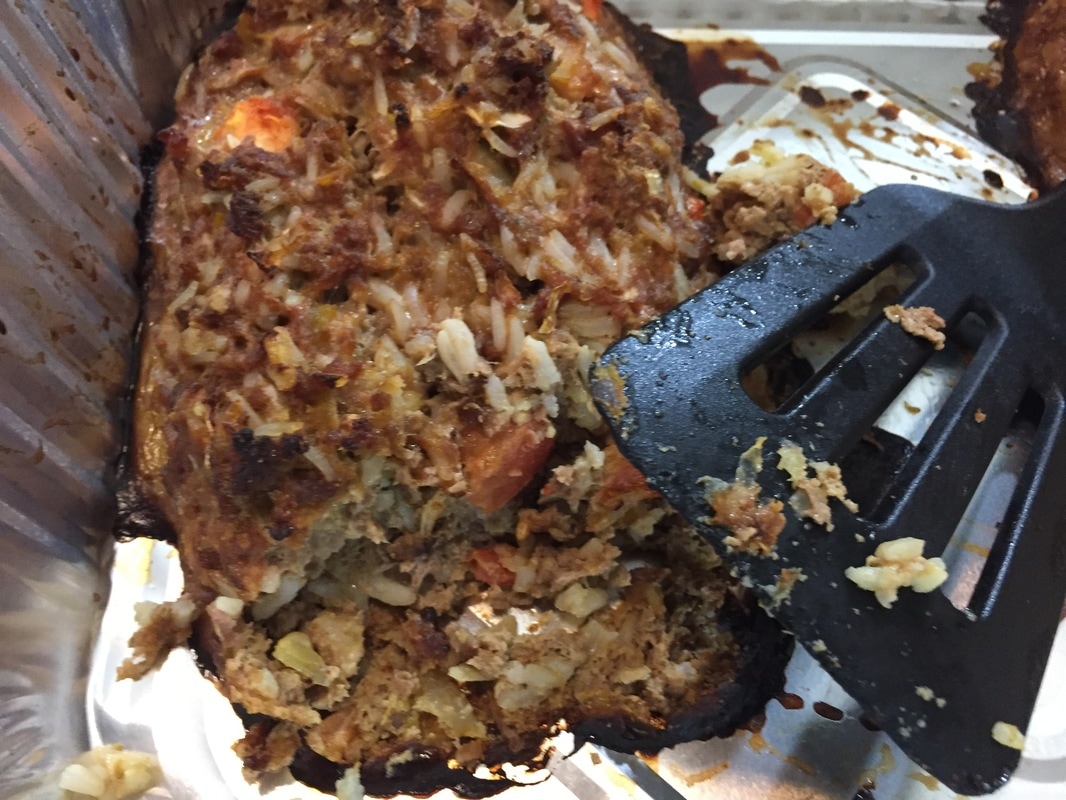
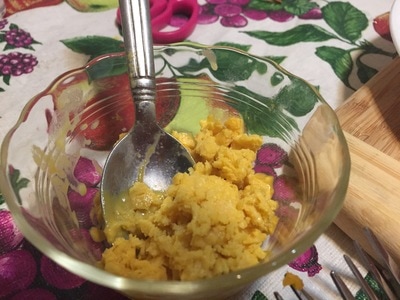
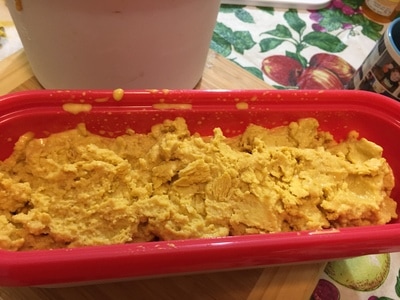
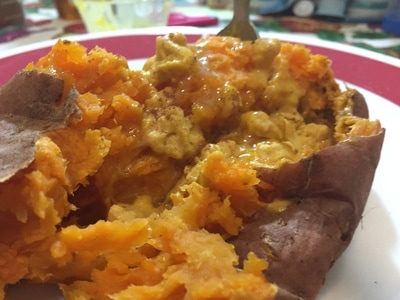
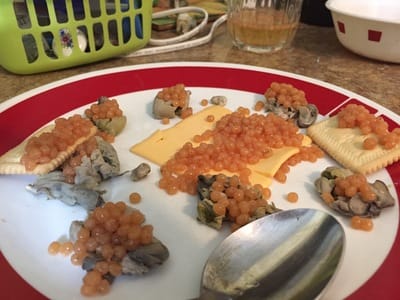
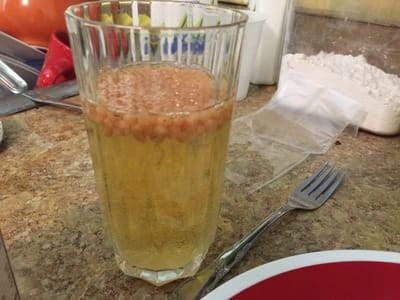
But in reality, it just tastes like the frankfurters you'd find in a can of spaghetti-O's, even though most people say it tastes nutty, but I didn't taste a hint of nuts in this meatloaf. As you can tell from the video, I am not Scottish, so I confused what neeps and tatties really are. You see, neeps are what us Americans know as turnips, not potatoes and tatties are potatoes(in American parlance), not turnips! Sorry guys. Why in the world did I use whisky BBQ sauce when BBQ sauce isn't even a Scottish creation!? Well, a 1/2 cup of an alcohol as strong as whisky in a meatloaf is way too much, so I found online some whisky BBQ sauce. Traditionally, people drink Scotch whisky for a Burns supper. Turnips have a really bland taste, but they turned crunchy in the oven. Here's an interesting fact: sheep lungs are a traditional ingredient in haggis(consists of 10-15% of haggis), but unfortunately, they have been banned from the US since 1971. Haggis cannot be exported to the US, so it's instead made there. But the most important part of this video you guys should know about is who I got the haggis from. Shoutout to Nathalie Le from Facebook for getting me the can of haggis for my birthday 2 months ago(she messaged me from the Meatloaf Princess Facebook page and wanted to get me something off my Amazon wish list). This video is for you, Nathalie! Thank you! HELPFUL LINKS: Whisky BBQ sauce: https://www.amazon.com/Sticky-Fingers-Tennessee-Barbeque-18-ounce/dp/B00CP9V7A6/ref=sr_1_11_a_it?ie=UTF8&qid=1485114761&sr=8-11& Haggis: https://www.amazon.com/Caledonian-Kitchen-Haggis-Lamb-14-5/dp/B00LA5RXUE/ref=sr_1_1_a_it?ie=UTF8&qid=1485114809&sr=8-1& You will need: For the cooking equipment: A large bowl A lasagna pan Nonstick cooking spray For the meatloaf: 2/3 tbsp. onion powder 2/3 cups applesauce, preferably unsweetened 1/2 cup shredded Cheddar cheese 1/2 cup turnips(rutabagas) 1/2 cup mashed potatoes 1/2 cup whisky BBQ sauce(see HELPFUL LINK above) Pinch of cayenne pepper Pinch of allspice Pinch of salt Pinch of black pepper 1 cup breadcrumbs 15 oz. haggis(see HELPFUL LINK above) 1. In a large bowl, mix all the ingredients up until you get a firm mixture. 2. Spray a lasagna pan with nonstick cooking spray. 3. Form 2 loaves from the mixture. 4. Bake in a 350 degree Fahrenheit oven for 15-20 minutes(if using canned haggis) or 60 minutes(if using fresh haggis). 5. Bon appetit! I've always wondered why you're hard-pressed to find a meatloaf recipe online made with just beans, let alone baked beans(well I did find this recipe). Now i know why: such a meatloaf doesn't hold its shape together. That's not a big deal to me- as long as it tastes good, I'm satisfied. But I'm sure most people don't feel the same way as I do. It's also probably a bad idea to make a meatloaf out of beans- it causes gas and flatulence, especially if you're using baked beans. What drove me to make a baked bean meatloaf? A can of bread(yes, you read that correctly). Bread in a can is a thing that exists and is particularly popular in Boston(it's known as Boston brown bread), and it goes well with baked beans. The bread itself tastes like molasses and is very dense, so it probably wouldn't make for a good bread for a peanut butter and jelly sandwich(I didn't try doing that- I got sick with a sinus infection 2 days after recording this video so I wasn't in the mood for the very dense bread that brown bread is). It's a plain meatloaf but beans and bread is a pretty plain concept. The only "exotic" part about this meatloaf is the corn(I just had some leftover and I didn't want it to go to waste). But why the bread and butter pickles? I was doing a google search and that's what came up when I typed in "canned brown bread". The good thing about a meatloaf made with baked beans is that the liquid is already provided for you in addition to the beans itself, so you don't need to add any liquid ingredient into the meatloaf mixture. Now that I think about it, baked beans, Oreos, and pop-tarts are really good for making a meatloaf since you get a meatloaf filler(beans, pastry, or cookies) and a liquid or cream! My dad insisted I cover the lasagna pan with aluminum foil so the meatloaf wouldn't dry out but it did still dry out. This meatloaf probably would've dried out sooner without the aluminum foil though. HELPFUL LINK: Canned Brown Bread: https://www.amazon.com/BREAD-BROWN-RAISIN-16-Pack/dp/B00G7UBC68/ref=sr_1_9_s_it?s=grocery&ie=UTF8&qid=1485034224&sr=1-9& You will need: For the cooking equipment: A large bowl A lasagna pan Nonstick cooking spray Aluminum foil For the meatloaf(beanloaf, in this case): 2/3 tbsp. onion powder 2 beaten and whisked eggs 1/2 cup bread and butter pickles 1/2 cup corn(optional) 1/2 a loaf of canned brown bread(see HELPFUL LINK above) Pinch of salt Pinch of black pepper 3 cups of baked beans 1. Put the first 4 ingredients into a large bowl. 2. Crumble up the brown bread and put the crumbled up pieces into the large bowl. Add the rest of the meatloaf ingredients to the large bowl. 3. Mix all the ingredients up until you get a firm mixture. 4. Spray a lasagna pan with nonstick cooking spray. 5. Form 2 loaves from the mixture. 6. Cover the lasagna pan with aluminum foil(so the meatloaf doesn't dry out) and bake in a 350 degree Fahrenheit oven for 45-60 minutes. 7. Bon appetit! You may notice this video is longer than most of my previous videos. Well that's because I recorded my Toastmasters speech with the making of this trail mix. Hence the title of this video. I wanted to be creative with this particular speech. Initially, I thought for this speech(Speech 5 in the Communicating on Video advanced manual- Instructing on the Internet), I could do whatever instruction I liked. But then I read the directions for this speech and it said I had to give speech on how to prepare a speech. I'm pretty sure you can search "how to prepare a speech" on YouTube and you'll get countless results. But I wanted to make this version of "how to prepare a speech" my own and i did that using a recipe, albeit a very simple one. The venue of my club's Toastmasters meetings is in a county government building, so I don't think they would've appreciated it if I brought some actual cooking equipment, like a George Foreman grill or a portable skillet in. In choosing which recipe to use, I had to think of one that involved minimal preparation at home, which actually reminds me of the cooking classes I took at the library as a teenager- they didn't have ovens so you prepared everything in the class at the library, except baking the final product. To this day, my library still has no ovens for cooking classes. :( When I was thinking of the beef component for the meatloaf part of the trail mix, the first thing that came to my mind was beef jerky. Only problem was I hate beef jerky(it tastes like leather, but maybe that the point of jerky or maybe I don't like the leathery texture of jerky). Also, trail mix is almost always nonperishable, so I couldn't use cold cuts(i.e. roast beef) or ground beef. So I used dried(chipped) beef instead, which is salty af, but goes well with sweet foods(like raisins and candy)! For the tomato based part of it, I was going to use sun-dried tomatoes, until I tried it and realized they are tough to chew, just like jerky. That was also the moment when sun dried tomatoes joined the ranks of bell peppers(don't like the smell and they're too bitter) and fennel(tastes like rubber to me) on my list of foods I hate. So I decided to "marinate" the dried beef instead in a tomato sauce-mixture. I put the word marinate in quotation marks because in culinary terms, I didn't technically marinate the dried beef. All I did was mix the dried beef and tomato sauce mixture up before cooking the dried beef in the oven. I used this recipe for my inspiration for cooking the dried beef, except I used a tomato sauce mixture instead of sriracha, which leads me to my next point. Why did I cook the dried beef at 250 degrees Fahrenheit? I did this because any hotter and the coating of the peanut butter-coated dried bananas and Crunch bites would melt just by being exposed by hot, dried beef. The trail mix was a bigger hit with my club than I thought. After the meeting, I ended up with only 3 or 4 slices of dried beef when I originally started out with 12! The only reason my dad didn't try this recipe was because salty foods make him thirsty and he forgot to bring a bottle of water to the meeting that day. Note: The following is just the actual recipe. If you want to know how it relates to actually preparing a speech, then watch the video below! You will need: For the cooking equipment: A medium bowl A baking tray A large bowl For the marinade: 1/2 cup tomato sauce 1/4 cup ketchup 2 tbsp. light brown sugar A dash of Worcestershire sauce For the trail mix: 12 slices of dried(chipped) beef 3 oz. of peanut butter coated-dried bananas Raisins 1 cup of breadcrumbs Bacon bits Crunch bites(or any chocolate candy you like) Pinch of cayenne pepper Cashews 1 packet of meatloaf seasoning mix 1. Mix all the marinade ingredients up in a medium bowl. Add the dried beef. Coat the dried beef in the marinade. 2. Separate the slices of dried beef and put each slice onto a baking tray. 3. Cook the marinated dried beef in a 250 degree Fahrenheit oven for 15 minutes. 4. Combine the cooked, dried beef with the rest of the trail mix ingredients in a large bowl. Mix all the ingredients up with 2 spoons. 5. Bon appetit! You just don't find any insect foodstuffs where I'm from(or in any supermarket in North America, for that matter)- unless you happen to visit an Asian supermarket(especially a Korean one). I found a can of silkworm pupae at a Korean supermarket. I knew I had to buy it and use it in a video! Even in 2017, the only place you can readily find edible insects for sale is online. So I was pretty psyched(do people even say that anymore, lol?) to find it at a brick and mortar store. My initial plan in my head was to just clean the pupae, marinate them in some sauce, sautee them, and eat it. But 130 grams of silkworm pupae is not enough food for a meal. Then I saw pictures of sweet potato toast pop up on my Instagram feed. When I see a new food craze, I always want to make fun of it by making it as gross as possible and bugs on sweet potato toast will just do the trick! The silkworm pupae on their own don't taste like anything, but they do leave a wet sneaker aftertaste, which is masked by soy sauce or Korean BBQ sauce. But the pupae do something interesting when you put Korean BBQ sauce on them- they disintegrate and all you see are black dots which can only be their organs or insides! Yes, I tried the insect organs and they remind me of poppy seeds! I told you food would get weird on this channel. Silkworm pupae also pair well with guacamole, surprisingly enough. Naturally, my dad didn't try this recipe, because like 99% of Americans, he's creeped out by bugs, so eating them is out of the question. Making this recipe is easy but waiting for the bugs to be removed of any remnants of the fluid they came in the can takes a couple of hours. But it is so worth it in the end! I used red palm oil to sautee the pupae, thinking they would turn color like the onions did in this video. But alas, they didn't and all I ended up with was a spatula stained yellow. :( But I bet someday future generations will be eating bugs as proteins either along traditional protein sources like chicken and cow, or possibly in lieu of such sources. Maybe that will happen in my lifetime even. Usually, I don't spotlight or give a shoutout to other YouTube channels but I gave a shoutout to Food Oddities, a channel where a guy named Remy tries weird food. I make weird food, he eats weird food- what a perfect pairing! HELPFUL LINK: Silkworm Pupae: https://www.amazon.com/Korean-Food-Silkworm-Pupa-Canned/dp/B00OPMX1HS You will need: For the cooking equipment: A medium bowl A colander A baking sheet A frying pan A spatula 100-130 grams Silkworm Pupae(see HELPFUL LINK) Water 2 medium sweet potatoes Red palm oil for sauteeing the silkworm pupae Guacamole Korean BBQ Sauce 1. Drain the liquid out of the can of silkworm pupae. Place the silkworm pupae in a medium bowl. Fill the bowl with cold water. Let the pupae sit in the cold water for an hour. 2. Change the water by pouring the pupae into a colander to drain the water. Put the pupae back in the bowl. Fill with cold water again. 3. Repeat steps 1 and 2 two more times. If the pupae you have didn't come in a can, skip steps 1-3. 4. Cut 2 medium sweet potatoes lengthwise. Ideally you want the slices to be 1/4-inch thick but you need a very sharp knife to do that. Otherwise, you'll just end up with sweet potato boats. 5. Put the slices of "toast" onto a baking tray. Bake in a 450 degree Fahrenheit oven for 5-10 minutes, flipping them over halfway through(don't do this if you have boats instead of "toast"). 6. After 10 minutes, if the sweet potato slices are still raw, cook them on the other side in the microwave for 3 minutes, before flipping them over and cooking them for another 30 seconds. 7. Pat dry the silkworm pupae with a paper towel after they are done soaking. 8. Pour red palm oil into a frying pan. Spread the oil around the pan. Turn the stove on to heat the oil up. 9. Once the oil is heated up, put the pupae into the frying pan. Sautee the pupae by flipping them over with a spatula constantly and moving them around the pan. Do this for 1-2 minutes. 10. Put guacamole on top of the slices of sweet potato toast. Top the guacamole with the sauteed pupae. Top the pupae with Korean BBQ sauce. Don't be alarmed if the bugs disintegrate and all you see are black dots. That's completely normal! 11. Bon appetit! So why did I pick an obscure Indonesian(well technically, it's Javanese, but the island of Java is part of Indonesia) dish to base this meatloaf off of!? Well, when I was bored, I looked up all the Wikipedia entries of food dishes I could find(literally) and I compiled dozens of lists on my phone of possible meatloaf recipes. So one problem I'll never have with this channel is coming up with new ideas! I may have issues making recipes that are too similar to previous videos or just aren't weird enough(in my opinion, anyway). I also had an extra pound of ground goat meat to spare after making this meatloaf and I didn't want it to go to waste. So I searched the ideas on my phone that involved goat meat. I also had canned lemongrass on hand too. I forgot to add soy sauce to the meatloaf but I find it's better to just top the finished product with the sauce. It reminds me of eating sushi with soy sauce, only this is a hot dish made from goat meat(which kind of tastes like beef and lamb, but has a lighter color than ground beef). One of the best parts about cooking new recipes is that I don't know what to expect(like the existence of a black chicken head). I didn't expect to see red palm oil turn the onions yellow in color(literally). That was so cool! If I ever want to turn things a different color when sauteeing, then red palm oil is the go-to oil for me! In the video, I used more than the 1/4 cup each of coconut milk and tamarind nectar, which was a big mistake. Because of this big mistake, I had to use breadcrumbs to absorb the extra liquids. But if you're going to do that, use plain breadcrumbs- it won't detract from the Indonesian flavor experience! Inspiration for this recipe: https://en.wikipedia.org/wiki/Tongseng HELPFUL LINKS: Dried Galangal: https://www.amazon.com/Your-Kitchen-Organic-Dried-Galangal/dp/B00KJJH0D2/ref=sr_1_2_a_it?ie=UTF8&qid=1483919655&sr=8-2&th=1 Ground Goat Meat: https://www.shepherdsongfarm.com/shop/ground-meat-kabobs/ground-goat/ You will need: For the cooking equipment: A frying pan A large bowl A lasagna pan Nonstick cooking spray For the meatloaf: 1/2 a chopped up onion 1 bay leaf Red palm oil for sauteeing the onion & bay leaf 2 beaten and whisked eggs 1 tbsp. canned lemongrass 1 chopped up tomato 1/2 cup shredded green cabbage 1 piece of dried galangal(see HELPFUL LINK) 1/4 cup coconut milk 1/4 cup tamarind nectar Pinch of garlic powder Pinch of cinnamon Pinch of ground coriander Pinch of black pepper Pinch of salt 1 cup jasmine rice 1 pound ground goat meat(see HELPFUL LINK) Breadcrumbs in case the meatloaf mixture doesn't hold up Soy sauce to top the meatloaf(optional) 1. Pour red palm oil into a frying pan. Spread the oil around the pan. Turn the stove on to heat the oil up. 2. Once the oil is heated up, put the chopped up onion and bay leaf into the frying pan. Sautee the onion and bay leaf by moving them around the pan. Don't be alarmed of the onion and bay leaf turning yellow! That's totally normal(and cool). 3. Put the sauteed onion and bay leaf into a large bowl. Remove the bay leaf(it's not edible)! 4. Put the next 4 ingredients into the large bowl. 5. Cut up the dried galangal with the sharpest knife you have. Put the galangal pieces into the large bowl. 6. Put the next 10 ingredients into the large bowl. 7. Mix all the ingredients up. If the meatloaf mixture isn't holding up, just add breadcrumbs! 8. Spray a lasagna pan with nonstick cooking spray. 9. Form 2 loaves from the meatloaf mixture. 10. Bake in a 375 degree Fahrenheit oven for 60-65 minutes, or until the internal temperature of the meatloaf reaches 160 degrees Fahrenheit. 11. Top with soy sauce(optional). Bon appetit! Note: the edges of the dried galangal aren't edible! I probably should've sauteed it along with the bay leaf and onion, and discarded it along with the bay leaf. :( Here's another use for butternut squash seed oil(you know, the type I found at the lone Long Island pit stop that may or may not be in violation of federal laws regarding over the counter sales)- in ice cream! This sounded like a good idea to me at the time, until I realized oil doesn't freeze very well and scooping out this ice cream is a pain in the ass(not impossible, but annoying). Which makes me wonder how all these recipes for olive oil don't end up in a frozen brick. Oh yea, they used eggs for a custard base. I'm not a fan of having to cook a custard base for an ice cream, but if I ever use oil in ice cream in the future, I very well might have to use that method. I got my inspiration for this recipe from https://communaltable.wordpress.com/2010/04/27/olive-oil-ice-cream/, by the way. Other than that little snafu, the ice cream tasted like peanut butter ice cream with a soy sauce aftertaste- tasty to me, but offputting to my dad. He even wondered if I should've said this is a good replacement for peanut butter ice cream for nut allergy sufferers(you know, because of butternut. I looked online- butternut squash is NOT a nut and is safe for tree nut allergy sufferers!). I'm not usually a fan of eating savory ice creams(well, this recipe is in a gray area, since it tastes both sweet and savory) at night, but I figured out it tastes really good on top of a graham cracker. I very well have this ice cream for dinner, using this video as a reference! Now that I think about it, butternut squash ice cream is very versatile! HELPFUL LINK: Butternut Squash Seed Oil: http://www.wholeheartedfoods.com/pumpkinseed-oil-shop.htm You will need: For the cooking equipment: A large bowl A blender(optional but helpful) Aluminum foil An ice cream maker A 1-quart ice cream tub For the ice cream: 1 1/2 cups 1% milk 1 cup half and half 15 oz. butternut squash puree 1/3 cup granulated sugar Pinch of salt 1/2 cup butternut squash seed oil(see HELPFUL LINK) 1 tbsp. red cooking wine A sweet potato to put the ice cream on(optional) 1. Put the first 5 ingredients into a large bowl. Mix all the ingredients up, either in a blender or by hand with a spoon, until the puree has been dissolved. 2. Put aluminum foil on top of the large bowl. Put the large bowl in the fridge for 1 hour. 3. MIx the butternut squash seed oil in with the ice cream base. 4. Turn the ice cream maker on and pour the ice cream base into the bowl of the ice cream maker. Add the red cooking wine into the bowl of the ice cream maker as it's churning. Let the ice cream maker churn for 15-20 minutes but stop if it looks like the spinning bowl is about to overflow! 5. Shut the ice cream maker off and detach the bowl. Scoop the ice cream into the ice cream tub. 6. Freeze the ice cream for at least 3 hours(or if you like soft serve, eat immediately). 7. Put the ice cream on top of a sweet potato(optional), on top of graham crackers, or get inspiration from this video. Bon appetit! Note: The ice cream will be hard as a brick after freezing, so I found the best way to scoop the ice cream out is: 1. Uncover the lid 2. Let the tub sit at room temperature for 20 minutes 3. Run the sharpest knife available under hot water. 4. Cut the ice cream in a checkerboard pattern(i.e. vertical, then horizontal). 5. Run a scooper or spoon under hot water. 6. Scoop the ice cream out. I got the Imperial Sphericator for my birthday(from myself. In other words, I bought it for me) and I had plans of using this machine for New Year's 2016 but plans fell through that year. But I knew I had to make this video to celebrate the new year! Because what's more fancy than caviar sitting on top of a glass of champagne(rhetortical question but maybe a Lamborghini)? The product is great and by no means am I sponsored by the makers of this machine but I do have two criticisms to make: 1. It was supposed to come with sodium citrate but it didn't, so I had to order that myself on Amazon. 2. It was also supposed to come with a manual but it didn't, so I downloaded one. Unfortunately, I couldn't find the original link to it, though I did luckily save it to iBooks as a PDF. The PDF to the manual is at the bottom of this post. Why am I even sharing a PDF file? Because there are a lot of things that can go wrong when using the Sphericator, like your liquid mixture being too thick or too thin for the Sphericator. The manual has all the troubleshooting tips for these problems and any others you may have. When I told my dad my idea, he was a bit skeptical the machine would work, but work it did, and when he saw the meatloaf liquid being turned into pearls, he was amazed and impressed(and this is coming from a STEM professor!). I was kind of amazed myself also, but the liquid being dropped into the calcium chloride bath and instantly turning into pearls reminded me of pooping on the toilet for some reason! So I said it was pooping caviar! I told you I make food weird! I was a little disappointed the taste of the pearls resembled more like tomato than beef- I should've use more beef broth and less tomato juice. Other than that, the pearls tasted delicious. It's best to top foods with the pearls rather than eating the pearls on their own, so I used some New Year's stalwarts- oysters, crackers, and "champagne"(white sparkling grape juice), as well as American cheese, since meatloaf is an American dish. Note to self: use fresh oysters instead of the one found in a can. Canned oysters taste like tuna. HELPFUL LINKS: Imperial Sphericator: http://spherificator.com/ Manual for Imperial Sphericator(in case it's missing): on the bottom of this post You will need: For the cooking equipment: 3 small bowls A blender A sieve A mesh strainer A medium bowl A glass bowl Imperial Sphericator(see HELPFUL LINK above) For the caviar: 1/4 cup water 1/2 tsp. sodium citrate 3/8 cup low sodium tomato juice 3/8 cup fat free, low sodium beef broth 2 tbsp. breadcrumbs Pinch of paprika Pinch of cayenne pepper Pinch of onion powder 1/2 tsp. granulated sugar 1/2 tsp. sodium alginate 2 cups water 1 tbsp. calcium chloride Serve with: Oysters American cheese Crackers Champagne or white sparkling grape juice 1. In a small bowl, mix 1/4 cup water with the sodium citrate until the sodium citrate is dissolved. Pour the sodium citrate mixture into the blender. 2. Pour the next 6 ingredients into the blender as well. 3. In another small bowl, mix the sugar and sodium alginate together. Sprinkle the sodium alginate mixture onto the surface of the mixture in the blender. 4. Put the cover on the blender and blend on low speed until the powders dissolve. The mixture should be bubbling immediately after blender. 5. Remove the lid from the blender and let the mixture rest for 30-45 minutes to let the air escape. You want the mixture afterwards to have the consistency of a sugary syrup. 6. Pour the mixture into a mesh strainer with a medium bowl underneath to collect the liquid. The mesh strainer will filter out the solids and powders. 7. In a glass bowl, mix the calcium chloride and 2 cups water until the former dissolves into the latter. Mix for at least 30 seconds. 8. Screw the nozzle of your choice into the bottom of the Sphericator(it should come with 2 nozzles). 9. Connect the plug to the Sphericator and undo the top lid. 10. Pour the liquid into the top of the Sphericator. 11. Put the lid back onto the Sphericator. 12. Plug the Sphericator into a socket and hold the Sphericator 6 inches above the calcium chloride bath. 13. Hold down the button of the Sphericator to let the liquids drop into the calcium chloride bath. The liquids will instantly turn into pearls. Rotate the Sphericator in a circular motion above the bath as you're making the pearls. 14. Once all of the pearls have been formed, let them sit in the bath for 1 minute. 15. Scoop the pearls with a sieve to remove the liquids. Place the pearls into a small bowl. 16. Run the pearls under running water(like a sink) to remove the calcium chloride bitterness. 17. Serve the pearls on top of oysters, American cheese, crackers, and/or champagne(or white sparkling grape juice). Bon appetit! Note: The pearls only last for 24 hours before congealing!
For this new year, I'm refocusing my channel from "ugly food can be tasty" to "make food weird" because let's face it folks- the vast majority of the recipes on my channel are weird. In fact, my thinking when it comes to making a recipe I find online my own is to substitute a key ingredient for the weirdest, similar ingredient I can think of(and get my hands on)! I've always been gravitated toward strange food even before I started cooking for myself. Here's the new channel trailer! |
Archives
October 2019
Categories
All
|
||||||

 RSS Feed