|
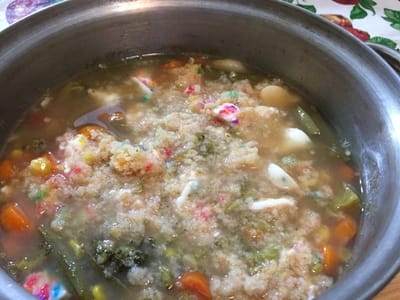
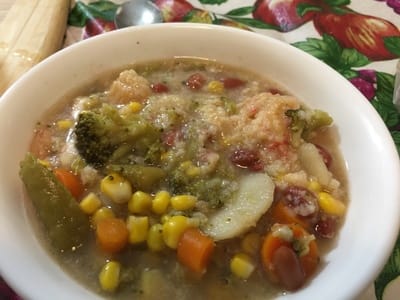
I didn't know sugar cookie-flavored eggnog was even a thing in existence until I happened to be shopping at a small supermarket known for it's many cuts of meat, among other things. They also carry unusual food products I can't find at my local supermarket, like sugar cookie eggnog. If I encounter a strange beverage, the first thing i want to do with it is make a stew out of it- hey I did that last Christmas(no pun intended, RIP George Michael with my Eggnog Stew! So how does the sugar cookie eggnog compare to regular eggnog- well, the former tastes a lot more buttery than the latter, and that's about it. I was expecting it would also taste like the sprinkles you put on top of a sugar cookie, but oh well. The butteryness of the eggnog paired well with the butter beans and potatoes I used! You will need: For the cooking equipment: A large saucepot with a lid A small bowl For the stew: 2 cups of stock(I used seafood stock) 2 cups of sugar cookie eggnog 15 oz. drained butter beans 10 oz. peas(I used garlic parmesan peas) 10 oz. cooked potatoes or fries Onion powder Marjoram Nutmeg Black Pepper Salt Sugar cookies Wonton strips or garlic bread to serve on the side For the thickener: 1/4 cup water 2 tbsp. all-purpose flour 1 tbsp. lemon juice 1 tsp. granulated sugar 1. Put all stew ingredients into the large saucepot. Mix all the ingredients up so the spices aren't floating on the surface. 2. Bring the stew to a boil on the stove. As the stew is boiling, cover the saucepot with the lid. 3. Once the stew is boiling, reduce the heat to a simmer. Let the stew simmer for 45 minutes. 4. While the stew is simmering, mix the thickener ingredients in a small bowl. 5. When the stew is done simmering, turn the stove off and pour the thickener into the stew. Bring the stew to a boil again. Cover the saucepot with the lid as the stew is boiling. 6. Once the stew is boiling, reduce the heat to a simmer. Let the stew simmer for an additional 3 minutes. 7. Shut the stove off, take the lid off of the saucepot, and let the stew cool off at room temperature for 5-10 minutes. 8. Crumble up the sugar cookies. Put the crumbled up sugar cookies into the stew(or you can just dump the cookies into the stew whole). Mix the sugar cookies into the stew. 9. Serve with wonton strips or garlic bread. Bon appetit!
2 Comments
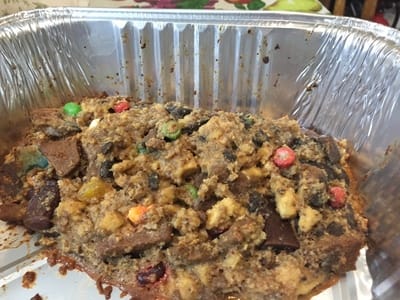
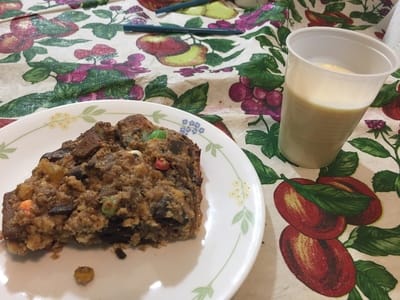
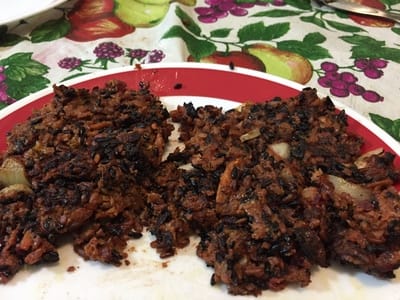
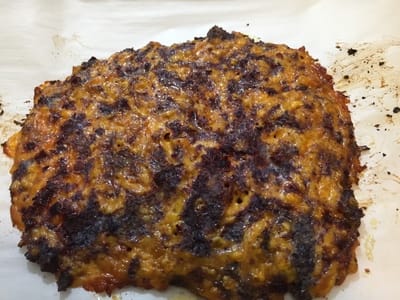
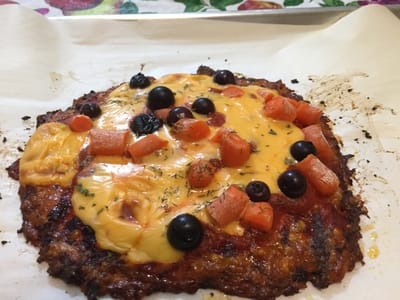
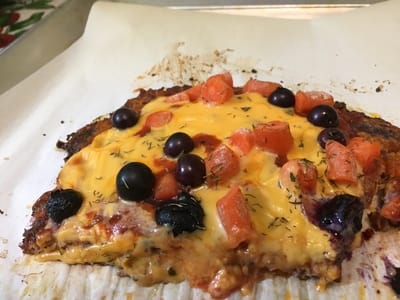
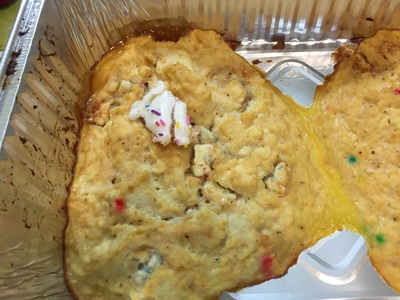
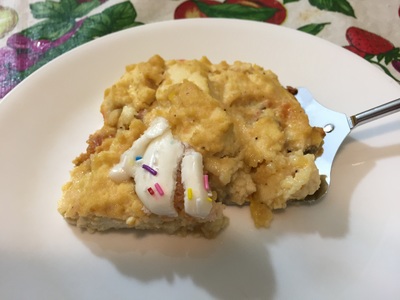
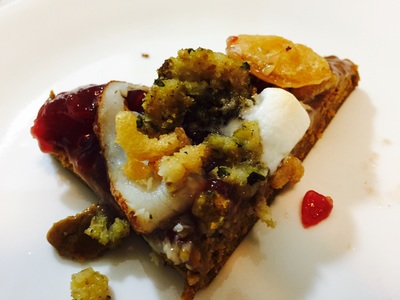
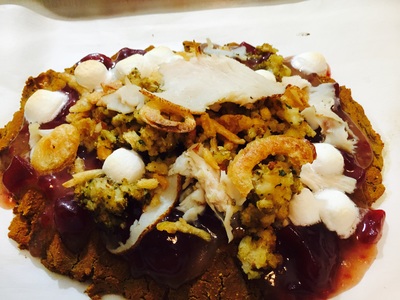
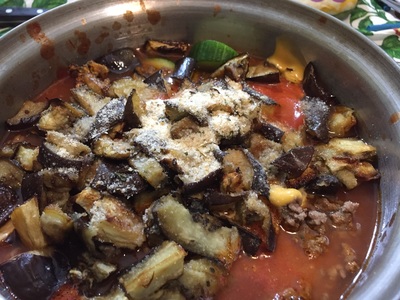
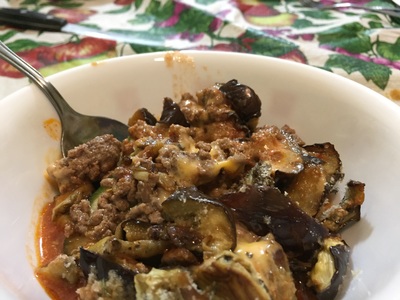
One of the best parts of Christmas is the gingerbread house making. I wish I did it more often every Christmas but with this channel now, I had the perfect excuse to buy gingerbread house kits, so I decided to turn them into a meatloaf! A lot of the parts of these two kits(see HELPFUL LINKS) had candies that I didn't like, such as the colorful dots from the gingerbread house kit(not the chocolate cookie house). I like chocolate candy more than non-chocolate candy- and I certainly hate candy canes(or anything that tastes like peppermint. Yuck!). If I wanted to have a peppermint flavor in my mouth, I can just brush my teeth right now, there's no need to deliberately ingest that flavor in my food. End peppermeint rant. You can't build a house without people that are going to end up inhabiting it(and that goes for gingerbread houses too), so I crumbled up some gingerbread people(the politically correct term, because 2016). This is the only socially acceptable way to eat people, even if they are just cookies made (loosely) in the shape of people. The meatloaf wasn't too sweet, but my dad still didn't try this meatloaf. I also added Froot Loops, only because it bring back childhood memories. When I was in 1st grade(which was over 20 years ago and way before the USDA put a stop to kids eating sugary desserts in school or parents bringing foood in), we were advised not to discard our milk cartons in December, for the classes would use those to hold the gingerbread houses together(with frosting as the glue). The only other thing I remember about that day in 1995 was that I was eating the Froot Loops we were using as decorations for the houses and my teacher told me(as a 5 year old) to stop eating the cereal. I was so mad because my 5 year old-brain thought that "why hold off on eating the food we're putting on the gingerbread house if it's only going to end up being eaten anyway when we're done making them?" Surprisingly, the icing I used in the meatloaf held the shape of the mixture together, even after it was long been melted in the oven. That, of course gives me ideas to use icing instead of eggs in future meat-based meatloaf recipes. After doing over 100 videos for this channel in the span of less than 2 years, I wanted to change up the format of the videos, which is why I did a gingerbread house unboxing. Opening those boxes felt like Christmas- oh wait, that''s tomorrow! :) The gingerbread cookie pieces made the meatloaf extra heavy, yet so good! HELPFUL LINKS: Hershey's Chocolate Christmas Cookie House Kit: https://www.amazon.com/Hersheys-Chocolate-Christmas-Cookie-House/dp/B01M4P24AF/ref=sr_1_7_s_it?s=grocery&ie=UTF8&qid=1482599395&sr=1-7& Jelly Belly Gingerbread House Decorating Kit: https://www.amazon.com/Jelly-Belly-Gingerbread-House-Decorating/dp/B0170PZX90/ref=sr_1_3_s_it?s=grocery&ie=UTF8&qid=1482604287&sr=1-3& You will need: For the cooking equipment: A large bowl Ziploc bag Nonstick cooking spray Lasagna pan For the meatloaf: 2/3 tbsp. onion powder 2 beaten and whisked eggs The following components of the 2 gingerbread kits: The candies 1 icing bag All of the gingerbread house pieces 1 large chocolate cookie house piece 2 Gingerbread people Froot Loops cereal Pinch of salt Pinch of black pepper 1 pound chopped, drained, crumbled up firm tofu 1. Put the onion powder and eggs into a large bowl. 2. Put the gingerbread house pieces and the large chocolate cookie house piece into a Ziploc bag. Crush them up with your fists or a hammer until they resemble crumbs. Put the crushed up pieces into the large bowl. 3. Cut the tip of the icing bag open with a scissor. Pour as much of the icing as you can into the large bowl. 4. Crumble up the gingerbread people and put them into the large bowl, along with the salt, black pepper, and tofu. 5. Mix all the ingredients up until they form a firm meatloaf mixture. 6. Spray a lasagna pan with nonstick cooking sprauy. Form 2 loaves from the meatloaf mixture. 7. Bake in a 350 degree Fahrenheit oven for 40-45 minutes. 8. Bon appetit! I'm at it again with the recipes using birthday cake soda(what, I did buy a 12-pack?!), this time in the form of a stew. And unlike previous stew recipes, I added stuff to the top of the stew when it was done cooking, namely mini party cakes(they didn't have any large, generic party cakes when I went to supermarket) and birthday cake kisses! Naturally, the crumbled up mini party cakes softened in the liquid of the stew and the kisses melted in the hot liquid. The only thing I could taste from the kisses was the crunchy sprinkles that didn't melt! HELPFUL LINKS: Birthday Cake Soda: https://www.amazon.com/Hersheys-Kisses-Birthday-Cake-Flavor/dp/B01LYB6YCH/ref=sr_1_1_s_it?s=grocery&ie=UTF8&qid=1482180093&sr=1-1& Birthday Cake Kisses: https://www.jonessoda.com/collections/jones-beverages/products/limited-edition-birthday-cake-soda-12-pk You will need: For the cooking equipment: A large saucepot with a lid A small bowl For the stew: 2 cups of stock(I used seafood stock) 2 cups of birthday cake soda(see HELPFUL LINKS) 15 oz. drained pink beans 10 oz. corn(I used lime fiesta corn) 10 oz. mixture of broccoli, carrots, snap peas, and water chestnuts Onion powder Marjoram Allspice Black Pepper Salt Birthday cake kisses(see HELPFUL LINKS) 2 mini party cakes Wonton strips or garlic bread to serve on the side For the thickener: 1/4 cup water 2 tbsp. all-purpose flour 1 tbsp. lemon juice 1 tsp. granulated sugar 1. Put all stew ingredients into the large saucepot. Mix all the ingredients up so the spices aren't floating on the surface. 2. Bring the stew to a boil on the stove. As the stew is boiling, cover the saucepot with the lid. 3. Once the stew is boiling, reduce the heat to a simmer. Let the stew simmer for 45 minutes. 4. While the stew is simmering, mix the thickener ingredients in a small bowl. 5. When the stew is done simmering, turn the stove off and pour the thickener into the stew. Bring the stew to a boil again. Cover the saucepot with the lid as the stew is boiling. 6. Once the stew is boiling, reduce the heat to a simmer. Let the stew simmer for an additional 3 minutes. 7. Shut the stove off, take the lid off of the saucepot, and let the stew cool off at room temperature for 5-10 minutes. 8. Crumble up the mini party cakes and put them in the stew. Dump the birthday cake kisses into the stew. Mix the party cakes and the kisses into the stew. 9. Serve with wonton strips or garlic bread. Bon appetit! First, for the cat update. Sadly, my cat Emily(see above) passed away almost two months ago. She had cancer and was old(14 1/2, to be exact, which is pretty old in cat years). Emily was the very first pet I had and she was so beautiful. Toward the end of her life, she became a cranky old lady, not wanting to play with her 3 (non-biological) feline brothers. Emily apparently was meant to be an only cat, because when my family adopted Chandler(R.I.P.) and Cameron, she hated them and would fight them if they interacted with her. Jordan, on the other hand, she liked, but maybe that was because we took Jordan in as a kitten and Emily didn't see him as a threat. Every cat has a backstory, and Emily is no exception. In 2004, she lived with her biological feline brother at a neighbor's house on my block. They moved away and threw Emily out onto the streets, taking just her biological brother. Emily was living outside for 6 months. Another neighbor was feeding her cold cuts but couldn't take her in, as she had several other cats already. My mom(R.I.P.) noticed Emily and introduced me to her. I wasn't always a cat lover. Up until that point when I met Emily, I hated animals as a result of a traumatizing incident in Kindergarten when the class gerbil bit my finger(what? I was only 5 at the time). Emily made me love cats. She was there for me in my formative adolescence and college years. And now the newest feline member of my family: Misty! She is 3 1/2 years old and my family adopted her a month ago from the local animal hospital(they always have cats up for adoption). Misty is special in that she's a black cat and those sort of cats are least likely to be adopted(maybe it's due to the superstition of black cats being bad luck, black cats not being very photogenic, just plain bias against darker-colored creatures and people, or all of the above). Misty's backstory: She was dropped off at the animal hospital when she was just 6 months old and unlike today, she was emaciated. But she bulked up and was brought back to health. The people at the animal hospital didn't call her Misty- they referred to her as Beauty, because she is one. Beauty was up for adoption for 3 years! She wasn't the original cat my dad and I wanted to adopt. After we put Emily to sleep, we saw an adorable 3-week old female orange kitten. But we couldn't take the kitten home because she was too young to be tested for FIV and feline leukemia. It turned out the kitten was FIV-negative and feline leukemia-negative, but apparently someone else adopted the cat before we could, even though we said we'd like to adopt her if she passed those tests. But all was not lost as two days prior, my dad told me about a female adult black cat up for adoption. I tried interacting with Beauty from her cage, but she wasn't very responsive or playful to strangers. So I just brushed Beauty off as not a very playful cat. But I really wanted to adopt a female cat that day, so I settled on her. I like giving my cats human names and the name Misty is very similar to Beauty. Misty is in fact a very playful girl- and a big one too! She weighs 15.3 pounds, which is due to both her large frame and obesity. Misty scares the boys(Cameron and Jordan) off due to her size so they don't mess with her. Enough about the cats, now I'm going to talk about the rice cakes. Every time I go to the supermarket, I always see so many different flavors of puffed rice cakes(the Quaker brand, not the recipe I made)- from chocolate rice cakes to even buttered popcorn-flavored ones! But I also noticed on the Internet different colors of rice- red, black, brown, white, yellow, pink, etc.. In addition, riced vegetables are all the rage these days, so there's cauliflower rice, which can be purple, orange, green, or white; and even riced beets! You can also make riced vegetables from spiralized veggie noodles too, although when I tried doing that, I ended up with something resembling mashed vegetables more than rice. I wanted to combine as many colors of rice as possible into a rice cakes because the first thing that comes to my mind when I think of rice is rice cakes. But the rice cakes turned out to look more like latkes than anything else. Coincedentally, Hannukah this year starts on Christmas Day, so like the invention of corn flakes(which was accidental), I accidentally found a new purpose for this recipe- for latkes made from rice and not potatoes! The latkes didn't hold its shape together. But that really didn't matter because they tasted so good! My dad said they tasted like vegetables, which is true, given 4 of the 6 rices in the latkes weren't rices at all- they were riced vegetables. Like potato-based latkes, they pair well with applesauce and they reminded me of the latkes my mom used to make me! Did you know Bhutan red rice is Bhutan's only export!? HELPFUL LINKS: Bhutan Red Rice: https://www.amazon.com/Lotus-Foods-Heriloom-Bhutan-Gluten/dp/B00198C8BG/ref=sr_1_2_a_it?ie=UTF8&qid=1482101477&sr=8-2& Forbidden Black Rice: https://www.amazon.com/Lotus-Foods-Heirloom-Forbidden-Black/dp/B00198C89I/ref=sr_1_2_s_it?s=grocery&ie=UTF8&qid=1482101527&sr=1-2& You will need: For the cooking equipment: A food processor A microwave-safe bowl with lid A cheese grater A large bowl 2 saucepots A frying pan A spatula For the rice cakes: 12 oz. butternut squash noodles 3/4 cup riced beets Purple cauliflower rice 3/4 cup broccoli rice using 1 1/2 stalks 1/2 raw onion Bhutan red rice(see HELPFUL LINK) Forbidden black rice(see HELPFUL LINK) 2 beaten and lightly whisked eggs 1/4 cup shredded cheddar cheese Parsley Cinnamon Black pepper Salt 1 tbsp. All-purpose flour Olive oil for frying Applesauce to dip the rice cake latkes in 1. Put the butternut squash noodles in the bowl of the food processor. Put the lid on the bowl, plug the food processor in, and pulse the noodles until they look something like rice. 2. Transfer the pulsed butternut squash into a microwave-safe bowl. Add the riced beets and purple cauliflower rice into the microwave-safe bowl. 3. Grate the heads of 1 1/2 stems of broccoli against a cheese grater using the largest grates on the grater(this will make the broccoli look like rice the most), until you get 3/4 cup of riced broccoli. To make it easier for you, you can also break the broccoli apart into smaller pieces and grate it that way. 4. Put the riced broccoli into the microwave-safe dish. 5. Put the lid on the microwave-safe dish and microwave the riced vegetables for 8 minutes to soften them up. 6. Put the softened, riced vegetables into a large bowl. 7. Cook 1/4 cup of raw Bhutan red rice and 1/4 cup of raw forbidden black rice in 2 separate saucepots. Follow the directions on each bag of rice. 8. Put the cooked Bhutan red rice and forbidden black rice into the large bowl. 9. Add the next 7 ingredients into the large bowl. 10. Mix all the ingredients up until you get a firm mixture. 11. Pour olive oil into a frying pan and spread the oil throughout the inside of the pan. 12. Turn the stove on to heat the oil up. Once the oil is heated up, spoon the rice mixture into the frying pan. Flatten the rice mixture into patties using the back of a spatula. Cook the patties for 1-2 minutes before flipping them over with the spatula. If the patties break apart, just move the broken apart patties into a new patty using the spatula. 13. Cook the patties on the other side for 1-2 minutes before putting the latkes onto a plate. Repeat for as many batches as needed to use all of the rice mixture(I needed to make 4 batches). 14. Dip the latkes into some applesauce. Bon appetit! Last year, I saw at a small supermarket I normally don't go to purple cauliflower, orange cauliflower, and green cauliflower. I naively thought they were always in season, until they weren't after January. After making the Meatloaf Pizza with the Cauliflower Crust last summer, I thought that if I ever got my hands on purple cauliflower, I was going to make a rainbow pizza using purple cauliflower crust. And make the pizza I did! There were some snags along the way while making the purple cauliflower crust. For one thing, I bought the last head of purple cauliflower in that small supermarket that day. It only cost $1.50 for good reason- it was on the clearance section because it was starting to go bad(read: moldy), so I could only use half of the head(the half that wasn't moldy), resulting in a smaller pizza than I hoped for, which is why I also bought riced beets just in case the entire head was unusable. The only good thing about the leaves of the purple cauliflower head being moldy was that they detached very easily. Strangely enough, one of the predicted food trends for 2017 is naturally purple vegetables, including purple cauliflower! The pizza was very colorful- and tasty. Although looking back on making this pizza, the pizza was a tad too greasy due to the American cheese I used. But otherwise it was crispy and delicious! You will need: For the cooking equipment: A cheese grater A microwave-safe bowl with lid Small bowl Large bowl A large baking sheet Parchment paper Nonstick cooking spray For the purple cauliflower crust: 1 head of purple cauliflower 1/4 cup riced beets 1 cup shredded cheddar cheese 1 egg Garlic powder Thyme Onion powder Salt Pizza toppings: Tomato sauce 1-2 slices American cheese 7 chopped up baby carrots Blueberries Parsley Thyme Dill weed To make the crust: 1. Remove the leaves from the purple cauliflower, leaving only the head. Grate the head against a cheese grater. Put the grated cauliflower into a microwave-safe bowl. 2. Put the lid on the microwave safe bowl. Microwave the riced cauliflower for 6-8 minutes to soften them up. 3. Put the riced beets into a small bowl and microwave the beets for 20 seconds to soften them up. 4. Place the softened riced beets and cauliflower into a large bowl, along with the rest of the crust ingredients. 5. Mix all the ingredients up until you get something that looks like dough. 6. Place parchment paper onto a baking sheet. 7. Spray the parchment paper with nonstick cooking spray. 8. Put the dough onto the parchment paper. Flatten the dough with your hands until it is about 1/2-inch thick. 9. Bake the crust in a 425 degree Fahrenheit oven for 10-12 minutes. To top the pizza: 1. Take the cooked pizza crust out of the oven. 2. Cover the pizza with enough tomato sauce to leave some uncovered edges on the crust. 3. Tear the slice(s) of American cheese into pieces and put those pieces on top of the tomato sauce. 4. Top the pizza with the rest of the pizza toppings. 5. Bake in a 425 degree Fahrenheit oven for 10-12 minutes. 6. Bon appetit! Having still had some birthday cake soda left over, I decided to make a tofu dessert meatloaf(I am the Meatloaf Princess after all!). Crumbled up cake doesn't bind a meatloaf very well, so I had to put some plain breadcrumbs into the meatloaf mixture. The tofu was bland but if I put any other spices in it besides basic salt and pepper, it would taste a lot less like a birthday cake or party cake. The birthday cake kisses melted entirely when the meatloaf was baking but the outsides of the meatloaf tasted like those kisses, only it reminded me of caramelized sugar(which doesn't have anything to do with caramel- or maybe it does!) You can't have a birthday cake without frosting, so I separated the frosting from the cake of the generic party cake I used and I put the frosting on top of the finished meatloaf, though the meatloaves looked conjoined and given the location of the frosting on the meatloaves, they look suspiciously a lot like breasts(and not the type that come from a chicken either)! HELPFUL LINKS: Birthday Cake Soda: https://www.jonessoda.com/collections/jones-beverages/products/limited-edition-birthday-cake-soda-12-pk Birthday Cake Kisses: https://www.amazon.com/Hersheys-Kisses-Birthday-Cake-Flavor/dp/B01LYB6YCH/ref=sr_1_1_a_it?ie=UTF8&qid=1481735190&sr=8-1& You will need: For the cooking equipment: A large bowl Lasagna Pan Nonstick cooking spray For the meatloaf: 2/3 tbsp. onion powder 2 beaten and whisked eggs 1/2 cup Birthday Cake Kisses(about 22 Kisses)(see HELPFUL LINK)\ 1/2 cup Birthday Cake Soda(see HELPFUL LINK) 1 cup crumbled up generic party cake without the frosting or the frosting removed Pinch of salt Pinch of black pepper Plain breadcrumbs 1 lb. chopped, drained, crumbled up firm tofu 1. Set the frosting removed from the cake to the side for now. 2. Put all ingredients except for the plain breadcrumbs and frosting into a large bowl. 3. Mix all the ingredients up. You probably won't get a firm mixture at this point, so add some plain breadcrumbs until you get the mixtue to be slightly firm. 4. Spray a lasagna pan with nonstick cooking spray. 5. Form 2 loaves in the lasagna pan. 6. Bake in a 350 degree Fahrenheit oven for 40-45 minutes. 7. Take the meatloaves out of the oven and top them with the frosting you set aside in step 1. 8. Bon appetit! It's kind of late me posting a Thanksgiving recipe of any kind, but better late than never, amirite? This recipe is another way to use up any leftover ingredients from Thanksgiving dinner(who knows, maybe you froze a lot of leftovers right after Thanksgiving and you don't know a recipe to use them all in?)! This is my version of all my favorite foods to eat on Thanksgiving on one homemade pizza. I normally don't like gravy but I couldn't spread just cranberry sauce(which is actually a gelatin and not a sauce) onto the crust, so I mixed it with some gravy. The best part a green bean casserole is not the green beans- it's the French-fried onions on top! Similarly, the best part of candied yams isn't the yams(though those are good too)- it's the marshmallows on top! Unlike other Thanksgiving pizza recipes you can find on the Internet, this one has a crust made from sweet potato flour, which I found out existed when I looked at this good website: http://www.anti-grain.com/index.html I found a similar product on Amazon that I used: HELPFUL LINK: Sweet Potato Flour: https://www.amazon.com/Z%C3%B3calo-Peru-Sweet-Potato-Flour/dp/B0032BYMJE/ref=sr_1_2_a_it?ie=UTF8&qid=1481402909&sr=8-2& Though I tasted more pumpkin than sweet potato in the final product- I used canned pumpkin in the making of the crust, because a traditional Thanksgiving dinner isn't complete without a pumpkin pie! You will need: For the cooking equipment: A large bowl A baking sheet Parchment paper Nonstick cooking spray A medium bowl For the crust: 1 cup canned pumpkin 1 cup sweet potato flour(see HELPFUL LINK) 1 tsp. salt 1 tsp. baking soda Pinch of cinnamon Pinch of nutmeg Pinch of allspice To top the pizza: Gravy to taste(I used turkey gravy) Cranberry sauce to taste 2-4 oz. cold cut turkey breast Stuffing French-fried onions Marshmallows How to make the crust: 1. Put all the crust ingredients into a large bowl Knead the dough on a kitchen counter or in the large bowl until the dough is orange in color. 2. Put parchment paper onto a baking sheet. Spray the parchment paper with nonstick cooking spray. 3. Put the dough onto the parchment paper. Flatten the dough to 1/2 inch thick either with the palm of your hands or a rolling pin. 4. Bake the crust in a 400 degree Fahrenheit oven for 10-20 minutes, or until the dough is fully cooked. To top the pizza: 1. Mix the gravy and cranberry sauce together in a medium bowl until the cranberry sauce has been mashed and incorporated into the gravy to form something that looks like s sauce. 2. Pour only enough gravy-cranberry sauce onto the sweet potato flour crust to leave the edges of the crust uncovered. 3. Top the gravy-cranberry sauce with the turkey breast, stuffing, French-fried onions, and marshmallows. 4. Bake in a 400 degree Fahrenheit oven for 3-5 minutes. 5. Bon appetit! We've finally reached over 300 subscribers, guys(and gals)! So I searched for a 300-year old recipe to celebrate and I stumbled upon this link: http://www.notquitenigella.com/2013/08/13/easy-moussaka-recipe/ So shoutout to Not Quite Nigella for the inspiration for this recipe! This wasn't the original recipe I was going to make for you guys once we reached this milestone, but due to my liver resection, I can't consume alcohol yet(my liver hasn't fully regenerated yet), so no Chocolate Rum Raisin ice cream video(yet). Either I don't know what a zucchini looks like or the particular supermarket I went to didn't have any at the time, so the next best substitute was a cucumber, but I probably should've cooked the cucumber, because that was the predominant taste of this dish(along with the potatoes). However, I already was cooking three other vegetables for this video(the eggplant, potatoes, and onion) and I didn't want to have to cook a fourth one. Otherwise this dish turned out delicious! I loved how the cheese made the taste of the moussaka remind me of a cheeseburger! You will need: For the cooking equipment: A large baking sheet Nonstick cooking spray A large saucepot A frying pan A medium saucepot For the moussaka: 1 eggplant Olive oil 2-3 purple potatoes Enough water to fill a large saucepot 3/4 of the way 1 chopped up onion 1 lb. ground beef 12 oz. tomato paste Beef broth to taste Red cooking wine to taste Tomato sauce to taste Ketchup to taste Worcestershire sauce to taste Light brown sugar to taste Pinch of cayenne pepper Pinch of paprika Pinch of salt Pinch of black pepper 4 slices of American cheese 1 chopped up zucchini or cucumber, raw An additional 3/4 cup water Breadcrumbs 1. Spray a large baking sheet with nonstick cooking spray. 2. Cut the eggplant into half-inch slices(ideally). Place the slices onto the baking sheet. Drizzle the slices with olive oil. 3. Bake in a 425 degree Fahrenheit oven for 15 minutes. 4. Take out the baking sheet after 15 minutes and turn the eggplant slices over. Place the baking sheet back into the oven for another 15 minutes at 425 degrees Fahrenheit. 5. Take the baking sheet out of the oven and set the baked eggplant slices to the side for now. 6. Fill a large saucepot with water 3/4 of the way. Place 2-3 purple potatoes into the saucepot. Bring the saucepot to a boil. Let the potatoes boil for 3 minutes. 7. After 3 minutes, shut the stove off. Pour cold water over the potatoes. Let the potatoes cool off for 5 minutes. 8. Cut up each boiled potato into 1-inch wide slices(ideally). Pour olive oil into a frying pan. Spread the oil around the pan. Turn the stove on to let the oil heat up. 9. Sautee the potatoes in the frying pan until golden. You may need to make a batch for each potato. WATCH OUT FOR HOT OIL WHEN PUTTING THE POTATOES INTO THE PAN!! 10. Wash and dry the large saucepot. Put the sauteed potatoes into the large saucepot Pour a little more olive oil into the frying pan. Turn the stove on to heat the oil up. 11. Sautee 1 chopped up onion until it's translucent. Put the sauteed onion into a medium saucepot. 12. Pour a tiny bit more olive oil into the frying pan. Turn the stove on to let the oil heat up. 13. Put 1 pound of ground beef into the frying pan and brown the ground beef until it's completely brown. Set the browned ground beef to the side for now. 14. Put the next 11 ingredients into the medium saucepot. This will be the sauce for the moussaka. Mix all the ingredients up. 15. Bring the sauce to a boil on the stovetop. Once it's boiling, reduce the heat to a simmer and let the sauce simmer for 10 minutes. Stir the sauce occasionally. 16. Arrange the moussaka in the large saucepot as follows: Bottom layer: The sauteed and boiled potatoes 6th layer: 2 slices of American cheese that have been broken apart into pieces Top the cheese with: The sauce with the sauteed onions(all of it) 5th layer: 1 chopped up zucchini or cucumber, raw 4thlayer: The browned ground beef 3rd layer: 2 more slices of American cheese that have been broken apart into pieces 2nd layer: The baked eggplant slices Top the eggplant slices with: an additional 3/4 cup water Top layer: Breadcrumbs 17. Cook the moussaka on the stovetop for 20-25 minutes on low heat. DO NOT BOIL THE MOUSSAKA! 18. Bon appetit! |
Archives
October 2019
Categories
All
|




 RSS Feed