|
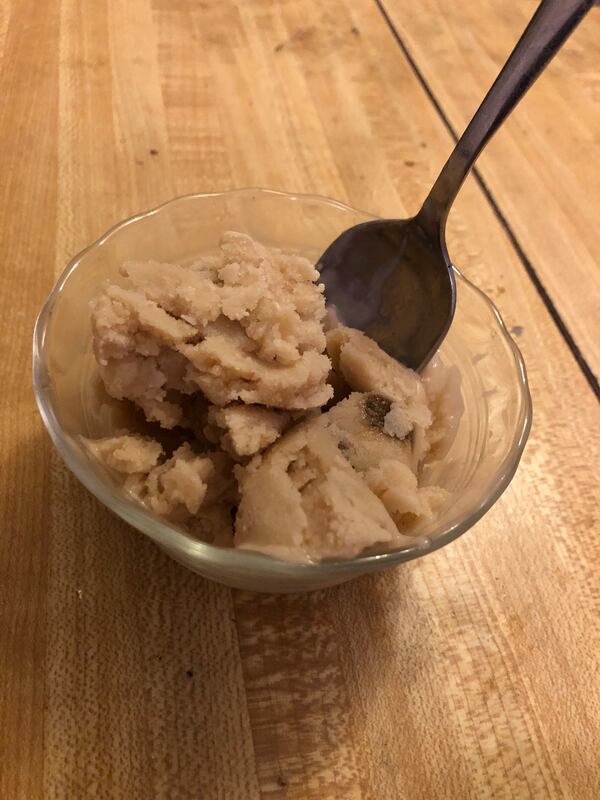
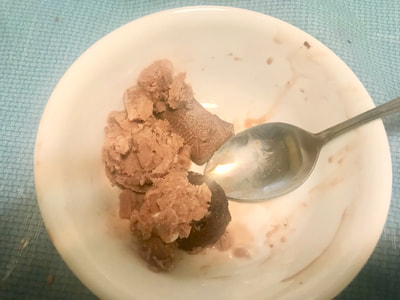
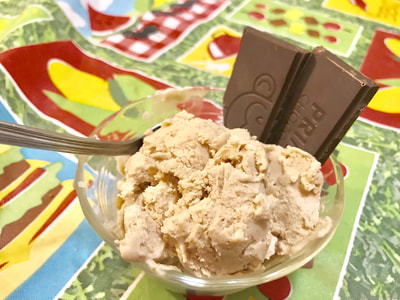
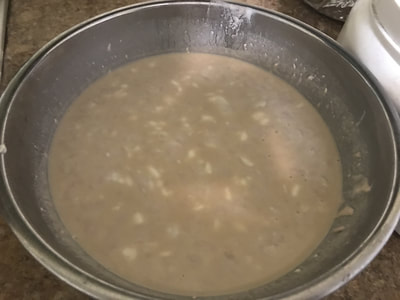
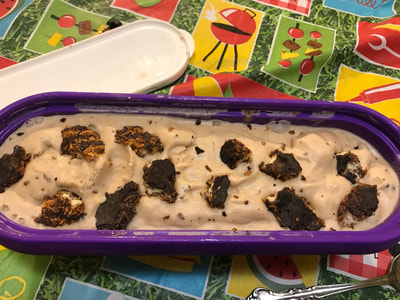
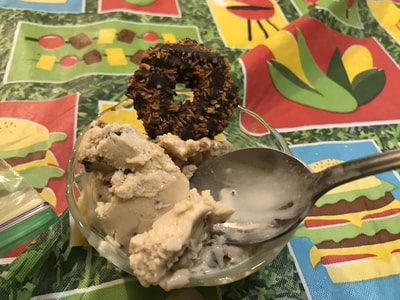
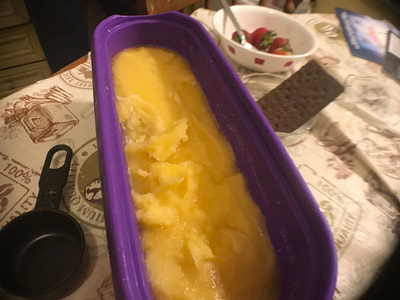
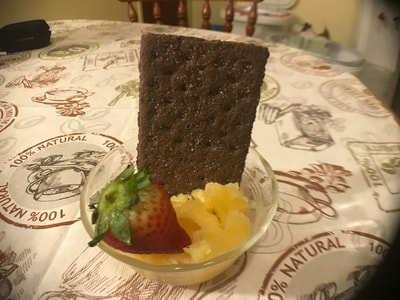
In this video, you'll learn 5 ways to use baru nuts, a rare type of nut found in the Brazilian savanna(I incorrectly say the Amazon in the video but it's not the same thing): 1. A nut butter 2. Baru nut milk 3. Baru nut ice cream using the nut milk 4. Cheese made from baru nut milk pulp 5. Baru nut ice cream cake All of these recipes(except for the cake) are vegan! You're probably wondering right now, "What does it taste like, anyway!?" Good question. It tastes like a dry almond, basically, though others claim it's a hybrid between cashews and peanuts. You may notice this video is quite long, at a little under 12 minutes. I haven't made a video that long in almost 4 years and I had doubts about whether to even bother putting this video up considering baru nut milk, like many nut milks, don't lend themselves to making creamy ice cream. Initially, I tried following the conventional methods for softening hard ice cream, namely leaving the open tub out for 10 minutes and using a spoon and knife that have been run under hot water, but it took me an additional 25 minutes to scoop just 1/2 a cup of ice cream. Then my sister told me to put the ice cream in the microwave, which is what she does all the time. I had my doubts about this method because I've always envisioned ice cream just melting into a puddle for even a second in the microwave. But apparently the newer microwaves on the market have a "soften mode" for frozen desserts. After lots of testing, I came to the conclusion that this ice cream needs to be softened in the microwave on soften mode for 2 minutes, 15 seconds. Trust me, after that time period, the ice cream will still be a block of ice but if you put just enough elbow grease in it, it's doable to scoop it out with an ice cream scooper. Yesterday, though, I had a breakthrough. When I went to scoop the ice cream after I softened it in the microwave, I scooped a huge chunk out. On my birthday, I buy myself an ice cream cake from a local ice cream store. You can have two flavors in your cake but if you only want one, the layers go like this: Bottom layer: ice cream On top of that: Cookie crunchies On top of the crunchies: layer of whipped cream To top the whipped cream: sprinkles I'm telling you this because I realized if I make the ice cream look like a deconstructed ice cream cake, I'll be more likely to eat it because nobody(including myself) wants to have an arm workout with their ice cream. Apart from the whipped cream, I had everything else. Once I bought some Cool Whip, this ice cream tasted even better! Granted, I had a lot of brain freeze just eating the block of ice cream but it was worth it. Sure I could've thrown the ice cream away but to me, that's disrespectful to the farmers in Brazil who toil so hard to grow the 80-foot trees baru nuts come from. I'd like to think as the years go on what with climate change, people will become less likely to throw out perfectly good food, even hard ice cream that can be turned into an ice cream cake. Apart from the less than desirable texture of the ice cream, it looks like some sort of chocolate ice cream that tastes very nutty. But I need to backtrack to the three recipes that are necessary to even make this ice cream: the nut butter, the milk, and the pulp resulting from the milk(which, while you don't need it for this ice cream, you really shouldn't throw out because it can be made perfectly edible). The Nut Butter Of the 5 recipes, the best one is definitely the nut butter(but the cake comes in a close 2nd). It tastes like a mix of chunky cashew, peanut, and almond butters. This is the only recipe I'll plan on repeating for the surplus baru nuts I have. To me, just eating plain baru nuts isn't very enticing. I'm a sucker for a nut butter and jelly sandwich, though! The Nut Milk When I made these recipes, I overestimated how many nuts needed to be soaked in water by a lot- 2 cups, to be precise. My blender can only fit 6 cups total and 1/4 of nut milk is just the nuts- the rest is water and other stuff, like sweeteners. I didn't throw out the extra soaked nuts, though. I turned them into milk off camera, but I used them for other things, like mac and cheese and my morning oatmeal. Of course, I drank some too. As for the pulp that I ended up with, I saved some of it to make a baru nut pulp bread off camera. Strangely enough, the milk tasted like the kind you get from a cow, at least once you put in the maple syrup. Otherwise, it's just bland. The Rest of the Nut Pulp There was a lot of pulp resulting from making the milk. I used most of the pulp to make vegan cheese. Some parts ended up hard but still edible nonetheless while most of it was just plain crumbly. It tasted nutty obviously and cheesy from the nutritional yeast I put in. The crumbly bits tasted like either really thin cottage cheese or dry Parmesan cheese. You can spread some of this cheese onto some Triscuits or you can use them as the cheese for homemade pizza. The cheese doesn't melt, though. My dad didn't try the cheese because he was full but he did try the milk and ice cream. To him, the milk and the ice cream tasted nutty. HELPFUL LINKS: Salted Baru Nuts: barukas.com/products/barukas-with-sea-salt Unsalted Baru Nuts: barukas.com/products/baruka-nuts Baru Nut Trail Mix: barukas.com/products/barukas-trail-mix Baru Nut Butter Ingredients 6 oz. salted baru nuts(see HELPFUL LINKS) 2 tbsp melted coconut oil Pinch of cinnamon 3/4 tsp. vanilla extract Instructions 1. In a small food processor, grind up the salted nuts for 5-10 minutes, or until really fine in consistency. 2. Scrape down the edges of the bowl. 3. Add 1 tbsp. of melted coconut oil. Process again until the contents in the food processor don't move around anymore. 4. Add the rest of the melted coconut oil, cinnamon, and vanilla extract. Process again until you end up with a creamy nut butter. 5. Reserve the nut butter for now. Baru Nut Milk Ingredients 13-16 oz. unsalted baru nuts(see HELPFUL LINKS) Enough water to submerge the nuts for soaking(I used 1 3/4 cups) plus an additional 3-4 cups of water 1 tsp. vanilla extract 2 tbsp. chopped dates Maple syrup to taste Instructions 1. In a large saucepot, soak the nuts in enough water to submerge them overnight, for at least 8 hours. 2. Using a colander with a bowl underneath, drain the nuts. Discard the water. 3. Place 12 oz. soaked nuts in a blender along with 3-4 cups of water. Some of the nuts will float while others will sink to the bottom. 4. On pulse mode, blend the nuts and water. If the mixture is too watery, add more soaked nuts and blend on pulse mode again. 5. Add the vanilla extract and dates. 6. Blend on pulse mode for at least 1 minute. 7. Taste the milk. If it's too bland, add maple syrup. 8. Blend on pulse mode again. 9. Repeat steps 7 and 8 until the milk is sweet enough for your liking. 10. With a large bowl underneath, strain the milk through a cheesecloth or nut milk strainer. Squeeze out as much milk as you can. The solids are your nut pulp, which you should reserve for now. Baru Nut Pulp Cheese Ingredients Baru nut milk pulp(see above) 3 tbsp nutritional yeast 1 1/2 tbsp. coconut oil 1-2 tbsp. lemon juice Pinch of garlic powder Pinch of cayenne or Aleppo pepper Pinch of salt Instructions 1. In a large bowl, combine all ingredients until you get a firm mixture. While you're mixing all the ingredients up, break up the coconut oil. 2. Chill the cheese in the fridge overnight, or for at least an hour. 3. Serve with Triscuits or use in place of Parmesan cheese for whatever you like. Baru Nut Milk Ice Cream Makes 1 quart Ingredients Baru Nut Milk(see above) 2 tbsp. baru nut butter(see above) Maple syrup to taste(optional) 1/4 cup baru nut trail mix(see HELPFUL LINKS) Instructions For Making the Ice Cream 1. Mix the nut butter into the milk. 2. Taste the mixture. If it's not sweet enough, add maple syrup until the ice cream mixture is sweet enough. 3. Put the ice cream mixture in the fridge to let it chill for 30-60 minutes. 4. Turn your ice cream maker on and pour the chilled ice cream mixture in. Let the ice cream churn for 11-12 minutes. 5. Add in the trail mix. Let the ice cream churn for another 3-4 minutes. 6. Turn the ice cream maker off. Scoop the ice cream halfway into a quart-sized ice cream tub. 7. Top that ice cream with more trail mix. Cover the trail mix with the rest of the ice cream. Top the ice cream with more trail mix. 8. Let the ice cream set in the freezer overnight, or at least 4 hours. For Scooping the Ice Cream 1. Take the lid off the ice cream tub and place tub in microwave. 2. Set the microwave to soften ice cream mode. Soften the ice cream in the microwave for 2 minutes, 15 seconds. 3. With an ice cream scooper and a lot of elbow grease, scoop out the ice cream. It's normal for it to look like shaved ice. Baru Nut Milk Ice Cream Cake Ingredients A slice of softened baru nut milk ice cream Oreo crumbs Cool Whip Sprinkles Instructions 1. Top a slice of the ice cream with some Oreo crumbs, then Cool Whip, and finally, the sprinkles.
3 Comments
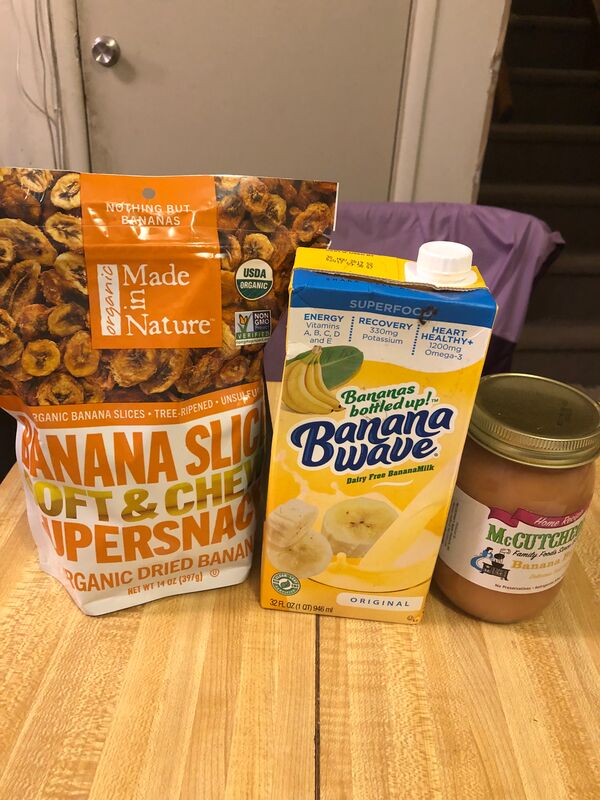
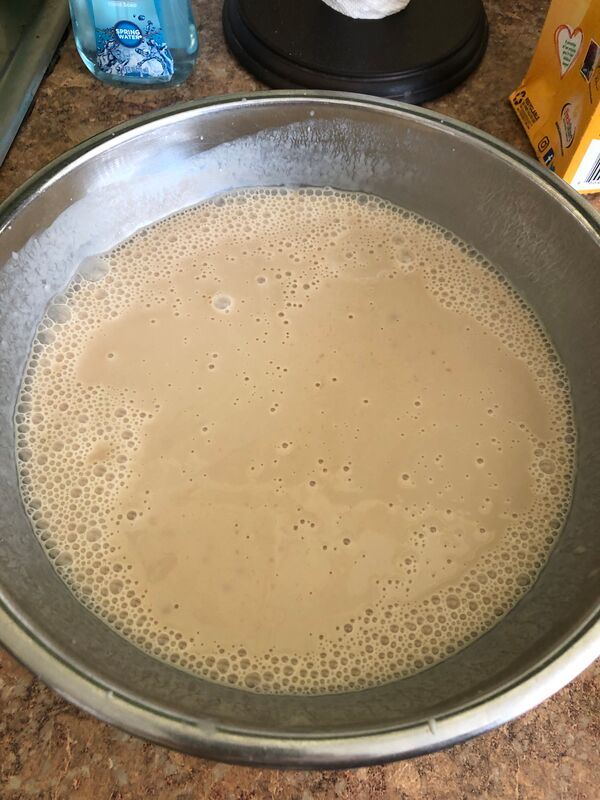
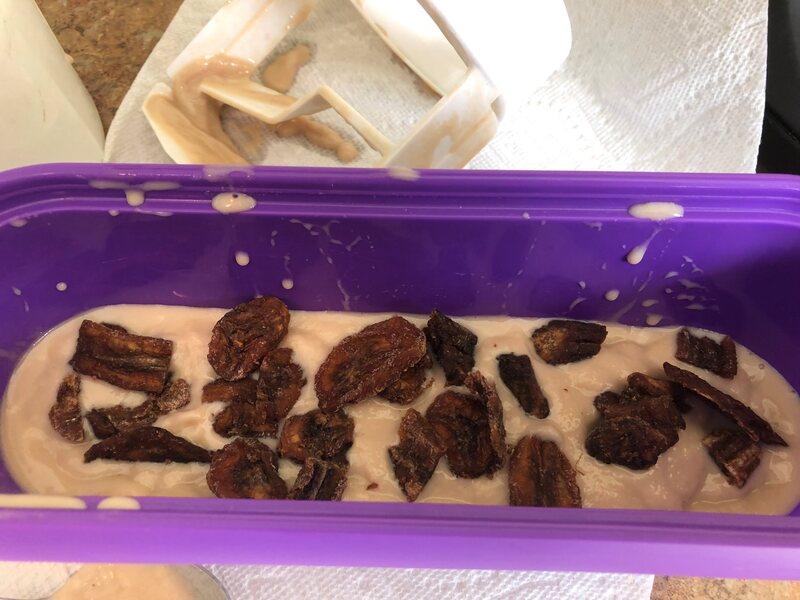
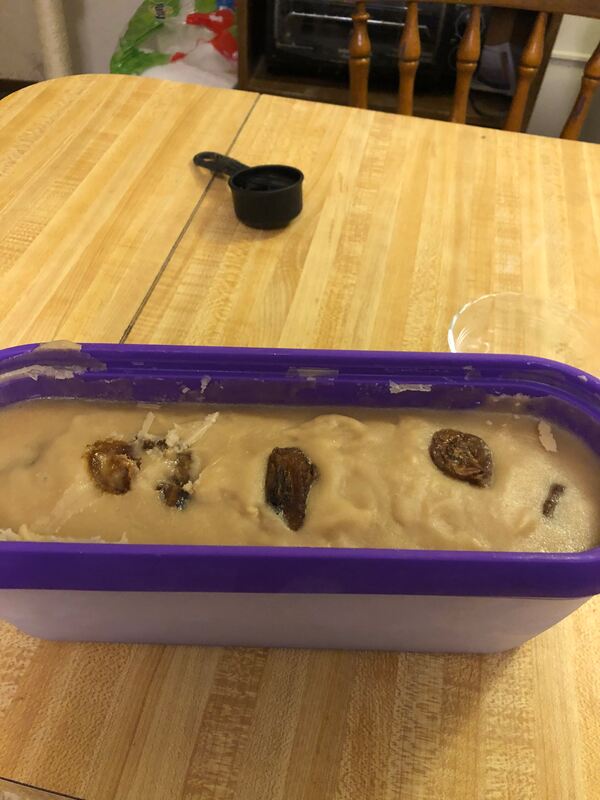
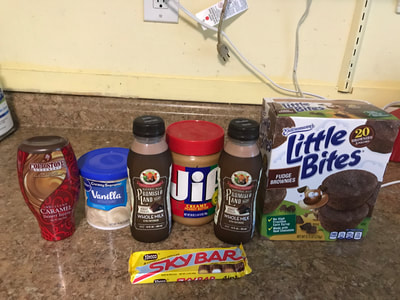
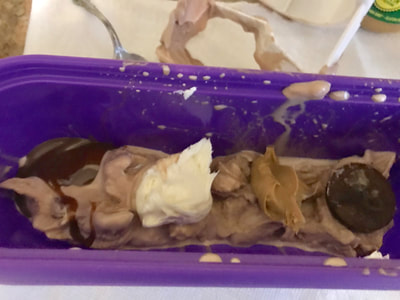
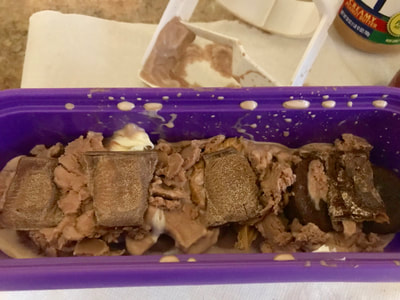
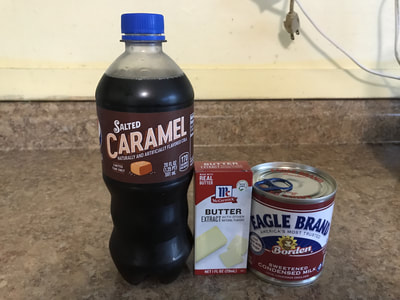
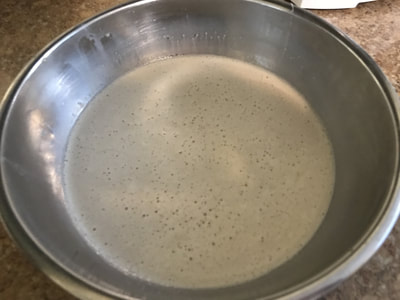
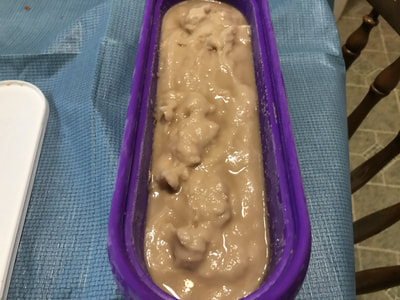
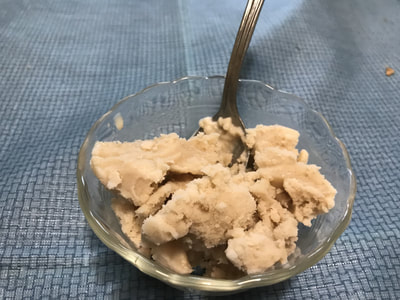
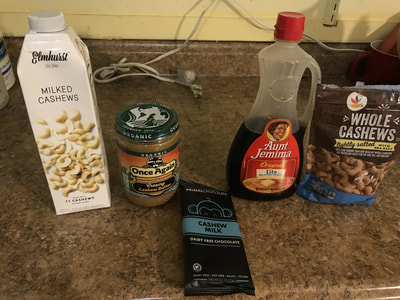
Each of the 3 ingredients in this vegan banana ice cream comes from bananas, including the milk. Now that's bananas! I discovering new ingredients so when I found this carton of Banana Wave Milk(I don't remember where), I just knew I had to make an ice cream out of it. Now just putting banana milk into an ice cream maker is possible, but I wanted to jazz up this ice cream a bit, so I mixed banana butter and banana milk together to make it even creamier. I'm also a big sucker for chunky ice creams, so I used dried banana pieces too. This has to be the easiest ice cream I've ever made and that's a good thing considering my sister, her husband, and her 2 kids under the age of 7 just moved in. I filmed this recipe on one of the rare occasions they weren't home but going forward, expect most of the filming will be in my basement apartment. But still expect children's voices in the background- apparently, you're not supposed to tell a 6-year old boy to shut up, much less a 2-year old. Listen, I'm gonna be honest with you, I anticipated needing a lot of elbow grease to scoop out banana milk ice cream, but I was pleasantly surprised having been proven wrong about this. You wouldn't even believe this is vegan. It tastes like bananas, obviously, with chewy, dried bananas pieces. Considering this is a one-note ice cream, I recommend putting a some sort of flavored coconut butter on top like this. Why coconut butter? It has coconut oil in it, which is the key ingredient to a conventional magic shell. But I really wanted to keep the sundae vegan, so the kind of magic shell you'd find in the supermarkets is no good since there's milk in it. Heck, even my dad wanted a second helping because it was that good and he's far from vegan! HELPFUL LINKS: Banana Wave Milk: https://www.bananawave.com/products/ Banana Butter: https://www.amazon.com/McCutcheon%60s-Banana-Butter/dp/B01N65WKNK/ Dried Banana Pieces: https://www.amazon.com/Made-Nature-Organic-Dried-Bananas/dp/B06XTF7N69/ref=sr_1_3? You will need: For the ice cream: 32 oz. Banana Wave Milk(see HELPFUL LINKS) 18 oz. banana butter(see HELPFUL LINKS) Dried banana pieces(see HELPFUL LINKS) 1. In a large bowl, combine banana milk and banana butter. It's ok if banana butter clumps float to the bottom of the bowl. You won't see them in the final result. 2. Pour the mixture into an ice cream maker. Churn the ice cream for 11 minutes. 3. Add 6-10 dried banana pieces in. Let the ice cream churn for another 2-3 minutes. 4. Turn the ice cream maker off. Scoop half of the ice cream into an ice cream tub. 5. Top that ice cream with however many banana pieces you like before covering them up with the rest of the ice cream. 6. Let the ice cream harden in the freezer overnight, or for at least 4 hours. One of the most innovative candy bars I know of is turned into a delicious, homemade ice cream, complete with all the components of a Sky Bar, as well as said candy bars too! It's a shame Necco(the maker of Sky Bars) shut down because they made one of the most creative candy bars known to humanity- the Sky Bar, which has 4 sections: caramel, vanilla, peanut, and fudge. So I thought to myself, "wouldn't it be awesome to make an ice cream that also has those 4 sections of a Sky Bar?" I remember buying Sky Bars when I was a kid at a local pharmacy with my mom. It's a shame that both my mom and that pharmacy are now gone. Of course I had to take some creative liberties when it came to the sections: in the actual bars, peanut-flavored caramel, which is a thing is used, but that's kinda hard to find so I just used some good 'ol fashioned peanut butter instead. As for the vanilla part, the vanilla part in a Sky Bar is said to have the consistency of a Valomilk cup, which itself is hard to find too, but it's basically a milk chocolate cup filled with marshmallow cream, so I used vanilla frosting instead. The only fudge I could find at my supermarket were mini fudge brownies, which is not part of a Sky Bar. I wish I bought more chocolate milk because 2 cups really isn't much when it comes to making ice cream. But then again, when I recorded this video, I had just gotten my top surgery date so time was of the essence to record a video before I needed to recover. This recipe was kind of a spur of the moment-type deal. But this ice cream is so addicting and all the sections of the Sky Bar ice cream tasted better frozen. Though it was kind of a pain in the ass to scoop out the frozen sections and by that I mean it took a lot of elbow strength to get them out of the tub. Honestly, this ice cream is probably the most fun I've had making out of all the ice cream videos I've made on this channel. My dad said the ice cream tasted like it came from an ice cream parlor! HELPFUL LINK: Sky Bars: www.amazon.com/Sky-Bar-1-5-24-count/dp/B008H4WLLC You will need: For the cooking equipment: An ice cream maker An ice cream tub For the ice cream: 2 cups full-fat chocolate milk 5 Sky Bars(see HELPFUL LINK) Caramel sauce Vanilla frosting Peanut butter 3 mini fudge brownies 1. Turn the ice cream maker on and pour the chocolate milk into the maker. Let the ice cream churn for 11 minutes. 2. Break apart 4 Sky Bars into quarters and then cut those quarters in half. Put the Sky Bar pieces into the ice cream maker. 3. Push everything down with a spoon so the candy churns with the ice cream. Let the ice cream churn for another 3 minutes. 4. Turn the ice cream maker off and put 1/3 of the ice cream into an ice cream tub. Top 1/4 of that ice cream with caramel sauce, another 1/4 with vanilla frosting, another 1/4 with peanut butter, and the last 1/4 with 1 mini fudge brownie. 5. Top the toppings w/ another 1/3 of the ice cream. Repeat step 4, except this time put in 2 mini fudge brownies. 6. Top those toppings with the rest of the ice cream. Break apart another Sky Bar into quarters and place them on top of the ice cream. 7. Put the lid on the ice cream tub and place in the freezer overnight. If it's made with milk, can caramel be turned into a sorbet? Why, yes it can! I used Salted Caramel Pepsi Soda, but that was a limited edition flavor last fall and can't be found as of now. But I put an alternative salted caramel drink in the link below that I think will work. It's espresso, albeit salted caramel flavored, but it should do the trick! I love when the big soda companies come up with limited edition flavors but I don't love the fact they're mostly sold in 12-packs. I can barely make enough recipes with a 6 pack of beer, for Christ's sake! But I took the opportunity to buy a single serving of the salted caramel soda in the coolers they have near the checkout counters. This was last fall, when no one eats sorbet or ice cream, so I left the bottle uncovered until this summer. So how does it taste? I didn't actually sip the soda before I turned it into a sorbet but from reviews I read online of people that have, they said it had a fruity taste and a caramel aftertaste. I found this simple 3-ingredient soda pop sorbet recipe but I didn't want to use vanilla extract, which has nothing to do with caramel. Sure I could've ordered caramel extract, but that's kinda obvious. So I used butter extract(which is a thing) instead and let me tell you, it brought out the caramel flavor and took some of the sweetness out of it. This sorbet has a one note taste of a combination of caramel and carbonated drink, but long after I shot this video, I decided to put some magic shell on top of the sorbet(flavored coconut butter works too!) and now I'm more inclined to actually take it out of my freezer and eat it. Like most sorbets and other frozen desserts that are easy to scoop, it melts quickly, so you better eat it fast, but not too fast so as to give yourself brain freeze! That's quite the culinary tightrope to walk on! My dad didn't like the sorbet because he said it tasted like candy. Well, technically, caramel is candy and is used in candy bars, so he's right about that astute observation. HELPFUL LINK: CARAMEL DRINK: www.amazon.com/Starbucks-Doubleshot-Espresso-Salted-Caramel/dp/B06X9RZWPN/ref=sr_1_7_a_it?ie=UTF8&qid=1531669968&sr=8-7& You will need: For the cooking equipment: A large bowl An ice cream maker An ice cream tub For the sorbet: 20 oz. caramel drink(see HELPFUL LINK) 14 oz. chilled, sweetened condensed milk 2 tsp. butter extract 1. Mix all the ingredients into a large bowl. 2. Turn the ice cream maker on and pour the sorbet mixture into the bowl of the maker. Let the sorbet churn for 12-14 minutes. 3. Turn the ice cream maker off and scoop the sorbet into an ice cream tub. Put the lid on the tub and place the tub in the freezer overnight, or at least 4 hours. Do you like the taste of cashews? Then you'll love the taste of this cashew milk ice cream that has cashew butter and actual cashews in it! To really be extra, have it with some cashew milk chocolate. Every nut can be turned into the following things:
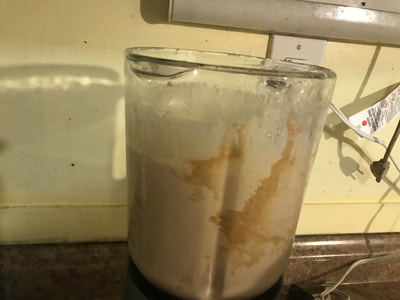
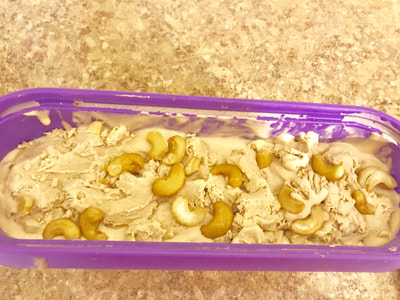
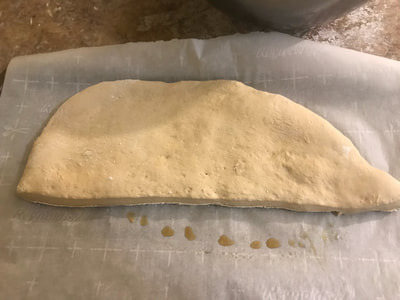
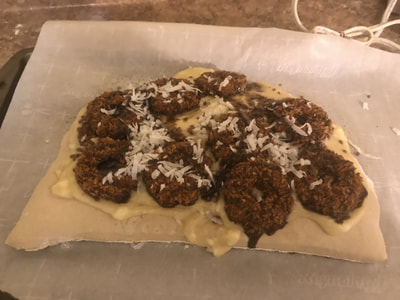
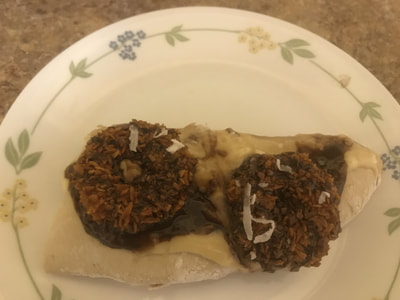
Yea, flour doesn't really apply to ice cream, but the milk and nut butter sure do! Cashews are unique in that they can also be turned into cream and cheese, but making both is a time-consuming process and unnecessary for the purposes of this recipe. Did you know cashews grow on apples in the rainforest? When cashews are harvested, they're detached from the apples it grew on and the apples are usually left for the livestock since they don't travel well fresh. If you do manage to find cashew apples in the states, it'll probably be in a Hispanic supermarket in the frozen food aisle. I tried using cashew apples in this recipe but I just couldn't stand the smell of the fruit after boiling it to remove the exterior wax. It smells like fruity gasoline to me. Yuck! The cashew butter I used had a rubbery aftertaste to it that was hidden by the sweetness of the maple syrup and the cashew milk chocolate. Me thinks it must've been the brand of cashew butter I was using since cashews don't have a rubbery aftertaste. The only drawback with this ice cream is that it's hard to scoop out immediately after removing it from the freezer, so you need to let it sit uncovered at room temperature for 15 minutes before attempting to scoop. I think the maple syrup makes it hard to scoop, so using granulated sugar probably would've been better. This ice cream is creamy and doesn't melt easily as much as dairy-based ones. My dad said this ice cream was nutty and likened it to Haagen-Dazs ice cream in that it's heavy, which is a pretty big compliment, especially coming from my dad! HELPFUL LINK: Cashew Milk Chocolate: eatingevolved.com/products/cashew-milk-primal-chocolate You will need: For the cooking equipment: A blender An ice cream maker An ice cream tub For the ice cream: 16 oz. cashew butter 2 cups cashew milk 3/4 cup maple syrup Whole, roasted cashews Cashew milk chocolate bar for garnish(see HELPFUL LINK) 1. Put the first 3 ingredients into a blender and blend on high for 3 minutes. 2. Turn the ice cream maker on and pour the blended ice cream mixture into the bowl of the machine. Let the ice cream churn for 11-13 minutes. 3. Add some cashews into the bowl of the machine and let the ice cream churn for an additional 2-3 minutes. 4. Turn the ice cream maker off and pour half of the ice cream into an ice cream tub. Top that ice cream with more cashews and top those cashews with the rest of the ice cream before topping that with additional cashews. 5. Put the lid on the tub and let the ice cream harden overnight in the freezer. Once it's frozen, let the ice cream soften at room temperature, unopened, for 15 minutes before scooping. 6. Top with a piece of cashew milk chocolate. This dessert pizza has all the components of Samoa Girl Scout Cookie: chocolate, caramel, and coconut. People create recipes with Girl Scout cookies, particularly either Thin Mints, Tagalongs, or Samoas, but you've never seen one turned into a pizza- until now! The dough had a mind of its own- it kept needing more and flour just so it wouldn't stick to my hands. Then when I went to flatten it, it kept retracting to its original thick, flattened state, thus resulting in a really chewy crust. Good thing I made a ton of caramel frosting to wash that crust all down. The best pizza doughs use yeast but that takes forever and I just want to mix up all the ingredients once and forget the rest, so I used beer, which is related to yeast. But if you don't want alcohol in your pizza, you can always used milk- thanks to the baking powder, the dough's gonna rise anyway as its baking in the oven. For some reason, the softened cookies reminded me of those Lunchable dessert pizzas when I was a kid where they gave you enough stuff to make 2 pepperoni "pizzas" but only enough materials for 1 dessert "pizza". Spoiler alert: I ate the dessert pizza before the pepperoni ones. The crust reminded me of all those Friday nights when I was a teenager when my sister and I would watch DVDs from Blockbuster while waiting for some dessert pizzas from Domino's Pizza to show up later than 30 minutes(so much for that guarantee they showed on TV- the delivery guy always confused our address, which ends in "Street" with another of the exact same name a mile away that ends in "Drive". Where's good urban planning when you need it?) that had to be ordered over the phone and not through an app. And this was when Domino's solely made pizza and not other stuff along with pizza. 6 things in that paragraph do not exist today:
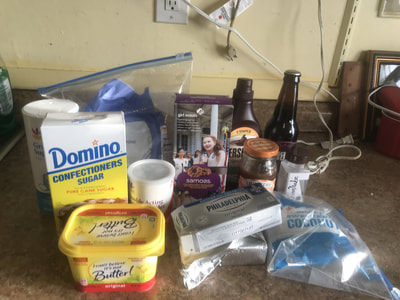
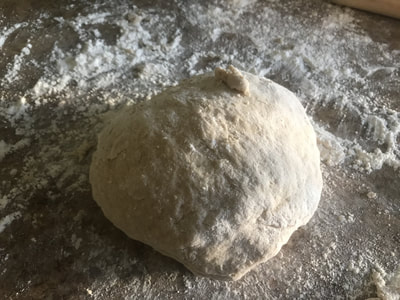
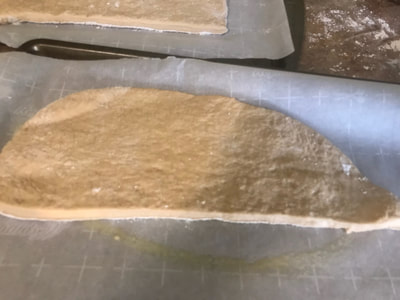
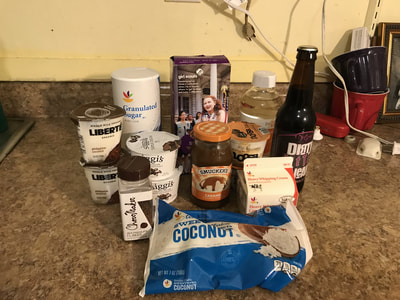
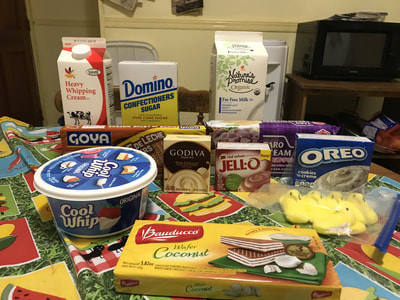
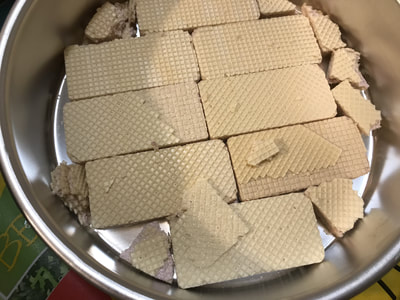
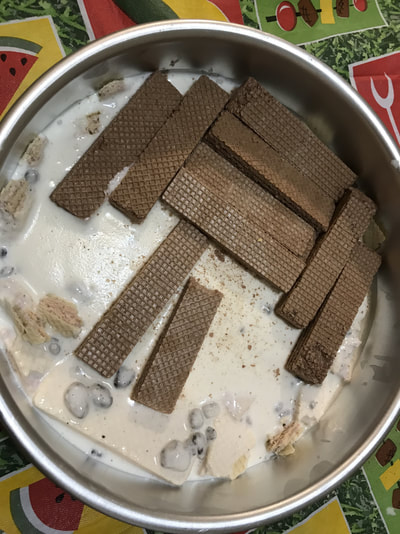
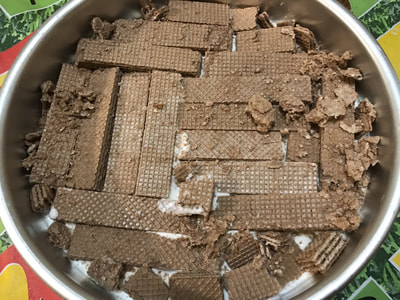
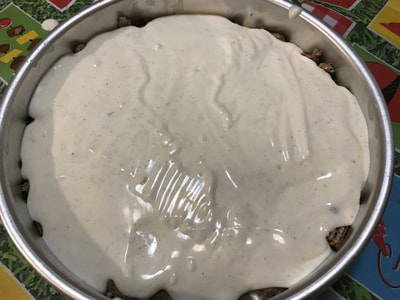
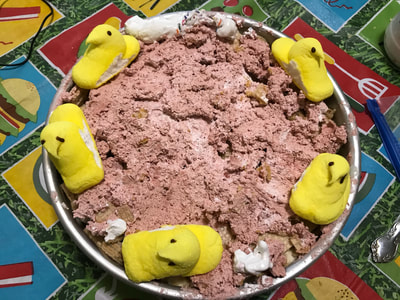
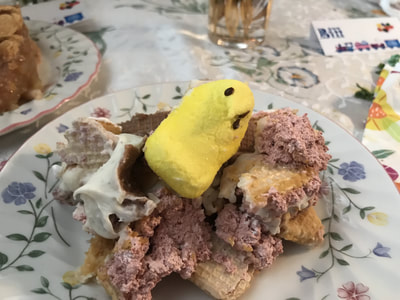
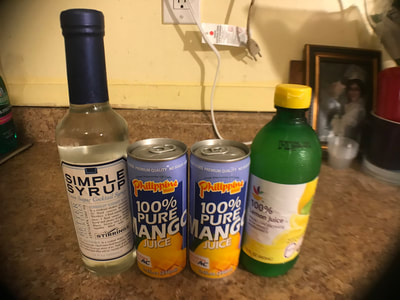
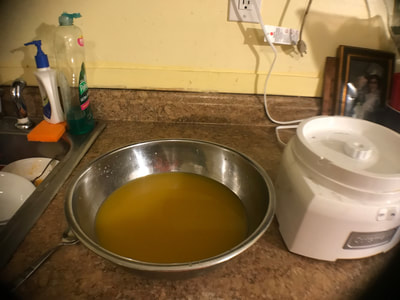
My dad didn't try this pizza because it has beer in it and chocolate, which keeps him up at night. Makes 6-8 slices of pizza You will need: For the cooking equipment: 2 large bowls A rolling pin Parchment paper Nonstick cooking spray 2 baking trays For the crust: 3 cups all-purpose flour 2 tsp. baking powder A litte over 1/4 cup granulated sugar 12 oz. chocolate caramel coconut beer or milk Additional flour for the countertop For the caramel frosting: 1/4 cup softened butter 8 oz. softened, plain cream cheese 1 cup confectioners' sugar Caramel sauce To top the pizza: The caramel frosting Samoa Girl Scout cookies Chocolate sprinkles Shredded coconut Chocolate syrup To make the crust: 1. Mix the dry ingredients in a large bowl before adding the beer or milk. 2. Combine all ingredients until you get a dough ball. 3. Flour your countertop or surface and pour the dough onto the floured countertop or surface. Knead the dough until it's no longer sticky. You're going to need a lot of flour so if your hands get sticky, just add flour to them and pour more flour onto the dough ball. This might take 10-15 minutes. 4. Flour a rolling pin and flatten the dough ball as much as possible. It's normal if it wants to retract to its original shape, just keep flattening it. 5. Cut the flattened dough in half. 6. Place parchment paper on 2 baking trays and spray the parchment paper with nonstick cooking spray. 7. Put each crust onto a baking tray and bake the crusts in a 350 degree Fahrenheit oven for 18-20 minutes. 8. Let the crusts cool at room temperature for 10 minutes before decorating them. To make the frosting; 1. Mix the butter and cream cheese together in another large bowl. An electric mixer would really help! Then add the confectioners' sugar and caramel sauce. 2. Mix everything until you get a frosting that's not liquidy for at least 2 minutes. If it still is, just add more confectioners' sugar to the frosting. To decorate the pizza: 1. Put caramel frosting on the crusts, leaving 1 inch on the edges uncovered. 2. Top the frosting with the Samoa cookies, the chocolate sprinkles, the shredded coconut, and the chocolate syrup, all in that order. 3. Bake the pizzas in a 350 degree Fahrenheit oven for 1-2 minutes. Here's a new way to enjoy those yummy chocolate caramel coconut Girl Scout cookies- in a frozen yogurt! Chocolate caramel coconut beer optional. They sell Samoa Ice Cream at my local supermarket so there was no point in making something I can just buy in its finished form. Not everyone has chocolate coconut caramel beer but with a frozen yogurt recipe, you don't have to have the beer in it. You can find chocolate yogurt, caramel yogurt, and coconut yogurt in many supermarkets these days, so I decided to combine all 3 types of yogurt and turn it into a frozen dessert! Given my experiences with making ice cream in the past, I anticipated that the frozen yogurt would be hard to scoop but I was pleasantly surprised how easy it was. The key is that you need to use yogurt with fat in it- fat-free yogurt(who eats that s--- anymore!?) will only result in a frozen dessert that's hard to scoop. And if it's hard to scoop, I'm less inclined to eat it. Ain't nobody want to wait 15 minutes for their ice cream to thaw out enough to be scoopable! The frozen yogurt tasted malty from the beer, but coconut was also another flavor detected along with chocolate. Caramel not so much. My dad didn't try this recipe due to the beer in it. Even if I forgone the beer, he still wouldn't have eaten it due to the chocolate in it. You will need: For the cooking equipment: A medium saucepot A large bowl Aluminum foil An ice cream maker An ice cream tub For the frozen yogurt: 12 oz. chocolate caramel coconut beer(optional) 8 oz. full-fat chocolate yogurt(I used Icelandic-style yogurt) 8 oz. full-fat salted caramel yogurt(I used Australian-style yogurt) 11 oz. full-fat coconut yogurt(I used French-style yogurt) 1/2 cup heavy whipping cream 1 cup granulated sugar 1 tbsp. light corn syrup Caramel sauce Shredded coconut Chocolate sprinkles At least 4 Samoa Girl Scout Cookies For the beer(optional); 1. . Pour the beer into a medium saucepot. Put the saucepot on the stove on low heat and let the beer reduce until there's only 8 ounces left. Reducing the beer cooks some of the alcohol out, which will enable the ice cream to freeze. For the rest of the frozen yogurt: 1. Put the next(or first if you're not using beer) 6 ingredients into a large bowl and mix all the ingredients up. It's ok if there's cream on top from the yogurt. 2. Put aluminum foil over the bowl and put it in the fridge for at least 2 hours, or overnight to let it chill, especially if you're using beer. 3. Put in some caramel sauce, shredded coconut, and chocolate sprinkles into the frozen yogurt base and mix all the ingredients up. 4. Turn your ice cream maker on and pour the frozen yogurt base into the bowl of the ice cream maker. Let the frozen yogurt churn for 15 minutes. 5. Break apart 4 Samoa cookies either with your hands or a knife into the smallest pieces possible. Put the chopped cookies into the churning frozen yogurt. Let the frozen yogurt churn for another 2-3 minutes. 6. Turn the ice cream maker off and pour half of the frozen yogurt into an ice cream tub. Top with more Samoa cookies(doesn't matter if they're chopped) and caramel sauce. 7. Cover the cookies with the rest of the frozen yogurt. Put the lid on the ice cream tub and place in the freezer for at least 6 hours, or overnight. This no-bake cake has the perfect combination of wafer cookies and pudding! I'm astounded by the variety of wafer cookie and pudding flavors out there. Pudding and wafer cookies were made for each other, so it makes perfect sense to make a cake out of them. The only wafer cake cake(not a typo) I was able to find was something called oblatne, which is a Russian wafer cake made with really thin wafer cookies, like the kind you'd find at an Eastern European grocery. Personally, I like the American version of wafers, which are thicker. It's a good thing I didn't like the sesame brown rice wafer cookies I bought from an Asian supermarket(they tasted like coffee, which I hate), otherwise I would've had to 86 the red velvet pudding layer and that's no fun- I mean it's so artificially colorful! But I probably should've bought more Cool Whip- there wasn't enough frosting to cover the top wafer layer, so I had to improvise with some Peeps and marshmallow fluff to cover the exposed layers. The wafers definitely softened having been in the fridge overnight covered by pudding, but that kind of put an extra special touch to this dish. This cake is very rich and heavy but man it's addicting! I made this cake for my family's annual Easter celebration and people ate half of the cake. The other half lasted another 6 days before it was all gone(by me)! You definitely taste the red velvet frosting obviously. The taro and dulce de leche wafers not so much. But the coconut flavor is prominent from said flavored wafers. My grandpa tried the cake and he thought it was very good. Sadly, I didn't record him eating it on camera so you're going to have to take his word for it. HELPFUL LINKS: Taro Cream Wafers: www.amazon.com/Mei-Taro-Cream-Wafers-7-05/dp/B006RPBAX8/ref=sr_1_1_a_it?ie=UTF8&qid=1523208257&sr=8-1& Red Velvet Pudding Mix: www.amazon.com/JELL-Pudding-Red-Velvet-3-4/dp/B01FLO53CY/ref=sr_1_1_a_it?ie=UTF8&qid=1523203249&sr=8-1& You will need: For the cooking equipment: A deep cake pan A medium bowl A large bowl For the cake: 7 oz. Taro Cream Wafers(see HELPFUL LINKS) 4 oz. Oreo Pudding mix 3 1/2 cups heavy whipping cream 3 1/2 tbsp. confectioners' sugar 5 oz. Coconut Wafers 3 oz. White Chocolate Pudding mix 4.5 oz. Dulce de Leche Wafers 3.4 oz. Red Velvet Pudding mix(see HELPFUL LINKS) 8 oz. Cool Whip Peeps Marshmallow fluff 1. Put a layer of taro wafer cookies into the bottom of a deep cake pan. Break apart the cookies to fill in the edges of the layer in the pan. 2. Make the Oreo pudding according to the package directions in a medium bowl. 3. Measure out 2 cups heavy whipping cream and 2 tbsp. confectioners' sugar and put both into a large bowl. Mix until thickened to get whipped cream. 4. Mix the Oreo pudding with the whipped cream and pour it on top of the taro cream wafers. 5. Top the Oreo pudding mixture with a layer of coconut wafer cookies. Break apart the cookies to fill in the edges of the layer in the pan. 7. Make the white chocolate pudding according to the package directions. 8. Measure out 1/12 cups heavy whipping cream and 1 1/2 tbsp. confectioners' sugar and put both into a large bowl. Mix until thickened to get whipped cream.. 9. Mix the white chocolate pudding with the whipped cream and pour it on top of the coconut wafers. 10. Top the white chocolate pudding mixture with a layer of dulce de leche wafer cookies. Break apart the cookies to fill in the edges of the layer in the pan. 11. In a large bowl, mix the Cool Whip and red velvet pudding mix until you get a pink frosting. Cover the dulce de leche wafers with the frosting. 12. Cover the cake with aluminum foil and place in the fridge for at least 6 hours to let it chill and set. 13. Top any remaining visible dulce de leche wafers with Peeps and marshmallow fluff. It seems like the timing of videos like these don't match the expiration dates of the ingredients on hand. I don't remember when I bought this 100% mango juice but I do know I bought it from Trader Joe's(don't bother trying to look for it there- they change the ingredients they sell monthly and that's what I like about them. I just wish I had more time to go there more often.) and it expires in April 2018, so clearly this is not going to be a summer video. The first thing that comes to one's mind when it comes to the month of October is not mango or brainfreeze(it's Halloween). I only made s sorbet once before and when I looked at this link for inspiration, the recipe said to make simple syrup from scratch. Luckily, you can buy simple syrup at the supermarket(at least where I am)! There's no need to chill the mango juice mixture if you leave the bottle of simple syrup in the fridge for 2-3 hours. Just mix all the ingredients and pour into the ice cream maker! It tasted like mango but my dad thought it tasted like pineapples(and no, this is not the first time he's had sorbet despite falsely admitting to that in the video). The only bad thing about this sorbet is that it melts quickly so you need to immediately eat it after scooping it! You will need: For the cooking equipment: A large bowl An ice cream maker An ice cream tub A large soup spoon For the sorbet: 12 oz. simple syrup(which is just sugar dissolved in water), chilled in the fridge for 2-3 hours before hand 3 tbsp. lemon juice 16 oz. 100% mango juice(you can use any mango flavored juice if you can't find the pure kind) 1. Pour the first two ingredients into a large bowl and mix them together. Then add the mango juice and mix everything together again. 2. Turn your ice cream maker on and pour the mango juice mixture into the bowl of the maker. Let the sorbet churn for 14 minutes(or whatever your ice cream maker manual's instructions say). 3. Transfer the sorbet into an ice cream tub using a large soup spoon to prevent the sorbet from melting. Put the lid on the tub and place the tub in the freezer overnight. Bon appetit! |
Archives
October 2019
Categories
All
|

 RSS Feed