|
Towards the end of each calendar year, many YouTube channels have a year-in-review video of some sort, whether it be featuring all of the videos in the past year or the top moments from the channel in that year. These videos usually are uploaded a few days before the end of the year, leaving out any top moments after that point in the calendar year. So I'm uploading this video with just a few hours left in 2015 where I'm from(it may be 2016 now where you are, so in that case, "Happy New Year!"). A video with 90 different pictures of the foods I have shown you how to make in 2015 would be way too much, so instead I am satirizing the year-in-review video type and I hand picked the top 10 worst meatloaf recipes of 2015. You may or may not agree with my choices(except for the #1 choice, I think we can all agree that one was pretty gross). Enjoy(or not)! There will be more good(and inevitably bad) recipes coming out in 2016, so stay tuned!
0 Comments
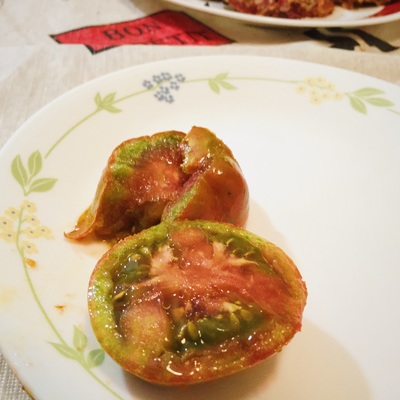
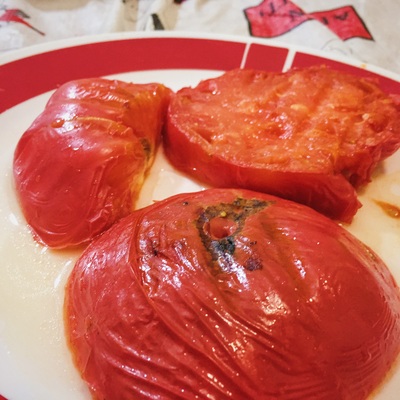
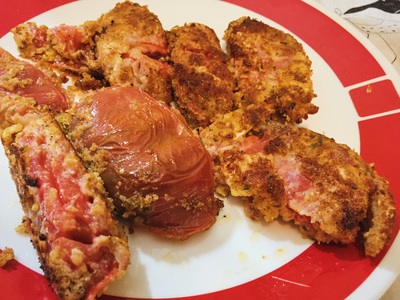
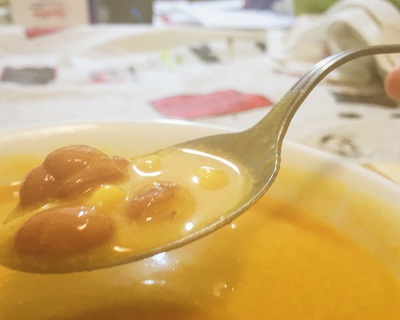
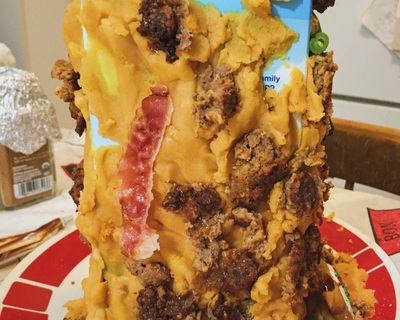
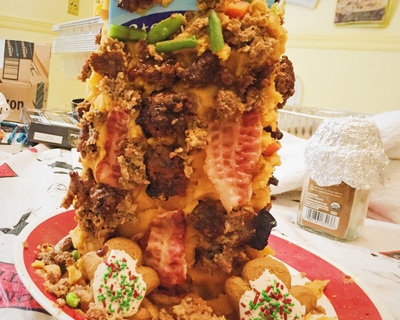
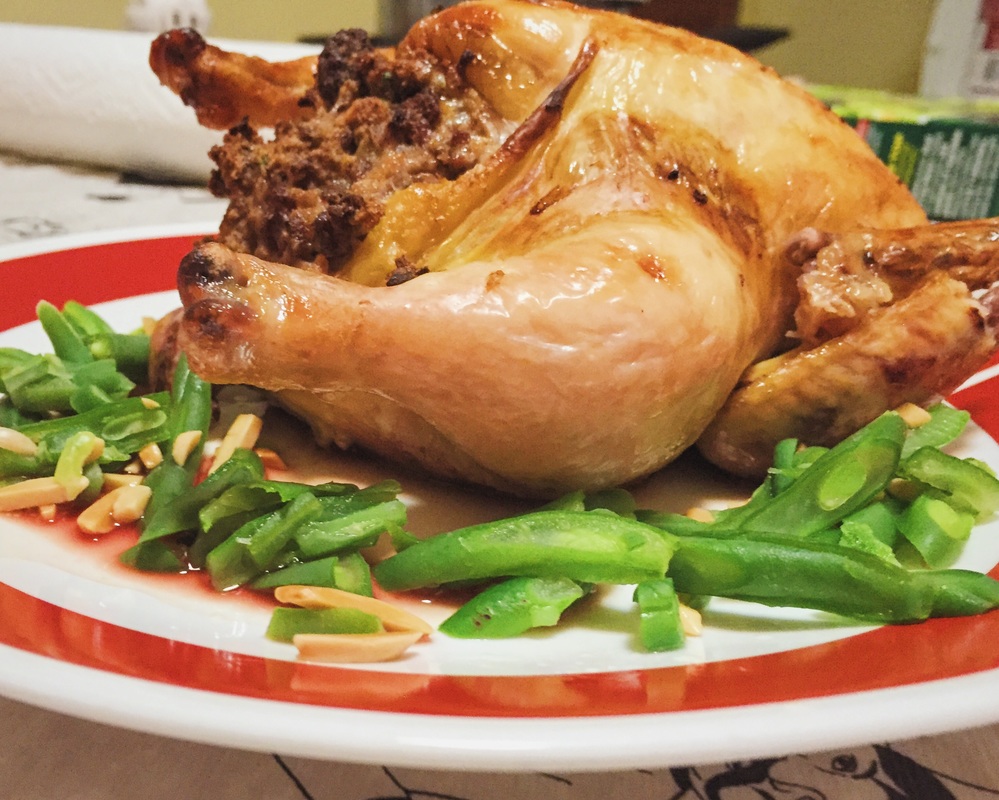
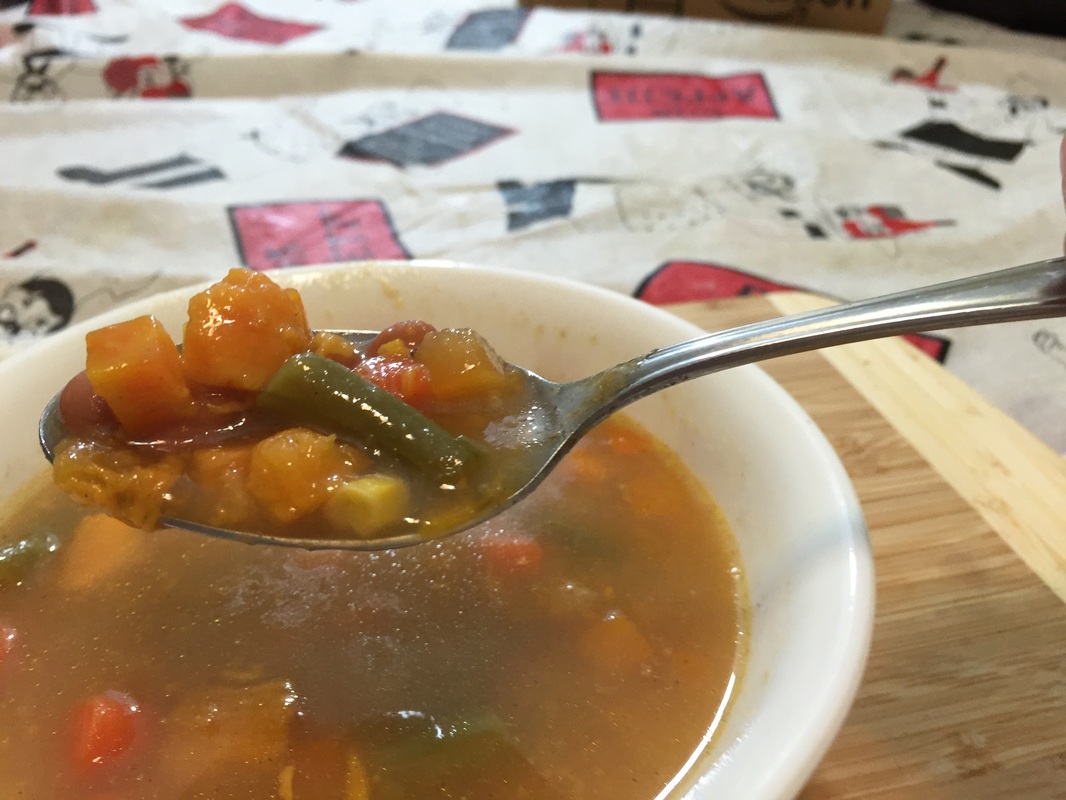
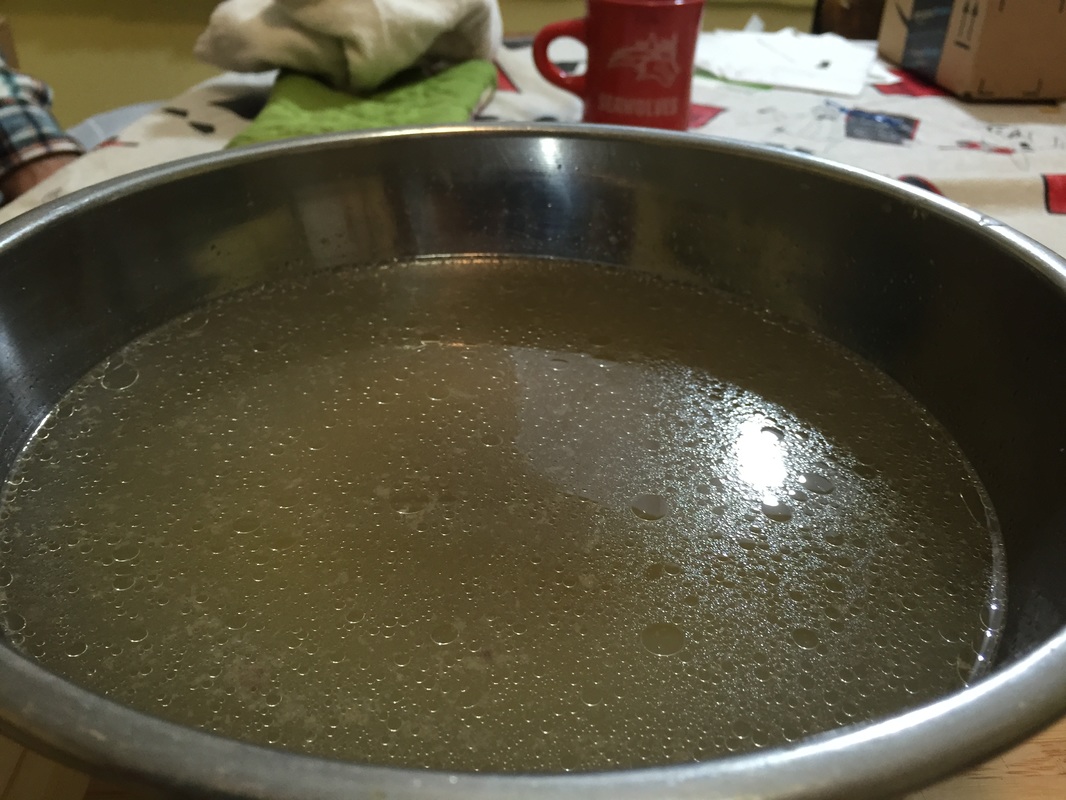
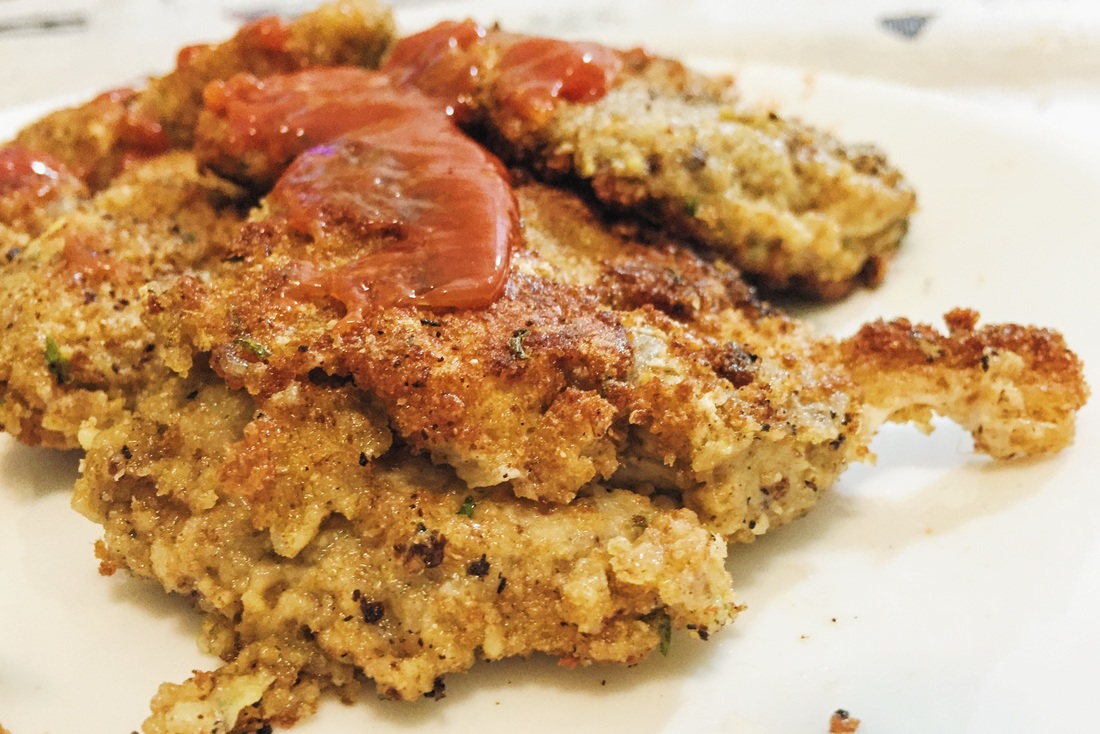
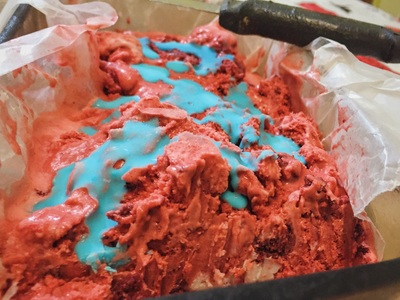
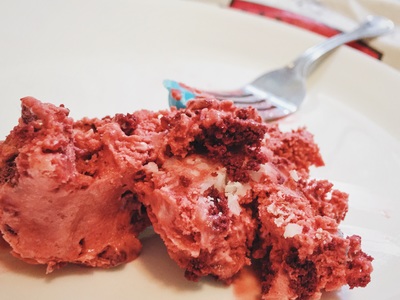
Left-to-right: Roasted Heirloom Tomato, Grilled Heirloom Tomato, and Fried Heirloom Tomato A few weeks ago I went to a local gourmet supermarket and I happened to stumble upon some heirloom tomatoes for sale. You may be wondering, "What's an heirloom tomato and how does it differ from a regular tomato?" Heirloom tomatoes can be of many different colors and sizes, ranging from red, green, orange, yellow, brown, or a mix of these colors. A regular tomato is almost always a red tomato of uniform size. Heirloom tomatoes are tomatoes whose seeds have been passed down through generations(hence the term "heirloom"). Spoiler alert: the seeds in the tomatoes I used in this video won't be passed down to future generations because I threw out the seeds. I am definitely not a gardener. In fact, I still remember having to grow a plant in 2nd grade(way back in the 20th century(ok, 1999, but I''m not that old!)) with some boy named Stephen as my partner. Our plant never grew. :( In my first internship, I researched ways to grow vegetables via hydroponic gardening, though I have never partaken in this practice myself. I also think heirloom tomatoes are just another food ingredient that is a product of the advent of gourmet, more expensive foods(in the supermarket I went to, heirloom tomatoes were $5.99 a pound!) that have pervaded most supermarkets still in business today in the 2010s. Waldbaum's and Pathmark never had fancy gourmet foodstuffs, and now they are no longer in existence. Heirloom tomatoes taste like ordinary red tomatoes, only with unidentifiable slight differences in taste depending on the color of the tomato. I originally wanted to just show you how to grill and fry tomatoes but a video that has the title "2 ways to..." doesn't seem to make sense to me. But that's my preference. So I also am showing you how to roast an heirloom tomato(which is just a fancy way of saying "put in the oven for 3-5 minutes"). You can also eat heirloom tomatoes raw, but what's the fun in that? I got my George Foreman grill for my birthday in November and it is amazing. Although I did have such a grill when my mom was still around 6+ years ago and she used it. But this is the first time I'm using the grill myself, and the first time in 6+ years my family is using such a grill. You will need: For grilling: 1 heirloom tomato Olive oil A pastry brush A grill 1. Wash your tomato in some water. Then cut it in half vertically. If you have one piece that is bigger than the other, cut that piece in half as well. 2. Brush each tomato slice in olive oil using a pastry brush. 3. Warm up your grill(a George Foreman grill usually takes 4 1/2 minutes to warm up; as for a charcoal grill, I don't know). 4. Once your grill is warmed up, put the oiled up tomato slices on the grill. If you're using a George Foreman grill, put the cover down and let the slices grill for 4 1/2 minutes. There's no need to flip them over halfway through the grilling process. If you're using a charcoal grill however, you will need to turn them over after 2 minutes and 15 seconds. 5. Don't worry if you don't see any black grill marks if you're using a George Foreman grill. As long as you see any faint grill marks, you're good to go. The grilled tomato slices may be a bit mushy but that's OK. Bon appetit! For frying: 1 heirloom tomato AP flour 2 eggs Breadcrumbs 2 small bowls 1 medium bowl Canola oil for frying A frying pan 1. Wash your tomato in some water. Then cut it in half vertically. Cut each half into vertical strips that look like steak fries(really thick French fries). 2. Place the flour and eggs in separate small bowls. Beat and whisk the 2 eggs. 3. Dredge each strip first in flour, then in the beaten and whisked eggs, and then coat them with breadcrumbs. 4. Once all your strips are dredged and coated, pour some canola oil into a frying pan. Heat the oil up. 5. Once the oil is heated up, place the strips into frying pan very carefully. Since tomatoes are very moist by nature, you'll need to watch out for hot splashing oil!! 6. Once all of the strips are in the pan, let them cook on one side for 1-2 minutes. Then, using a spatula, flip them over and let them cook on the other side for 1-2 minutes. 7. Bon appetit! For roasting: 1 heirloom tomato Olive oil A pastry brush A baking tray or cookie sheet 1. Wash your tomato in some water. Then cut it in half vertically. 2. Brush the top and bottom of each half with olive oil using a pastry brush. 3. Place the oiled up halves on the baking tray. Roast in a 350 degree Fahrenheit oven for 3-5 minutes. Bon appetit! Left: Eggnog Stew Right: Spoonful of Eggnog Stew You might be wondering what caused me to think up such a crazy recipe. I needed recipe ideas for videos for the last week of December and when I was going grocery shopping two weeks ago, I saw lots of eggnog being sold and I have a go-to stew recipe that up until now, I have used beer, as per the recipe. But I wanted to change things up and turn a holiday dessert drink into a hearty dinner, so I used non-alcoholic eggnog in place of beer. I honestly thought this recipe wouldn't turn out well. My hypothesis was that since eggnog is so thick, there's no possible way for it to boil. It turns out eggnog does boil(hooray!), as done any other liquid. This revelation opens up the way for future stews using other types of liquids(ex. soda, juice, wine, milk). As for why I chose the other ingredients for the stew, I wanted ingredients that symbolized the holiday season(i.e. both Thanksgiving and Christmas), so I used turkey stock(which is only sold around November-December, strangely enough), corn, butternut(winter) squash, and Roman beans. Wait, what!? How does Roman beans factor into the holidays? These type of beans are also known as cranberry beans(which have no relation to actual cranberries) and we all eat cranberries in some shape or form on Thanksgiving(mainly in the form of "cranberry sauce" which is really just some sort of cranberry jam). I also read online that Roman beans taste like chestnuts(even though to me they tasted like black beans) and that is related to Christmas via the song "Chestnuts Roasting on an Open Fire". Allspice is related to cinnamon and the holiday season. You will need: For the cooking equipment: A large saucepot A small bowl For the stew: 2 cups of eggnog 2 cups of turkey stock 3 1/2 cups of drained Roman(cranberry)beans 4 cups of winter(butternut)squash & corn, combined Pinch of allspice Pinch of marjoram Pinch of onion powder Pinch of black pepper Pinch of salt For the thickener: 2 tbsp. of all-purpose flour 1 tbsp. of lemon juice 1 tsp. of sugar 1/4 cup of water 1. Put all the stew ingredients in a large saucepot. 2. Mix all the ingredients together so that the spices and everything else in the saucepot are distributed evenly among the stew. 3. Cover the saucepot and bring the stew to a boil on the stove. 4. Once the stew is boiling, reduce the heat to a simmer. Let the stew simmer for 45 minutes. Stir the stew around every 5-10 minutes. 5. As the stew is simmering, put all the thickener ingredients in a small bowl. Mix all the ingredients up to distribute them evenly. 6. Once the stew is done simmering, turn the stove off for now. Add the thickener to the stew. Mix the thickener into the stew. 7. Cover and bring stew to a boil again. 8. Once the stew is boiling, reduce the heat to a simmer. Let the stew simmer for 3 minutes. 9. Once the stew is done simmering a second time, uncover the saucepot and let the stew cool off for 5-10 minutes before putting it in your mouth. 10. Serve with wonton strips or garlic bread. Bon appetit! Left picture: Back of the "house" Right picture: Front of the "house" A few months ago, somebody on Reddit told me to make a Meatloaf gingerbread house. I don't remember which user made this suggestion, but all I have to say is "Thank you". The only example of a savory gingerbread house I could find on YouTube is some video by Epic Meal Time a few years ago about a gingerbread house made entirely out of meat. I thought getting a few pieces of meatloaf and making an actual house of them would not only be frustrating, but the house probably wouldn't hold its shape together. So I went back to my only memory of 1st grade- when we made actual(sweet) gingerbread houses using little milk cartons kids drink from in the cafeteria as the base and the glue was frosting. One of the things you could decorate the house with was some Froot Loops cereal. I kept eating the cereal and the teacher had to tell me to stop eating it several times. My 6-year old logic thought, "It's food. Why can't I eat it!?" This was back in 1996(yikes!). So a memory that is almost two decades old helped me make this recipe, only with a much bigger base for a house. I remember eating most of my aunt's gingerbread house by myself a few years ago. One year, I remember making my own gingerbread house at home based off a kit from this place near me called "Gingerbread University"(not an accredited university). Today, I am in the middle of finishing off a finished gingerbread house I bought from a gourmet supermarket made entirely out of chocolate bars, Oreos, gum drops, peanut butter gingerbread men, and M&Ms. Of course, there isn't actually any gingerbread in the house; it's just a candy house. That's the correct term for it. Gingerbread is one of the only Christmas food flavors I like, besides eggnog. Candy canes are gross to me and peppermint just tastes like toothpaste(I don't care if peppermint is edible, let's just leave that flavor for brushing teeth). As for Christmas traditions, most of my family has Christmas dinner on the night of Christmas Eve and I don't go because I end up coming home around midnight. Instead, my dad and I usually visit my grandpa on Christmas Day for lunch and dessert. It's a change from the glutton-fest known as Thanksgiving. I said in the video that since there's leftover meatloaf and vegetables, that can be its own dinner in itself, but for some reason my meatloaf was dry. I guess I needed more moisture in it besides the eggs and ketchup, but in any case, a dry meatloaf isn't appetizing. You will need: For the cooking equipment: A lasagna pan Nonstick cooking spray A ceramic plate A large bowl For the meatloaf: 2/3 tbsp. of onion powder 2 beaten and whisked eggs 1/2 tbsp. of Worcestershire sauce 1/2 cup of ketchup Pinch of oregano Pinch of paprika 1 tbsp. of real bacon bits Pinch of black pepper Pinch of salt 1 cup of crumbled up gingerbread cookies(about 4 cookies) 2-3 tbsp. of breadcrumbs 1 pound of 93% ground beef For the house: An empty 1-gallon milk carton 2 1/2 cups of mashed sweet potatoes(see helpful link) 1 cup of mixed vegetables 3 slices of cooked bacon French-fried onions Breadcrumbs Cinnamon BBQ sauce 2 gingerbread men For the meatloaf: 1. Put all the meatloaf ingredients in a large bowl. 2. Mix the ingredients up so that all the ingredients are distributed evenly among the mixture. 3. Spray a lasagna pan with nonstick cooking spray. 4. Form 2 loaves from the meatloaf mixture. 5. Bake in a 350 degree Fahrenheit oven for 60-65 minutes or until the internal temperature of the meatloaf reaches 160 degrees Fahrenheit. For the house: Note: You should decorate the house and prepare the ingredients for the house while the meatloaf is cooking. 1. Put some plastic gloves on for sanitary reasons. 2. Place some cooled mashed sweet potatoes on the ceramic plate. Flatten the potatoes out using the back of a spoon. 3. Put the milk carton on top of the mashed sweet potatoes so that the carton doesn't move around as you are decorating the house. 4. Cover the carton up with the mashed sweet potatoes. Make sure the mashed sweet potatoes are cool enough to the touch so that you won't burn your hands. 5. Ultimately, the house is yours so you can decorate it however you want but I placed some mixed vegetables(carrots, corn, peas, green beans) onto the mashed sweet potatoes as decorations. I also use some slices of bacon and some French-fried onions to represent some of the doors and windows of the house. 6. When the meatloaf is done cooking, let it rest for 10-15 minutes before breaking it apart. 7. Once you can break apart the meatloaf without burning your hands, place the pieces of meatloaf onto the mashed sweet potatoes and try to cover up the mashed sweet potatoes with the meatloaf pieces. 8. Top the roof with breadcrumbs, cinnamon, and BBQ sauce. 9. Place the 2 gingerbread men in front of the house. These are the edible "residents"! 10. Bon appetit! Note 1: Milk cartons aren't microwavable and this house can serve at least three people, so to heat up any leftover food on the house, remove the food from the house and just microwave the food. I know it kept me really full and I only ate 1/3 of it! Note 2: You're probably only going to end up covering the house with 4 ounces of the meatloaf and you might have some leftover vegetables, so I suggest you have the remaining food as a meal. I have never stuffed a meatloaf inside another type of meat like a Cornish hen until this recipe. It feels weird stuffing a chicken knowing that you're stuffing it up where the hen's anus was. This recipe was also very risky. It's (hopefully) common knowledge in food safety that you don't put raw beef and raw chicken in the same area because that leads to cross-contamination. That is why I browned the beef before stuffing it in the hens and why I didn't put the meatloaf stuffing and hens in the same lasagna pan. There wasn't enough room in my oven for 3 lasagna pans so I had to sadly dispose of the remaining meatloaf stuffing. However, I suggest you cook it in the oven in a separate lasagna pan if you are fortunate enough to have a large oven that can fit 3 lasagna pans, to reduce waste. Whenever you're cooking raw poultry, it's imperative to fully cook the chicken and have a working meat thermometer available, which I didn't have, so I had to judge whether the hens were cooked purely by sight alone, which is not a good idea to try at home It turns out red cooking wine is the same color as the blood of the hens. I should've in hindsight used white cooking wine, even if it cost me an extra $3. Some parts of the hens were still a little pink after cooking them, so I had to dispose of the raw meat. I'm a bit leery after reading an article online about how the national system that distributes chicken meat has no federal regulations and may come contaminated without the supermarkets that sell it from realizing it. Apparently the FDA and the USDA aren't on the same page when it comes to poultry. However, these chicken meat distributors do have to ensure that ground chicken is safe for consumption so any future meatloaf recipes that use ground chicken aren't off the table. Now I know why my aunt was so stressed out about cooking the turkey on Thanksgiving- serving raw turkey that sickens your family will probably put you on their naughty list for years to come. My dad is leery of eating chicken and beef in the same meal, even though he said the chicken was good. Fortunately, nobody in my household got sick from the hens. You will need: For the cooking equipment: A frying pan 3 lasagna pans or roasting pans A large bowl A small bowl A pastry brush For the edible stuff: 2 Cornish hens, with the giblets removed For the meatloaf stuffing: 1 pound of 93% ground beef Olive oil for browning 2 beaten eggs 1/2 cup of shredded mozzarella cheese 1 cup of breadcrumbs 2 tbsp. of red or white cooking wine Pinch of paprika Pinch of cayenne pepper Pinch of garlic powder Pinch of onion powder Pinch of black pepper Pinch of salt For the glaze: 3 tbsp. of red or white cooking wine 2 tbsp. of olive oil Pinch of sage Pinch of black pepper Pinch of salt For pouring on top of the hens: 1/2 cup of red or white cooking wine for each hen 1/2 cup of chicken broth for each hen To prepare the meatloaf stuffing: 1. Pour olive oil in a frying pan. Heat the oil up. 2. Once the oil is heated up, put the ground beef into the frying pan. Brown the beef until it is fully cooked(i.e. it is brown in color, with no red or pink parts remaining). 3. Place the browned beef in a large bowl. Let it cool off for 5-10 minutes or until you can touch it without burning yourself. 4. Place the rest of the meatloaf stuffing ingredients in the large bowl. 5. Mix all the ingredients together so that the egg and the rest of the ingredients are distributed throughout the mixture. To prepare the hens: 1. Remove the packaging off of the hens. 2. Remove the giblets that are inside the hens. That involves sticking a clean hand inside where the hen's anus was. If you bought them from a supermarket, they should be in little plastic bags. 3. You can fry the giblets if you want to eat them but otherwise, you can just dispose of them. 4. Once the giblets are removed, wash the hens on both the inside and outside under some water, like in a sink. 5. Check that there are no feathers on the hens. If you happen to find feathers, burn the feathers off. For the glaze: 1. Put all glaze ingredients in a small bowl. 2. Mix all the glaze ingredients together. Set the bowl to the side for now. The remaining steps: 1. Stuff the hens with the meatloaf mixture. You'll probably have some meatloaf mixture left over considering these hens don't weigh more than 2 pounds usually. If you have room in your oven for a 3rd lasagna pan or roasting pan, form the meatloaf stuffing into a loaf shape and bake in the oven at 400 degrees Fahrenheit for 15-20 minutes so that the raw egg inside the stuffing is fully cooked. Otherwise, dispose of the remaining meatloaf stuffing. 2. Place each hen inside a lasagna pan or roasting pan. 3. Brush the glaze on the hens using a pastry brush. 4. Pour the red or white cooking wine and chicken broth on top of the hens. This is to moisten the hens. 5. Roast inside a 400 degree Fahrenheit oven for 60-75 minutes, or until the internal temperature of the thigh, breast, and wing reaches 165 degrees Fahrenheit. This is where a working meat thermometer comes in handy. 6. As the hens are cooking, spoon the liquid that's on the bottom of the pans on top of the hens every 15 minutes to ensure the hens don't dry up. 7. Serve with vegetables of your choice(I used green beans and almonds) 8. Bon appetit! I got into making stews because after my Oktoberfest Meatloaf video in October, I had 5 bottles of pumpkin beer left over. Then after I made my Deconstructed Oxtail Meatloaf video that same month, I had leftover vegetable stock. So I found a recipe on the Internet that used beer in a stew(http://www.myrecipes.com/recipe/vegetable-beef-stew) and I made it my own. I had made 3 stews before this video(none of which were recorded on film), so 3 bottles of beer were used, which left me with 2 bottles left. In the making of this recipe, there was a failed stew recipe I tried making- it involved French fried onions, raw hominy(gross), and raw adzuki beans(which are disgusting). It smelled horrible so I 86'd that recipe and decided to make a video of a stew using ingredients I like that I have used before in stews. It was actually the first time I had hominy and adzuki beans. Lo and behold, this recipe actually smelled and tasted good! Adzuki beans, by the way, when made into a paste, are sweet, which is what I was initially hoping for. In fact, adzuki bean paste is a common Asian dessert paste. You may be wondering, why pink beans? I have used them in a previous stew with success and they sound very interesting. Goya has cans of pink beans. I make stew because I usually make enough of it to last me 3-5 dinners. Plus it pairs well with garlic bread or even wonton strips! This recipe uses the ham stock I made in the previous video. I don't make stocks for my own health, you know! You will need: For the cooking equipment: A large saucepot A small bowl For the stew: 4 cups of ham stock 1- 12 ounce bottle of beer(I used pumpkin beer but you could use whatever beer you want, so long as it's not nonalcoholic beer- I don't know how that would taste in a stew) 3 1/2 cups of pink beans, drained(it's important to drain the beans first; otherwise, you'll end up with a salty stew and nobody likes salty stews) 9 chopped up baby carrots 4 cups of cooked vegetables(I used frozen vegetables that I cooked in the microwave. They were sweet potatoes and a medley of green beans, peas, corn, and carrots. But you can use whatever vegetables you want) Pinch of onion powder Pinch of marjoram Pinch of black pepper Pinch of salt For the mixture that thickens the stew: 1 tsp. of granulated sugar 1/4 cup of water 2 tbsp. of all-purpose flour 1 tbsp. of lemon juice 1. Put all stew ingredients in a large saucepot. 2. Mix all the ingredients of the saucepot around with a spoon so that the spices are distributed evenly among the stew. 3. Place saucepot on a stove and turn the burner on. Cover saucepot with lid. Bring stew to a boil. 4. Once the stew is at a boil, reduce the heat to a simmer. Let the stew simmer for 45 minutes. 5. Every 10 minutes, stir the stew around using a metal spoon. 6. After 45 minutes, turn the burner off for now. 7. To make the thickening mixture, put the granulated sugar, water, flour, and lemon juice in a small bowl and mix well. 8. Pour thickening mixture into the saucepot. Stir the mixture into the stew. 9. Cover saucepot with lid and bring stew to a boil. 10. Once the stew is at a boil, reduce the heat to a simmer. Let the stew simmer for another 3 minutes. 11. After 3 minutes, turn the burner off and uncover the saucepot. Let the stew cool down for 5-10 minutes before you actually put it in your mouth. 12. Serve with garlic bread or wonton strips. 13. Bon appetit! I have made several stews in the past, but this is the first time I actually made one from scratch. It's not just because I want to challenge myself and expand my culinary horizons, it's because I can't find any kind of stock made from pigs in the supermarket. I have seen: Beef Stock Chicken Stock Seafood Stock Vegetable Stock Turkey Stock Lamb Broth but not anything that says "Pork Stock" or "Ham Stock", which I find strange. Then again, I also can't find Duck Stock or Insect Stock either. So I decided to make my own and share this recipe with all of you. In my research, a lot of ham stock recipes take several hours, which I don't have to spare. But I did find one recipe that requires simmering for only 2 hours(http://www.foodandwine.com/recipes/ham-hock-stock). I just modified that recipe to suit my needs, mainly cut ingredients in half, because I didn't have 4 ham hocks. You might be wondering, what is a ham hock? Think of it as the pig's ankle or wrist, which is mainly bone, but also has meat and fat on it. A picture of a stock or broth isn't too appetizing on it's own, but it is an essential ingredient to any soup or stew. One of the things with having cats is that they want to know what smells funny to them, so Jordan is in the video in the beginning. Of course, there's no way he will ever eat this recipe, but at least he doesn't meow often, unlike Cameron. Feline cooking assistants are terrible. All they do is smell the food you're making and intrude on you while you're cooking. You will need: For the cooking equipment: A large pot A large bowl A colander For the stock: 9 cups of water(that was the amount of water that submerged the ham hocks, but it might be different for you.) 2 ham hocks(about 1 lb. of ham hocks) 9 chopped up baby carrots 1 bay leaf Pinch of onion powder 1/2 tbsp. of crushed peppercorns Pinch of salt Pinch of black pepper 1. Put the water in a large pot. 2. Submerge the hocks in the water. Make sure they are fully submerged in water, otherwise, you won't get much stock. 3. Put the rest of the ingredients in the pot. 4. Stir mixture with a spoon to distribute the spices evenly. 5. Put pot on a stove and heat the burner. Cover the pot with a lid. Bring contents of pot to a boil. 6. Once the contents are at a boil, reduce the heat to a simmer. Let the contents simmer for 2 hours, or until the meat has fallen off the bone(i.e. the hocks are no longer pink). 7. Place a large bowl in a kitchen sink. 8. Place a colander directly on top of the bowl. 9. Pour contents of pot into the colander. Make sure you don't burn yourself with splashing hot liquids!! This will separate the solids from the liquid. The liquid is your stock. 10. Dispose the solids since ham hocks are inedible on it's own. Let stock cool down for a few minutes before tasting it and/or using it in another recipe. 11. Bon appetit(I guess)! When I went to a supermarket at least 10 miles away from my home, I found this interesting loaf of meat called "scrapple". I've heard about the dish before when I was doing my research for my 7th Toastmasters speech, "The History of Meatloaf". It was only $1.99 for a pound of this scrapple. I showed my sister this block of meat and she thought it was disgusting. My dad tried some of the finished dish and he spit it in the garbage! Heck, I even fooled my grandma by giving her a piece of the finished dish by first telling her it was a type of sausage I fried. She said it was good, and then I told her the contents in scrapple: Water Pork Pork with skins Pork livers(!) Pork tongue(!) Pork hearts(!!) Flour Onions Spices Corn starch Then she got pissed. But it was a good prank! Later, she told me the scrapple was bland. I loved it, so that's what counts. Scrapple is actually a regional dish you can find in Pennsylvania, Maryland, and Delaware. I was actually surprised I found some scrapple in NY state. You're probably not going to find scrapple anywhere else in the USA or even the entire world. Though I have seen some homemade "scrapple" recipes that use breakfast sausage on the Internet(example: http://www.justapinch.com/recipes/breakfast/meat-breakfast/sausage-scrapple.html) . But scrapple is normally made in factories. The Amish eat scrapple for breakfast, traditionally. Scrapple originated in the 17th and 18th centuries. I called this dish I made a meatloaf because the scrapple I started with technically was loaf-shaped. Also, I didn't fry the scrapple without any coating or breading, which is the traditional way to cook scrapple. In hindsight, I should've called this a deconstructed meatloaf, which it kind of is. But I took creative liberties to call this dish a meatloaf. You might be wondering, "Why not bake the scrapple loaf?" Based on my past experience with the unsuccessful chicken liver meatloaf I baked, I learned if it's offal, it can only taste good if it's fried. Of course, I haven't made any sort of batter in months, so in the video, I thought you mix flour and egg together, but it turns out that doesn't really work. I even considered not including the first failed method of coating and breading, but then looking at the footage, my cat Emily was meowing during that failed attempt. Come on, cats are adorable! I thought if I gave my cats fresh food and water before recording these videos, they would be quiet throughout the recording but apparently that isn't the case. My dad taught me a method of coating and breading that he learned from his mom(my grandma): put the flour and egg in separate bowls. Dip whatever you're frying first in the flour, then the egg, and last, the breadcrumbs. It looks like he passed down this technique to me- and now I'm passing it down to you all. Fried scrapple doesn't taste good on its own, but it's delicious with ketchup. I also tried eating it with maple syrup and grape jelly on top but it didn't taste as good. You will need: For the cooking equipment: 2 small bowls A medium bowl A frying pan A spatula For the meatloaf: 1 pound of scrapple 1 cup of all-purpose flour 2 eggs 3 cups of breadcrumbs(I used whole wheat seasoned breadcrumbs, but you could use whatever seasoned breadcrumbs you like. If you're using plain breadcrumbs, add spices to the breadcrumbs) Enough canola oil to fill a frying pan an inch deep 1. Cut the scrapple loaf into half-inch square-shaped slices. 2. Pour the flour into one small bowl. 3. Beat and whisk the eggs in the second small bowl. 4. Pour the breadcrumbs into the medium bowl. 5. Dip the slices into the flour, then the whisked eggs, and then coat them in breadcrumbs. 6. Pour enough canola oil to fill a frying pan an inch deep. 7. Light the stove to heat up the oil. 8. Once the oil is heated up, put the breaded slices into the frying pan. You will need to make at least 3 batches to fry all the slices. Watch out for splashing hot oil!! 9. Let the slices in the pan cook on one side for 1-2 minutes. 10. After 1-2 minutes, flip the slices over using a spatula. Let the slices cook on the other side for 1-2 minutes. 11. Repeat steps 6-10 for the remaining batches. 12. After each batch is cooked, put them on a plate. 13. Serve with ketchup. 14. Bon appetit! Left: Overview of the cake Right: Slice of the cake When I was a kid, I saw Viennetta ice cream cakes in the frozen food aisle of some now-defunct supermarkets(I'm looking at you, Waldbaum's and Pathmark, RIP; those two supermarkets were at one point rated the worst and dirtiest supermarkets in the entire nation, according to Consumer Reports, which I can believe). My mom never let me buy the cake, but then again she never let me choose the pair of glasses with flowers on them because they looked too babyish. I'm wearing them right now, this is the ultimate revenge. But in all seriousness, I loved my mom. I don't think you can find Viennetta cakes anywhere in the USA today(maybe in Canada though), so the next best thing is to make your own cake. Of course, the traditional Viennetta cake was made with vanilla ice cream and topped with a chocolate topping. I am obviously not traditional when it comes to food. Besides, a red ice cream cake is eye-catching from a distance. Red Velvet ice cream is the ice cream with the strangest color I could find, and even then it was at a ShopRite at least 10 miles from my home. You know what else is eye catching- birthday cake Magic Shell! It's unnaturally blue. I thought with the addition of the Magic Shell, the cake would taste too sweet, but it turned out to taste just sweet enough for me. However, that cake is in a queue of sorts because I'm still finishing off the ice cream birthday cake I bought from a local ice cream shop. This Viennetta cake doesn't compare to that birthday cake, but it comes close. By the way, the flavors of the birthday cake I chose were Maraschino Cherry Chip (which is also a red ice cream) and Rainbow Cookie(my favorite type of cookie), but the outside of the cake is white, not red. I would share with you the picture of the cake but it would give away how old I am. Maybe next year, people, when I stop requesting to have the number of years I turned written in icing on my cake. There are actually more cooking equipment needed than ingredients for this recipe. So it's a fairly easy recipe. Inspiration for this recipe from http://www.southernplate.com/2012/06/homemade-viennetta.html. You will need: For the cooking equipment: A loaf pan A freezer Wax paper An unused flat hair comb(nobody likes hair in their cake. I recommend you throw away the comb you use for this recipe after using it because ice cream in your hair is gross. Unless you're into that sort of thing.) Aluminum foil For the cake: 1 quart(6 cups) of red velvet ice cream(or any ice cream flavor, really, since that particular flavor is hard to find in most supermarkets) 2 bottles of Magic Shell(the stuff that supposedly freezes upon contact with a frozen surface like ice cream. Spoiler alert: didn't happen with this recipe.) Note: You can go traditional and use chocolate flavored-Magic Shell since that was the flavor of the coating on the original Viennetta cakes, but I used Birthday Cake-flavored and Rainbow Sherbet-flavored Magic Shells). Also, you're not going to need the entire bottles. 1. Let your ice cream sit at room temperature for 5-10 minutes. It makes scooping it out easier. 2. Line your loaf pan with wax paper. 3. Pour 2 cups of ice cream onto the lined loaf pan. 4. Flatten the ice cream into one layer using your hands. 5. Make rivets in the ice cream using your comb. This is where the Magic Shell will go. 6. Pour about 1-2 tbsp. of Magic Shell into the rivets in the ice cream for each layer. 7. Repeat steps 3-6 with the middle and top layers(it's a 3-layered cake). What I did was use the Birthday cake-flavored Magic Shell for the bottom and top layers, and I used Rainbow Sherbet for the middle layer) 8. Cover the loaf pan with aluminum foil and place loaf pan in the freezer overnight for the cake to set. 9. Bon appetit! |
Archives
October 2019
Categories
All
|

 RSS Feed