|
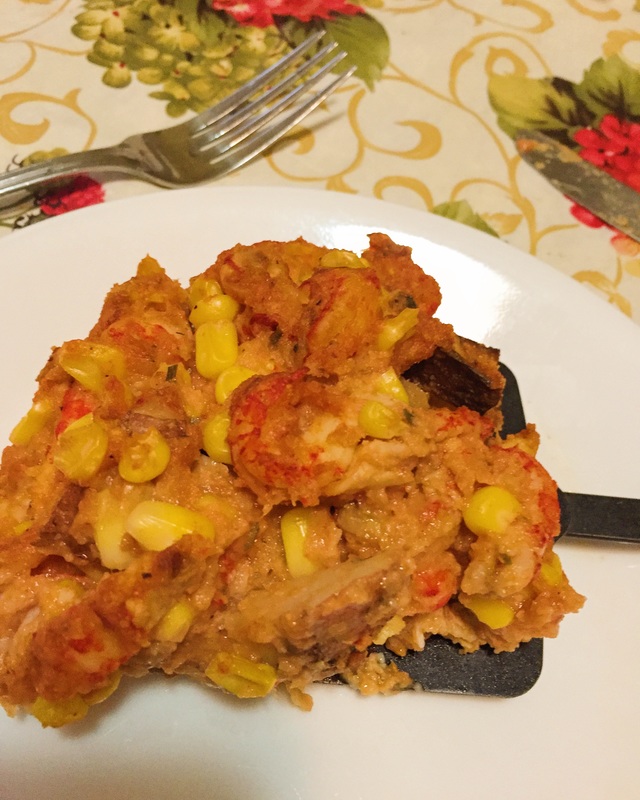
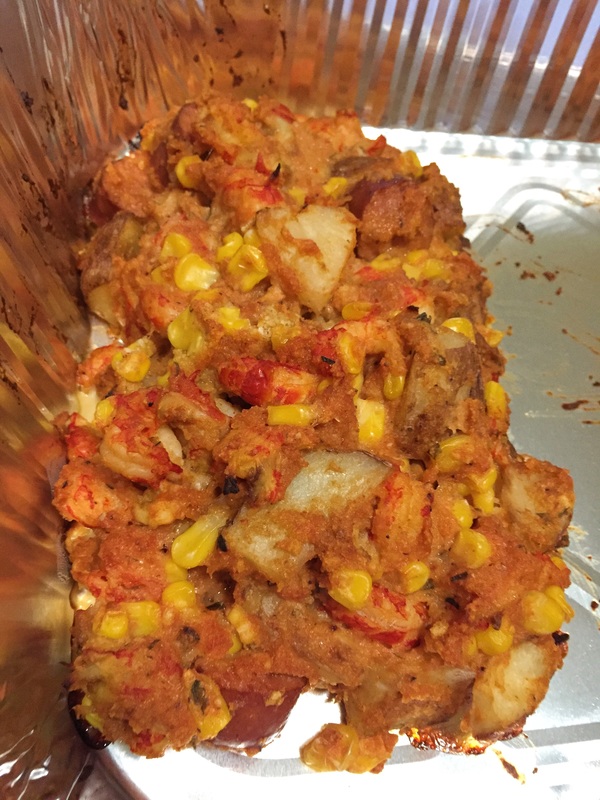
I found some crawfish tail meat a couple of weeks ago at a gourmet supermarket. I've never seen crawfish tail meat sold on its own. In the past, I've seen live crawfish in the seafood department maybe once(considering I live very far from Louisiana or the US South), so I seized the opportunity(and $15) for this tail meat. With Easter coming up(as I'm writing this post, today is Easter) at the time of filming this video, I found a recipe for a crawfish boil(http://www.foodnetwork.com/recipes/alton-brown/crawfish-boil-recipe.html) so I figured, "Why not turn this tail meat I have into a meatloaf?" I've turned langoustine tail meat into a meatloaf before so it should be a similar type of concept. Except it really isn't- from my research on baked crawfish tail meat and crawfish meatloaf, it takes 45-60 minutes to cook the tail meat, yet the package already said the meat was fully cooked, but why take a chance with raw meat? Crawfish boil usually includes Andouille sausage(a Cajun sausage), which I included in the actual meatloaf, though I was debating how many sausage links to put in the meatloaf without making the meatloaf so spicy as to render it inedible or even make the meatloaf too salty- I used two Andouille sausage links, ultimately. This is the first time I used sausage and a different type of meat in the same meatloaf. There's no danger of cross-contamination because the Andouille sausage links I used were fully cooked. Personally, I've never had a crawfish boil before but if I had to judge based on the meatloaf I ate based off of it, I'd say it would be spicy but not too spicy so as to require you to drink a cup of milk(though when my dad tried the meatloaf, he said it was good but it's too spicy for him to have it for an actual meal). As for the corn and potatoes, they both came from frozen vegetable steamer bags that I cooked before putting them in the meatloaf. Normally in a crawfish boil, there's no sauce in the dish but every meatloaf needs some sort of sauce, in my expert opinion, so seafood cocktail sauce is a good choice. You will need: For the cooking equipment: A lasagna pan Nonstick cooking spray A large bowl For the actual meatloaf: 2/3 tbsp. of onion powder 2 beaten and whisked eggs 1 cup of corn 1 cup of red potatoes 2 tbsp. of honey mustard 1/2 cup of seafood cocktail sauce Pinch of oregano Pinch of dill weed Pinch of paprika Pinch of cayenne pepper Pinch of garlic powder Pinch of black pepper Pinch of salt 1 cup of unseasoned breadcrumbs 2 cut up, cooked, Andouille sausage links 1 pound of crawfish tail meat 1. Put all ingredients in a large bowl. 2. Mix all the ingredients together until everything is distributed evenly among the meatloaf mixture. 3. Spray a lasagna pan with nonstick cooking spray. 4. Form 2 loaves. 5. Bake in a 350 degree Fahrenheit preheated oven for 45-60 minutes. 6. Bon appetit!
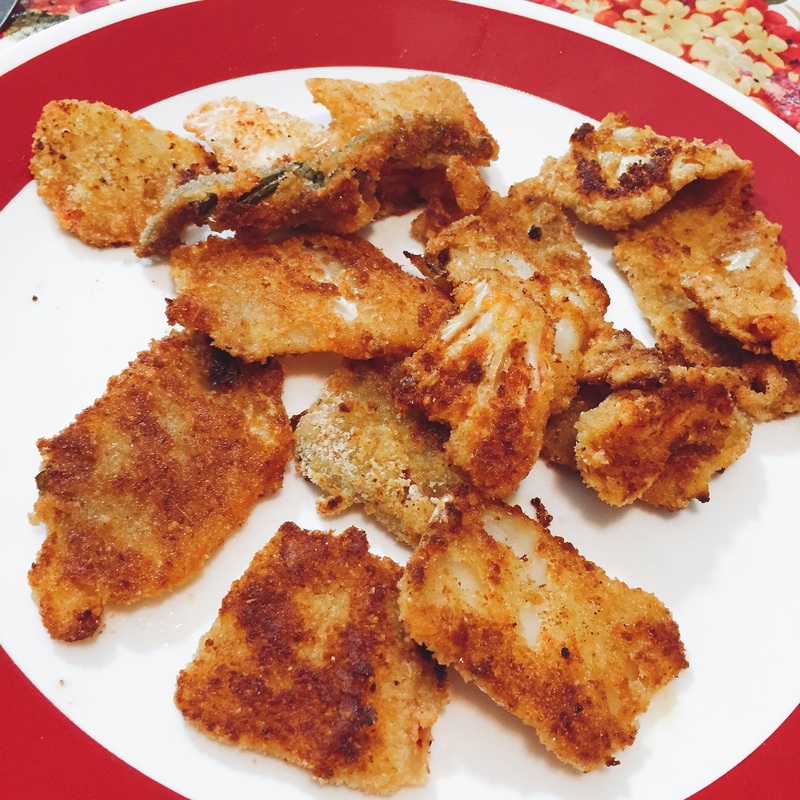
1 Comment
 I have a list of foods that I will never put in any of my dishes because I hate them- ginger included, in all forms(except for gingerbread, I like that). Pickled ginger that comes with sushi- yuck! Crystallized ginger- eww! Ginger- too strong a smell. I may have talked about foods I hate in some previous blog post but here's an updated version of foods you will never see on the Meatloaf Princess channel:
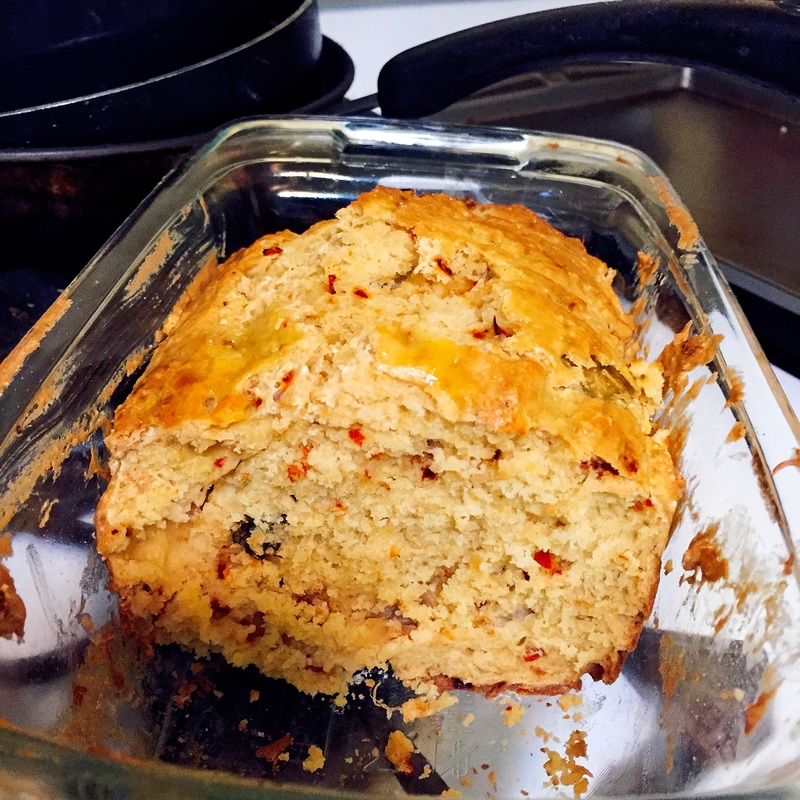
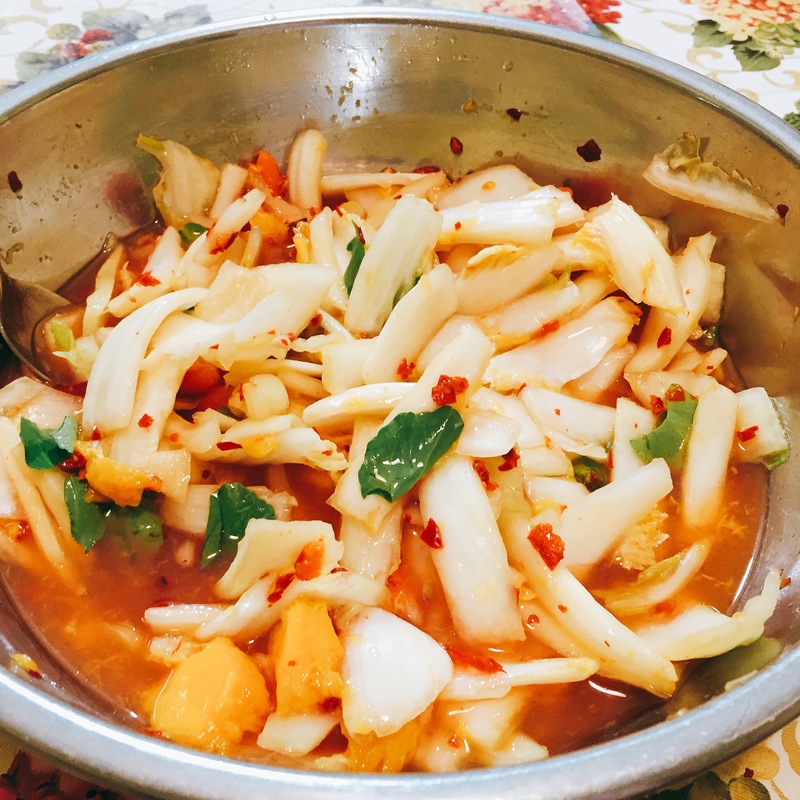
I never realized how spicy Sriracha is- it has a Scoville scale between 1,000-2,500, yet I've downed cayenne pepper, chipotle, chili peppers, and jalapeno peppers that were much higher on the Scoville scale than Sriracha. Tip of the day: DO NOT LICK SRIRACHA! YOU WILL GET A BURNING TONGUE THAT EVEN MILK CANNOT QUELCH! I equate licking Sriracha to putting your tongue on an cold pole that gets stuck there on a freezing winter day- you know it's probably a bad idea but you do it anyway just to get firsthand experience(full disclosure: I've never stuck my tongue on a cold pole as a kid, I've just seen that happen in sitcoms. But that must be painful). If I had to create this recipe again, I would not include the Sriracha. Sriracha is good, however, when paired with something sweet, like mango yogurt, so that's why Sriracha isn't in my list of hated foods. I've never seen anyone on the Internet saute with just sesame seed oil, so I decided to try it out myself- it isn't that bad actually. The heated sesame seed oil, combined with the onions provided a nice Asian food aroma to my home. I have no regrets when it comes to this meatloaf- however, I probably should've used unseasoned breadcrumbs instead of seasoned breadcrumbs- I kind of overestimated the amount of spices I put into my meatloaf. You should always use a meat thermometer to determine if your meats are cooked fully. Just because a meat may look done doesn't mean it is. If you have seen my previous videos, you may be wondering why I didn't use the kimchi yogurt bread I made? It went bad so I decided not to take a chance. For a more authentic Asian flavor, I suppose you could use panko breadcrumbs for your meatloaf binder. Shout out to http://fiveandspice.com/2013/05/07/kimchi-meatloaf/ for providing me the inspiration for this recipe. The recipe in the link actually put the sesame oil in the meatloaf and had a glaze using maple syrup, ketchup, and mustard. You will need: For the cooking equipment: A frying pan A large bowl A lasagna pan Nonstick cooking spray For the actual meatloaf: 1 small, diced onion Sesame oil for sauteing Pinch of cinnamon or ginger Pinch of garlic powder 2 beaten and whisked eggs 1 cup of kimchi 2 tsp. of reduced sodium soy sauce 1/4 cup of maple syrup 1/4 cup of ketchup 2 tbsp. of honey mustard 2 tbsp. of Sriracha(optional) Pinch of cinnamon or ginger Pinch of garlic powder Pinch of black pepper Pinch of salt 1 cup of breadcrumbs 1 pound of ground chicken 1. Pour enough sesame oil in the frying pan to saute your onion- in other words, put enough oil to spread around your pan. 2. Heat the oil up by turning your stove on. Once the oil is heated up, dump your diced onions into the frying pan, along with the cinnamon and garlic powder. 3. Saute everything until the onions are translucent in color. 4. Once you're done sauteing, put the sauteed onions into the large bowl. 5. Add the rest of the meatloaf ingredients into the large bowl. 6. Mix everything up so that all the ingredients are distributed evenly among the meatloaf mixture. 7. Spray a lasagna pan with nonstick cooking spray. 8. Form 2 loaves in the lasagna pan from the meatloaf mixture. 9. Bake the meatloaves in a 350 degree Fahrenheit preheated oven until the internal temperature of the meatloaf reaches 165 degrees Fahrenheit, which could take at least an hour, but your mileage may vary. 10. Serve with a glass of milk to quell the spiciness. Bon appetit! I probably would've never thought of this recipe had I not visited the website of the Salt and Straw(www.saltandstraw.com), an ice cream shop with locations in Portland, Oregon and Los Angeles. Personally, I've never visited a Salt and Straw location in person though that's on my bucket list, let alone travel outside of the Eastern Standard Time Zone. You can't get kimchi ice cream from salt and straw at the moment, though I found an old Yahoo article(https://www.yahoo.com/style/weirdest-ice-cream-flavors-c1432066374299.html) about their kimchi ice cream- they used chocolate covered kimchi(say what?), swirls of kimchi caramel(is that even a thing?) in a jasmine rice ice cream. Sadly, my recipe is nowhere as sweet as the ice cream I just described. It's 100% savory and spicy, which means this makes for a terrible ice cream choice at 10 pm or later, when I usually crave something sweet. If you do want some semblance of sweetness in this recipe, I suppose you can pour honey on top of the kimchi ice cream. Considering there is no bona fide recipe for kimchi ice cream on the Internet that you can make at home, I had to go with the base recipe for a typical ice cream made in an ice cream maker- vanilla ice cream(my dad's favorite, though I saw a quart of blue, green, and yellow-colored vanilla ice cream with the Crayola logo at the supermarket today. My dad rejected my offer of getting that for him. Womp-womp[or insert sound effect if someone loses a pricing game on The Price is Right]). My inspiration for this recipe was from https://www.hamiltonbeach.com/easy-vanilla-ice-cream-for-15-quart-ice-cream-maker.html. You hardly taste any vanilla whatsoever in this ice cream. When I read the manual for my ice cream maker, it said you can only put mix-ins that are no larger than a chocolate chip, so I had to finely dice the kimchi(a food processor may or may not help in this endeavor). The kimchi ice cream is kind of hard to scoop out, so you're going to need a lot of arm strength and elbow grease to retrieve your ice cream. You will need: For the equipment: A large bowl An ice cream maker An ice cream tub For the ice cream: 2 cups of half-and-half 1 cup of heavy whipping cream 1/2 cup of granulated sugar 1 1/2 tsp. of vanilla extract 3/4 cups of finely diced kimchi Any remaining kimchi juice Honey on top to sweeten the ice cream(optional) 1. Pour the first four ingredients into a large bowl. Mix well until the vanilla extract and sugar are distributed evenly among the base for this ice cream. 2. Turn your ice cream maker on and pour the base into the ice cream maker. Let the ice cream maker churn for 10-15 minutes, or until the mixture is thick and starts to freeze. 3. Pour the kimchi and remaining kimchi juice into the ice cream maker while it's still churning. Let the ice cream maker churn for an additional 5 minutes and during that process, you may need to scrape the ice cream from the edges of the bowl that's part of the ice cream maker and distribute the kimchi into the ice cream mixture. 4. After the ice cream is done churning and the kimchi has been distributed evenly into the ice cream, put the ice cream into a 1.5 quart ice cream tub. 5. Close the lid of the tub and put it in the freezer for at least 2 hours or overnight. 6. If you want some sweetness in your ice cream, top with honey. Bon appetit! Makes 1.5 quarts. When I plan recipes, I try to consolidate multiple recipes into one video if I can if they are simple enough. If you can remember from last year, I made a video called "3 Ways to Cook Heirloom Tomatoes". I could've called this kimchi video that this blog post is about "2 Ways to Cook Kimchi" but that wouldn't make any sense because to me, when it comes to listicles, it's only intriguing if you have 3 or more items in the list. Besides, I'm using kimchi in other ways too. However a BuzzFeed post called "9 Ways to Cook with Kimchi" would possibly garner me some likes and shares. When I told my dad about recording this video, he didn't think it was so simple. But I proved him wrong- the grilled kimchi only takes 30 seconds to grill if you use a George Foreman grill and the fried kimchi only takes 15-30 seconds to fry on each side. The prep for cooking the kimchi though is slightly more involved but it's doable. I researched ways to grill kimchi and the only search results I got were for kimchi grilled cheese sandwiches. Then I looked for ways to grill cabbage and the only search results I got were for grilling cabbage halves, which are much bigger than little kimchi pieces. I basically had to wing it for this recipe, armed only with the knowledge I obtained from grilling heirloom tomatoes last December. When I researched ways to fry kimchi, most of the search results I got were for kimchi fried rice. However, I found one result that involved deep-frying kimchi(http://www.mrskimskimchi.com/blogs/recipes-1/13785697-it-happened-deep-fried-kimchi), which is pretty similar to pan-frying it. Heck, I followed a recipe for deep-frying candy bars last month when I made my Pan-Fried Candy Bars. That link taught me a much faster way to dry out kimchi- put it in the microwave for 20 seconds, instead of weighing it down with a heavy can for several hours. Of course this method only works if you're using heat to cook your kimchi, so if you were making kimchi ice cream, this method would be a bad idea. Nobody likes melted ice cream. :( When it comes to comparing which kimchi tasted better, it would be the fried kimchi, hands-down, due to the crunchiness of it. Besides, everything tastes better fried, even if it is less healthier for you. :( You will need: Grilled Kimchi For the cooking equipment: A George Foreman grill A pastry brush For the actual grilled kimchi: A dozen kimchi pieces 1/4 cup of olive oil Pinch of salt Pinch of black pepper 1. Microwave the kimchi for 20 seconds to dry it out. 2. Brush the kimchi pieces with olive oil, using a pastry brush. 3. Season the kimchi with salt and pepper. 4. After warming up your grill, arrange the kimchi on the grill in one layer, so everything is cooked evenly. 5. Close the lid on the George Foreman gril and let the kimchi cook for 30 seconds. If smoke starts coming out of the grill, unplug the grill immediately! 6. Bon appetit! Makes 12 grilled kimchi pieces Fried Kimchi For the cooking equipment: A large bowl A medium bowl A small bowl A frying pan 2 forks For the actual fried kimchi: A dozen kimchi pieces All-purpose flour 2 beaten and whisked eggs Plain breadcrumbs Pinch of chili powder Pinch of salt Pinch of black pepper Canola oil for frying 1. Pour some plain breadcrumbs into a medium bowl. Mix the chili powder, salt, and black pepper into the breadcrumbs. 2. Dredge the kimchi pieces in flour. 3. Coat the dredged kimchi pieces in egg. 4. Bread the kimchi pieces in the seasoned breadcrumbs. 5. Put breaded kimchi on to a large plate. 6. Pour canola oil into a frying pan and spread the oil around the pan. 7. Heat the oil up on the stove. 8. Once the oil is heated up, put the breaded kimchi into the frying pan. Let the kimchi cook for 15-30 seconds. 9. After 15-30 seconds, flip the kimchi pieces over using 2 forks. Let the kimchi cook for an additional 15-30 seconds. You might have to make 2 batches. 10. Remove the fried kimchi from the grill. Bon appetit! Makes 12 fried kimchi pieces When I find inspiration for a recipe from an already existing recipe on the Internet, I try not to copy it ingredient for ingredient. That would be plagiarism, in the words of every college professor ever. In other words, I like to put my own spin on other people's recipes. For this recipe I found only a YouTube video(https://www.youtube.com/watch?v=nEbD-YTckRY) that was a kimchi soda bread using silken tofu. I remember the recipe saying something about how the tofu was supposed to resemble buttermilk. I then researched buttermilk substitutions and one substitution is to use 1/2 cup of blended Greek yogurt and 1/2 cup of water for every 1 cup of buttermilk you wanted to substitute. When I was at the supermarket, I kind of chickened out on using no buttermilk whatsoever so I bought enough yogurt to make 2 cups of the buttermilk substitution and some buttermilk. I couldn't have used silken tofu anyway, as the supermarket ran out of it, so i was going to have to use a silken tofu substitution. When I tasted the bread, I got a huge kick of spiciness from the dried chili pepper flakes and kimchi I used. Yet when I had the bread again a few days later, the bread was much less spicy. The spiciness goes down as the bread gets older and less fresh though. But this is the first time in my life I have had any spicy bread. Let's face it people, bread is usually sweet or savory, but never spicy. I find if you use this bread to make a peanut butter and jelly sandwich, you barely even taste the kimchi and the chili pepper taste is less pronounced. Nevertheless, you should have a glass of milk with your kimchi yogurt bread. You will need: For the cooking equipment: A large bowl A small plate A one-pound can or weight A colander A hand mixer or stand mixer(or a large spoon) 2 small bowls A medium bowl A loaf pan Baking tray Nonstick cooking spray Pastry brush For the bread: 1/3 cup of kimchi, cut up into pieces 4 cups of all-purpose flour 1/4 cup of granulated sugar 2 tsp. of salt 1 tsp. of baking soda 4 tbsp. of butter 2 tbsp. of dried chili pepper flakes 1 egg yolk 2 tbsp. of kimchi juice 1 cup of buttermilk 1/2 cup of water 1/2 cup of blended Greek yogurt(I used apple cinnamon yogurt) 1 beaten and whisked egg 1. Put the cut up kimchi in a large bowl and cover it with the small plate. Top the small plate with the one-pound weight and let it sit at room temperature for 3-4 hours to drain the liquid from the kimchi. 2. Drain any excess liquid after the 3-4 hour period using a colander. Put the kimchi in a small bowl. Make sure the large bowl is clean and dry before putting the dry ingredients in it. 3. Put the flour, sugar, salt, and baking soda into the large bowl. Mix those dry ingredients together. 4. Incorporate the butter into the dry ingredients using a large spoon, hand mixer, or stand mixer. 5. Add the kimchi and chili pepper flakes to the batter in the large bowl. Mix those 2 ingredients in the batter. 6. Put the egg yolk, kimchi juice, and buttermilk into a medium bowl. 7. In a second small bowl, mix the water and yogurt together to get a liquid resembling buttermilk. Pour the water-yogurt mixture into the medium bowl. 8. Mix all the wet ingredients together in the medium bowl. 9. Combine the wet ingredients with the batter in the large bowl until you get a somewhat solid, cohesive dough. 10. Flour your hands and knead the dough 2-3 times. 11. Spray a loaf pan with nonstick cooking spray. 12. Put the dough into the loaf pan. 13. Brush the top of the dough with the beaten and whisked egg, using a pastry brush. This will give the bread a nice brown finish on top. 14. Bake the loaf in a 375 degree Fahrenheit oven for 40-50 minutes, or until the dough is fully cooked. 15. Let the bread rest at room temperature for 5-10 minutes and serve with a glass of milk. 16. Bon appetit! With all the rage for international food products in virtually all supermarkets, I'm surprised there is no Hot Pockets stuffed with kimchi you can get buy. To be fair, I don't think fermented cabbage wouldn't be very good frozen. But one can only dream... This recipe only requires 2 ingredients- a roll of crescent dough(I used Pillsbury) and kimchi(whether it be store-bought or homemade; I used both for this recipe). Due to the lack of large bowls and the short shelf life of the champagne kimchi recipe, all of the kimchi recipes I make going forward will use store-bought kimchi. Ironically, the hot pockets filled with the store-bought kimchi were a lot messier than those filled with the champagne kimchi. Looking back on tasting these hot pockets, I think they could've used a minute or two longer in the oven- the dough was slightly undercooked. But they were still delicious nonetheless. Since kimchi is so spicy, I highly recommend you eat these hot pockets with some sort of dairy product, like a glass of milk. My dad was surprised how easy these hot pockets are to make. In fact, he said I should make more simple recipes like this. I told him somebody has to make recipes that are more complex than 2-ingredient recipes. It's almost a cliche how many YouTube cooking channels focus on quick, simple recipes. Besides, I like challenging myself when cooking and learning new culinary techniques, even if they are time-consuming. Time to cook: 9-12 minutes You will need: For the cooking equipment: A wooden cutting board A rolling pin A lasagna pan Nonstick cooking spray For the hot pockets: 1 roll of crescent dough 1-2 tbsp. of kimchi for each of the 4 hot pockets 1. Break the roll of crescent dough into 4 pieces. If you're using the Pillsbury brand, there are dotted lines on the dough that will guide you. 2. Flatten each dough pieces on a wooden cutting board using a rolling pin. 3. Put the kimchi on one half of the flattened dough. 4. Fold the dough up. Some kimchi juice may leak from the pastry but make sure no kimchi is showing in the hot pockets. 5. Poke 2-3 holes on the top of the hot pocket using a fork to allow the steam to vent during the cooking process. 6. Repeat steps 2-5 for the other 3 dough pieces. 7. Spray a lasagna pan with nonstick cooking spray. 8. Put the hot pockets into the lasagna pan. 9. Bake in a 375 degree Fahrenheit oven for 9-12 minutes, or until the dough is fully cooked. 10. Bon appetit! Note: Store the leftover hot pockets in the fridge. The themed food for this month of March is kimchi. Why kmchi? When I think of March, I think of St. Patrick's Day and a dish associated with that holiday are cabbage rolls. I associate cabbage with kimchi. Plus it's a good excuse for me to visit a small local Asian grocery. Up until my junior year in college, I have never heard of kimchi nor known about its existence- until I took an Intro to Korean Culture class(to fill one of my humanities requirements). I was exposed to a lot of new terms and dishes associated with the Korean culture. My first taste of kimchi was a sample some students brought in during the group presentations of our final projects. Kimchi is not that bad. It's spicy but I kind of like it. Yet finding a jar of kimchi is hard to find where I live unless I either go to a gourmet supermarket or head to an Asian grocery. During my trip to the Asian grocery, I bought champagne mangos(also known as atalufo mangos), Napa cabbage, and a 4 pound jar of the only kimchi the store was selling(to consume and use in future kimchi recipes). This grocery also has a restaurant inside it that mainly makes Filipino food, so I had Dingguan(a stew with pork blood in it) for lunch. The Dingguan was a bit iron-y(but that's par for the course considering the liquid in the stew was pig blood), gritty from the pork belly, and slightly spicy. But it was delicious. Traditionally, kimchi is fermented for weeks or months before consuming. It's a way to pickle vegetables for the winter. But I managed to stumble upon a kimchi recipe that takes only 24 hours to ferment: http://www.foodandwine.com/recipes/sparkling-white-kimchi. The recipe in this link uses 7Up but the same principles apply- use some sort of carbonated beverage in the kimchi(doesn't have to be soda). Instead of scallions(which are hard to come by where I live), I used onions instead. Onions aren't exactly a direct substitution for scallions but shallots are(which I also couldn't find). Shallots are a good substitute for onions. I also didn't want to deal with large chiles so I used dried chili pepper flakes instead. You may be wondering why I used 2 1/3 tbsp. of the flakes- there are 6 chili peppers in the little jar of chili pepper flakes- 20 tbsps., I figured 1 chili pepper = 3 1/3 tbsp.(I know, the math is wrong), but I thought 3 tbsp. of chili pepper flakes was too much, so I reduced it to a manageable 2 tbsp.- and a 1/3 tbsp. The way kimchi is traditionally eaten is with rice- my dad brought leftover pizza from his stay with my grandma when she was at the hospital so I figured, why not top the pizza with kimchi? The pizza really offsets the kimchi's spiciness with the cheese. Similarly, I recommend you drink milk with kimchi. Peppers have capsaicin and drinking water doesn't help with reducing the burning sensation in your mouth from spicy foods- but dairy products do. During the fermenting process, my home really stank of onions so I Googled for ways to reduce kimchi odors and one way is to put a box of open baking soda next to the offending culprit(in this case, the kimchi). This life hack worked instantly, making the air in my house breathable. Time to halve and core the cabbage: 30 minutes Time to get rid of the moisture: 1 hour Time to ferment the kimchi: overnight or 24 hours Makes 4 cups of kimchi You will need: For the equipment: A ruler(for measuring the 2 inch strips of cabbage) A large bowl(or two; I only had one) A colander Small plates A 1 lb. can (I used a can of baked beans but any 1 lb. weight will do) Plastic wrap(if you're using a Mason jar, you don't need this) For the kimchi: 1 pound of Napa cabbage, halved & cored(see http://www.wikihow.com/Core-a-Cabbage on how to do this (I used Method 2)) 1 tbsp. of salt 1 tbsp. of champagne vinegar(you can use rice vinegar if you don't have champagne vinegar) 1 diced onion 2 1/3 tbsp. of dried chili pepper flakes 18 chopped up baby carrots 1 chopped up champagne mango(atalufo mango) 1 1/2 cups of white sparkling grape juice 1/3 cup of watercress leaves 1. Cut the halved and cored cabbage into 2 inch strips. I used a ruler to measure out a 2-inch white strip of cabbage and then I used said strip as a stencil for cutting the cabbage. Remove the leaves from the white strips. 2. Put the white cabbage strips into a large bowl or two. If you only have one large bowl, you can discard the cabbage leaves. Otherwise you really should use most of the cabbage in the kimchi. But alas, I only had one bowl. :( 3. Wash the cabbage and drain the water from the cabbage using a colander. 4. Mix the salt into the cabbage so that it is distributed evenly. 5. To get rid of the moisture, place a plate smaller than the width of the large bowl on top of the cabbage and weigh the cabbage down using a 1 pound can at room temperature for an hour. You should notice the cabbage deflating when the can sinks further into the bowl. 6. Drain the cabbage to get rid of any remaining moisture using a colander. 7. Add the next 6 ingredients to the large bowl. Mix everything together so all the liquids and ingredients are distributed evenly. 8. If you have Mason jar(s), put the kimchi in the jar(s). Otherwise, cover the top of the large bowl with plastic wrap. 9. Let the kimchi ferment in the fridge overnight(or 24 hours). 10. Mix the watercress in with the kimchi. 11. Bon appetit! The kimchi should last for 3 days. 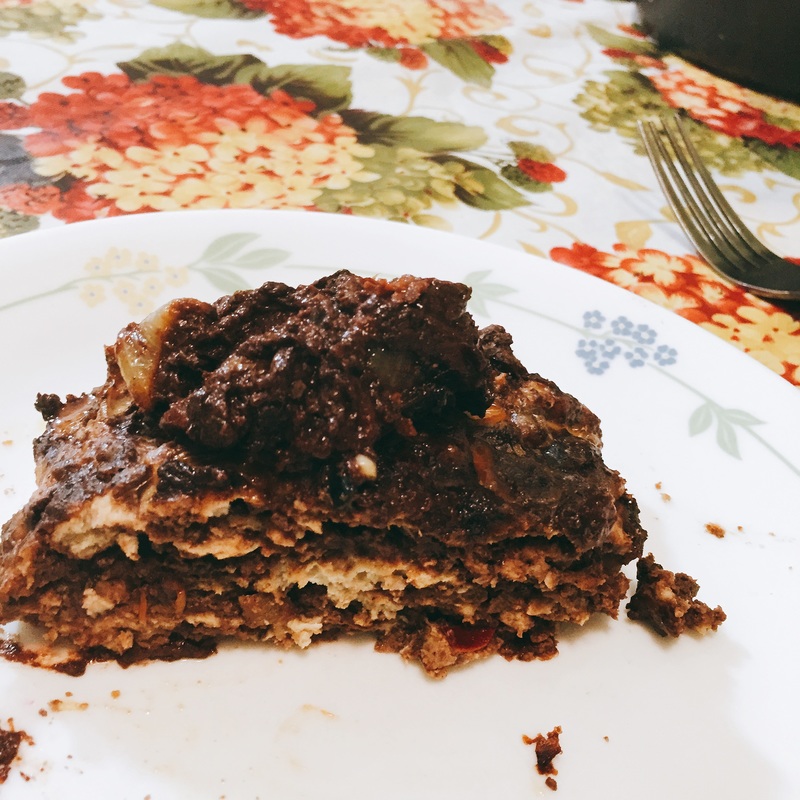 Normally, at the conclusion of the themed food videos for each month, I make a tofu meatloaf and use most of the recipes I've made for that month in the meatloaf. But the idea of a chicken mole meatloaf sounded appealing to me and I still got to use some of the chocolate bread I made last week for another video. I normally buy my sauces for my meatloaves premade but there really aren't any good ones you can get online(and besides, I wouldn't know if the jars of mole sauce would be delivered in time to record the video). So I made my own mole sauce. But in my research for finding a mole sauce recipe, I noticed that a lot of the sauces needed to be simmered for hours and with my day job, I don't have the time for simmering sauces for such a lengthy amount of time. So I managed to find the inspirations for my recipes, http://www.spicesinc.com/p-2290-mole-sauce.aspx and http://www.momswhothink.com/recipes/dinner-recipes/easy-mole-sauce-recipe.html. You might be wondering why I used 2 sources of inspiration for one sauce. I used most of the needed ingredients from the first link and in place of chicken broth that I didn't have, I used tomato sauce(which is what the recipe in the second link used). Traditionally the chocolate used in a mole recipe is either dark chocolate or pure 100% chocolate, which is bitter. I wanted the sauce to be a little sweet so I used semisweet chocolate instead. I couldn't find dried chiles where I'm from so i used chili pepper flakes instead. The sauce itself tastes a tad sweet at first but then you get the spicy kick in your mouth(it's not super spicy, but it's spicy enough to need a sip of water). If you looked at my Chocolate Bread video, you may notice it is a sweet bread recipe because it uses dark chocolate chips in the bread. Again, I wanted to offset the spiciness of the meatloaf with sweetness. And that's the taste of the final product(the meatloaf). In fact, my dad said it tasted like a dish he would find at a restaurant! :) That compliment means a lot coming from this picky eater, yet he said the thought of having chocolate for dinner is still unappealing for him. Chocolate can be savory, people! I didn't want the meatloaf to be bland so I used most of the spices I included in the mole sauce into the meatloaf(except for the chili pepper flakes, because I forgot to include them in the meatloaf, but maybe that's a good thing considering the meatloaf is already moderately spicy). You will need: For the cooking equipment: A frying pan A medium saucepan A large bowl A lasagna pan Nonstick cooking spray For the chocolate mole sauce: 1 diced onion 1 tbsp. of dried chili pepper flakes Olive oil for sautéing 1/2 tbsp. of garlic powder Pinch of oregano Pinch of cumin Pinch or parsley flakes Pinch of paprika Pinch of cinnamon 1 tbsp. of cocoa powder 1 tbsp. of all-purpose flour(for thickening the sauce) 1 cup of tomato sauce 2 ounces of semisweet baking chocolate For the meatloaf itself: 2/3 tbsp. of onion powder 2 beaten and whisked eggs 1/2 cup of the chocolate mole sauce(see needed ingredients above) Pinch of garlic powder Pinch of oregano Pinch of cumin Pinch of parsley flakes Pinch of paprika Pinch of cinnamon Pinch of black pepper Pinch of salt 1 cup of crumbled up chocolate bread(link for the creation of the chocolate bread is: 1 pound of ground chicken Any remaining mole sauce to top the finished meatloaves For the sauce: 1. Pour olive oil into a frying pan. Heat the oil up. 2. Once the oil is heated up, put the onion and chili pepper flakes into the frying pan. Saute the onion and chili pepper flakes for 15-30 seconds. You don't want to burn the onion!! 3. Put the next 9 sauce ingredients into the frying pan. Mix everything together until you get a nice paste. 4. Shut the heat off and put the paste into the medium saucepan. Add the tomato sauce and bring the paste/sauce to a boil. Stir the contents of the saucepan as the sauce is boiling. 5. Once the sauce is boiling, reduce the heat to a simmer. Cover the saucepan with a lid and let it simmer for 20 minutes. 6. Remove the saucepan from the stove after 20 minutes and add the semisweet baking chocolate. I advise you cut your baking chocolate into either small pieces or chocolate shavings. Mix the chocolate into the sauce until all the chocolate melts. This sauce recipe makes 3/4 cups of sauce. For the meatloaf: 1. Put the first two meatloaf ingredients into a large bowl. 2. Measure a 1/2 cup of the chocolate mole sauce and put that amount into the large bowl. 3. Put the next 10 meatloaf ingredients into the large bowl. 4. Mix all the ingredients up until everything is distributed evenly among the meatloaf mixture. 5. Spray a lasagna pan with nonstick cooking spray. 6. Form 2 loaves. 7. Bake in a 350 degree Fahrenheit oven for 60-65 minutes, or until the internal temperature of the meatloaf reaches 170 degrees Fahrenheit. 8. Top the meatloaves with the remaining chocolate mole sauce. 9. Bon appetit! |
Archives
October 2019
Categories
All
|


 RSS Feed