|
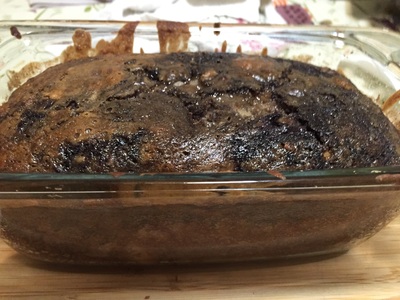
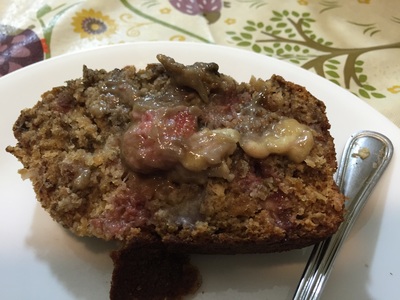
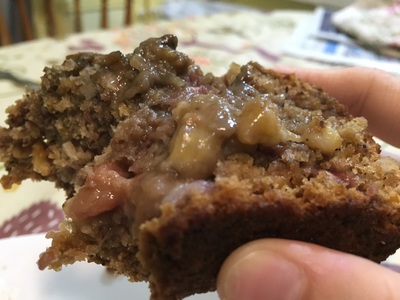
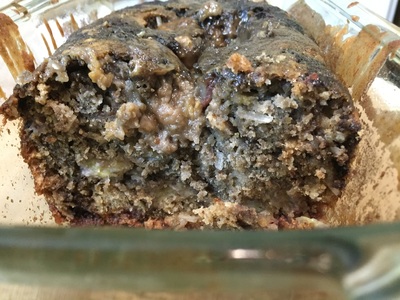
Here's another way you can eat all the components of an acai bowl that isn't a smoothie bowl- in bread form! Well, quick bread anyway. Sometimes I doubt myself whenever I'm making a recipe for which my inspiration for said recipe(in this case, http://sambazon.blogspot.com/2010/04/featured-recipe-acai-banana-bread.html) is pretty much the only one on the web that utilizes a particular ingredient(in this case, the acai berry) Did you know if you leave out acai berry puree for 20 minutes at room temperature, you get a liquid that is the consistency of acai juie? I didn't until I made this bread. The bread looked liquidy so I had doubts on whether the bread would actually cook. Well it did, but apparently purple liquids like acai berry puree turn brown in a 350 degree Fahrenheit oven during the baking process, which is probably why this bread looks like the Chocolate Bread I made back in February.The insides of the bread may look burnt(or even like a war zone) but judging by the taste(which is really what counts), it was creamy in the center. As for the picture of me holding a slice of the bread, I poured some of the gooey center on top of a slice of this bread. My dad liked this bread. In fact, he had two slices for himself! We ate half the loaf in one night! That's how good the bread was! The taste is definitely reminiscent of banana bread, with a hint of coconut and chocolate(from the acai berry puree). The taste of any granola was nonexistent and I only got a faint taste of strawberry once. It's a really delicious bread, bottom line. You will need: For the cooking equipment: A large bowl 2 small bowls A loaf pan A baking sheet For the bread: 2 eggs 1/2 cup of butter at room temperature 1 cup of granulated sugar 1/2 tsp. of vanilla extract 1/2 tsp. of lemon juice 1 tsp. of baking soda 1/2 cup of shredded, sweetened coconut 1/2 cup of granola 1/2 cup of chopped up strawberries 2 chopped up bananas 1 1/2 cups of all-purpose flour 1 1/2 tbsp. of hot water 1 packet of acai puree, thawed 1. Crack the eggs open in a small bowl. Separate the egg yolks and egg whites by spooning out the yolks using a spoon. Put the yolks into a second small bowl. 2. Cream together the butter and sugar in a large bowl. 3. Add the egg yolks and next 8 ingredients into the large bowl. Mix all the ingredients together until you get a cohesive batter. 4. Stir the flour into the batter until it's well combined. 5. Whisk egg whites until stiff using a whisk. Pour the stiff egg whites into the batter and fold it into the batter. 6. Stir the hot water into the batter. 7. Spray a loaf pan with nonstick cooking spray on all inside sides of the loaf pan. 8. Pour half of the batter into the loaf pan. 9. Pour the puree on top of the batter in the loaf pan. Cover that puree with the remaining batter. 10. Using a spoon handle or wooden skewer, make acai swirs by stirring the batter in a circular motion. 11. Bake in a 350 degree Fahrenheit oven for 45 minutes, or until the bread is fully cooked. You can tell when the bread is done by sticking a toothpick into the bread. If it comes out clean, the bread is done. However, don't worry about the center of the loaf being gooey and liquidy. That's due to the bananas and is totally normal. 12. Let the loaf cool at room temperature for 15 minutes. 13. You could put stuff like butter or jelly on top of a slice of this bread but the bread is sweet enough as it is on its own(at least for me anyway). 14. Bon appetit!
0 Comments
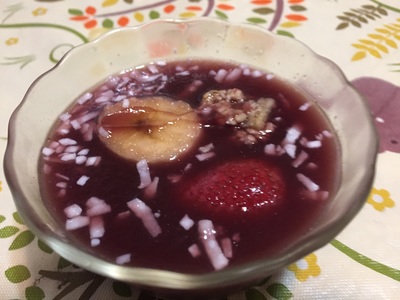
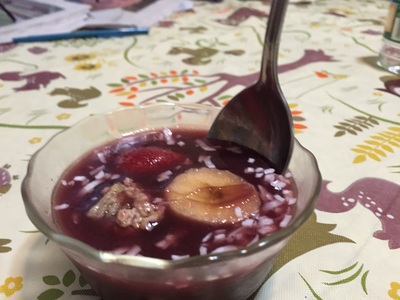
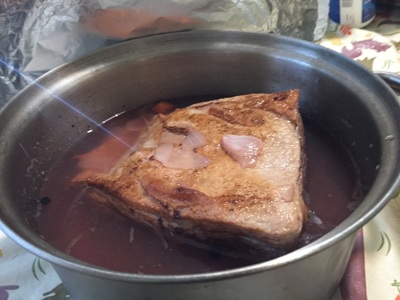
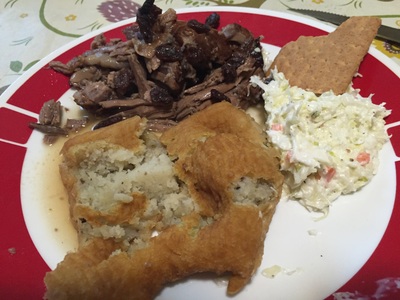
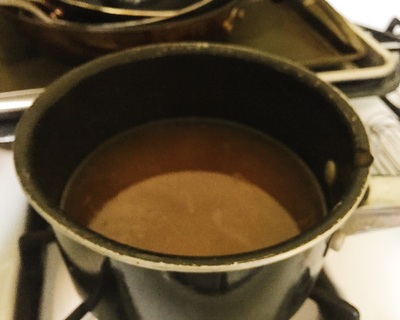
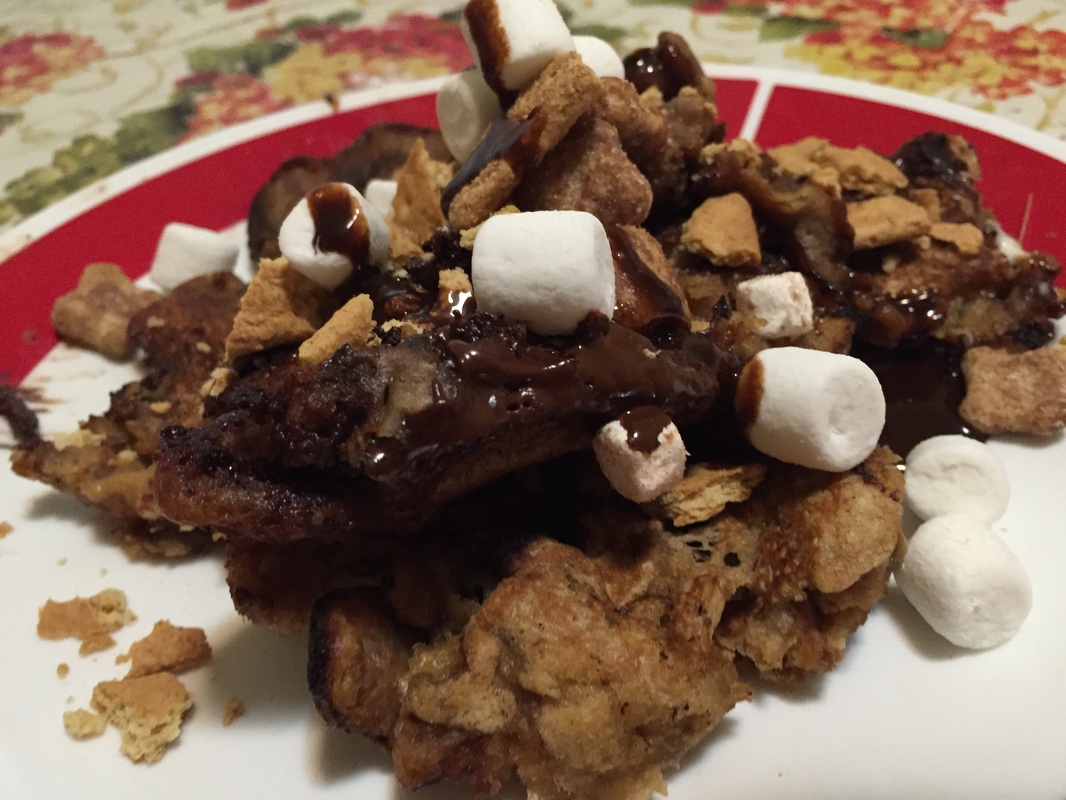
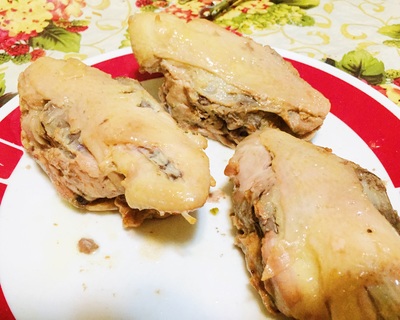
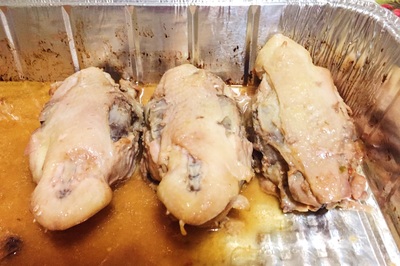
Believe it or not, I've never had an actual acai bowl. You know, the type you kept seeing on your Instagram feed last summer(hey, I don't follow the trends in real time people!). I thought to myself, "What if I put all the components of an acai bowl, only in gelatinized form?" This recipe is the answer to that thought. Acai is a superfruit native to Brazil only, which is why it only comes in three forms in North American supermarkets: pureed, powdered, or juice. Some people think acai is too strong in taste, which is why I also added grape juice(because it's purple too). Personally, I can drink acai juice straight out of the bottle. But I do realize not everybody has my adventurous taste buds(though if they did, the world would be a better place). Not all acai bowls are alike- some have chocolate, some have kiwis, etc. But my ideal acai bowl would also have strawberries, bananas, coconut, and granola. Coincidentally(ok, not really), these four things are in this jello. This is the first time I've made jello with stuff actually submerged in it. The taste of the jello wasn't too sweet, the granola provided a crunch to the jello and the coconut provided a nice touch to the jello. My dad even loved the jello too- so much so he had an entire bowl of it! You may have noticed some changes on my channel- I'm using different music(to reflect the new theme of my channel, which is about ugly yet tasty food) and a different introduction to better reflect what people on YouTube will actually watch for more than 15 seconds before closing the video! You will need: For the cooking equipment: A small saucepan A large bowl 4 little bowls Plastic wrap For the jello: 3/4 cups of acai juice 2 packets of unflavored gelatin 1 cup of grape juice 1/4 cups of water Strawberries Bananas Shredded, sweetened coconut Granola pieces 1. Bring the water to a boil in the small saucepan. With this little water, it should boil in 2-3 minutes. 2. As the water is reaching the boiling point, mix the unflavored gelatin into the acai juice until you get a smooth liquid with no lumps(ideally) 3. Add the boiling water to the acai juice mixture. 4. Mix the grape juice into the acai juice mixture. 5. Put pieces of strawberries, bananas, coconut, and granola into the little bowls(I only used one or two pieces of each item in each bowl). 6. Pour the liquid over the solid ingredients in the little bowls, covering it. 7. Put plastic wrap over each of the the little bowls. 8. Put the little bowls in the fridge to let the gelatin set for 2-4 hours. 9. Bon appetit! I like to do my own thing on this channel and cook whatever the hell I want- except for 2 occasions, my dad's birthday and Father's Day. Because he does so much for me both as a dad and a cameraman for my videos. On those two days, my dad gets to call the shots as for what I have to cook. This year, he told me to make him sauerbraten. My dad's mom was Austrian and German. She made sauerbraten for him and his three brothers when he was a kid. Though she complained about how long it took to make it, which is probably why she only made it on special occasions. He recalls eating sauerbraten with red cabbage and potato dumplings. I used neither of those things in this recipe because a) eating plain red cabbage to me is gross and b) my local supermarket doesn't sell premade potato dumplings and the closest thing to that are knishes. The last time my dad had homemade sauebraten was at least 40 years ago, when he was a teenager, and he recalled eating the dish at a now-defunct German restaurant 20 years ago. He said this sauerbraten was the best Father's Day gift I have given him! My dad said he went to culinary heaven when he ate this meal. Maybe he said that because of nostalgia but no matter what the intention, I'm flattered. Apparently I'm not very good at making gravy- the gravy I made was kind of thin but my dad still enjoyed it. The graham cracker crumbs tended to float towards the top. I remember when I made the Pumpkin Spice Gravy last fall, the gravy was also kind of thin. But then again, I don't make gravy very often. I loved the dish as well but really, this video and post is all about my dad. You may notice in the video I say "ugly food can be tasty"- well that's because I'm rebranding my channel this summer to focus it on food that doesn't look pretty necessarily but tastes amazing. In other words, it's pretty much what I'm doing now. I'm just trying to appeal to more people than I am now. In the coming weeks, you will see a new channel banner, new music on my videos, and a new channel trailer. That's all I'm going to say for now. HELPFUL LINK: Juniper Berries: https://www.amazon.com/Spice-Hunter-Juniper-Berries-1-3-Ounce/dp/B004M1BEDA/ref=sr_1_8_s_it?s=grocery&ie=UTF8&qid=1466361081&sr=1-8& Serves 4-5 adults Inactive time: 2-4 days plus 37-40 minutes You will need: For the cooking equipment: A large saucepot and a cover for it Paper towels to pat dry the bottom round A frying pan 2 forks to turn the bottom round over Aluminum foil 2 lasagna pans Nonstick cooking spray A meat thermometer to measure the internal temperature of the bottom round A large plate A colander A large bowl A medium saucepot A whisk For the food: 2 cups of water 1 cup of cider or champagne vinegar 1 cup of red wine vinegar 1 tbsp. of salt 12 juniper berries(see helpful link) 3/4 tsp. of ground up peppercorns or whole mustard seeds 6 cloves or cinnamon 2 bay leaves 8 chopped up baby carrots 3/4 of a large onion 2 lbs. of bottom round More salt for rubbing into the bottom round Olive oil for browning the bottom round 1/3 cup of granulated sugar 3-5 ounces of crushed up honey graham crackers(using a food processor or a Ziploc bag and your fists) Raisins for garnish Serve with cole slaw or red cabbage; and knishes or potato dumplings 1. Put the first 10 ingredients into a large saucepot. Cover and bring large saucepot to a boil. 2. Once the contents of the large saucepot are boiling, reduce the heat to a simmer. Let contents simmer for 10 minutes. 3. Remove large saucepot from stove and uncover it. Put large saucepot on a cool burner. Let marinade in saucepot cool until you can stick a finger in it without burning yourself. This could take at least 30 minutes. 4. Once the marinade is cool to the touch, pat dry the bottom round with paper towels. Put a little bit of salt on the bottom round and rub it into the meat. 5. Pour olive oil into a frying pan and spread it around the pan. Heat the oil up on the stove. 6. Once the oil is heated up, put the bottom round into the frying pan. 7. Cook the bottom round for 1-2 minutes on each side. Once the meat has browned on a side, turn it over to another side using two forks. Repeat this process until the entire bottom round has be browned. Tip: Brown the larger, thicker sides of the meat for 2 minutes and the thinner, smaller sides for 1 minute. 8. Put the browned bottom round into the marinade that's in the saucepot. The saucepot will warm up at this point, so wait 7-10 minutes until the saucepot is cool to the touch or slightly warm at most. 9. Cover the saucepot with aluminum foil and put it in the fridge. Let the meat marinade for 2-4 days. If the meat isn't fully submerged in the liquid(as with my case), turn it over once a day. 10. After the meat is done marinating, add the granulated sugar to the meat and marinade and mix it in. Don't put all of the sugar on the meat- you don't want sweet meat! Spread some of the sugar off of the meat and into the marinade. 11. Use 2 lasagna pans to fully hold the meat and marinade, stacked on top of each other. 12. Spray top lasagna pan with nonstick cooking spray. 13. Put the meat into the top lasagna pan, then the marinade. 14. Cover the lasagna pans with aluminum foil. Cook in a 325 degree Fahrenheit preheated oven for 4 hours, or until the meat is tender. Using a meat thermometer, make sure the internal temperature of the meat reaches 160 degrees Fahrenheit. 15. Put the meat onto a large plate. In the sink, put a large bowl in it. Then the drain the liquid that's in the lasagna pans through a colander, thereby separating the solids and liquids. Discard of the solids. 16. Pour the remaining liquid into a medium saucepot. Bring medium saucepot to a boil on the stove. 17. Once the liquid in the medium saucepot is boiling, add the crushed honey graham crackers a spoonful at a time. Mix each spoonful into the liquid using a spoon or whisk. Whisk the liquid until it thickens to form a gravy to your liking. 18. Cut the meat up. At this point, it should resemble the texture of something liked pulled pork. Top the meat with gravy and raisins. 19. Serve with cole slaw or red cabbage; and knishes or potato dumplings. 20. Bon appetit! As I mentioned in the last blog post(the one about Hawaiian Marinated Chicken), s'mores beer doesn't fare well when boiled- it overflows. But I wasn't about to empty out my remaining s'mores beer bottles down the drain, I looked into a different way to cook beer- by frying it in the form of pancakes(I was inspired by http://allrecipes.com/recipe/87685/beer-pancakes/). I remember making my Fried Champagne in January and how it ended up in pancake form. This time, with the s'mores beer, I deliberately made pancakes. But I also had other s'mores flavored-foodstuffs, S'morz cereal(yes it's' back!) and ingredients for traditional s'mores: marshmallows, graham crackers, and chocolate in the form of both semisweet baking chocolate and chocolate syrup. So I decided to add those things into the s'mores beer pancakes. My dad tried the pancakes and he said he'd eat it- if I omitted the beer. :( Well, more pancakes for me then! :) IHOP may or may not have had s'mores pancakes and/or waffles on its menu but irregardless, doesn't these pancakes look like something you'd eat there(sans beer, of course)? Aren't these pancakes Instagram-worthy? It doesn't matter what the answer is to the first question but for the latter, I hope it's yes! There's a common myth in cooking that alcohol cooks itself off in any amount of heat for any amount of time. That's not entirely true- I read somewhere that it takes 30 minutes on the stovetop to cook off 90% of the alcohol! These pancakes were only cooked for 30 seconds on each side, so there was still a good amount of alcohol remaining. This is why I say in my video these pancakes aren't for kids! Besides, my target audience isn't kids or families anyway. But if you do want to serve your kids S'mores Deluxe Pancakes, just use root beer instead of s'mores beer. The recipe will be the same otherwise. Most other s'mores pancake recipes use chocolate chips in the pancakes, but let's be honest, people- you don't(normally) put chocolate chips with the marshmallows in between graham crackers! They wouldn't last in a campfire. Anyway, here's the recipe: HELPFUL LINK: S'morz Cereal: https://www.amazon.com/Kelloggs-Cereal-Smorz-10-20-Ounce/dp/B01ALC0182/ref=sr_1_1_a_it?ie=UTF8&qid=1465754346&sr=8-1& Makes 12 pancakes For the cooking equipment: A large bowl A whisk A spatula A frying pan For the pancakes: 1 cup of all-purpose flour 1/4 cup of granulated sugar 1/2 tsp. of salt 3/4 tsp. of baking powder 2 tbsp. of melted butter 1 beaten and whisked egg 1 cup of s'mores beer(replace with root beer if you can't find this flavor of beer or you're serving these pancakes to kids) 1/3 cup of S'morz cereal(see helpful link) 2 tbsp. of chocolate syrup 2 oz. of chopped, semisweet baking chocolate 1/3 cup of mini marshmallows 1/3 cup of crushed graham crackers Olive oil for frying For garnish: S'morz cereal Mini marshmallows Crushed graham cracker crumbs Chocolate syrup 1. Put the first 7 ingredients into the large bowl. Mix all the ingredients up using a spoon and a whisk. A few lumps in the batter is OK. 2. Add the S'morz cereal, chocolate syrup, baking chocolate, mini marshmallows, and crushed graham crackers to the batter. Mix all the ingredients together. 3. Pour olive oil into a frying pan. Spread the oil around the pan. Turn the stove on and heat the oil up. 4. Once the oil is heated up, spoon 1/4 cup of batter into the frying pan. Don't fill the frying pan too much with batter! 5. Let the pancakes cook for 30 seconds before flipping them over. 6. Once the pancakes are flipped over, let them cook for another 30 seconds. After those 30 seconds, shut the stove off and put the pancakes on a plate. 7. Repeat steps 3-6 for remaining batches(I made 4 batches in total, but YMMV). 8. Top the pancakes with the garnish ingredients. 9. Bon appetit! When it comes to cooking, even the best-laid plans sometimes don't work out. I'm not talking about this recipe, of course, for this one turned out quite well. But I had a different intention for using the chicken backs I bought from a local butcher. My (failed) plan: Make a chicken stock out of the chicken backs, then use said stock in a S'mores Beer Stew. The rub: I tried cooking pasta in S'mores Beer but the beer, which was a porter, was too foamy and overflowed in my large saucepot. Conclusion: s'mores beer is not good for boiling. My second (failed) plan: Use the Hawaiian marinade I bought from the supermarket as part of my own take on sauerbraten for Father's Day. The rub: My dad tried the marinade and he hates it. It looks like I'll be making my own marinade that is more traditionally related to sauerbraten. I did my due diligence in researching other chicken back recipe videos on YouTube but the only videos I could find used the chicken backs in a Jamaican curry. It looks like I'll have to be a pioneer for the foodie YouTube community yet again(but hey, I ain't complaining!). My dad is not a trained chef but one of his few dinners that he can make from scratch is chicken thighs in the oven. It turns out that his experience came in handy when it came to cooking the chicken backs(though I had help from http://www.ehow.com/info_12331301_cook-chicken-backs.html). He normally cooks chicken thighs in the oven for 60-90 minutes, which is also the time range for cooking chicken backs. I watched a YouTube video of somebody cooking chicken backs in the oven for 20 minutes. The catch: the backs were cut up into small pieces, making cooking them a heck of a lot faster. But that would require a butcher's knife and even my sharpest knife can't cut through bones. Normally I thaw my chicken out 24 hours before cooking it. My only problem was that after 24 hours, the chicken backs were only partially thawed. But I needed to make this video on the day I did. My dad never thaws chicken in the microwave and I admit thawing chicken out in the microwave isn't the ideal way to thaw out meat, because there's the chance some of it may get accidentally cooked. You don't want half the chicken being raw and half being cooked. But you gotta do what you gotta do to cook your meal, even if that means thawing out the chicken in the microwave. Fortunately, I was able to figure out the defrost settings of my microwave- and my dad learned more about his own microwave that day. Another part of my original plan for the chicken backs was being able to find the internal organs that are supposedly inside the backs, taking them out, and frying them. But it turns out I couldn't find any organs inside whatsoever, so it's likely the butcher took the organs out of the backs. But when I ate the chicken backs, I had a taste of chicken liver(yuck!) in my mouth, so there might have been organs in the backs all along- they were just too small to remove. Other organs you may find inside a chicken back include:
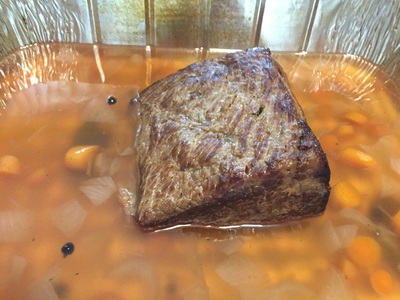
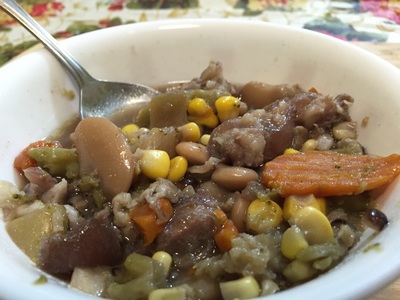
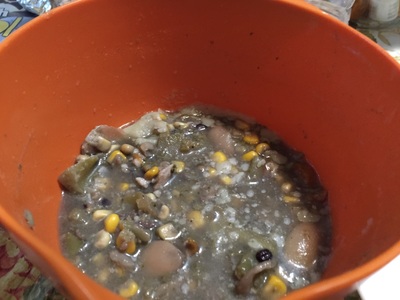
I can safely say after eating chicken backs that the only parts of a chicken I haven't eaten are the 4 organs listed above, as well as chicken genitalia or reproductive organs(but if I ever find that, I'm willing to try it). HELPFUL LINK: Hawaiian Marinade: http://www.amazon.com/Lawrys-Hawaiian-Tropical-Juices-Marinade/dp/B00G863WC8?ie=UTF8& You will need: For the cooking equipment: A lasagna pan Nonstick cooking spray A sheet of aluminum foil A pastry brush 2-3 Ziploc Bags For the marinated chicken: Chicken backs(I used 3), thawed out completely 1/4 cup of Hawaiian marinade per chicken back(see helpful link, though I think Lawry's Hawaiian marinade is found in most major supermarkets) More Hawaiian marinade to brush onto the chicken backs 1. Put each chicken back into a Ziploc bag(though I was able to fit 2 of them in one bag) 2. Pour the Hawaiian marinade into the Ziploc bag with the chicken backs in it. 3. Close the bag. Shake the marinade and chicken backs up in the bag. Make sure the backs are fully coated with marinade. 4. Marinate the chicken backs in their bags for 30 minutes. 5. Once the chicken backs are done marinating, spray a lasagna pan with nonstick cooking spray. 6. Put the chicken backs into the lasagna pan. Dispose of the bags the chicken backs have been marinating in. 7. Brush the outsides of the chicken backs with more Hawaiian marinade, using a pastry brush. 8. Cover the lasagna pan with a sheet of aluminum foil, so the chicken backs don't dry out in the oven. 9. Cook the chicken backs in a 350 degree Fahrenheit oven for 30 minutes before turning them over. 10. Turn the chicken backs over using two forks. 11. Pour more marinade on the other side of the chicken backs. 12. Cover the lasagna pan with aluminum foil again and return the chicken backs to the oven for another 30 minutes, or until the internal temperature of the thickest part of the chicken backs reaches 165 degrees Fahrenheit. Note: don't be worried if the chicken looks pink once it has reached the necessary internal temperature. That might be from the color of the marinade(orange). As long as your chicken is fully cooked, it's safe to eat. 13. Serve with fries. Bon appetit! I actually made this stew last month, back when nobody eats stews in May. Then again, even less people eat stews in June. That's besides the point. But why didn't I share this recipe with you all in May? Five reasons: 1. It turned out to be the ugliest-looking stew(or ugliest-looking anything) I've ever made but the taste was sublime(even though my dad said the meat coming off the veal neck bones was too fatty for him. He spit the piece I gave him into the trash can. It pains me when he does that.) 2. Banana bread-flavored beer is very hard to come by, so the only alternative to using that flavor of beer and still having a banana taste in the stew is to put either bananas or banana bread into the stew, and using plain beer. It seems crazy but then again this recipe is crazy. 3. Veal neck bones are hard to come by too. Though I suppose if I used the neck bones from a cow or pig, the stew may have looked nicer. 4. I was backed up in my video queue. 5. I don't know anybody other than myself who actually enjoys making and eating stews when it's 60 or 70 degrees outside. I was going to post this video in October but a recipe using another flavored beer didn't work out yesterday, and I want to keep a regular upload schedule for you all. By the looks of the stew, you would never suspect there's even a modicum of banana flavor in it. I could only taste the banana flavor right after I made the stew. After that, it just tastes like any other beer stew I've made in the past. It's really interesting how when you use neck bones in a stew, it gelatinizes overnight in the fridge. To be honest, it kind of looks disgusting that way. But never fear because the gelatinized state turns into liquid after 45 or 60 seconds in the microwave. Initially, I was going to not use veal neck bones, and instead I would've either bison broth or seafood stock(because that's what I had in the pantry at the time). But since I was using veal neck bones, I figured that would provide enough flavor to stew. Besides, all broths and stocks have water as a key ingredient anyway! When I find an interesting ingredient in a supermarket, my mind sets into motion how I can use it one of my upcoming recipes. This stew goes well with wonton strips and garlic bread. Inspiration for this recipe: http://cooking.nytimes.com/recipes/2938-vegetable-soup-with-meat You will need: For the cooking equipment: A large saucepot For the stew: 1 pint and 0.9 fl. oz. of banana bread beer 3 veal neck bones 15 ounces of butter beans 1 cup of yellow and purple corn 4 cups of a mixture of broccoli, cauliflower, and carrots Enough water to leave 1 inch from the top of the saucepot(I used 2 cups of water) Pinch of marjoram Pinch of onion powder Pinch of parsley flakes Pinch of salt Pinch of black pepper 1. Put all ingredients into the large saucepot. Mix the spices into the rest of the ingredients so that the spices aren't lying on top of the stew. 2. Turn the stove on, cover the saucepot with its cover, and bring the stew to a boil. 3. Once the stew is at a boil, reduce the heat to a simmer. Cover the saucepot and let the stew simmer for 90 minutes. Stir the stew around every 10-15 minutes. 4. At the 85 minute mark, remove the bones from the stew. Then remove the meat and fat from the bones. Return the meat and fat to the still simmering stew and let the stew simmer for another 5 minutes. 5. Serve with garlic bread or wonton strips. 6. Bon appetit! |
Archives
October 2019
Categories
All
|
 RSS Feed