|
A few months back, I visited a 7-11 for the very first time and I saw this really interesting candy called "Crunchkins", which are basically like Whoppers candy except there are some circular candies flavored like birthday cake, others tasting like a brownie, and still others tasting like a glazed donut.
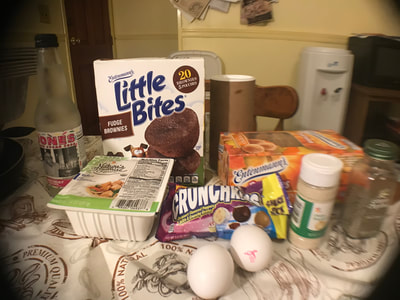
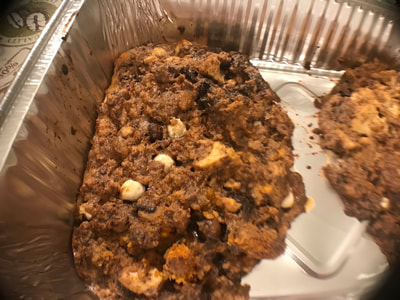
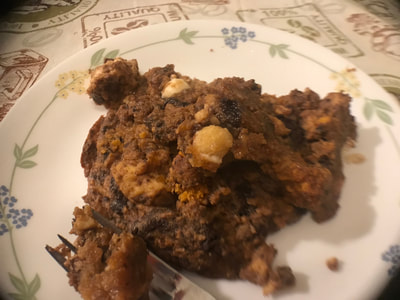
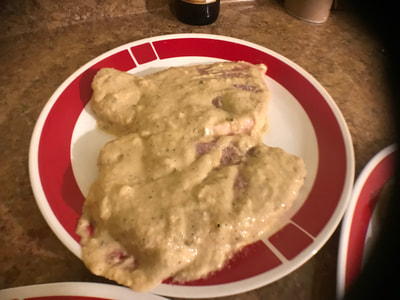
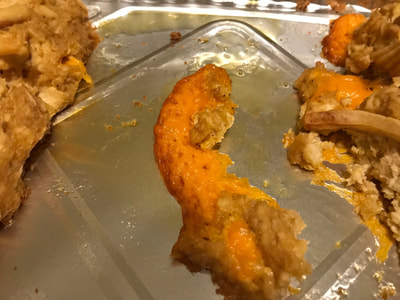
I have never seen such an interesting flavor of candies before and my initial idea was to make an ice cream out of them but then I realized that would be way too sweet, so I decided to make a tofu meatloaf with them and the flavors they represent(you know, actual cake, brownies, and donuts). I found it really interesting that the exterior of the Crunchkins melted in the oven, leaving the crunchy interiors of all the candies. If this isn't the sweetest meatloaf I've ever made, it's probably the most indulgent. YOLO! I also find it fascinating that when I make dessert meatloaves the end result is usually a flattened, rectangular pancake. Still tasty, nonetheless! The only glazed donut holes I could find were pumpkin spice flavored since this is October after all, so there was a little pumpkin spice flavor in the meatloaf too. I didn't taste much birthday cake flavor though but to be fair, I only used birthday cake flavored soda and not actual cake in this meatloaf. My dad definitely didn't try this meatloaf as it had chocolate in it. HELPFUL LINK: Birthday Cake Soda: www.jonessoda.com/collections/jones-beverages/products/limited-edition-birthday-cake-soda-12-pk You will need: For the cooking equipment: A large bowl A lasagna pan Nonstick cooking spray For the meatloaf: 2/3 tbsp. onion powder 2 beaten and whisked eggs 1/2 cup birthday cake soda(see HELPFUL LINK) 3.5 oz. bag Crunchkin candies(probably can find it at a 7-11) 2-4 packs Entemann's brownie bites 1/2 cup's worth of crumbled, glazed donut holes Pinch of salt Pinch of black pepper 1 pound chopped, drained, crumbled up, firm tofu 1. Put the first 4 ingredients into a large bowl. 2. Crumble up the brownie bites into a breadcrumb consistency and put them in the large bowl, along with the rest of the ingredients. 3. Mix all the ingredients up until you get a firm mixture. 4. Spray a lasagna pan with nonstick cooking spray and form 2 loaves from the meatloaf mixture. 5. Bake the meatloaves in a 350 degree Fahrenheit oven for 40-45 minutes.
0 Comments
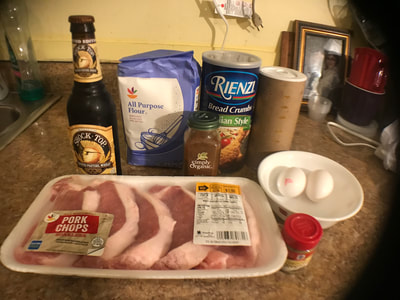
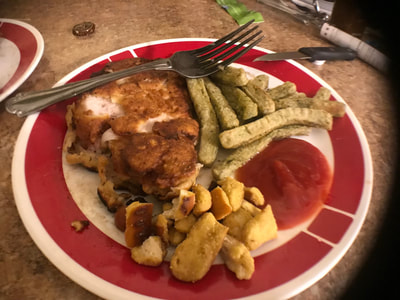
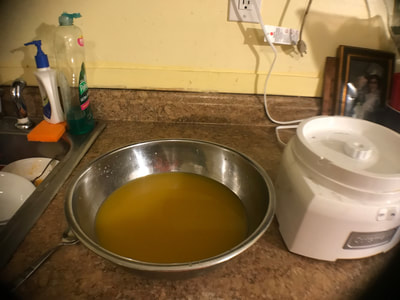
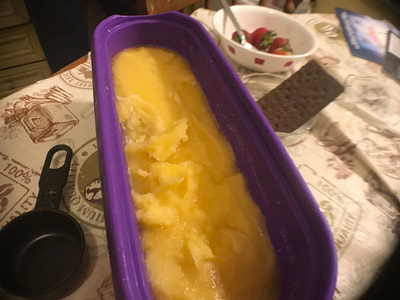
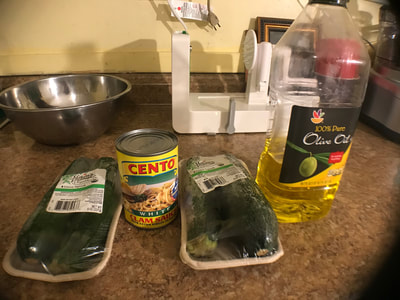
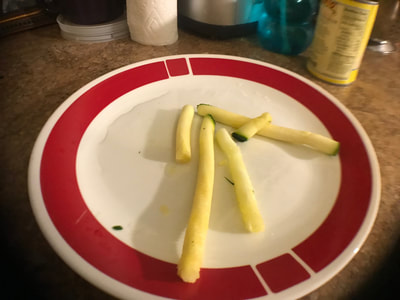
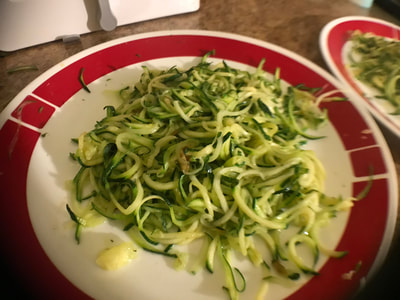
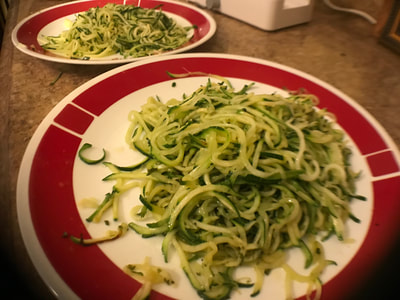
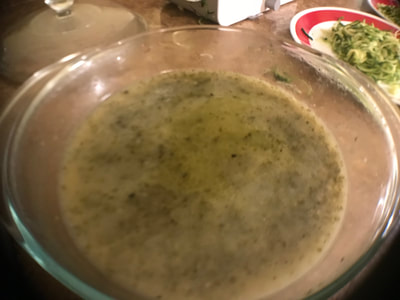
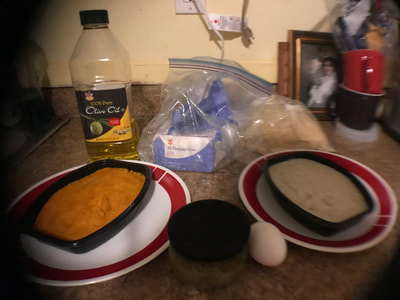
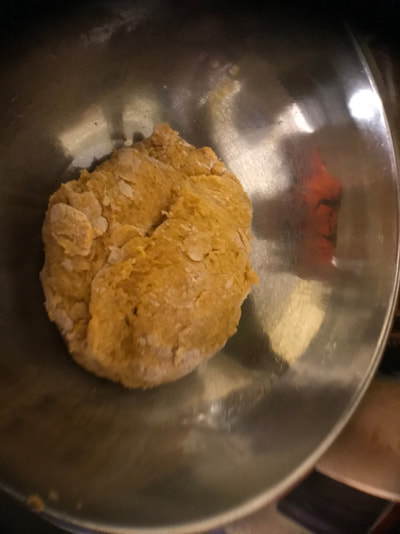
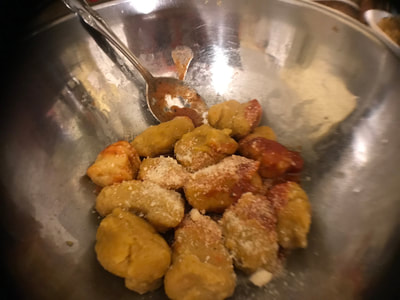
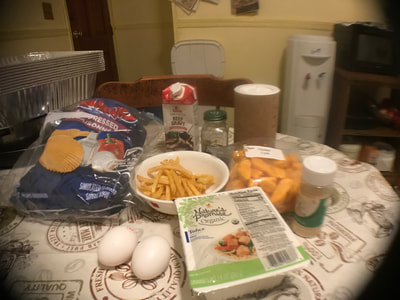
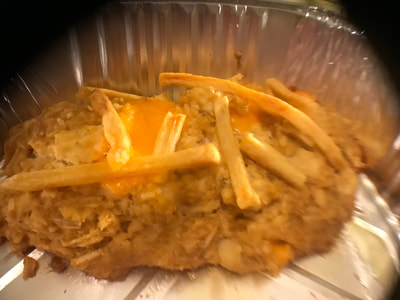
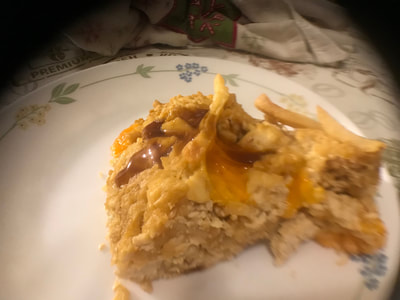
I had one last bottle of beer in my six pack of pretzel-flavored beer and I needed a way to use it. So I wondered why fish and chicken can be beer-battered but not pork chops. In fact, I searched "beer battered pork chops" on YouTube and only got battered pork chops that didn't use beer. Pretzels and pork go well together when you think about it. I vaguely remember my mom making pork chops for herself when I was a kid but I remember the dog Porkchop from Doug a lot more. I didn't realize pork chops burn so easily. After tenderizing them with a meat mallet, I thought it would take 4 minutes per side to cook but I only ended up with a burnt batter and had to dispose of 2 of the 5 chops. Something in the realm of 2 minutes or 2 minutes and 15 seconds would be better. The thing that matters is that the internal temperature of the chops is at least 145 degrees Fahrenheit. The batter on the pork reminded me of beer-battered fish and the pork had a texture reminiscent to that of chicken. But the pork was so soft in my mouth. I sometimes wonder why no one has thought of beer-battered pork chops before! Of course, my dad didn't try the chops because of the beer in it. You will need: For the cooking equipment: Wax paper A meat mallet or rolling pin A large bowl A frying pan A meat thermometer 5 boneless pork chops For the batter: 2 beaten and whisked eggs 1 1/2 cups all-purpose flour 3/4 cup seasoned breadcrumbs 12 oz. of beer(I used pretzel-flavored beer) Pinch of salt Pinch of paprika Pinch of oregano Olive oil for frying Fries, ketchup, and pretzel bites on the side(optional) 1. To tenderize the pork chops, place each chop in between 2 sheets of wax paper and press the top sheet of wax paper with a meat mallet or rolling pin. This will help the meat cook better. 2. Put all the batter ingredients into a large bowl and mix all the ingredients up. 3. Dip each chop into the batter and coat the chops in the batter on both sides before placing them onto a plate. 4. Pour olive oil into a frying pan and turn the stove on to heat the oil up. Once the oil is heated up, place each chop into the pan(my pan could only fit 1 chop, so you'll need to make multiple batches) and cook the chop for 2-2 minutes, 15 seconds. 5. Flip each chop over and let it cook on the other side for 2-2 minutes, 15 seconds. 6. Place the cooked chops onto a plate and measure the internal temperature of the pork with a fork by placing the thermometer into the center of the chop. The temperature must read at least 145 degrees Fahrenheit before it's safe to eat! 7. Serve with fries, ketchup, and pretzel bites on the side(optional). It seems like the timing of videos like these don't match the expiration dates of the ingredients on hand. I don't remember when I bought this 100% mango juice but I do know I bought it from Trader Joe's(don't bother trying to look for it there- they change the ingredients they sell monthly and that's what I like about them. I just wish I had more time to go there more often.) and it expires in April 2018, so clearly this is not going to be a summer video. The first thing that comes to one's mind when it comes to the month of October is not mango or brainfreeze(it's Halloween). I only made s sorbet once before and when I looked at this link for inspiration, the recipe said to make simple syrup from scratch. Luckily, you can buy simple syrup at the supermarket(at least where I am)! There's no need to chill the mango juice mixture if you leave the bottle of simple syrup in the fridge for 2-3 hours. Just mix all the ingredients and pour into the ice cream maker! It tasted like mango but my dad thought it tasted like pineapples(and no, this is not the first time he's had sorbet despite falsely admitting to that in the video). The only bad thing about this sorbet is that it melts quickly so you need to immediately eat it after scooping it! You will need: For the cooking equipment: A large bowl An ice cream maker An ice cream tub A large soup spoon For the sorbet: 12 oz. simple syrup(which is just sugar dissolved in water), chilled in the fridge for 2-3 hours before hand 3 tbsp. lemon juice 16 oz. 100% mango juice(you can use any mango flavored juice if you can't find the pure kind) 1. Pour the first two ingredients into a large bowl and mix them together. Then add the mango juice and mix everything together again. 2. Turn your ice cream maker on and pour the mango juice mixture into the bowl of the maker. Let the sorbet churn for 14 minutes(or whatever your ice cream maker manual's instructions say). 3. Transfer the sorbet into an ice cream tub using a large soup spoon to prevent the sorbet from melting. Put the lid on the tub and place the tub in the freezer overnight. Bon appetit! It was a battle just to come up with a recipe my dad would actually eat in honor of his birthday next week, as he's a picky eater set in his ways. He wanted me to making him spaghetti and clam sauce, his favorite meal, but plain spaghetti just isn't weird at all. So I asked if he would like his favorite vegetable, bell peppers, spiralized into noodles, and he declined. Then we came up with spiralizing zucchini, his other favorite vegetable. Unfortunately, zucchini is out of season where I am, so my dad reluctantly agreed to have me spiralize green squash(which look the closest to zucchin) instead. Personally, I thought I wasn't going to like this dish because of the clams inside the cans of white clam sauce(I hate canned clams, but not the fresh kind), but i was pleasantly surprised by how delicious it was. I also thought this dish wouldn't fill me up, as it's just a veggie covered in a sauce- I mean, how can that be a meal? Well it filled me up, thanks to the clams and some garlic bread I ate off-camera! My dad loved this dish and he said this was the best present I ever made him(cue the aww's)! You will need: For the cooking equipment: A spiralizer A plate A frying pan A spatula A microwave-safe dish A soup ladle For the edible stuff: 3-4 green squash or zucchini Olive oil for sauteeing Onion powder(optional) Parsley(optional) 20 oz. white clam sauce 1.Set the spiralizer with the spaghetti blade. Insert the squash in the spiralizer. 2. Crank the handle of the spiralizer and have the noodles land on a plate. Don't crank too hard, otherwise the spiralizer will stop sticking to the surface! Repeat steps 1 and 2 for the remaining green squash. 3. Pour olive oil into a frying pan and spread the oil throughout the interior of the pan. Turn the stove on to heat the oil up. 4. Once the oil is heated up, place just enough noodles so that there's room to move them around the pan. If you like, you can add onion powder or parsley to season the noodles as they're sauteeing. 5. Saute the noodles by moving them throughout the pan for 20-30 seconds. Then put the noodles onto a plate. Repeat steps 5 and 6 for the remaining squash. 6. Microwave your white clam sauce for 2-2 1/2 minutes in a microwave-safe dish. Ladle the sauce onto each plate of noodles. Bon appetit! I'd say I did pretty good for my first time making gnocchi. It's actually one of the easier types of pastas to make; you don't even need a pasta maker since the dough just needs to be rolled into logs and cut into pieces. But let's face it, traditional potato gnocchi isn't weird enough, so I used sweet potatoes instead. Then it turned out I didn't have enough mashed sweet potatoes for this recipe so I bought some mashed cauliflower(which, by the way is not a potato, but it it is a potato substitute) to go into the gnocchi as well. You barely even taste any cauliflower though. To make the recipe even more sweet potato-ey, I added some sweet potato flour into the dough. But it turns out sweet potato flour needs a lot of assistance from good ol' all-purpose flour to actually form any sort of dough the can be kneaded and not stick to the countertop. I tried rolling each gnocchi against the back of a fork to get the rivets you see on the outside of traditional gnocchi- the rivets were there, but they weren't visible to the camera. The rivets also have an important function- they help sauce stick to the gnocchi better. The gnocchi tasted hearty and heavy, just like gnocchi should. Even though they look like chicken nuggets, they'd make for a good prank. When my dad tried the gnocchi, he stated the obvious: it's doughy and potato-ey, but would be great with some meat sauce(which is his favorite when it comes to making spaghetti). HELPFUL LINK: Sweet Potato Flour: www.amazon.com/Z%C3%B3calo-Peru-Sweet-Potato-Flour/dp/B0032BYMJE/ref=sr_1_3_a_it?ie=UTF8&qid=1507572801&sr=8-3& You will need: For the cooking equipment: A large bowl A medium bowl 2 small bowls A large saucepot A slotted spoon For the gnocchi: All-purpose flour(start off with 1/2 cup) 1/4 cup sweet potato flour(see HELPFUL LINK) Pinch of salt 12 oz. mashed sweet potatoes 6 oz. mashed cauliflower 1/2 tbsp. olive oil 1 egg To top the gnocchi: Tomato sauce Parmesan cheese 1. Put the first 3 ingredients into a medium bowl and mix all the ingredients together. 2. In a large bowl, put the next 3 ingredients in it. 3. Beat 1 egg in a small bowl and place only the egg yolk into the large bowl. Mix all the ingredients in that bowl together. 4. Add the flour mixture to the mashed sweet potato mixture and mix until you get a crumbly dough. This will require you to use more all-purpose flour just to not the dough stuck on your hands. 5. Flour your countertop or similar surface with all-purpose flour. Place the dough onto the floured surface and knead the dough until you get a firm dough ball. If the dough ball keeps sticking to the surface, add more all-purpose flour to both the ball and surface. 6. Once you get your dough ball, flour your surface again with fresh all-purpose flour and break apart a lemon-sized piece of the dough. Roll the dough into a log shape and cut it into pillow-like shapes with a butter knife. Repeat until all the dough is turned into gnocchi. 7. Make rivets in each gnocchi by rolling it back and forth against the back of a spoon. 8. Boil a pot of water in a large saucepot. Once the water is boiling, add a pinch of salt to the water and place the gnocchi into the boiling water, one gnocchi at a time. Each batch should only be 12-15 gnocchi. Let the gnocchi cook until they float to the surface of the boiling water, which should take about 2 minutes. 9. Retrieve the cooked gnocchi with a slotted spoon and place into a bowl. Use the same pot of boiling water for all the gnocchi. That is, once one batch has been cooked and retrieved, immediately add the next batch of gnocchi into the boiling water. 10. Top with tomato sauce and Parmesan cheese. Bon appetit! You guys, a lot of things have happened in my life recently, the most important one of them all is that I've come to the realization I'm transgender. That is, my physical body was assigned female at birth but my heart and soul is male and I'm transitioning socially and medically so that my heart/soul and physical body are aligned to be male. I'll probably get a lot of hate because of who I am and in that case, f--- you. Seriously, I got no time for transphobic a-holes. So if you hate trans people and want to ruin my life by trolling or harassing me, please unsubscribe from this channel! YouTubers don't typically ask people that watch their videos to unsubscribe but the community I'm trying to build is tolerant of transphobic people as well as tolerant of weird food. :) I've had to cut a lot of people out of my life because I'm trans, from high school friends to family to even medical professionals, unfortunately. I hate to say this, as I'm not normally a vindictive person, but it's for the best that my psychiatrist who denied I was trans is retiring at the end of the year. I fired my gynecologist because FYI, "transgendering" is a politically incorrect word. The correct word is "transitioning". So in future videos, if my voice cracks a bit, that's from the testosterone I'm taking to induce the correct puberty that was meant to happen in the first place. You probably won't see any facial hair for a year or two but facial hair grows quickly in my family so you never know! My hairline will probably start receding in a couple of years before I even turn 30 but I don't sweat the small stuff, as my 8th grade Spanish teacher once said. The other big thing happening in my life is I'm going back to school to study manufacturing, so I can get to a point where I'm able to support myself financially on my own one day because as much as you guys think my dad is cute, he's not going to live forever(don't worry, he's healthy at the moment!). The upload schedule might be erratic but at least one video will be posted every weekend. So thank you to all of you who will support me in the transitioning process and to those that won't, goodbye. Shoutout to PurpleEchoingForest on Instagram for suggesting the poutine meatloaf idea! Originally, I was going to have 2 separate meatloaves- one with all the components of an all-dressed potato chip, including the chips themselves, bbq sauce, vinegar, onion, and carrot(in place of bell peppers, which I absolutely hate); and the other being a poutine meatloaf. Then I realized I wouldn't have anything authentic to hold up the poutine meatloaf since fries make for terrible meatloaf binders, and the thing all-dressed chips and poutine have in common is that their both Canadian. The all-dressed chips can hold the poutine meatloaf together! Being the somewhat ignorant American that I am, I thought today, October 1, was either Canada Day or Thanksgiving in Canada. Turns out I'm wrong on both parts- Canada Day is July 1 and this year, Canada's Thanksgiving is not until the 9th(the 2nd Monday in October). I've never had poutine before, let alone travel to Canada(which I'd love to do, only to see if I could stand living there permanently seeing as Trump is president; I already said too much about my political views). The combination of beef gravy, fries, and cheese curds is addicting. Speaking of cheese curds, I had to order them on Amazon, as I can't find cheese curds in Long Island supermarkets(but I probably could if I were upstate, like in Albany). The cheese curds tasted like cheese that's a little squeaky, as they're wont to be. Plus they melt so beautifully that when you pull on them melted, they're very stretchy. If you look at a picture of this meatloaf, it looks like the fish in fish and chips or fried chicken strips, except the white stuff is tofu and not fish or chicken. This meatloaf is definitely heavy on the carbs, seeing as there's fries AND potato chips in it. Surprisingly, my dad thought the meatloaf was dry. I told him he could top it with some gravy and then he said he doesn't like cold gravy. :( HELPFUL LINKS: All-Dressed Potato Chips: www.amazon.com/Ruffles-All-dressed-Chips/dp/B004A6OMT0/ref=sr_1_2_a_it?ie=UTF8&qid=1506884872&sr=8-2& Cheese Curds: www.amazon.com/Cheddar-Cheese-Curds-1-LB/dp/B00HENSOAO/ref=sr_1_1_sspa?ie=UTF8&qid=1506884895&sr=8-1-spons& You will need: For the cooking equipment: A large bowl Nonstick cooking spray A lasagna pan For the meatloaf: 2/3 tbsp. onion powder 2 beaten and whisked eggs 10 cooked, straight fries(like the ones at McDonald's) 1/2 cup cheese curds(see HELPFUL LINKS) 1/2 cup beef gravy Pinch of salt Pinch of black pepper 1-1 1/2 cup's worth of crushed All-Dressed Potato Chips(see HELPFUL LINKS) 1 pound chopped, drained, crumbled up, firm tofu More cooked fries to top the meatloaves with(optional) Beef gravy for the top of the meatloaf(optional) 1. Put the first 9 ingredients into a large bowl. Mix all the ingredients up until you get a firm meatloaf mixture. 2. Spray a lasagna pan with nonstick cooking spray. Form 2 loaves from the meatloaf mixture. 3.Top the meatloaves with more cooked fries(optional). 4. Bake the meatloaves in a 350 degree Fahrenheit oven for 40-45 minutes. Serve with beef gravy on top(optional). |
Archives
October 2019
Categories
All
|


 RSS Feed