|
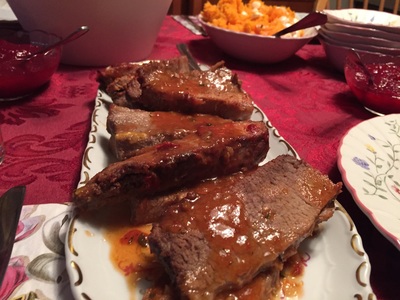
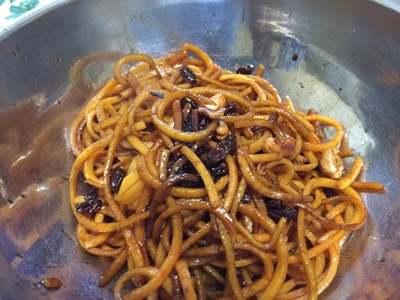
Normally I would put each recipe in its own blog post and video, but they were both served at Thanksgiving, so I combined all the footage into one video and blog post. It's more convenient. First, the Birthday Cake Soda Brisket: I needed to use my 12 pack of Jones Birthday Cake Soda and I've heard of people making brisket with Coca Cola, so I looked up Coca Cola Brisket recipes. But each recipe had its own cooking time so I picked the one with the shortest amount of time needed. However, that recipe was wrong in that it said to cook the brisket for 30 minutes per pound, when it really took twice as long, and even then, it could've used more time in the oven. But it was 8:30 at night by the time the 3-hour mark passed (I was tired by that point) and the internal temperature of the meat reached 178 degrees Fahrenheit, just two degrees short of the ideal 180-205 degree mark. However, brisket is safe to eat at least 160 degrees Fahrenheit, though it may be tough to cut up and chew in some places. You might be wondering what the red sauce over the brisket in the picture above is- that is the sauce the brisket was cooked in. You don't have to do anything to it other than pour it on top of the cut up brisket. One of my aunts told me she cooked the turkey for the same amount of time I cooked the brisket- and that's when I knew how time-consuming it is to cook a brisket! Other notes: You need to put aluminum foil over the roasting pan or lasagna pan before you put it in the oven. Also, you need to trim the fat off the cooked brisket. For the Butternut Squash Noodles: Fun fact: Most highways in the US have pit stops where you can buy stuff, eat food, and/or use the facilities(you know what I mean!). Long Island didn't have such a pit stop until this summer. Once the Long Island Welcome Center was open, I knew I wanted to visit it because they only sold food made on Long Island and in New York State, along with dishes made exclusively with ingredients sourced from those areas. Once of the most interesting finds there was butternut squash seed oil for sale. I knew I had to buy a bottle to use in a Thanksgiving recipe! My original plan was to get pre-cut-up butternut squash chunks from my local supermarket to coat in flour and fry in the butternut squash seed oil, but all they had was pre-spiralized butternut squash noodles, so I used those instead. The supermarket didn't have whole butternut squash either. But I didn't want to boil them or bake them- I figured they'd be better in a stir-fry. Though not a traditional Asian stir-fry(save for the use of the soy sauce), I made a Thanksgiving-style stir fry, using raisins, pumpkin maple syrup, cinnamon, and cashews. My extended family loved both dishes, but I think their favorite was the noodles. Some people couldn't believe the noodles were actually vegetables! I had more leftover brisket than noodles at the end of Thanksgiving, and even then only enough to last one extra meal. HELPFUL LINKS: Birthday Cake Soda: https://www.jonessoda.com/collections/jones-beverages/products/limited-edition-birthday-cake-soda-12-pk Butternut Squash Seed Oil: http://www.fioreoliveoils.com/products/butternut-squash-seed-oil-1 You will need: For the cooking equipment for the brisket: A roasting pan or lasagna pan Nonstick cooking spray A large bowl Aluminum foil A meat thermometer For the Birthday Cake Soda Brisket: 3 lbs. beef brisket, with visible fat trimmed off 1 cup ketchup 1 packet Knorr vegetable recipe mix 12 ounces Birthday Cake Soda(see HELPFUL LINKS) For the cooking equipment for the noodles: A small bowl A frying pan For the Butternut Squash Noodles: 12 ounces spiralized butternut squash noodles 2 tbsp. pumpkin maple syrup 1/4 cup soy sauce Butternut squash seed oil(see HELPFUL LINKS) Raisins to taste Honey roasted cashews to taste Cinnamon to taste For the brisket: 1. Spray a roasting pan or lasagna pan with nonstick cooking spray. 2. Put the brisket into the pan. 3. In a large bowl, mix the remaining brisket ingredients together to make a sauce. Pour the sauce over the brisket. 4. Cover the pan with aluminum foil. Roast the brisket in a 325 degree Fahrenheit oven for at least 4 hours, or until the internal temperature of the meat reaches 160 degrees Fahrenheit, but ideally between 180-205 degrees Fahrenheit. Check the temperature of the meat every hour. 5. When the meat is done cooking, let it rest at room temperature for 10 minutes. 6. Cut the meat against the grain, into strips. Reserve the sauce the brisket was cooked in. This will be the sauce you pour over the strips. 7. Bon appetit! For the noodles: 1. In a small bowl, mix the pumpkin maple syrup and soy sauce together. 2. Pour butternut squash seed oil into a frying pan and spread the oil around the pan. Turn the stove on to heat the oil up. 3. Put 4 ounces of the noodles into the frying pan. Move the noodles around the pan to coat them in oil. 4. Add the raisins, cashews, and cinnamon into the frying pan. Stir all the ingredients up in the pan. 5. Pour a little bit of the pumpkin maple syrup-soy sauce mixture into the pan and mix it in with the rest of the ingredients. Cook the noodles until they are slightly crunchy. 6. Repeat steps 2-5 for two more batches. 7. Bon appetit!
0 Comments
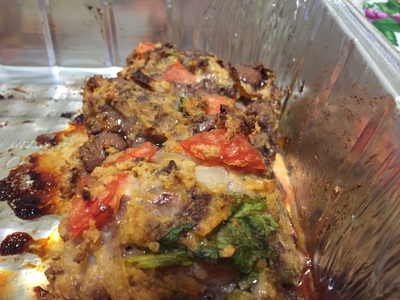
I'm very prone to turning food puns into meatloaf recipes, in case you haven't learned by now! So when my dad bought one of those fun-size candy bags for Halloween last month, the majority of said candies were Whoppers candy. I figured, "well, there is such a thing as the BK Whopper Burger, so why not combine all the components of that burger with Whoppers candy to form one meatloaf!?" Did you know when you melt a Whopper candy, the melted chocolate tastes like chocolate milk? I didn't know that until I tasted the meatloaf. This is the first time I used lettuce in a meatloaf, and it turns out lettuce wilts in the oven and then turns crunchy, exactly like the lettuce in a Whopper burger! My dad tried a piece of the meatloaf without the Whoppers and he said something along the lines of "...as you get closer to the balls", which is wrong on SO many levels! I had to apologize to you guys about the impromptu sexual innuendo, and in the video, I found my dad guilty of innuendo! Ironically, my dad hates sexual humor and he said he walked into that comment because of this recipe(f that's the correct phrasing). But it was funny! I thought about turning my dad's comment into a meme, but I don't want to expose him to harsh Internet comments. The online notoriety for him in that case isn't worth the hassle. You will need: For the cooking equipment: A large bowl A lasagna pan Nonstick cooking spray For the meatloaf: 1 small onion or 1/2 large onion sautéed in olive oil 2 beaten and whisked eggs 1/2 cup Whoppers candy 2 chopped up tomatoes Some lettuce 1/8 cup ketchup 1/2 cup mayonnaise 1 cup breadcrumbs Pinch of black pepper Pinch of salt 1 lb. 93% ground beef 1. Put all the ingredients up into a large bowl and mix them up until you get a firm meatloaf mixture. 2. Spray a lasagna pan with nonstick cooking spray. 3. Form 2 loaves from the meatloaf mixture. 4. Bake in a 350 degree Fahrenheit oven for 60-65 minutes, or until the internal temperature of the meatloaf reaches 160 degrees Fahrenheit. 5. Bon appetit! I saw the exact moment the Chicago Cubs won the World Series for the first time in 108 years, at 12:47 am EST on November 2, 2016(well, technically it was November 3 where I live). That winning moment inspired me to make this meatloaf, especially after I heard the sports commentators mentioning that the Curse of the Billy Goat has been broken. After doing some Internet research, I found other Cubs curses-
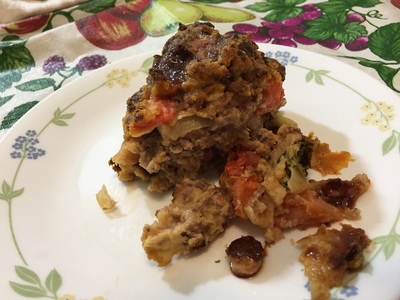
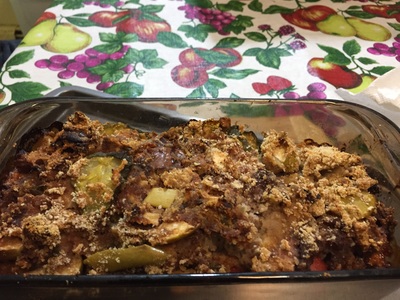
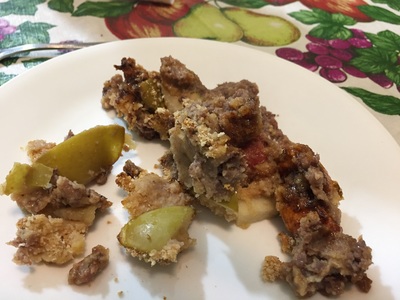
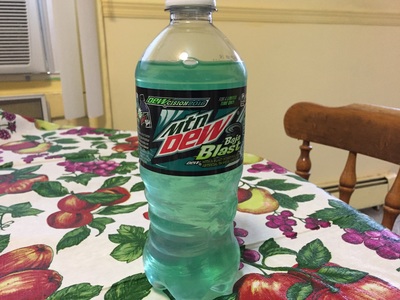
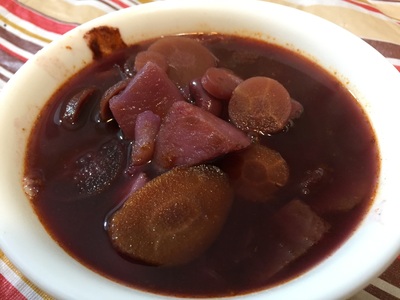
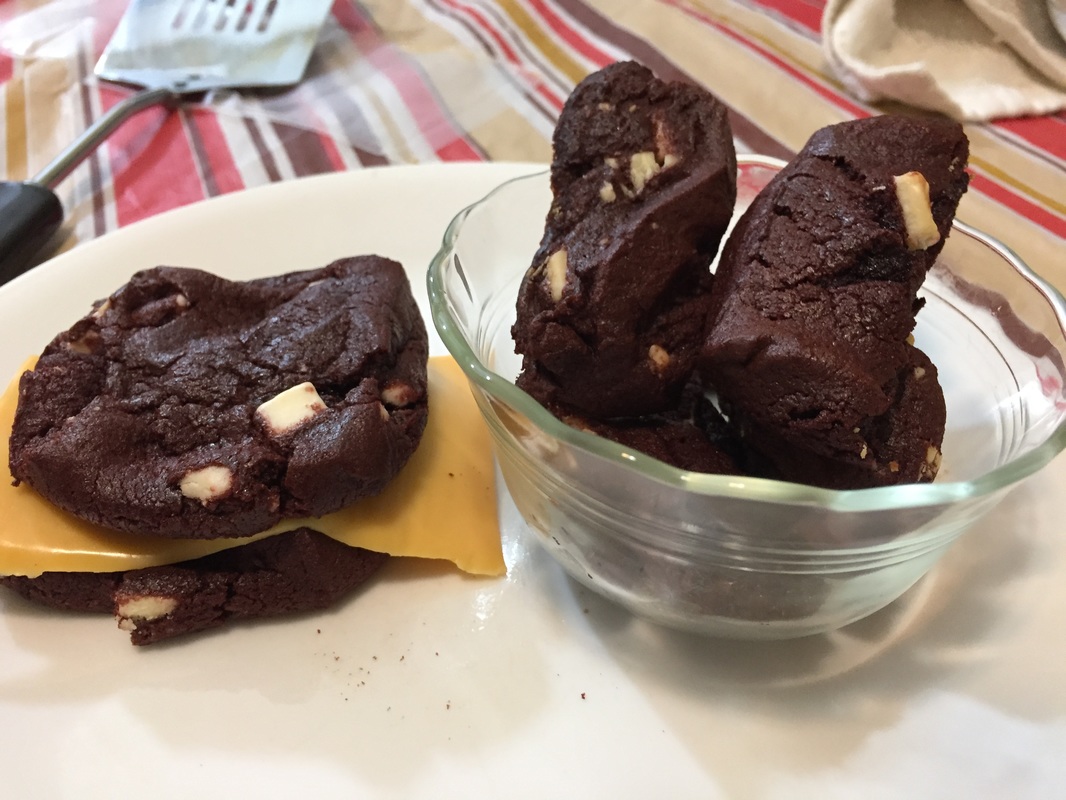
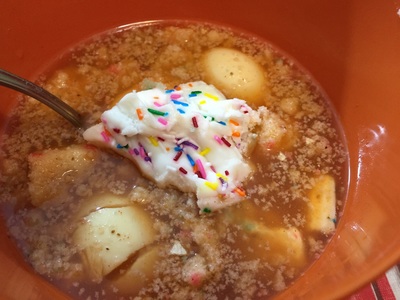
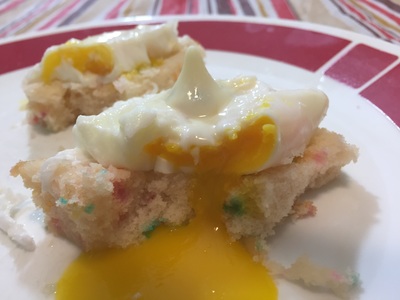
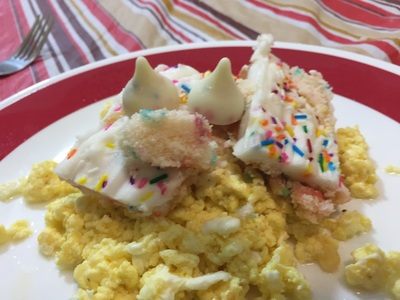
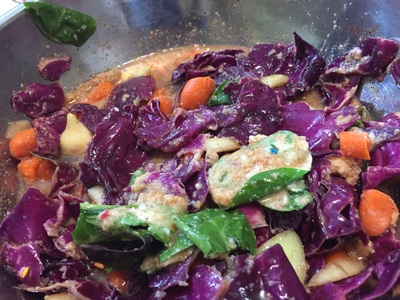
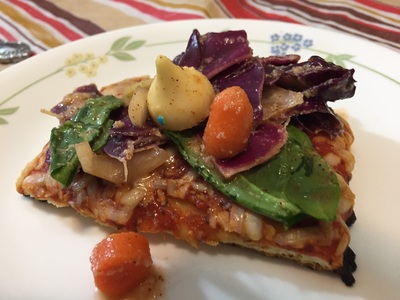
This was my first time making a meatloaf using exotic meat(my definition of exotic meat is anything that can't be found in a local supermarket, and thus needs to be bought online). According to my dad though, goat isn't exotic. The best description of what goat meat tastes like is this: meat with the consistency of ground beef but hints of lamb and chicken. I also got my inspiration for another ingredient in this meatloaf- the green apple. The late Cubs announcer Harry Caray said in 1991, “Sure as God made green apples, someday, the Chicago Cubs are going to be in the World Series — and maybe sooner than you think.” In addition, I used the components of a Chicago-style hot dog(mostly). But when I say "mostly", I mean I accidentally used ketchup, which you never put on a Chicago hot dog! I omitted the use of poppy seed filling(Chicago hot dogs are served on a poppy-seed bun) because I tried the poppy seed filling I bought and it tasted horrible(read: like play-doh)! Sadly, I forgot to use celery salt and chili powder as well. But this meatloaf was the best I could do with what ingredients I didn't forget to buy. Full disclosure: I live nowhere near Chicago, but I do love a good underdog story. My favorite baseball team is the Yankees. HELPFUL LINK: Ground Goat Meat https://www.shepherdsongfarm.com/shop/ground-meat-kabobs/ground-goat/ You will need: For the cooking equipment: A large bowl Nonstick cooking spray A loaf pan A baking sheet or cookie tray For the meatloaf: 2/3 tbsp. onion powder 2/3 cup unsweetened applesauce or 2 beaten and whisked eggs 1/2 cubed green apple 3 dill pickles 3 black garlic cloves 1/4 cup relish 1/4 cup honey mustard 1/4 hot fudge topping, unheated 1/2 cup Butterfinger bites 1/4 tsp. vanilla extract 1 cup breadcrumbs Pinch of salt Pinch of black pepper 1 lb. ground goat meat(see HELPFUL LINK) 2 beef frankfurters 1. Put all ingredients except for the frankfurters into a large bowl. 2. Mix all the ingredients up to get a firm meatloaf mixture. 3. Spray a loaf pan with nonstick cooking spray. 4. Put half of the meatloaf mixture into the loaf pan. 5. Top the meatloaf mixture that's in the loaf pan with the frankfurters. Cover the frankfurters with the remaining meatloaf mixture that's in the large bowl. 6. Bake the meatloaf in a 375 degree Fahrenheit oven for 60-65 minutes, or until the internal temperature of the meat reaches 160 degrees Fahrenheit. 7. Bon appetit! No I'm not colorblind! It's funny how a green soda can give you a purple stew, what with the broth that made the liquid look like murky water and the liquid from the purple carrots I used. It's just so unnatural. In the video, I used way too much salt so I ended up pouring the entire 20 oz. bottle of soda into the stew to offset the saltiness. But the stew didn't taste salty at all so I think the extra soda did the trick. This video is similar to the Stew Made With Black Soda!? video I made, in that I got both limited edition sodas from a local copycat Panera Bread near my day job. Also, this is the final video filmed before my liver resection, which means the next video I upload will be the first brand new recipe in over a month! You will need: For the cooking equipment: A large saucepot with a lid A small bowl For the stew: 2 cups green soda(I used Mountain Dew Baja Blast) 2 cups beef or bison broth 16 oz. dark red kidney beans 10 oz. BBQ potatoes 10 oz. mixture of yellow, orange, & purple carrots Pinch of salt Pinch of black pepper Pinch of onion powder Pinch of allspice Pinch of marjoram For the thickener: 1/4 cup water 1 tbsp. lemon juice 1 tbsp. all-purpose flour 1 tsp. granulated sugar 1. Put all stew ingredients into the large saucepot. Mix all the ingredients up so the spices aren't floating on the surface. 2. Bring the stew to a boil on the stove. As the stew is boiling, cover the saucepot with the lid. 3. Once the stew is boiling, reduce the heat to a simmer. Let the stew simmer for 45 minutes. 4. While the stew is simmering, mix the thickener ingredients in a small bowl. 5. When the stew is done simmering, turn the stove off and pour the thickener into the stew. Bring the stew to a boil again. Cover the saucepot with the lid as the stew is boiling. 6. Once the stew is boiling, reduce the heat to a simmer. Let the stew simmer for an additional 3 minutes. 7. Shut the stove off, take the lid off of the saucepot, and let the stew cool off at room temperature for 5-10 minutes. 8. Serve with wonton strips or garlic bread. Bon appetit! I saw a BuzzFeed listicle about different grilled cheese sandwich recipes and one of the entries was this link: www.cupcakeproject.com/2012/08/chocolate-chip-cookie-grilled-cheese.html That looked so cool, but I wanted to put my own twist on it, so I used red velvet cookies in place of chocolate chip cookies because red velvet cookies are colorful and stand out when looking at them from afar. I wasn't in the mood to make red velvet cookies from scratch so I bought some Toll House Cookie copycat that was red velvet cookies. You know, the type where you break and bake. Over the summer, there was a story on the news about a new state fair food: cookie fries. That looked so cool too, so all I did was cut some of the cookie dough pieces in half. I realized I forgot to serve these fries with "ketchup"(strawberry jelly), but you can just dip the "fries" into the "ketchup". The key to getting the cheese melted is to place the slice of cheese immediately after you take the baked cookies out of the oven. But if you just have some room temperature red velvet cookies, you can follow the link in the first paragraph of this blog post. You will need: For the cooking equipment: Nonstick cooking spray A large baking sheet or cookie tray A pizza cutter For the sandwich and "fries": Enough red velvet cookie dough to make 12 cookies Slices of American cheese Strawberry jelly to serve with the "fries"(optional) 1. Spray a baking sheet with nonstick cooking spray. 2. Place 9 cookie dough pieces onto the baking sheet. 3. Cut each of the 3 remaining pieces not on the tray in half with a pizza cutter before baking. Place those "fries" onto the baking sheet. 4. Bake the cookie dough pieces and "fries" in a 350 degree Fahrenheit oven for 14-17 minutes. 5. Right after taking the cookies out of the oven, cut 3 of the 9 uncut cookies in half to make "fries". 6. Place 2 cookies onto a plate. Top one of the cookies with a slice of American cheese. Place the other cookie on the plate on top of the cheese. 7. Serve the "fries" with strawberry jelly(optional). Bon appetit! The only eggs I've ever had until making this video were scrambled eggs and hard boiled eggs. But I saw an interesting link on the News app on my smartphone(http://food-hacks.wonderhowto.com/how-to/upgrade-eggs-instantly-with-milk-beer-other-creative-poaching-liquids-0171313//) I had Birthday Cake Soda on hand so I figured if you can make poached eggs with traditional soda than why not other flavors of soda? I applied a similar logic after I saw this video on YouTube(www.youtube.com/watch?v=eqrEJgQjAK4), about using beer in scrambled eggs and another video on pickling eggs(www.youtube.com/watch?v=VhvGggGnQtg), for this video. My dad doesn't like the idea of the existence of a birthday cake-flavored soda, so he tried none of the 3 egg dishes I made. But he said the video was well-executed. I'll take that. My favorite of the 3 egg recipes was the poached eggs because of the runny yolk that came out, which is perfection for poached eggs. Surprisingly, this was my first time ever making or tasting poached eggs! You might be wondering why I said you could use Old Bay seasoning in lieu of pickling spice- well, it's a substitution, for I couldn't find pickling spice at my local supermarket, so the next best thing was the Old Bay seasoning. HELPFUL LINKS: Birthday Cake Soda https://www.jonessoda.com/collections/jones-beverages/products/limited-edition-birthday-cake-soda-12-pk Birthday Cake Kisses: https://www.amazon.com/Hersheys-Kisses-Birthday-Cake-Flavor/dp/B01LYB6YCH/ref=sr_1_1_a_it?ie=UTF8&qid=1478290479&sr=8-1& You will need: For the cooking equipment: A large saucepot with a lid A small or medium frying pan 3 small bowls A medium saucepot with a lid A narrow, medium bowl or sterilized Mason jar 2 large plates A slotted spoon Aluminum foil(if using a narrow, medium bowl for the pickled eggs) For the pickled eggs: 4 peeled, hard boiled eggs 1 cup of Birthday Cake Soda(see HELPFUL LINK) 1 cup of white vinegar 1/4 cup of granulated sugar 1/2 tsp. of salt 1 tbsp. of pickling spice or Old Bay seasoning Birthday Cake Kisses(see HELPFUL LINK) and slice of party of funfetti cake for garnish For the scrambled eggs: 2 eggs 1/2 cup of Birthday Cake Soda Pinch of black pepper Olive oil Parmesan cheese Birthday Cake Kisses & vanilla frosting for garnish For the poached eggs: 2 eggs 36 oz. of Birthday Cake Soda Birthday Cake Kisses for garnish 2 slices of party or funfetti cake without frosting For the pickled eggs: 1. Put the Birthday Cake Soda, white vinegar, granulated sugar, salt, and pickling spice(or Old Bay seasoning) into a large saucepot. Mix all the ingredients together. 2. Bring the pot to a low boil on the stove. Put the flame on medium heat and cover the pot with a lid. 3. Once the water is boiling, reduce the heat to a simmer for 3 minutes. After 3 minutes of simmering, turn the flame off. Uncover the pot and let the pickling liquid cool off at room temperature for 30 minutes. 4. When the pickling liquid has cooled down, put the hard boiled eggs into a narrow, medium bowl or sterilized Mason Jar. Pour the pickling liquid on top of the hard boiled eggs in the bowl or jar. 5. Cover the bowl with aluminum foil or close the lid on the jar. Place the bowl or jar into the fridge for 24 hours to let the eggs pickle. 6. When the eggs are done pickling, put some Birthday Cake Kisses and a slice of party or funfetti cake into the bowl or jar. Mix all the ingredients up. 7. Bon appetit! For the scrambled eggs: 1. Crack open 2 eggs into a small bowl. Add the Birthday Cake Soda and black pepper to the small bowl. Mix all the ingredients up. 2. Pour olive oil into a small or medium frying pan. Spread the oil around the pan. Heat the oil up by turning the stove on. 3. Once the oil is heated up, pour the egg mixture into the frying pan. Stir the mixture up and add Parmesan cheese into the frying pan to help the scrambled eggs bind. Fold the egg mixture in. The eggs might be a bit liquidy when done but they should be fluffy and look like traditional scrambled eggs. If the eggs are too watery for you, add more Parmesan cheese. 4. Put the scrambled eggs onto a large plate. Top with Birthday Cake Kisses and vanilla frosting. Bon appetit! For the poached eggs: 1. Fill a medium saucepot with 36 oz. of Birthday Cake Soda. Bring the pot to a boil on the stove. 2. Crack 2 eggs into 2 separate bowls. Do not whisk the eggs! 3. Once the soda is boiling, reduce the heat to a simmer. Put the eggs into the simmering soda. Let the eggs poach(cook) for 4 1/2 minutes. 4. After 4 1/2 minutes, shut the flame off and retrieve the poached eggs using a slotted spoon. Place each egg onto a slice of party or funfetti cake without the frosting. Top each poached egg with a Birthday Cake Kiss. Bon appetit! My initial plan before I knew I needed a liver resection was to have the entire month of November dedicated to recipes using Jones Birthday Cake Soda(see HELPFUL LINKS), which I happened to find online, plus a Thanksgiving recipe or two. But alas, that wasn't meant to be. However, I will be posting several Birthday Cake Soda recipes this month and next month. I don't think anybody has ever used the words "birthday cake" and "kimchi" in the same sentence- until now! The taste was a mix of sweet and spicy, with crunchiness sprinkled in(pun intended). I also happened to find Birthday Cake Kisses(see HELPFUL LINKS) to use as a garnish for this kimchi. My dad was too weirded out to taste the kimchi. I felt a weird sense of satisfaction dropping a piece of funfetti cake onto a pile of fermented vegetables. Kimchi is great as a taco filling or on top of a slice of pizza or hot dog! HELPFUL LINKS: Birthday Cake Soda: https://www.jonessoda.com/collections/jones-beverages/products/limited-edition-birthday-cake-soda-12-pk Birthday Cake Kisses: https://www.amazon.com/Hersheys-Kisses-Birthday-Cake-Flavor/dp/B01LYB6YCH/ref=sr_1_1_a_it?ie=UTF8&qid=1478290479&sr=8-1& You will need: For the cooking equipment: A large bowl A medium plate A small plate A 1-lb. weight or can Aluminum foil For the kimchi: 1 head of red cabbage 1 tbsp. of salt 1/2 a raw onion 15 chopped up baby carrots 1 1/2 tbsp. of chili powder 12 ounces of Birthday Cake Soda(see HELPFUL LINK) 1/3 cup of spinach leaves 1/4 of a party or funfetti cake 9 Birthday Cake Kisses(see HELPFUL LINK) 1. Wash the head of red cabbage. 2. Pick the leaves off the head of red cabbage. This process took me 30 minutes, so it's time-consuming but worth it! 3. Cut the leaves in half using either a knife or your hands. Put the cut up leaves into the large bowl. Wash the cabbage leaves. 4. Mix the salt with the cabbage leaves. Put a medium plate on top of the leaves. Place a 1-lb. weight or can on top of the plate. Let the salted cabbage be weighed down for an hour. At some point, switch the medium plate with a small plate as the salted cabbage is weighed down. 5. After the cabbage has been weighed down, drain any remaining liquid. 6. Add the next 4 kimchi ingredients to the large bowl. Mix all the ingredients up with a spoon. 7. Put aluminum foil on top of the bowl. Place the bowl in the fridge to let the kimchi ferment for at least 24 hours, or overnight. 8. Put all remaining kimchi ingredients into the large bowl. Mix all the ingredients up with your hands. 9. Serve on top of a slice of pizza or hot dog, or in a taco. Bon appetit! |
Archives
October 2019
Categories
All
|
 RSS Feed