|
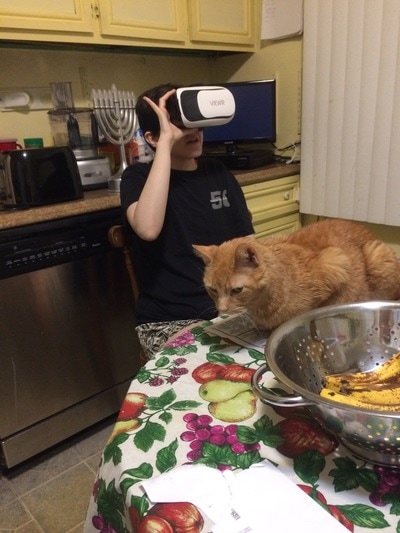
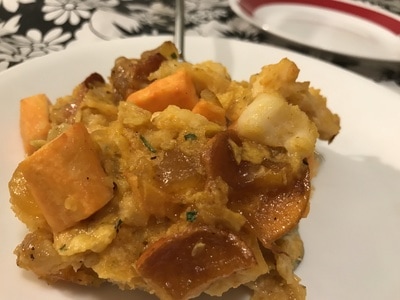
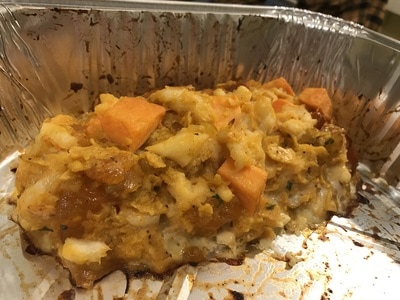
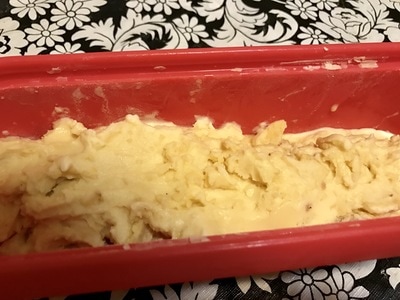
It pains me to write this post as it has now been exactly 3 weeks since I had to put Cameron(the big orange cat) to sleep. He was very sick and was between the ages of 11-13- so sick I'll spare you guys the picture of him the day we said goodbye to him. He looked thin and emaciated, as if someone ran him over. Maybe it's because his death is most recent out of the 3 cats I had to put to sleep in the span of 18 months, but his passing touched me the most. I wasn't that close to him but he always made his presence known on the Meatloaf Princess channel by meowing off-camera. I'd always proceed to say, "Shut up, Cameron!" but cats just don't listen. Perhaps Cameron meowed because he wanted to live on on the Internet- or maybe it was because he was hungry, for I recorded the videos before feeding him. Still, even when he was full, he meowed unprovoked. This cat had a very interesting life. He was the first cat we adopted from our local veterinary hospital(they always have cats up for adoption) back in 2007. Back then, the staff named him Freud, which was the ugliest name ever! Cameron didn't even come close to resembling Sigmund Freud. Someone found Cameron in the Pine Barrens(a local forest) and brought him to the vet to be put for adoption. So why the name Cameron? It was my sister Rachel's idea, for it was her turn to name a cat(I named Emily and Chandler was named by the animal shelter). Of course this was before Jordan and Misty were even born. One of my fondest moments of Cameron was back in 2011 when he ran away for 2 weeks just because he saw female cats under my car, yet he was neutered. When my dad tried to catch him, Cameron jumped his fat ass over a 10 foot fence! Ultimately we found him at the abandoned house next door. Cameron was best buddies with Chandler- they'd always sleep together and Chandler would lick and groom Cameron. But Cameron was also best buddies with Jordan- they used to wrestle when Jordan was a kitten smaller than Cameron. But when Jordan got bigger and played more aggressively, Cameron didn't like it. There were occasions where there would be a cut on Cameron's face as a result of playing with Jordan. His track record with female cats was pretty terrible, like a certain orange president I won't name. Cameron never learned to get along with the feline ladies. He always bullied Emily and the only reason he didn't fight Misty was because he was sick and she was several pounds heavier than him. But he'd approach and Misty would hiss at him. Jordan(a male), in comparison, gets along with Misty. When it came to humans, Cameron's closest human was my sister before she moved out. Then his favorite human was my dad. Every time my dad laid on the couch, Cameron would jump on to his belly and rest there! As for this meatloaf, I figured it only be fitting if most of the ingredients were orange like Cameron was. In fact, the meat in this meatloaf is orange roughy fillets, which are not orange in color. They're called that because it's a better name than slimehead. What I didn't tell you guys in the video was all the bad things about this fish. If I did, my dad wouldn't have let me made this video. First off, the species is unsustainable and overfished. But that's not the worst part about this fish. It's actually the fact they accumulate large amounts of mercury due to their long lifespan of up to 150 years! Bottom line is don't make use this fish if you're pregnant or are a child. If you really want to make this recipe without orange roughy, I suggest you use tofu instead! So what does an orange roughy taste like? It tastes just like cod, flounder, or any white fish, except the texture in one's mouth is stringier. Plus it's very juicy, especially when crumbling the fillets to turn them in to a ground meat consistency. Yes, you can order fish over the Internet, but I suggest you don't do it in the winter if you live in an area that gets snow. The nor'easter a couple of weeks ago screwed up UPS shipping, so by the time I got the fish the first time it was rotten. But the sender sent me new orange roughy fillets at no cost to me due to the storm. This meatloaf has everything- sweetness, spiciness, crunchiness, and savoriness! My dad liked this fish. HELPFUL LINKS: Orange Roughy Fillets: https://wholey.com/orange-roughy/ Candied Orange Peel: https://nuts.com/driedfruit/oranges/diced-orange-peel.html Dried Cantaloupe: https://nuts.com/driedfruit/cantaloupe/chunks.html Dried Persimmon: https://nuts.com/driedfruit/persimmons/organic.html You will need: For the cooking equipment: A large bowl A lasagna pan Nonstick cooking spray For the meatloaf: 2/3 tbsp. onion powder 2 beaten and whisked eggs 2 tbsp. candied orange peel(see HELPFUL LINKS) 1/2 cup raw, chopped up sweet potato chunks 6 dried persimmons(see HELPFUL LINKS) 1/2 cup dried cantaloupe chunks(see HELPFUL LINKS) 1/2 cup French dressing Pinch of cayenne pepper Pinch of Old Bay Seasoning Pinch of chipotle chili powder Pinch of parsley 1 cup crushed Doritos(I used Cool Ranch Doritos and crushed them in a Ziploc bag) 16 oz. orange roughy fillets(see HELPFUL LINKS) 1. Put the first 4 ingredients into a large bowl. 2. Crumble up the dried persimmons and dried cantaloupe and put them into the large bowl. 3. Add the next 6 ingredients into the large bowl. 4. Cut the fillets into strips and crumble up the strips with your fingers until the fish is a ground meat consistency. Put the crumbled up fish into the large bowl. 5. Mix all the ingredients up until you get a firm mixture. 6. Spray a lasagna pan with nonstick cooking spray. 7. Form 2 loaves from the meatloaf mixture. 8. Bake the meatloaves in a 400 degree Fahrenheit oven for 15-20 minutes. Bon appetit!
0 Comments
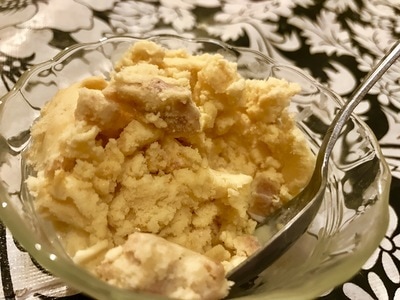
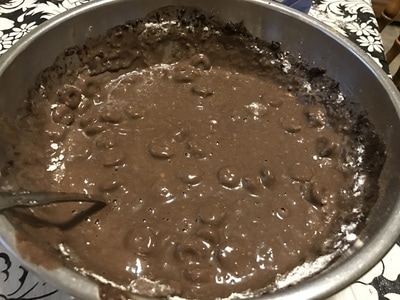
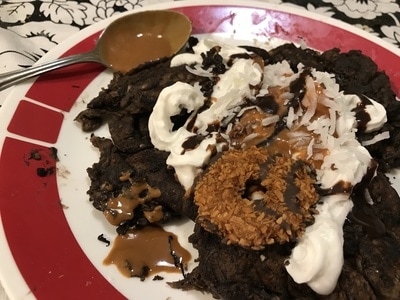
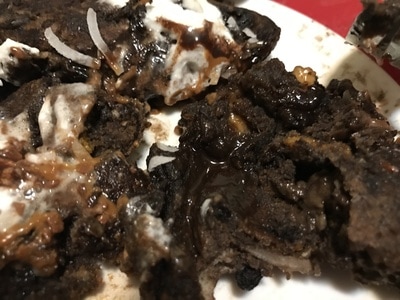
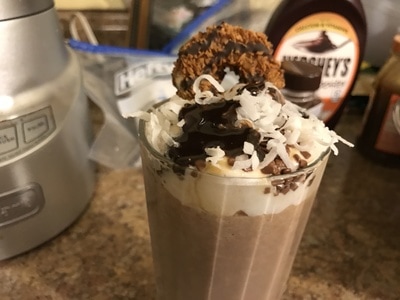
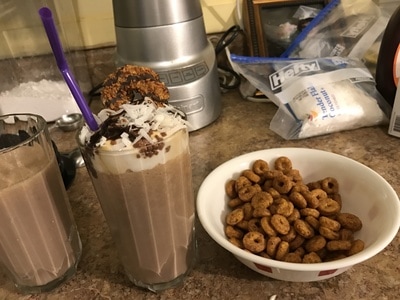
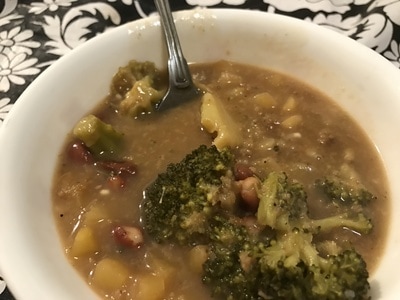
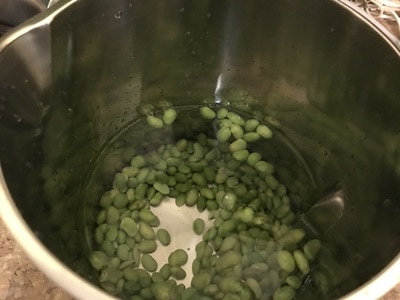
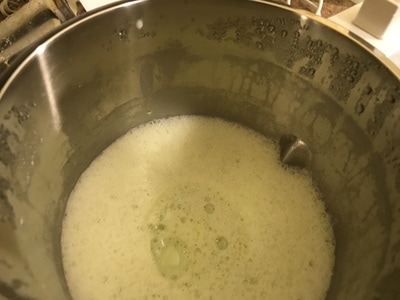
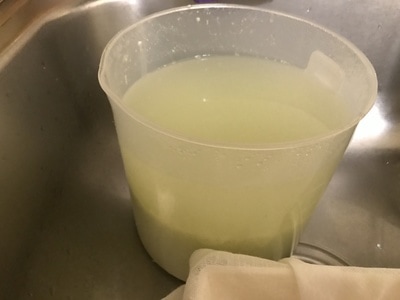
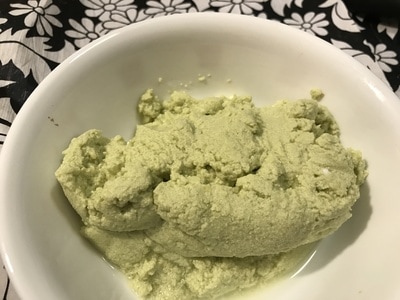
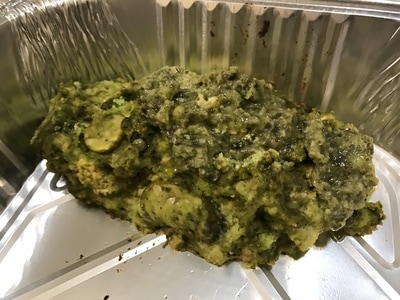
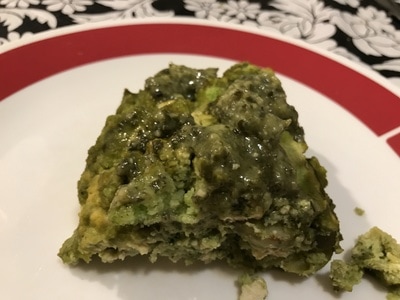
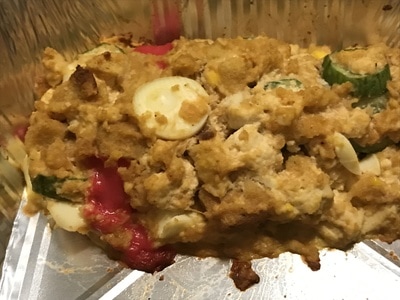
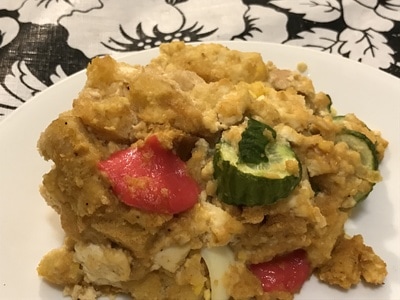
You normally don't find sausages ice cream- until now! There is such a thing as beer- flavored ice cream, so it shouldn't be a huge stretch of the imagination to have beer and brats flavored ice cream, Yes, there are actual chunks of bratwurst in the ice cream, along with beer & brats flavored potato chips! I got my inspiration for this unusual flavor of ice cream from Lay's newest flavor of limited edition potato chips- Beer & Brats! I'll probably do a taste test of these chips in a future video involving this flavor, but basically you taste cheese initially, which then leads to a hoppy and meaty aftertaste. It's crazy how these potato chip flavors are so accurate to their name! I tried my first bratwurst when I was in Florida on vacation six years ago, I believe at the Kennedy Space Center. It tasted good but I didn't have another one after that until making this recipe. Normally when I make ice cream, I don't use eggs only because it makes the recipe a lot simpler when you don't have to make a custard base. But since beer doesn't freeze very well, it needs some support in the form of a custard base. You can't just use any random beer either. A malty beer would be best. Initially, I was going to use Guinness beer but of course I went shopping on St. Patrick's Day and they were out of that beer, so I had to scramble to think of a substitute that wouldn't end up bitter. I thought of using Budweiser beer, but you don't want to use a hoppy beer like that since the hops in the beer turn bitter when cooked. So I took a chance and used an ale, which ended up working out since I ended up with a slightly sweet ice cream. I used Foster's Premium Ale. It's an Australian brand of beer that somehow is sold in NY state. Go figure! The ice cream ultimately tasted sweet and salty, & sweet and savory- both flavor combos from the bratwurst and potato chips being the salty and savory parts! You can eat this ice cream for dessert or put it on top of a steak for dinner! My dad wasn't used to the taste of beer in ice cream and he thought the bratwurst in the ice cream reminded him of cold cuts! HELPFUL LINK: Beer & Brats Potato Chips: https://www.amazon.com/Brats-Southwestern-Queso-Potato-Chips/dp/B06X3W6JWQ/ref=sr_1_1_a_it?ie=UTF8&qid=1490474114&sr=8-1&th=1 You will need: For the cooking equipment: A small bowl A medium saucepot A large saucepot A candy thermometer A strainer A large bowl Aluminum foil Ziploc bag An ice cream maker An ice cream tub For the ice cream: 5 eggs 1/4-1/2 cup granulated sugar 1 cup whole milk 1 cup heavy whipping cream 1 1/2 cups ale or stout beer(I used Foster's Premium Ale) 1/4 cup crushed Beer & Brats Potato Chips(see HELPFUL LINK) 2 bratwurst links To make the custard: 1. Crack 5 eggs into a small bowl, one at a time. DO NOT WHISK THE EGGS! Only put the egg yolks into a large bowl. Discard the egg whites. 2. Add the granulated sugar into the large bowl. Mix the egg yolks and sugar together until you get a yellow mixture. 3. Pour the whole milk and heavy whipping cream into a medium saucepot. Put the stove on at low heat. Stir the mixture until it develops a "skin" on top. Once the "skin" has developed, turn the stove off. 4. Remove saucepot from heat and spoon the milk mixture into the egg yolk mixture. Do not pour it all in at once- otherwise you'll end up with scrambled eggs! After spooning in the milk mixture each time, stir the egg yolk and milk mixtures together. Repeat until all the milk mixture has been mixed in with the egg yolk mixture and you have a pale yellow mixture. This is your custard. 5. Transfer your custard into a large saucepot. Attach a candy thermometer to the large saucepot. Put the saucepot on the stove on low heat. Heat the custard until it reaches 180 degrees Fahrenheit. Do not stir the custard! Stirring it will cause the custard temperature to drop. 6. Once the custard reaches 180 degrees, turn the stove off and remove it from heat immediately. Pour the custard through a strainer with a large bowl underneath. Dispose of the solids in the strainer immediately, otherwise they'll turn into scrambled eggs! 7. Pour aluminum foil over the large bowl and chill it in the fridge for now. For the ice cream: 1. While the custard is chilling, pour the beer into a medium saucepot. Put the saucepot on the stove on low heat and let the beer reduce until there's only 8 ounces left. Reducing the beer cooks some of the alcohol out, which will enable the ice cream to freeze. 2. Take the custard in the large bowl out and mix in the reduced beer. Put aluminum foil over the large bowl and let the beer mixture chill in the fridge for 8-24 hours. 3. 8-24 hours later, put Beer and Brats potato chips into a Ziploc bag. Close the bag and crush up the chips with your fists. Crumble up enough chips to get 1/4 cup. 4. Cut up 2 bratwurst links and crumble up the pieces until they have the consistency of ground meat. 5. Turn your ice cream maker on and pour the chilled beer mixture into the bowl of the machine. Let the ice cream churn according to your ice cream maker's instructions. My machine said to churn for 11 minutes. 6. After 11 minutes or whenever your ice cream maker says to, add the crushed chips and crumbled bratwurst as the ice cream maker is churning. Let the ice cream churn for an additional 4-5 minutes(or according to the manual). 7. Turn the ice cream maker off, detach the bowl, and scoop the ice cream into an ice cream tub. 8. Put the lid on the ice cream tub and let it freeze in the freezer for 5 hours, or overnight. 9. Bon appetit! I had plenty of leftover coconut caramel cupcake mix from my Samoa Girl Scout Cookie Creme Frappuccino video that I was about to throw out- until I saw this article from POPSUGAR about making pancakes with cake mix! I try not to waste food if I can help it and cupcakes are kinda close to cakes, so I thought this recipe might work. It did but I needed a lot more than the 1/2 cup all-purpose flour in that link- I needed double that amount. But that's probably because either there's not much flour in cupcake mix or I used a lot of beer(12 ounces worth, to be exact). But hey, at least I had enough batter to make pancakes for 3 meals! I used way too much cocoa powder- 2 tsp. instead of 2 tbsp. would've been sufficient because the pancakes itself don't remind one of Samoa Girl Scout cookies. These pancakes need toppings that have all the flavors of such a cookie to make it pop, like shredded coconut, chocolate syrup, chocolate sprinkles, and roasted coconut butter(which is the caramel flavor for this recipe). Oh, did I mention there's beer in the pancakes? Say what!? I found chocolate caramel coconut beer at a supermarket near my day job that is almost certainly inspired by Samoa cookies(or German Chocolate Cake, which is also chocolate, caramel, and coconut, but they also had chocolate peanut butter beer available from the same makers of the chocolate caramel coconut beer, which has almost certainly gotta be inspired by Tagalong cookies!). Of course, not all of the beer cooks out during its short stint in the frying pan, so I wouldn't recommend serving the pancakes to children, unless you replace beer with milk. Not only does chocolate keep my dad up at night, he doesn't like beer in his pancakes, which is why he didn't try them. These pancakes reminded me of something I'd get at IHOP in that they have lots of toppings, they're flavorful, they're decadent, and really sweet. If you want to save money on gas but still want decadent pancakes, then this recipe is for you! HELPFUL LINK: Roasted Coconut Butter: https://eatingevolved.com/products/sweet-salty-roasted-coconut-butter You will need: For the cooking equipment: A large bowl A soup ladle A frying pan A spatula Plates For the pancakes: 1 1/2 cups caramel coconut cupcake mix 1 cup all-purpose flour 2 beaten and whisked eggs 2 tsp. cocoa powder 2 tbsp. caramel coffee creamer 2 tbsp. shredded coconut 2 tbsp. roasted coconut butter(see HELPFUL LINK) 12 oz. chocolate caramel coconut beer(or plain milk for nonalcoholic pancakes) Chocolate sprinkles 1/4 cup caramel crunch cereal 3 crumbled up Samoa Girl Scout cookies Olive oil for frying the pancakes For the toppings: Whipped cream Roasted coconut butter Chocolate sprinkles Chocolate syrup Shredded coconut Samoa cookie for garnish 1. Put all the pancake ingredients into a large bowl. Mix all the ingredients up until you get a thick batter. 2. Pour olive oil into a frying pan. Spread the oil throughout the pan. Turn the stove on to heat the oil up. 3. Once the oil is heated up, spoon pancake batter into the frying pan with a soup ladle. Make sure all the pancakes have their own borders in the frying pan. 4. Cook the pancakes for 30-45 seconds before flipping them over on the other side with a spatula. 5. Cook the pancakes for 30-45 seconds on the other side. Once the pancakes are done cooking, put them on a plate. 6. Repeat steps 3-5 for multiple batches(I made 7 batches of pancakes). 7. Stack as much pancakes as you want on a plate. Top the pancakes with all the toppings mentioned. Bon appetit! I don't know what inspired me to make this drink. Maybe it's because I had 12 ounces of chocolate milk that I didn't want to go waste or maybe it's the fact that the Girl Scouts have never paired up with Starbucks to make a Samoa Girl Scout Frappuccino(yet anyway). In that case, this is what I would envision getting at a coffee shop. Now granted, a Samoa Cookie Frappuccino is a secret menu item at Starbucks that your barista may or may not know how to make, but I looked at that recipe and it had a mocha flavor in it. There's no mocha in a Samoa Girl Scout cookie!! Starbucks does make creme Frappuccinos without coffee or mocha flavor. Those are the only ones I'll drink though! I don't like the flavor of coffee. I thought this would be a popular video, but I suspect it won't be because the first 1 minutes and 18 seconds have the picture very fuzzy and the audio super low. Unfortunately, that video file got corrupted. People hate bad audio in a video. Bad picture, not so much. The rest of the video is fine after that point. But nevertheless, I persisted in making and sharing this video with you guys. When I think of a flavored Frappuccino drink, I think of all the flavors not only in the drink itself, but in the toppings as well. I used an unusual ingredient in the drink- roasted coconut butter, which a) is a thing and b) tastes like roasted caramel and has the consistency of peanut butter even though it's made from coconut! It's so addicting! That's why I keep it in the top shelf in the pantry. :) Inspiration for this recipe from http://thedomesticrebel.com/2015/04/12/copycat-birthday-cake-frappuccino/ HELPFUL LINK: Roasted Coconut Butter: https://eatingevolved.com/products/sweet-salty-roasted-coconut-butter You will need: For the cooking equipment: A blender A large bowl 2 cups A straw For the Frappuccino: For the drink: 12 oz. chocolate milk 4 tbsp. coconut caramel cupcake mix 2 tbsp. chocolate ganache mix(part of caramel cupcake mix) 2 tbsp. shredded coconut 2 tbsp. roasted coconut butter(see HELPFUL LINK) 2 tbsp. caramel coffee creamer For the topping: Redd-Whip Whipped Cream Caramel sauce Chocolate sprinkles Shredded coconut Chocolate syrup A Samoa Girl Scout cookie for garnish 1. Put all the drink ingredients into the blender. Put the lid on the blender, plug in the blender and blend until frothy and no longer powdery. 2. Remove the lid and pour the drink into 2 cups. 3. Mix whipped cream and caramel sauce in a large bowl. Put caramel whipped cream on top of drink. Top whipped cream with the rest of toppings. 4. Put a straw in for drinking. Bon appetit! It's amazing how many flavors of beer there are these days- there's even one that tastes like sticky toffee pudding! Well, I didn't taste the actual sticky toffee pudding in the beer itself, as it was 5 months past the date on the bottle(but still edible, albeit less flavorful). The sticky toffee pudding I tasted in the stew was from the actual sticky toffee pudding I put into the stew. Otherwise this stew was just like any other stew I've made in the past, although it could've used more vegetables in it, as I had to throw out some of the turnips that were blue or green(yuck!). Since this stew has beer in it, my dad declined tasting it(even though the beer I put in is only 5% alcohol). HELPFUL LINK: Sticky Toffee Pudding Stew: https://www.amazon.com/Mr-Kipling-Sticky-Toffee-Pudding/dp/B012OUULD4/ref=sr_1_1_a_it?ie=UTF8&qid=1489343952&sr=8-1& You will need: For the cooking equipment: A large saucepan A small bowl For the stew: 10 oz. broccoli 10 oz. turnips 15.5 oz. drained pink beans 2 tsp. fish bouillon dissolved in 2 cups hot water 11 oz. sticky toffee pudding beer Pinch of marjoram Pinch of allspice Pinch of garlic powder Pinch of onion powder Pinch of black pepper Pinch of salt 5 oz. sticky toffee pudding(see HELPFUL LINK) For the thickener: 1/4 cup of water 1 tsp. of sugar 1 tbsp. of lemon juice 2 tbsp. of all-purpose flour 1. Put all stew ingredients except for the sticky toffee pudding into a large saucepan. 2. Bring the stew to a boil on the stove. Once it's boiling, reduce it to a simmer but do not cover the pot! You have to make sure the pot doesn't overflow! Let the stew simmer for 45 minutes. 3. While the stew is simmering, you can make the thickener. Just put all thickener into a small bowl. Mix all the ingredients together. 4. When the stew is done simmering, turn the stove off. 5. Pour the thickener into the stew. Mix the thickener into the stew using a spoon. 6. Bring it to a boil again. Once it's boiling, reduce it to a simmer. Do not cover it. Let the stew simmer for an additional 3 minutes. 7. Once the stew is done simmering a second time, take the saucepot off of the stove. Mix the sticky toffee pudding into the stew. Break apart the pudding so that you get pieces of it throughout the stew. Let the stew cool for 5-10 minutes before eating. 8. Serve with wonton strips or garlic bread. Bon appetit! This video is actually a viewer-suggested recipe by blug on YouTube. Thank you, blug for this amazing idea! St. Patrick's Day is coming up and one of the things I associate St. Patrick's Day with is the color green. I've wondered for the longest time why people don't make tofu made from edamame. Tofu is made from soybeans and edamame is just young soybeans. Of course, I have some experience making tofu, from my homemade chocolate tofu semi-fail. But this time I had a new appliance on my hands that made the process of making tofu a million times easier: a soymilk maker, namely the Soyajoy G4. By using a soymilk maker, you can skip the process of bringing homemade soymilk to a boil and letting it simmer for 10 minutes three times. Because let's face it, soymilk can overflow your saucepot in a matter of seconds. Not so with a soymilk maker! The soymilk maker grinds and heats the beans and water for you, and in just 26 minutes, you get soymilk that doesn't need to be brought to a boil! The good thing about using edamame to make tofu is that you don't have to soak it in water overnight. All you have to do is heat it up in the microwave and voila! Cooked edamame that's ready to be turned into tofu. By using nigari(tofu coagulant), the milk actually curdled this time, thus yielding more material for the tofu, because tofu is made from soymilk curds. I ended up with 8 ounces of edamame tofu that resembled more like silken tofu you'd put into a smoothie than something you'd use in a meatloaf. But that's why I got store-bought tofu to put into the meatloaf as well! In making the actual meatloaf, I actually forgot several green ingredients, like lime peel and dill weed. Nevertheless the meatloaf was still flavorful, especially since I covered the white extra-firm tofu bits with pesto after the meatloaf was done cooking(pesto burns quickly in the oven). I managed to find green (pistachio) bread in my local supermarket(they were probably selling it because of the impending St. Patrick's Day) that tastes like the green part of a rainbow cookie! If i couldn't find green bread, I either would've used crushed kale chips(yuck!) or made my own green bread. So how does edamame tofu taste different from store-bought tofu? The big thing is that the former is sweeter than the latter type. HELPFUL LINKS: Soyajoy G4: https://www.amazon.com/SoyaJoy-G4-Maker-Stainless-Inside/dp/B00ALM5ZFM/ref=sr_1_1?ie=UTF8&qid=1489246181&sr=8-1& Nigari: https://www.amazon.com/Premium-Nigari-Natural-Tofu-Coagulant/dp/B00NS4FEH4/ref=sr_1_1_a_it?ie=UTF8&qid=1489250764&sr=8-1& Tofu Mold: https://www.amazon.com/Mangocore-Maker-Cheese-Pressing-Kitchen/dp/B01HTKIO3I/ref=sr_1_1?ie=UTF8&qid=1489252326&sr=8-1& Matcha Green Tea Powder: https://www.amazon.com/Zen-Spirit-Organic-Premium-Culinary/dp/B01G0S3Y44/ref=sr_1_4_s_it?s=grocery&ie=UTF8&qid=1489250824&sr=1-4& You will need: Green Edamame Tofu For the cooking equipment: Soyajoy G4(see HELPFUL LINKS) Aluminum foil A slotted spoon Tofu mold(see HELPFUL LINKS) Cheesecloth A small bowl For the tofu: 1500 mL(6.3 cups) water 1 1/2 cups cooked, shelled, edamame 1 tsp. nigari(see HELPFUL LINKS) 1 cup warm water 1. Put the water and edamame into the bowl of the soymilk maker. Put a lid on the container and plug it in. Press the "soaked beans" button. 2. Let the machine run for 26-30 minutes but unplug it if it overflows. You'll know when it's done when either you hear 2 beeps or don't hear the machine heating and grinding anymore. 3. Unplug the machine and remove the lid. Pour the soymilk into a pitcher topped with a strainer(both the strainer and pitcher come with the Soyajoy G4). 4. Press the back of a spoon onto the strainer to squeeze milk out. Dispose of the frothy pulp(okara). 5. Dissolve 1 tsp. nigari in 1 cup warm water. Slowly pour 3/4 of the nigari mixture into the soymilk, then wait 2-3 minutes. 6. After 2-3 minutes, sprinkle and stir the rest of the nigari mixture in. Put aluminum foil on top of the pitcher. Let the milk mixture sit for 25 minutes, undisturbed. 7. Retrieve the curds(which are in the bottom of the pitcher) with a slotted spoon. Line a tofu mold with cheesecloth. Put the curds into the lined tofu mold. Push the milk out of the curds in the slotted spoon with the back of a spoon. 8. Put the lid on the tofu mold. Place a 1-lb. weight(like a can) on top of the lid. Let the tofu be weighed down for 50 minutes. You should do this step in the sink! 9. Take the cheesecloth out of the tofu mold and turn the cheesecloth upside down to release the tofu into a small bowl. Put aluminum foil over the bowl and place the tofu in the fridge until you're ready to use it. Green Meatloaf You will need: For the cooking equipment: A large bowl A lasagna pan Nonstick cooking spray For the meatloaf: 2/3 tbsp. onion powder 2 beaten and whisked eggs 1/2 cup bread and butter pickles 1/2 cup guacamole 1 tsp. matcha green tea powder(see HELPFUL LINKS) Pinch of cilantro Pinch of parsley Pinch of black pepper Pinch of salt 1 cup crumbled up, green pistachio bread Green Edamame Tofu 8 ounces drained, crumbled up, extra firm tofu Pesto to cover any white tofu bits 1. Put all the ingredients except for the pesto in a large bowl. Mix all the ingredients up until you get a firm mixture that is green in color. 2. Spray a lasagna pan with nonstick cooking spray. 3. Form 2 loaves from the meatloaf mixture. 4. Bake the meatloaves in a 350 degree Fahrenheit oven for 40-45 minutes. 5. Take the lasagna pan out of the oven and cover the white tofu bits with pesto. Bon appetit! A few months ago, I went to a Walmart for the first time in many years to get some birthday cake kisses. Of course, I looked at all the foodstuffs available in the store and one of the things that caught my eye was a bottle of Goya gazpacho. Some viewer either on YouTube or Reddit suggested I make a gazpacho meatloaf. I didn't mention this in the video because I forgot the viewer's name. Sorry guys! I said this in the video but you might be wondering why I would use cook with an ingredients containing bell peppers, when in reality, I hate bell peppers. There's a caveat to my hatred- I'll tolerate bell peppers in an ingredient like gazpacho or salsa, but not in frozen dinners or the actual pepper(which is why I didn't put any bell peppers directly into the meatloaf) To me, bell peppers taste bitter. Gazpacho, at its essence, is tomato, bell peppers, garlic, cucumbers, and olive oil blended together, and served cold. This meatloaf wasn't served cold- it was a hot dish, just like a meatloaf is supposed to. Using croutons made this meatloaf fluffy and taste like a biscuit, but they are hard to crush up without a food processor, so you're better off using breadcrumbs(which is also made from stale bread). The pink stuff in the pictures isn't ham, it's pink cheese. I said in the video I didn't have any ham on me. That was kind of a white lie- I had some ham in the fridge, but it wasn't cubed, it was thin sliced. Besides, pink cheese looks very similar to ham! HELPFUL LINK: Gazpacho: https://www.amazon.com/Gazpacho-Soup-Ready-Eat-Liter/dp/B003XKF5X6/ref=sr_1_fkmr0_3_a_it?ie=UTF8&qid=1488658975&sr=8-3-fkmr0& You will need: For the cooking equipment: A large bowl A lasagna pan Nonstick cooking spray For the meatloaf: 2/3 tbsp. onion powder 2 beaten and whisked eggs 4 chopped up hard-boiled eggs 3 chopped up mini cucumbers or 1 chopped up full-size cucumber 2 cubed pink cheese sticks or cubed ham 2 tbsp. of orange peel or orange juice 1/2 cup gazpacho(see HELPFUL LINK) Pinch of cumin Pinch of garlic powder Pinch of black pepper Pinch of salt 1 cup crushed croutons or breadcrumbs(I crushed the croutons by putting them inside a ziploc bag on breaking them up with my fists) 1. Put all the ingredients in a large bowl. Mix all the ingredients up until you get a firm mixture. 2. Spray a lasagna pan with nonstick cooking spray. Form 2 loaves from the meatloaf mixture. 3. Bake the meatloaves in a 350 degree Fahrenheit oven for 40-45 minutes. 4. Bon appetit! |
Archives
October 2019
Categories
All
|


 RSS Feed