|
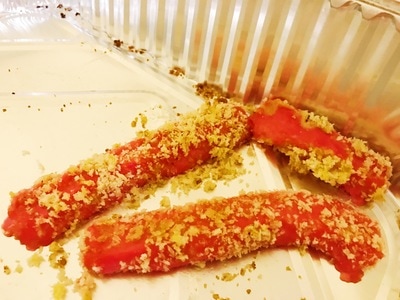
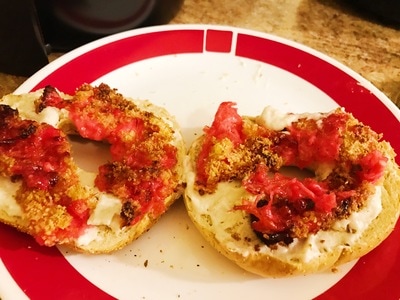
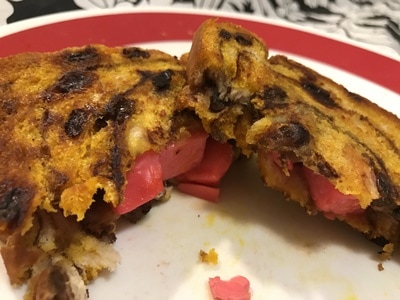
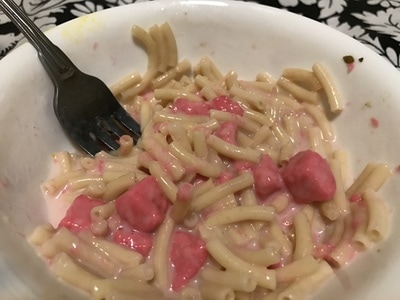
I am NOT sponsored by Cow Candy! A few weeks ago, I noticed a new product at my local supermarket that looked really weird in the dairy section- it was "Strawberry Jack Cheese" from Cow Candy. I've never thought cheese could be flavored to your liking, so of course, I had to buy this cheese. It tastes like strawberry milk in cheese form- sounds really strange but it's really good. My dad said is tasted like bubblegum! The best thing about this cheese is that it's naturally flavored with dried strawberries- no food colors or artificial flavorings(unlike the purple and green ketchup from my childhood in the early '00s)! I thought of the ways you could use cheese and I came up with 4 ideas. Well I had 5, until I realized pink ice cream already exists in the form of strawberry ice cream. But I digress. This could easily be a mystery basket product on Chopped since it's so out there! About the recipes: Pink Cheese Sticks- These are basically mozzarella sticks, except I used pink cheese in lieu of mozzarella. I cooked them 2 ways- in the oven and in the airfryer. The latter way didn't work out, as the cheese melted in the airfryer. But I made lemonade out of lemons by using the melted cheese as the topping on the next recipe, Pink Pizza Bagel. Pink Pizza Bagel- Had the airfried cheese sticks not melted, I probably would've chopped some pink cheese sticks up and placed it on top of the pizza sauce on top of the pizza-flavored bagel, which also exists. But that wouldn't have been as good as the melted cheese sticks I ended up with. So it all worked out in the end! The sauce I used was white pizza sauce I also found at the local supermarket. But you could easily use Alfredo sauce instead, which is the same color as the white pizza sauce. Grilled Pink Cheese Sandwich- Cutting up 2 pink cheese sticks into cubes didn't make it melt in the frying pan. I ended up with something that looks like cubed ham in between 2 slices of French toast. :( Mac 'n Pink Cheese- I was too lazy to boil pasta at this point, so I just microwaved some microwave mac and cheese and discarded the cheese packet you're supposed to mix in after the pasta is done cooking. The pasta itself didn't turn pink in color like I envisioned in my head. But I did end up with a pink sauce and some pink cheese chunks. But it was still really good! My favorite recipe: The Mac 'n Pink Cheese- the sauce I ended up with tasted like strawberry milk, which pretty much describes the sauce, with the addition of white pizza sauce to thicken it up. Least favorite: The Grilled Pink Cheese Sandwich- what's the point of a grilled cheese sandwich if you can't even get the cheese to melt!? That's the whole idea behind this sandwich! HELPFUL LINK: Pink Strawberry Jack Cheese: https://www.cowcandy.com/shop/!/Pinkie-Pie-Strawberry-Jack-Cheese/p/77291596/category%3D0 You will need: Recipe #1: Pink Cheese Sticks For the cooking equipment: A medium bowl A large bowl Tongs Wax paper A large plate A lasagna pan Nonstick cooking spray An airfryer For the sticks: 6 Strawberry Jack Cheese Sticks(see HELPFUL LINK) 2 eggs 1 cup panko breadcrumbs Oregano Garlic powder Parsley Black pepper Salt 1. Put wax paper onto a large plate. Remove the plastic covering from all the cheese sticks. 2. Beat and whisk 2 eggs in a medium bowl. 3. In a large bowl, mix the panko breadcrumbs and seasonings together. 4. Using tongs, dip each stick into the beaten and whisked eggs, making sure to coat them fully in it. Put each egg-coated stick into the breadcrumb mixture and coat each stick in breadcrumbs. Place the breaded sticks onto the wax paper-lined plate. 5. Freeze the sticks for 20-30 minutes. To bake the sticks: 1. Spray a lasagna pan with nonstick cooking spray. 2. Place 3 of the sticks into the lasagna pan. 3. Bake the sticks in a 400 degree Fahrenheit oven for 4 minutes. 4. Take them out of the oven and flip them over with tongs. Return the lasagna pan to the oven and let the sticks cook for an additional 4 minutes on the other side. To airfry the sticks: 1. Preheat an airfryer to 400 degrees Fahrenheit. 2. Take the cooking basket out of the airfryer when it's done preheating. 3. Place the remaining cheese sticks into the cooking basket. 4. Place the cooking basket into the airfryer. Set the timer for 10 minutes. After 5 minutes, take the cooking basket out and turn the melted cheese sticks over with 2 forks. Put the cooking basket into the airfryer and let the sticks cook for an additional minute before unplugging the airfryer(which will shut the machine off). 5. Take the cooking basket out and retrieve your melted pink cheese sticks for Recipe #2! Recipe #2: Pink Pizza Bagel For the cooking equipment: A plate For the bagel: 1 pizza-flavored bagel White pizza sauce or Alfredo sauce 3 Melted pink cheese sticks 1. If the bagel isn't thawed out, do so by microwaving it for 35 seconds. 2. Cut the bagel in half. Spoon the white or Alfredo sauce onto each bagel half. Place the melted cheese sticks on top of the sauce. Recipe #3: Grilled Pink Cheese Sandwich For the cooking equipment: A frying pan A spatula A plate For the sandwich: 2 slices of bread 2 pink cheese sticks Cooking oil of your choice(I used red palm oil) 1. Cut the cheese sticks into cubes. Place the cubes onto each slice of bread. 2. Pour cooking oil into the frying pan. Spread the oil throughout the pan. Heat the oil up. 3. Once the oil is heated up, put each cheese-topped slice into the frying pan. Cook for 30-60 seconds before taking them out of the pan with a spatula and onto a plate. 4. Make a sandwich by placing one cheese-topped slice on top of the other. Cut in half. Recipe #4: Mac 'n Pink Cheese For the cooking equipment: A colander For the dish: 1 microwave mac 'n cheese bowl 2 pink cheese sticks, cubed Milk White pizza or Alfredo sauce 1. Take the cheese packet out of the microwave mac 'n cheese bowl. You won't need it for this recipe. 2. Fill water to line and cook the pasta according to the instructions on the bowl. 3. Once the pasta is done cooking, drain the pasta out with a colander. Return the pasta back to the bowl. Pour milk to line in same bowl and place the cubed cheese sticks into the bowl. Mix all the ingredients up. 4. Microwave the bowl for 20 seconds. After that, let the pasta rest to let the cheese melt. 5. Pour white pizza sauce or Alfredo sauce into the bowl. Mix all the ingredients up. 6. Bon appetit!
1 Comment
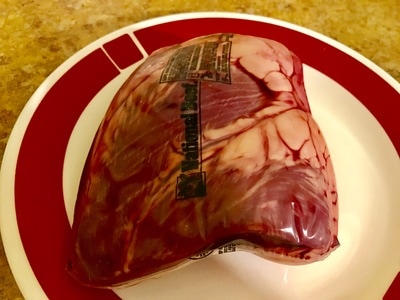
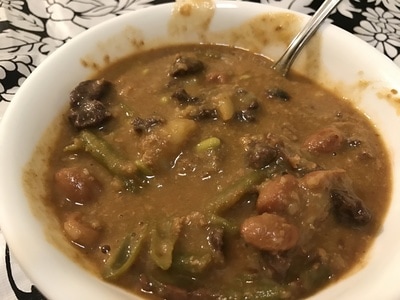
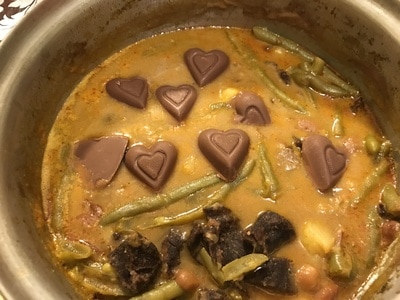
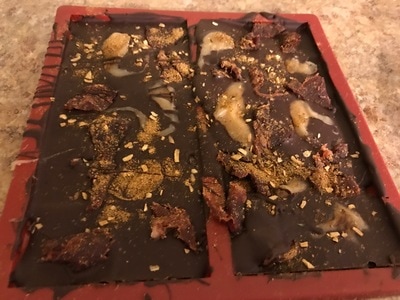
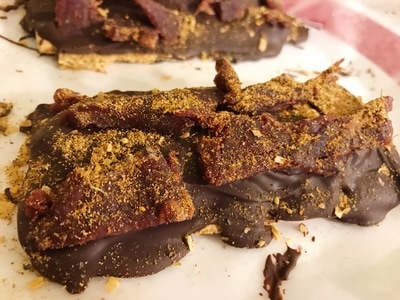
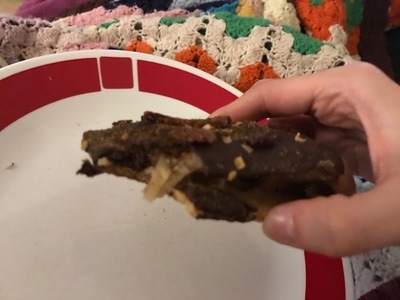
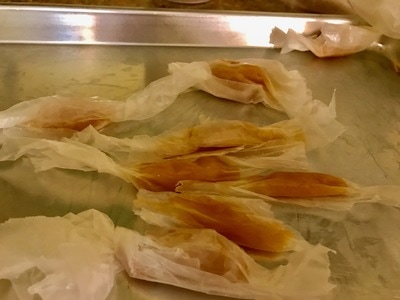
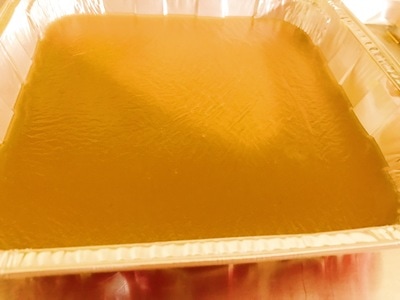
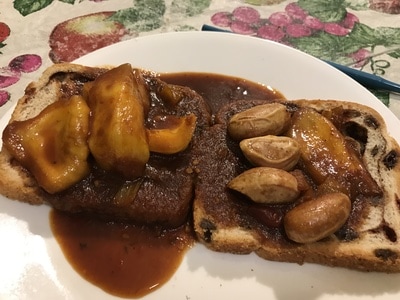
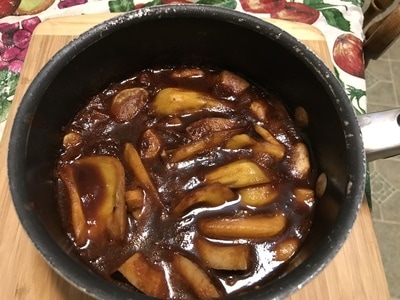
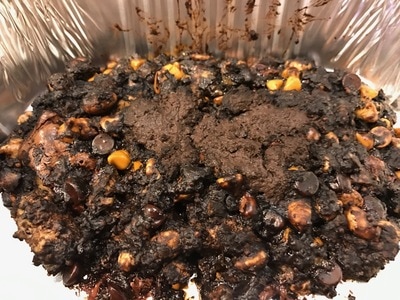
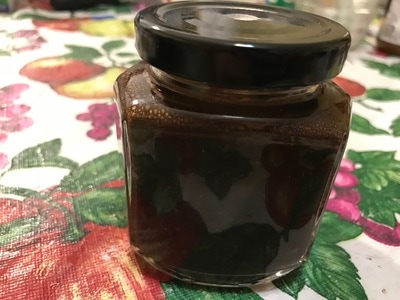
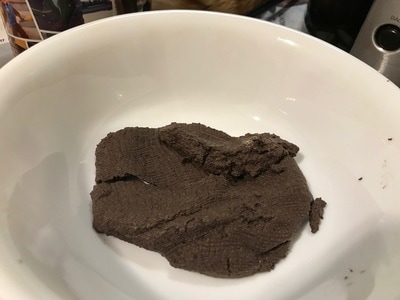
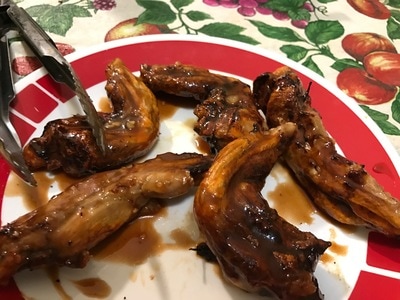
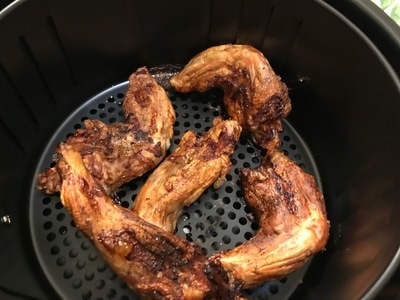
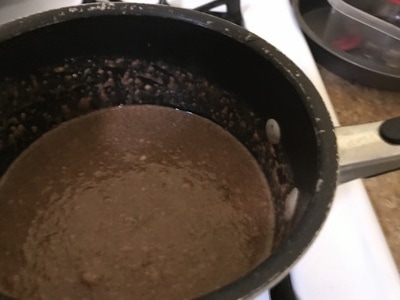
Happy(belated) Valentine's Day, everybody! When it comes to Valentine's Day, the image that I always bring up in my mind is of course, a heart. Chocolate-shaped hearts are in the supermarket everywhere in the month of January leading to February 14. But I had this weird idea to make a stew with both chocolate-shaped hearts and a cow heart, plus some chocolate milk to boot! Breaking down the heart was pretty cool. It was the biology dissection class I never had in high school(thanks a lot, vegans!). It doesn't even come close to the owl pellets(read: poop) I dissected in 6th grade for science class! When you break down a heart, you see many things, like the white plaque inside the heart that you can turn into beef tallow, and the arteries connecting the heart. This is probably a vegan's worst nightmare. It's very important to wear plastic gloves when cutting up the heart, since the heart is full of blood. I was expecting the cooked cow heart to taste like liver but it tasted like stew meat instead, which is great because I hate liver! Even my dad agreed that the heart tasted like stew meat. The chocolate taste came more from the chocolate hearts I put into the stew than the chocolate milk itself. This stew is so good and hearty! You will need: For the cooking equipment: Plastic gloves Kitchen shears or a butcher's knife A large plate A large bowl A medium bowl Aluminum foil A colander Paper towels A frying pan A spatula A large saucepot with lid For the stew: 1 cow heart 1 cup lemon juice or apple cider vinegar Water Red palm oil or any cooking oil 10 oz. potatoes 15.5 oz. Roman beans, drained 10 oz. green beans 2 tsp. fish bouillon in 2 cups hot water 2 cups chocolate milk Pinch of garlic powder Pinch of onion powder Pinch of paprika Pinch of allspice Pinch of marjoram Pinch of black pepper Pinch of salt Chocolate-shaped hearts Serve with: Garlic bread or wonton strips To prepare the heart: 1. Wear plastic gloves to protect your hands from cow blood! Remove the plastic from the heart(if there's any). Remove the fat(the pink stuff) and any external connective tissue with kitchen shears or a butcher's knife. Any white stuff you see is not meat! It's plaque. Note: cow heart is very slippery to cut up so be careful, especially with a knife! However, you can render the white stuff into beef tallow. 2. Cut out the red meat and put it in a medium bowl. Cut the internal veins, arteries, and connective tissue(the stringy stuff). Discard anything that isn't red heart meat. 3. Cut the chunks of red heart meat into smaller pieces so it cooks faster. 4. Submerge the meat in the medium bowl under cold water to remove the excess blood. Salt the water and let the meat sit in the salted water for 30 minutes at room temperature. 5. After 30 minutes, drain the liquid out using a colander. Put the heart meat back into the medium bowl. 6. Soak the heart meat in 1 cup of lemon juice or apple cider vinegar. If the meat isn't fully submerged, top it off with water until the meat is fully submerged. Put alumimum foil on top of the bowl. Let the heart meat soak in the bowl in the fridge for 1-24 hours. 7. After it's done soaking, drain the liquid out using a colander. Put the heart meat into a clean, large bowl. Pat dry the meat with paper towels to remove any excess liquid. To make the stew: 1. Pour red palm oil or any cooking oil into a frying pan. Spread it around the pan. Heat the oil up by turning the stove on. 2. Once the oil is heated up, put the heart meat into the frying pan. Not all of it is going to fit, so you'll have to work in batches. Brown the meat by moving it throughout the pan. If using red palm oil, it's ok if the meat is a little yellow. Put the cooked heart meat onto a plate. 3. Repeat steps 1 and 2 for the rest of the batches. 4. Put the cooked heart meat into a large saucepot, along with the potatoes, Roman beans, and green beans. 5. Mix 2 tsp. of fish bouillon into 2 cups of hot water to make a fish broth. Pour fish broth into the saucepot, along with the chocolate milk and spices/seasonings. 6. Mix all the ingredients up with a spoon. 7. Bring the stew to a boil. Once it's boiling, reduce the heat to a simmer and let the stew simmer for 2 hours, stirring occasionally. Put the lid on the saucepot. 8. After 2 hours, remove the lid and raise the flame to medium-medium low. The liquid will rise, so watch it at all times! Let the stew cook for 30 minutes. This will thicken the stew and reduce it. If the stew rises too much, you can always lower the flame a little. 9. Remove the saucepot from the stovetop. Add in as many chocolate hearts to the stew as you like. Serve with garlic bread or wonton strips. Bon appetit! Technically, this was my Valentine's Day special but of course, Valentine's Day has already passed. This is my first time making my own chocolate bars but I already have experience making chocolate at my day job(that's all I'll say about it- even the Meatloaf Princess needs money to support her weird recipes and herself(kinda)!), which prepared me well for this video. Originally, I was only planning to make chocolate bars, but I had so much beef tallow caramel leftover, I needed to use it, so I made my own Twix bars, which are really simple to make: Put a chunk of caramel on top of a graham cracker and top said graham cracker with melted Baker's chocolate. Let set. So you might be wondering which of the two types of chocolates I made I preferred- the answer to that would obviously be the Twix bars! Making your own chocolate bars is easier than making your own caramel, all you gotta do is melt Baker's chocolate, pour melted chocolate into candy bar moulds, and top with anything you like(well, except for fresh fruits and veggies- those will cause the chocolate not to harden and set due to the inherent moisture of the produce. Anything else is fair game!)! My dad didn't try either bar because chocolate keeps him up at night, unlike Yours Truly! These chocolates are a good combo of sweet and salty, with the meatloaf seasoning and beef jerky providing a bit of smokiness to the bars! HELPFUL LINK: Candy Bar Mould: https://www.amazon.com/Freshware-CB-607BR-Silicone-Break-Apart-Chocolate/dp/B00CBGPPTC/ref=sr_1_1?ie=UTF8&qid=1487534466&sr=8-1& You will need: For the cooking equipment: A large, microwave safe bowl with lid A candy bar mould(see HELPFUL LINK) Wax paper A large plate For the chocolate bars: 8 oz. Baker's semisweet chocolate Beef Tallow Caramel(see http://www.meatloafprincess.com/recipes--blog-posts/caramel-made-from-beef-tallow) Beef Jerky Meatloaf Seasoning For the Twix bars: 4 oz. Baker's German's chocolate 4 cinnamon graham cracker sheets Beef Tallow Caramel Beef Jerky Meatloaf Seasoning Meatloaf Chocolate Bars 1. Break apart the Baker's chocolate into pieces. If it's hard to break apart, just put the chocolate against your chest to break it. Put each piece into a microwave-safe bowl. Put the lid on the microwave-safe bowl and microwave in 30 second intervals, until the chocolate is melted. Stir after every 30 second interval(it took me 60 seconds to melt all the chocolate). 2. Spoon the melted chocolate into a clean, completely dry candy bar mould. 3. Once the chocolate is in the mould, work quickly to put the toppings on: remove the wax paper from 2-4 beef tallow caramels. Then, break apart the caramels and beef jerky into flat pieces. Put the toppings on the chocolate. Sprinkle meatloaf seasoning on top of the chocolate. 4. Rap the chocolate a few times to remove the air bubbles from the chocolate by banging it against a counter or flat surface. 5. Put the mould in the fridge to let the chocolate set for 45-60 minutes. 6. Demould the chocolate by bending the mould to get the chocolate bars out of it. 7. Bon appetit! Meatloaf Twix Bars 1. Put wax paper on top of a large plate. 2. Break apart the Baker's chocolate into pieces. If it's hard to break apart, just put the chocolate against your chest to break it. Put each piece into a microwave-safe bowl. Put the lid on the microwave-safe bowl and microwave in 30 second intervals, until the chocolate is melted. Stir after every 30 second interval(it took me 60 seconds to melt all the chocolate). 3. Place 1 whole cinnamon graham cracker sheet on the wax paper. Remove the wax paper from a large piece of beef tallow caramel. Place the caramel on top of the graham cracker. 4. Top the caramel with the melted chocolate. You want all the chocolate to fully coat the caramel and graham cracker! 5. Once the bar is fully coated in chocolate, break apart some beef jerky into bits and put the bits on top of the chocolate. Sprinkle the bar with meatloaf seasoning. 6. Repeat steps 3-5 to make 3 more bars. 7. Place the bar in the fridge to let the chocolate set for 45-60 minutes. 8. Once the bars have set, leave them out at room temperature; otherwise the caramel will become too hard to chew!. Bon appetit! Here's an unusual ingredient to make homemade caramel with- beef tallow, the rendered fat from a cow! My inspiration- a recipe for duck fat caramels- http://www.dartagnan.com/duck-fat-caramels-recipe.html I'm actually making meatloaf chocolate bars and I'm using beef tallow caramels because when I think of meatloaf for my meatloaf hybrid recipes, I usually think of beef being the dominant flavor. But don't worry, this caramel tastes nothing like beef at all- it's very buttery, albeit greasy. Once you ignore the greasiness of the caramel, it tastes like all the other types of caramel you'd normally find made. Most caramel is actually made from butter. The caramel is very rich. I was surprised this recipe worked, considering this was my first time making my own caramel. It's a lot easier than I imagined making caramel. But the key piece of equipment you need is a candy thermometer, which will tell you when the caramel is done simmering. You may notice I didn't show me eating the caramel- I lost the footage of me doing that and initially, I was planning on making the caramel making part of this recipe part of a longer recipe of me actually making the meatloaf chocolate bars. But I realized people on the Internet has a very short attention span and would rather sit through a 3 minute video than a 8 or 9 minute one. I didn't say this on video, but the caramel reminded me of the Werther's Caramel I had to suck on the day before my liver resection, as I was on a liquid and hard candy-only diet that day. Anything I can suck on was allowed(get your minds out of the gutter, people!). I don't want to give away how the meatloaf chocolate bars tasted but I can tell you the sweet caramel pairs well with savory flavors. HELPFUL LINK: Beef Tallow: https://epicbar.com/animal-oils-detail/27 You will need: For the cooking equipment: A medium saucepot A large 3-4 quart saucepot A candy thermometer A square 8-inch baking dish Nonstick cooking spray Wax paper 1 cup heavy cream 5 tbsp. beef tallow(see HELPFUL LINK) 1 tsp. salt 1/2 tsp. vanilla extract 1 1/2 cups granulated sugar 1/4 cup water 1/4 cup light corn syrup 1. Put the first 4 ingredients into a medium saucepot. Bring the contents of the saucepot to a boil. 2. Once the contents are boiling, turn the flame off completely and move the medium saucepot to a cool burner. 3. Attach a candy thermometer to a large saucepot and put the rest of the ingredients in there. 4. Bring the contents of the large saucepot to a boil, stirring the mixture until the sugar completely dissolves. 5. Gently swirl the boiling mixture with a spoon. Let the mixture boil until it turns a light caramel color. 6. Once the mixture is a light caramel color, pour the beef tallow mixture in the medium saucepot into the sugar mixture. Be very careful, the beef tallow mixture is still hot! The mixture will bubble, so at this point, reduce the heat to a simmer. 7. Let the mixture simmer until the temperature on the candy thermometer reads 248 degrees Fahrenheit exactly, stirring frequently. 8. Spray a square 8-inch baking dish with nonstick cooking spray. Pour the caramel mixture into the baking dish. The caramel is very hot! 9. Let the caramel cool at room temperature for 45 minutes. 10. Spray a sharp knife and fork with nonstick cooking spray. Cut the caramel into 1-inch squares(ideally). Put each square onto a large sheet of wax paper(given that the caramel is greasy). 11. Wrap the wax paper around the caramel horizontally. Twist each end of the wax paper. 12. The caramel should last 2 weeks. Use it in a chocolate recipe, dip it in melted chocolate, or eat it as is. Bon appetit! Every time I see a new fruit or vegetable at the supermarket, I have to try it, especially a big a** fruit like jackfruit. So what is jackfruit? It's the vegan version of pulled pork, except it's a vegetable that, when ripened, turns into a fruit with the consistency of jello and the taste of pineapple and banana. When I say big a** fruit, I literally mean it- the half jackfruit I bought was 5 pounds- and the world's biggest jackfruit was 80 pounds! The jackfruit doesn't just provide fruit/vegan meat, it also provides dozens of the largest seeds you'll ever encounter that, when boiled or roasted, are edible and taste like bland chestnuts(the seeds are literally the size of chestnuts)! When I bought the jackfruit, I wanted to use it in a video but all the ideas I thought were long 2-day recipes. I considered roasting the seeds and turning it into a risotto(with the seeds being the "rice"), only problem was the seeds are way too big to ever make the dish look like risotto. Another idea I considered was roasting the seeds and grinding them into flour for some sort of waffle. Both ideas require soaking the seeds overnight. :( Then I read on this website about some people cooking jackfruit seeds like baked beans and when I think of baked beans, I think of frank 'n beans(which is basically frankfurters and baked beans). Frankfurters are usually pork-based and jackfruit meat is a vegan pork substitute, so that's how the idea of vegan frank 'n beans was born! But vegan frank 'n beans uses bacon, which is not vegan. However, I did buy some precut coconut chunks and I treated the chunks like bacon(I didn't make coconut bacon though, I just threw the chunks in with the jackfruit meat and seeds). Jackfruit meat, even if it is ripe, has the consistency of pulled pork when cooked. Many people have their own secret BBQ recipe where they use an unusual ingredient to make their dish stand out, and the not-so-secret ingredient I used in the sauce for this dish was chocolate infused-balsamic vinegar, yet I didn't taste any chocolate in the end product. Of course, you could use any type of vinegar you like in the sauce. My dad didn't believe me when I told him jackfruit is liked pulled pork, but when he tasted it, he was proven wrong! I did use an ingredient in this dish that some may not consider to be vegan- honey. But luckily for them, vegan honey is a thing and they can use that instead. You might be wondering where I got the jackfruit seeds from- well duh, the jackfruit itself! It turns out breaking down the jackfruit is easy once it's cut in half. All you have to do is get some kitchen shears and cut around the pods to access the seeds. But there are also visible seeds on the outside of a half jackfruit you can just pull out of the fruit too! So what do jackfruit seeds taste like? Bland chestnuts I probably should've roasted before boiling them with everything else. The insides of the seeds reminded me of fava beans without the bitter exterior. But I'm certain the seeds would've been completely edible had I just roasted them first. :( HELPFUL LINK: Vegan Honey- https://www.veganhoneycompany.com/ You will need: For the cooking equipment: A frying pan A medium saucepot with lid For the frank 'n beans: 1/2 chopped onion 1/2 tsp. minced garlic(equivalent to 1 garlic clove) Red palm oil or any cooking oil 1 cup(23 seeds) jackfruit seeds(the "beans) 1 cup jackfruit meat(either unripe or ripe)(the "franks") 7 ounces chopped coconut(not shredded coconut!)(the "bacon") 1/2 cup vegan tomato sauce 1/2 cup water 1/2 cup vinegar(I used chocolate-infused balsamic vinegar) 1/4 cup honey or vegan honey 2 tsp. Dijon mustard 1/4 tsp. liquid smoke Pinch of chipotle chili powder Pinch of paprika Pinch of garlic powder Pinch of onion powder Pinch of salt Pinch of black pepper 2 slices bread to put the frank 'n beans on 1. Pour cooking oil into a frying pan. Spread the oil around the pan. Turn the stove on and heat the oil up. 2. Once the oil is heated up, put the chopped onion & minced garlic into the frying pan. Sautee the onion and garlic by moving the two around the pan and coating them in the oil. It's normal for the onions to turn yellow if using red palm oil. Continue sauteeing until the onions are translucent and everything is fragrant. 3. Put the sauteed onion and garlic into a medium saucepan, along with the next 15 ingredients. Mix all the ingredients up. 4. Bring the contents in the saucepot to a boil. Once it's boiling, reduce the heat to a simmer and let the contents simmer for 45 minutes. Stir the inside of the pot every 5-10 minutes and put a lid on the saucepot. 5. Let the saucepot cool down for 5 minutes. Put the vegan frank 'n beans on top of 2 slices of bread. 6. Bon appetit! By far, this was the most complicated recipe I ever did. Not the longest, but the one with the most steps. So where did I get my inspiration for this crazy recipe? Last year, I was at Sur La Table(a fancy cooking supply store that has cooking classes) taking a cooking class and after the class was over with, I was figuring out what to buy with my 10% coupon to the store I got for taking the class. Of course, the store reels you in in that the coupon is only good the day of the cooking class. I found in the discount pile a tofu making kit, which I bought. Initially, I thought making my own tofu would be easy- the box said it only takes an hour to make. Yea, that's misleading- it took me 12 hours to make a measly 2 ounces of homemade tofu! But if the box said how long it really takes, then nobody would buy the product. What the box also doesn't tell you is that making the pure soymilk with a soymilk maker(which actually exists) saves you 10 steps. Of course, I didn't have a soymilk maker so I had to do those 10 steps. If you just used a soymilk maker to make the soymilk, you could then go straight to the step of curdling it. Long story short, I'm never making tofu again without a soymilk maker. Also, I'm going to soak the soybeans overnight instead of in the morning, only to have to make the entire tofu at night when I could've watched the Super Bowl in its entirety. I should've bought a 6 quart saucepot so I could make the soymilk in 1 batch- the biggest saucepot I have maybe holds 4 quarts at most. As for the chocolate mustard, I also used a kit for that, but I got it at the Long Island Welcoming Center(the pit stop with the Taste of NY store that carries products solely made in NY state). Making mustard from scratch is so much easier than making tofu from scratch! So what makes both the tofu and mustard chocolatey? Cocoa powder! I think the reason I had so little tofu was because I got really tired after making the first batch of soymilk to use the rest of the soybeans. Also, I didn't have a candy thermometer that would've said when the chocolate soymilk was exactly 185 degrees Fahrenheit(a meat thermometer, which I did have, wouldn't have helped) so I could put the curdling agent(white vinegar) in. I should've used an actual tofu curdling agent like nigari or fresh lemon juice. When you make soymilk, you always end up with leftover ground soybeans known as okara- I tried making soy breakfast patties with them in the hopes of stuffing the meatloaf with the patties but the patties diidn't hold its shape together and was the blandest thing I ever tasted, so I discarded the okara. I used a pound of store-bought tofu for the meatloaf and I put the homemade chocolate tofu on top of the meatloaf. It wasn't a total loss and I learned some pretty valuable lessons. But why a candy bar meatloaf? I got the inspiration for this long recipe from an old video from The Protein Chef's YouTube channel. Of course, I made made many alterations to The Protein Chef's recipe to make it my own. HELPFUL LINKS: Tofu Making Kit: https://www.amazon.com/Table-Roaring-Brook-Dairy-Tofu-Making/dp/B00LEQL5XA/ref=sr_1_1_s_it?s=grocery&ie=UTF8&qid=1486757564&sr=1-1& Mustard Making Kit: https://www.amazon.com/Make-Your-Mustard-Crimson-Clove/dp/B0143MI3JU/ref=sr_1_3_s_it?s=grocery&ie=UTF8&qid=1486757607&sr=1-3 Chocolate Infused Balsamic Vinegar: https://www.amazon.com/Gourmet-Chocolate-Balsamic-Naturally-Flavored/dp/B00ZYXSSGG/ref=sr_1_3_s_it?s=grocery&ie=UTF8&qid=1486757649&sr=1-3& Chocolate Mustard You will need: For the cooking equipment: A medium bowl Saran wrap A blender or food processor The jar provided in the mustard making kit, or a sterile Mason jar For the mustard: The yellow mustard seeds, brown mustard seeds, salt, and horseradish powder provided in the mustard making kit OR 2 tbsp. yellow mustard seeds 2 tbsp. brown mustard seeds 1 tsp. salt 1/4 tsp. horseradish powder 1/3 cup white vinegar 1/3 cup chocolate-infused balsamic vinegar(see HELPFUL LINKS) 3 tbsp. cocoa powder 1. Put all the mustard making ingredients into the medium bowl. Mix all the ingredients up until it's no longer powdery. If the mixture is still powdery, add more white vinegar. 2. Cover the bowl loosely with Saran wrap. Let the mixture in the bowl soak for 8-10 hours. Liquid will still be present. 3. Put the mixture into a blender or food processor and blend for 30 seconds to desired consistency. 4. Pour the mustard into the jar provided in the mustard making kit, or a sterilized Mason jar. 5. Bon appetit! Chocolate Tofu For the cooking equipment: 2 large bowls A blender A large saucepot that can hold at least 6 quarts A colander 2-3 cheesecloths(1 cheesecloth is included in the tofu making kit) A candy thermometer A slotted spoon Tofu mold(included in the tofu making kit) A 2-3 lb. jar For the tofu: 3 cups yellow soybeans 2-3 tbsp. cocoa powder 1/4 cup fresh lemon juice, white vinegar, or 2 tsp. nigiri 3 1/2 quarts of water in total Preparing the soybeans 1. Soak the yellow soybeans in 6 cups of cold water, in a large bowl. Let the soybeans soak for 8-12 hours(or overnight). The soybeans should double in size by the time they're done soaking. Making the soymilk Note: Follow the directions for a soymilk maker or follow these 10 steps 1. Pour 2 cups of water into a large saucepot 2. Place either: a. If you have a blender that holds at least 14 cups of liquid, put all of the soaked yellow soybeans, 4 tbsp. cocoa powder, and 6 cups of hot water into the blender. b. If you have a medium blender that holds between 8-13 cups of liquid, work in batches of 3 cups yellow soybeans, 2 tbsp. cocoa powder, and 3 cups hot water in the blender. c. If you have a blender that holds less than 8 cups of liquid, work in batches of 1 cup yellow soybeans, 2/3 tbsp. cocoa powder, and 1 cup hot water in the blender. 3. For step 2, blend on high until the beans have been thoroughly blended and you get a brown mixture. Pour the brown mixture into the saucepot. 4. For options 2b and 2c, repeat step 3 until all the beans have been thoroughly blended and you get a brown mixture. 5. On the stovetop, bring the chocolate soybean mixture to a boil. Do not put a lid on the saucepot- you need to watch to see when the mixture foams up very suddenly! Make sure it never foams over!! 6. Once the mixture is boiling and has foamed up, turn the heat all the way down and stir the foam back into the mixture in the saucepot. 7. Let the mixture simmer for 10 minutes, while stirring frequently. 8. Place a large bowl in the sink. Put a colander over the large bowl. Fold a cheesecloth twice and place in colander. Slowly pour half the mixture into the cheesecloth(be careful- the mixture will be hot!). 9. Join the edges of the cheesecloth and twist to wring out the soymilk. Place the chocolate soymilk that has collected in the large bowl into a clean saucepot. 10. Repeat steps 8 and 9 for the rest of the mixture. Discard the leftover ground beans(known as "okara") or follow this link on how to make okara patties. Developing the curds 1. Bring the chocolate soymilk just to a boil. Make sure the soymilk doesn't foam over! Remove saucepot from burner. 2. Pour the boiling soymilk into a clean bowl and let it cool for 2 minutes, or until the temperature of the chocolate soymilk drops to 185 degrees Fahrenheit. You can measure the temperature with a candy thermometer. 3. Add either fresh lemon juice, white vinegar, or nigiri to the chocolate soymilk and stir gently 5 times to distribute it throughout the milk. It should begin to curdle immediately. Let stand for 15-20 minutes. Draining and pressing the curds 1. Place tofu mold in the sink and fold a clean cheesecloth twice, over the mold 2. With a slotted spoon, scoop the solid curds from the pot and transfer them to the mold. Dispose of the whey(liquid) remaining. 3. Fold the top of the cheesecloth over the curds and place the lid on top of the mold. Press down to release more liquid. 4. Place the mold on a plate and put a 2-3 lb. jar on top of the lid of the tofu mold. Put the tofu mold that's on the plate in the fridge for 1 hour to let the tofu press and drain. 5. Remove the cheesecloth from the mold and gently peel the cheesecloth from the tofu. Use immediately or place in a bowl with a small amount of cold water in the fridge until ready to use. Candy Bar Meatloaf For the cooking equipment: A large bowl Nonstick cooking spray A lasagna pan For the meatloaf: 2/3 tbsp. onion powder 2 beaten and whisked eggs 1/2 cup dark chocolate chips 1/2 cup peanut butter chips 1/2 cup butterscotch chips 1/2 cup honey roasted peanuts 4 crumbled up cookie crunch bars 1 tbsp. white hot cocoa powder 3 tbsp. dark cocoa powder(note: omit if you got at least 1 pound of chocolate tofu) 2 tbsp. caramel sauce 1/2 cup chocolate mustard(see recipe above) 1 cup cookie crisp cereal 1 pound of store-bought, chopped, drained, firm tofu(if you ended up with less than 1 pound of chocolate tofu) Whatever amount of chocolate tofu you have 1. Put the first 8 ingredients into the large bowl. 2. Either: a. If you ended up with at least 1 pound of chocolate tofu, omit the dark cocoa powder. b. If you ended up with less than 1 pound of chocolate tofu, put the dark cocoa powder into the large bowl. 3. Add the next 3 ingredients into the large bowl. 4. If you have less than 1 pound of chocolate tofu, add the store-bought tofu to the large bowl. Place whatever amount of chocolate tofu you have in a small bowl for now. But if you got more than 1 pound of chocolate tofu, add your chocolate tofu into the large bowl. 5. Mix all the ingredients up until it's firm and brown in color(if using store-bought tofu in the mixture). 6. Spray a lasagna pan with nonstick cooking spray. 7. Form 2 loaves from the meatloaf mixture. 8. If you have less than 1 pound of chocolate tofu, place whatever amount of chocolate tofu you do have on top of each loaf. Otherwise, skip this step. 9. Bake in a 350 degree Fahrenheit oven for 40-45 minutes. 10. Bon appetit! Did you know over a billion chicken wings will be eaten today, on Super Bowl Sunday? Well these wings can't be counted in this 1 billion, as they come from alligators. They're technically the legs of an alligator and are typically deep-fried. But as you can read from the title of this blog post, these wings are air-fried. Not only is air-frying food healthier, there's no oil required- and I'm afraid of splattering hot oil, which is why I have my dad brown ground meat and sautee large vegetables. Alligator meat is naturally lean but deep-frying them negates their nutritional value- but not if you air-fry them! Air-frying is super easy. You just preheat the air-fryer, put the food in the cooking basket, put the cooking basket into the air-fryer and press a couple of buttons- and voila, your food is frying! Technically you could use an instant pot(which is all the rage among foodies right now- wait, do people still say "all the rage" when they mean something trendy!?), but I have more uses for an air-fryer than an instant pot in the near future. You should treat alligator wings like chicken wings in how you cook them, but you might want to cook the former slightly less than the latter, as alligator meat overcooks faster than chicken and when you have overcooked alligator meat, you have tough meat and that's no fun to eat! It was kind of ironic how all I needed to do was press the "chicken" button on my air-fryer to cook alligator meat! Alligator meat is common in supermarkets in the Southern US, but I don't live in that region, so I ordered mine online(see HELPFUL LINK). You might be wondering, what does alligator taste like? It first tastes like chicken and then tastes like flounder. Also, why the hot cocoa BBQ sauce? It's technically still winter, so hot cocoa is apropos for this time of year. My dad didn't like the alligator wings- he said the meat was too chewy, so I probably should've customized the cooking settings on the air-fryer instead of just pressing the "chicken" button. Note: the air-fryer uses up a lot of electricity, as the wires became warm during air-frying, so you should unplug the air-fryer and wait several hours before using it again. HELPFUL LINKS: Alligator Wings: http://www.waterbuffalomeat.com/alleboin5lb.html Air-fryer: https://www.amazon.com/SimpleTaste-Multi-function-Circulation-Technology-Temperature/dp/B01M2Z9P9L/ref=sr_1_19?s=kitchen&ie=UTF8&qid=1486317092&sr=1-19& You will need: For the cooking equipment: An air-fryer(see HELPFUL LINK) A medium saucepot Tongs For the wings: 2 lbs. of alligator wings(see HELPFUL LINK) Salt Black Pepper For the hot cocoa BBQ sauce: 1/3 cup BBQ sauce(I used whisky BBQ sauce) 1/3 cup honey 2/3 cup white hot cocoa drink 1/3 cup white grape juice 3 tbsp. orange juice 2 1/4 tbsp. oil(I used what was left of my butternut squash seed oil) 4 tbsp. raspberry hot cocoa powder 1 1/2 tbsp. minced garlic 1/4 cup candied lemon peel 1. Preheat your air-fryer by pressing the preheat button on your machine. 2. Once the air-fryer is preheated, take the cooking basket out of the fryer. 3. Put 1 lb. of wings(5 wings) at a time into the cooking basket. Sprinkle the wings with salt and black pepper. Put the cooking basket back into the fryer. 4. Press the "chicken" button- or set the fryer at 360 degrees Fahrenheit for 25 minutes. The wings will be fully cooked when the internal temperature of the meat reaches 165 degrees Fahrenheit. 5. When the wings are fully cooked, remove the cooking basket from the air-fryer and retrieve the wings with tongs. Put the wings onto a plate. If the wire didn't get too hot, make your second batch, or unplug the air-fryer and wait several hours before using it again. 6. Put all the hot cocoa BBQ sauce ingredients into a medium saucepot. Mix all the ingredients up until the powder fully dissolves. 7. Bring the sauce to a boil. Once it's boiling, reduce the heat to a simmer and let it simmer for 6-7 minutes. 8. Remove the saucepot from the stovetop and coat the wings in the sauce with a fork and tongs. 9. Bon appetit! |
Archives
October 2019
Categories
All
|
 RSS Feed