|
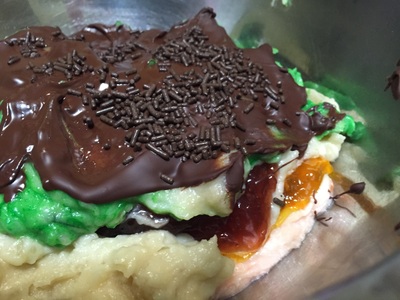
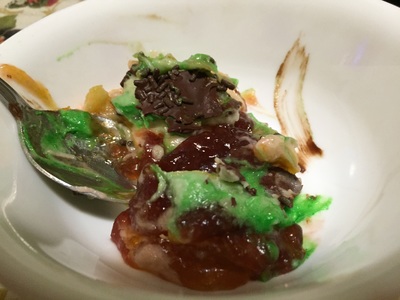
My favorite type of cookie isn't technically a cookie at all- it's the rainbow cookie(also known as Italian rainbow cookies or Italian flag cookies). They must be a regional thing up in New York and Long Island since I've never seen rainbow cookies in the Publix in Florida I visited while on vacation five years ago. But they're like heaven in your mouth. I love rainbow cookies so much, on multiple past birthdays, I've had a rainbow cookie ice cream birthday cake years ago and even a rainbow cookie cake for my 23rd birthday! Maybe it's because I associate these cookies with memories of when I was still little enough to sit in the front of the supermarket shopping cart with my mom, or maybe it's because of the mouth feel of a cake, hardened chocolate, and jelly in your mouth simultaneously. Here's a link that describes rainbow cookies in all its beauty: https://en.wikipedia.org/wiki/Rainbow_cookie Over the years, I've had many different flavors of edible cookie dough(and sometimes I order edible cookie dough online from Edoughble). But I've never seen nor eaten rainbow cookie dough. So I decided to make an edible cookie dough version of this recipe: http://www.foodnetwork.com/recipes/rainbow-cookies-recipe.html. Of course, when you make edible cookie dough of any flavor, you cannot use any egg products because raw eggs can make you ill. Luckily, there are some good egg substitutes that you can eat raw: instead of egg yolks, I used applesauce and in lieu of egg whites, I used aquafaba(chickpea water). It would really help if you own a stand mixer or hand mixer. I had the latter, but not the attachment that came with it, which makes it just as useless as no mixer at all. So if you do it by hand, you're going to get a good arm workout. But you're also going to need a lot of patience. I almost thought the almond paste would never incorporate into the granulated sugar. But it was only until I added the butter that everything came together. The best part about making edible cookie dough is that you get to eat it every step of the process. So I tasted the dough's metamorphosis from almond paste with sugar on it to a delightful, finished cookie dough. This dough is so sweet, it will make you want to start eating savory snacks. Or maybe it was because I ate too much cookie dough. But I still love it and so does my dad, even though he said he wouldn't eat it normally since he's a diabetic. My dad said the dough just tasted like rainbow cookies, even though I just learned the red jelly traditionally used in rainbow cookies is actually raspberry jelly and not strawberry jelly. I say this recipe is one of the best ones I've ever made. Although in reality, this is not how rainbow cookies are usually made- each layer is baked into a cake and only after it's flattened overnight is the jelly put in between the layers. But creative liberties, people. Creative liberties. Of course, there is some risk to eating raw flour, but eating raw egg products is a lot more riskier. I find that using the food colorings in the Helpful Link is better than just using food dye which is more of a liquid than icing. Food dye tends to bleed into every surface it comes into contact with. I'm not sure if this recipe can be considered to be a raw cookie recipe since the finished product is a huge dough and not a bunch of little cookies, but that's what I said in the first few seconds of the video and I'm sticking to that statement! HELPFUL LINK: Green and Red Food Colorings: http://www.amazon.com/Wilton-Set-8-Icing-Colors/dp/B0000CFMU7/ref=sr_1_2?srs=2603741011&ie=UTF8&qid=1464643598&sr=8-2& You will need: For the cooking equipment: A large bowl A medium bowl 4 small bowls A whisk A spatula without holes A stand mixer or hand mixer(highly recommended!) Gloves(but not latex or rubber) for when handling the food coloring Toothpicks for dipping into the food coloring For the actual dough: 3/4 cups + 2 tbsp. of granulated sugar 8 oz. of almond paste 2 1/2 sticks of softened, unsalted butter(I softened my butter at room temperature for 25 minutes) 2 cups of all-purpose flour 1/2 tsp. of salt 2/3 tbsp. of applesauce 3/4 cups of aquafaba(chickpea water)(found in 1 pound cans of chickpeas) An additional 2 tbsp. of granulated sugar Green food coloring(see helpful link) Red food coloring(see helpful link) 7 oz. of Apricot preserves 9 oz. of Strawberry preserves 2 oz. of semisweet baking chocolate Chocolate sprinkles 1. Put the 3/4 cups + 2 tbsp. of granulated sugar into a large bowl. 2. Cut the almond paste into French fry-like strips. Put the almond paste strips into the large bowl and mix the two ingredients together by breaking the almond paste further using a spatula if you're making this dough by hand. You want the resulting mixture to be something that's crumbly. 3. Add the sticks of butter a few pieces at a time into the large bowl. Beat the butter into the almond paste and sugar. A good technique is to use a spatula and butter knife simultaneously. The almond paste and sugar should stick to the butter. 4. In a measuring cup, put the flour in it and then top the flour with the salt. Pour the flour and salt into the butter mixture in the large bowl. Beat everything until it's well combined and looks like a dough. 5. Mix the applesauce into the dough. 6. Drain the liquid from a 1 lb. can of chickpeas into a medium bowl. Retrieve any chickpeas that fall into that bowl. 7. Discard 1/3 cups of the chickpea water. Whisk the rest of the chickpea water until it's foamy. 8. While whisking the foamy chickpea water, add the additional 2 tbsp. of sugar. Whisk the sugar and aquafaba until it forms stiff peaks. 9. Fold 1/4 cup of the whipped chickpea water into the dough in the large bowl. 10. Put the rest of the chickpea water into the dough and fold it into the dough until the dough is fluffy. 11. Divide the dough into 3 small bowls. 12. Set one of the three bowls to the side. This bowl won't be colored. 13. Put gloves on and dip a toothpick into the green food coloring. You don't need that much of it. Stir the green food coloring into the dough in one of the three bowls until the dough is green. 14. Dip a toothpick into the red food coloring. You're going to need even less of it since you want the dough to be a salmon pink color. Stir the red food coloring into the dough in the remaining bowl until the dough is a salmon pink color. 15. Wash and dry the large bowl out completely. Put the pink dough into the large bowl. 16. Top the pink dough with apricot preserves. Smooth the preserves out with a butter knife. 17. Top the apricot preserves with the green dough. 18. Top the white(uncolored) dough with the strawberry preserves. Smooth the preserves out with a butter knife. 19. Top the strawberry preserves with the green dough. 20. Put the semisweet chocolate into the 4th bowl and microwave the chocolate at 20-second intervals until the chocolate is fully melted. 21. Pour the melted chocolate on top of the green dough. Top the melted chocolate with chocolate sprinkles. 22. Put the large bowl into the fridge. Let the chocolate harden and set for 10-15 minutes. 23. Bon appetit!
1 Comment
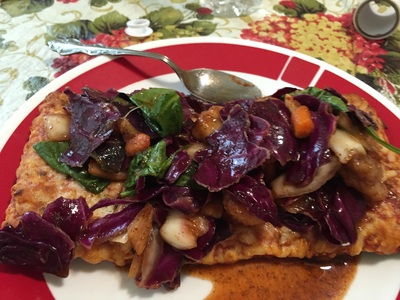
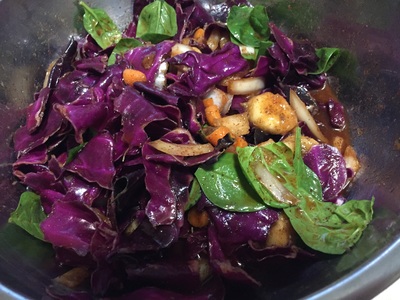
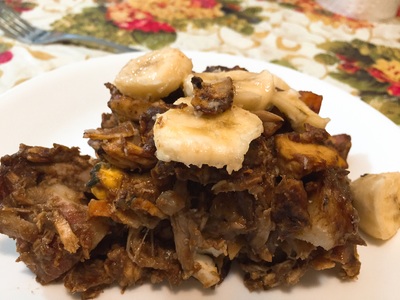
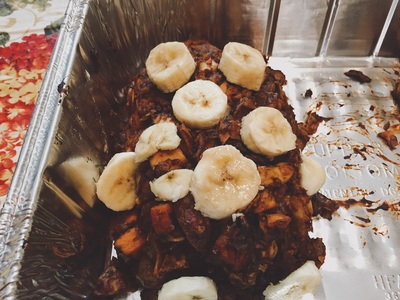
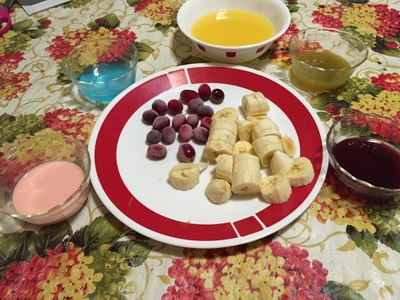
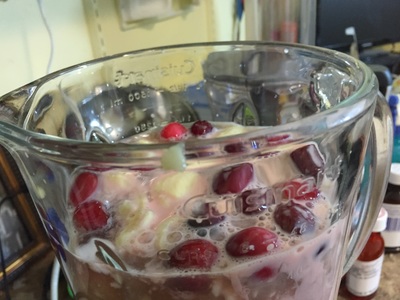
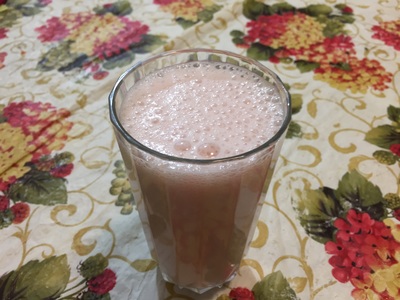
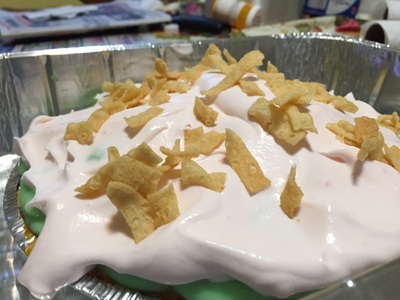
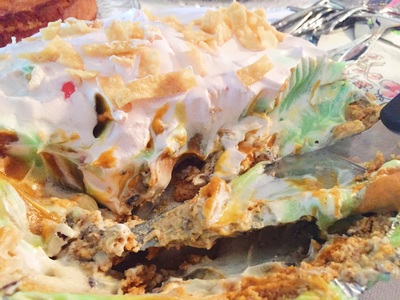
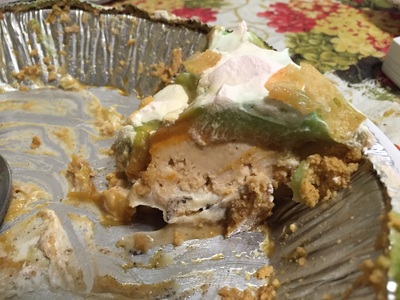
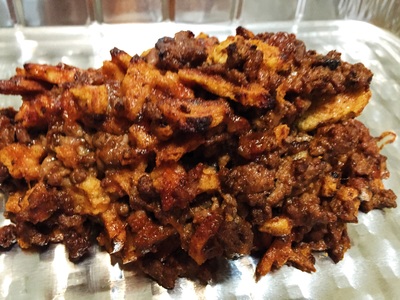
The list of dishes that haven't fallen victim to the rainbow-colored food craze is dwindling, now that I've created a Rainbow Kimchi! But seriously, kimchi is perfect for the rainbow food craze because it is naturally very colorful, and if you do it right, requires zero food dyes, which is bothering me about this rainbow food craze. I can't say the dish is fully natural, for I used blue soda(http://www.jonessoda.com/collections/jones-beverages/products/12-pack-of-berry-lemonade-jones-pure-cane-soda), although when I looked at the list of its ingredients, I couldn't find any food dyes. But soda is technically a man made beverage. I was a bit disappointed you can't see the chili powder or the blue soda in the picture on the right, but it's otherwise a very pretty kimchi dish. So why did I use onions in the kimchi? It may or may not be part of the rainbow(its outside is green but the inside is white), but it counterbalances the chili powder I used. Let me tell you, this kimchi tastes good on so many dishes. The first day I made it, I mixed it in with some spaghetti. The second day, I topped some pizza with it(see picture on left) while watching the pre-show of WWE Extreme Rules PPV, and the last day I mixed it in with some Mac and cheese(but I think with that one, the kimchi absorbed all the cheese powder, thereby making it less spicy, although that left plain elbow macaroni pasta.). When I tasted the kimchi, I first tasted the citrus flavor from the blue soda, which turned into the spiciness from the chili powder. My dad tasted it and spit it in the garbage because he said it tasted funny. I almost used different ingredients for the yellow and green ones- for the former, I bought a mango from the supermarket, but then I lost it. I didn't want to go back out just to get another one so I used the most abundant fruit in my household- the banana. For the latter, I wanted to use watercress, just like I did with the Champagne Kimchi I made in March but apparently watercress is out of season, so I used spinach instead. When you break apart the red cabbage leaves, it will leave a purple residue on your hands, which will require you to wash your hands several times and/or use Brillo to get it off you. You will need: For the cooking equipment: A large bowl Either aluminum foil, plastic wrap, or mason jars A large plate A small plate A 1-pound weight, like a can For the kimchi: 1 head of red cabbage, washed and rinsed 1 tbsp. of salt 1 tbsp. of vinegar(I used champagne vinegar) 1/2 a chopped up raw onion 2 tbsp. of chili powder 18 chopped up baby carrots 2 chopped up bananas 1 1/2 cups of blue soda(see helpful link) 1/3 cup of spinach leaves 1. Tear up the red cabbage by removing the leaves of it from the outside in. Cut these leaves into strips. Put these strips into the large bowl. 2. Wash the cabbage strips. 3. Add the salt and toss it with the cabbage. 4. Weigh down the cabbage with a large plate on top of the large bowl and put the 1-pound weight on top of the large plate. Let the cabbage be weighed down for 1 hour at room temperature. At some point, you will need to switch the large plate with a smaller plate as the cabbage is dried out and weighed down. 5. Drain out any excess liquid. 6. Add the rest of the ingredients except for the spinach leaves. 7. Stir in those ingredients. Don't worry if you hear any sizzling or bubbling from the soda- that's normal. So is the blue soda mixing in with everything and forming a brown juice. 8. Either put the kimchi in mason jars or cover the large bowl with plastic wrap or aluminum foil. Put the kimchi into the fridge and let it ferment overnight, or at least 24 hours, depending on how patient you are. 9. Mix the spinach leaves into the fermented kimchi. 10. Eat on its own(with milk to quell the spiciness), or on top of pizza, or mixed in with pasta. Bon appetit! Pig tails taste like pork or bacon- because they came from a pig! When I tried this meatloaf after I finished recording this video, I realized it didn't taste very good. It was very salty, so I assumed it was from the potatoes and sweet potatoes(which really came from microwaveable steamed bags and there's got to be extra salt in it to preserve its flavor while in a frozen state). Other possibilities included the yucca chips and canned salmon. But regardless of what was making the meatloaf too salty, I still wanted to salvage it so I doused the leftover meatloaf slices in honey, which offset the saltiness. Thanks to honey, this meatloaf won't go onto whatever Worst Recipes of 2016 video I end up creating at the end of the year. Not that this meatloaf is very healthy- it's far from it what with the starchy vegetables and pig tails. This meatloaf was so heavy, I could only stomach 2 oz. of it per meal, and leftover meatloaf doesn't last longer than 2 days. Well what about my dad? That option was off the table as he said the meatloaf was too fatty and he spit it into the trash can. :( There were so many moving parts(ingredients) to this meatloaf, I forgot an ingredient(which is rare for the Meatloaf Princess)- bananas or plantains. Unfortunately, I only realized my omission once the meatloaf was in the oven- too late to add them to the inside of the meatloaves. So I did the next best thing- put sliced bananas on top of the meatloaf and form it in the shape of a smiley face. But you can learn from my mistake and remember to put plantains or bananas into your meatloaf mixture if you ever decide to make this meatloaf. Yet after a year on YouTube, I have yet to hear anybody recreate one of my recipes and imitation is a sincere form of flattery(I think that's how the saying goes), so I decided to categorize all of the Meatloaf Princess videos for the immediate future under Entertainment instead of How To and Style(besides, I don't like associating myself with beauty vloggers. Yuck!) I wish YouTube had a Food category for videos though because then that's where all the channel's videos would go under. Also, I wish YouTube would let you choose more than one category for your videos. It's a tough call whether to classify your videos as How To and Style or Entertainment. But my YouTube idols, Epic Meal Time(https://www.youtube.com/user/EpicMealTime), categorize all their videos under Entertainment- even their "Handle It" recipe tutorials. But anyway, let's address the elephant in the room- what would possess me to make a meatloaf out of pig tails based on the national dish of some random country!? Four months ago, I found pig tails at a supermarket so of course, I bought them- they're super cheap- $2 for 4 pig tails! Surprisingly, they have just as much meat and fat as bone. But then again pig tails are the closest body part of a pig to the rectum that you can eat without going all Fear Factor and eating pig bum. And yes, I would consider eating pig bum if I had the opportunity to find it. I don't think my dad would've appreciated it if I said on camera pig tails are the closest pork body part to its ass that you'll probably ever get a chance to eat in your lifetime. I wanted to make a meatloaf out of pig tails instead of making a video very similar to the Chocolate Fried Pigs Feet(https://www.youtube.com/watch?v=dwBtPsgeNAI&index=4&list=PLRnQh2M6nqyVxxHD__jO1eVICleNrj54B) I made two months prior to purchasing the tails. When I touched the pig tails, I realized they were very meaty, so I could remove the meat from the bone. But first I had to boil the pig tails for almost 2 and a half hours(if you include the time it takes to bring the water to a boil). This recipe is based on the national dish of Belize- the Belizean Boil Up, which is basically a stew consisting of pig tails, fish, cocoa(the only cocoa I had was cocoa powder), and lots of starchy vegetables: http://www.thegutsygourmet.net/natl-belize.html I mention in my video that the pig tails may crackle during the time the meatloaf is cooking in the oven. It turns out I didn't hear any crackling while it was in the oven. However, the leftover meatloaf was definitely crackling in the microwave. And for the record, I've never been to Belize nor I am I of Belizean heritage. Makes 8- 2 oz. slices of meatloaf Total time: a little over 3 hours You will need: For the cooking equipment: A large saucepot A large bowl A lasagna pan Nonstick cooking spray For boiling the pigs tails: 4 pig tails, rinsed Enough water to submerge the pig tails in a saucepan 1 tbsp. of cocoa powder Onion powder Cayenne pepper For the rest of the meatloaf ingredients: 2 raw, whisked eggs 2 chopped up, hard-boiled eggs 10 oz. of sweet potatoes 10 oz. of potatoes 1/2 cup of tomato sauce Another 2 tbsp. of cocoa powder Pinch of garlic powder Pinch of onion powder Pinch of cayenne pepper Pinch of salt Pinch of black pepper 1 cup's worth of crushed yucca(cassava) chips 5 oz. of drained, canned salmon 2 chopped up bananas or plantains 1. Put the pig tails into the large saucepot and pour enough water into the saucepot to submerge them. 2. Bring the water and pigs tails to a boil on the stove. Cover the saucepot with a lid during the boiling process. 3. Once the water is boiling, continue to boil the pig tails 10-15 minutes before draining it. Keep the pot covered. 4. Clean your saucepot(by this point, it will have gunk on the rim of it. The gunk is probably pork fat, which I don't suggest you eat) and fill it with enough fresh water to submerge the pig tails again. 5. Repeat step 2. Add the cocoa powder(which will turn the liquid brown), cayenne pepper, and onion powder to the saucepot. Mix all the spices and powders into the water before the water boils. 6. Once the seasoned water is boiling, continue to boil the pig tails for another 2 hours. Keep the pot covered. 7. Stir the liquid and tails around every 10-15 minutes. The water will inevitably go down during the boiling process, so when it does, add 1 cup of water at a time until the water has fully submerged the tails. 8. Once the tails are done boiling, remove them from the saucepot and let them cool off on a plate for 10-15 minutes, or until you can safely remove the fat and meat from the bones without burning your fingers. 9. Remove the fat and meat from the tail bones once they're cool enough and put them into a large bowl. You can use a knife to remove the meat and fat from the bones if you're having a hard time. 10. Add the rest of the meatloaf ingredients to the large bowl. 11. Mix all the ingredients together until you get a firm meatloaf mixture. 12. Spray a lasagna pan with nonstick cooking spray. 13. Form 2 loaves. 14. Cook the meatloaves in a 375 degree Fahrenheit preheated oven for 30-40 minutes. Don't worry if you hear any crackling in the oven(or in the microwave as leftovers for that matter)- that's just the pig tails. 15.(Optional) Decorate the outside of the meatloaves with a smile made from chopped up bananas. 16. Bon appetit! This is not the first smoothie I've ever made. I can recall back to the year 2004 when I was 13 and my mom let me purchase The Idiot's Guide to Smoothies from Kohl's(a department store), of all places, in addition to my family's first blender. I still remember getting that book very dirty from making several of the smoothies from that book. My mom never liked when I wanted to make a smoothie because then she would have to clean up the blender, so I eventually stopped making smoothies. I had that blender for almost 10 years(most of the time it was unused) until I bought a newer, functional, not dusty one from Sur La Table. Smoothies were the first type of dish I've ever cooked for myself, even if it was just putting stuff into a blender and blending the contents of it. But when you think about it, smoothies are very similar to meatloaf and stews, in that it involves putting a bunch of ingredients together and cooking all of it in some fashion. Now smoothie recipes aren't going to become a regular thing on this channel. I just like rainbow-colored food so I figured I might as well make a smoothie, since a certain POPSUGAR video(https://www.youtube.com/watch?v=8E-RUgjbETE) doesn't include a blue ingredient in their smoothie- until I realized their recipe was a healthy rainbow smoothie. I guess including blue soda into a smoothie isn't considered to make a smoothie very healthy. But there are not many things in nature that are the color blue, save for blueberries, and even then, blended blueberries are actually purple in color. But you may be wondering where you can get blue soda. I used: HELPFUL LINK: Jones Berry Lemonade Cane Sugar Soda(http://www.jonessoda.com/collections/jones-beverages/products/12-pack-of-berry-lemonade-jones-pure-cane-soda). Initially, I envisioned this smoothie to just be a bunch of liquids blended together and nothing else. But there's no fun in making a smoothie without any fruit in it to be blended! Although I did take creative liberties in using orange juice as my orange ingredient, even though orange juice is yellow in color. Plus the green vegetable juice I used(V8 blend) is more of an olive green than grass green in color. When I was a kid, I thought the color pink was part of the rainbow and that it came after purple(violet), but my art teacher dispelled that assumption. So that's why I include pink ingredients into the smoothie. Of course, had I omitted the use of any pink ingredients, the smoothie would've turned out to be a much different color than pink. I said in the video that the cranberries and bananas were blended in but that wasn't really true- in some of the other glasses, I could detect a chopped up cranberry or a mushy banana that wasn't blended into a liquid. I believe the whole purpose of a smoothie is to blend ingredients together, not make a bunch of layers and stack them on top of each other in a blender. My dad liked the smoothie too. I'm a big professional wrestling fan, so when I was drinking this smoothie, the only voice in my mind was Chris Jericho saying, "Drink it in, man!" Jericho has this spiel of his where he stands on top of the ring and he tells the audience to drink in "The Gift of Jericho"- he's really talking about how great he is("The best in the world at what I do, do you understand!?"), which is then followed by boos from the audience since his character is a heel(villain). Just another interesting tidbit about the Meatloaf Princess. Makes 4- 8 oz. glasses and 1- 4 oz. glass of smoothie You will need: For the equipment: A blender For the smoothie: 1/2 cup of fresh or frozen(but not dried) cranberries 2 chopped up bananas A little over 1 cup of orange juice 1/3 cup of green vegetable juice A little under 1 cup of blue soda(see helpful link) 1/3 cup of grape juice 9 oz. of a strawberry yogurt protein drink 6 oz. of strawberry milk 1. Put all ingredients into a blender. Make sure the lid of the blender is closed tightly, otherwise there will be leakage during the blending process! Blend until the cranberries and bananas have turned into liquid. 2. Pour into a glass. Bon appetit! I decided to be ambitious this past Mother's Day and made not only an entree(the meatloaf stuffed in a black chicken that nobody on the Internet apparently likes) but also a dessert(this pie). That's maybe because my birthday is not for another six months and when my birthday comes around, I prefer to bring a birthday cake that is actually made by a professional baker, which isn't me. Although to be fair, I did make a sweet potato pie last Thanksgiving. I just didn't make a video of it to share with you all because it was a generic recipe I copied from the Internet. When I realized just how many varieties of pudding mixes my local supermarket sells(17 in total!), I realized that there were a variety of colors these puddings represent. But when most people think of pudding, they think of chocolate, which kind of too obvious of a flavor, which is why I omitted it from this recipe. Two of the puddings are hard to find, so here are the helpful links on where to purchase them: PUMPKIN SPICE PUDDING MIX: http://www.amazon.com/Jell-O-Instant-Pudding-Dessert-Filling/dp/B0078NMYEM/ref=sr_1_5_a_it?ie=UTF8&qid=1463519615&sr=8-5& STRAWBERRY PUDDING MIX: http://www.amazon.com/Jell-O-Instant-Strawberry-Pudding-Filling/dp/B005ZVOZL4/ref=sr_1_1_s_it?s=grocery&ie=UTF8&qid=1463519684&sr=1-1& Besides, every foodie on Instagram is obsessed with rainbow-colored food at the moment, and even though this isn't the traditional red through purple rainbow(which would require the use of artificial colorings and I tend to avoid those when I can), to me a rainbow can be a medley of colors. This recipe is also a satire on the rainbow-colored food trend. My initial thought in my mind was to make some sort of multi-layered pudding ice cream out of several of these flavors, but then I realized that would be too much work making six different flavors of ice cream. Then I thought of make a multi-layered pudding cake, but then I couldn't figure out how to incorporate a cake mix into the dessert as well. My final idea was to just make the puddings according to package directions, and just layer them on top of a pre-made graham cracker crust. Yet the most amount of layers I could find a pudding pie to have in a recipe from the internet was a grand total of four, and only one of the layers is actually pudding. So I decided to push the limit as to how many layers I could fit onto a pie. Initially this was going to be a 7-layer pie instead of a 6-layer one, but then I realized making another cream cheese layer and sticking it on top of the pie wasn't going to work. Apparently, even when you mix whipped cream cheese with other stuff, it doesn't spread as easily as frosting. Then I recalled the 4-layer pudding pie I saw online had the top layer being a whipped cream layer(Cool Whip, not Reddi-Whip, people!). But I thought a white whipped cream layer on top of this pie was going to be boring, so I mixed it with strawberry pudding. I wanted to not make the strawberry pudding just combine Cool Whip and the powdered form of it. But my dad convinced me to mix the prepare pudding with the Cool Whip, because nobody likes powdery whipped cream. On this rare occasion, he was right about this culinary decision(but he's still wrong 97% of the time). Harking back to not having chocolate in and on the pie, I didn't want to use chocolate chips to garnish the pie, because that would be too obvious of a culinary decision. Recalling how everybody on the internet loves a good sweet and salty combination(hello caramel sea salt!), I topped the pie with wonton strips I had in the pantry. My hypothesis was that the strips would provide a nice crunch to the pie, but they ultimately just softened up, which is not the worst thing in the world. So what did my extended family think of this pie? It was a hit(and I'm not joking this time!). If you look at picture #4, you notice that most of the pie is gone, although I had enough leftovers to tide me over for three more days after Mother's Day. Even my dad liked the pie(in addition to being a meatloaf traditionalist, he isn't particularly fond of chocolate, which this recipe doesn't have if you don't count the Oreo bits in the Oreo pudding). I'm thinking on planning on making a second version of a "rainbow" pudding pie next Easter that perhaps uses chocolate pie crust, flan, an almond butter frosting layer, rice pudding with raisins, butterscotch pudding(which I was going to put in the first version of a "rainbow" pudding pie, until I read the directions that said it has to be made on a stovetop, unlike the other pudding flavors I used that just require a combination of milk and pudding mix), and an Almond Joy pudding mixed with Cool Whip, topped with croutons. My inspiration for this recipe was from https://summerofpie.com/2012/03/26/seven-layer-bar-pie/ I have to admit this isn't a fast recipe. It took me 5 hours to make this pie, most of which is just letting each layer set in the fridge. But good things come to those who wait and patience is a virtue! So what were my dessert's competitors at Mother's Day:
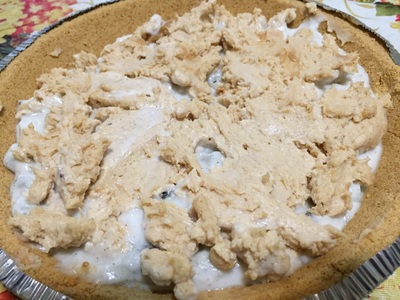
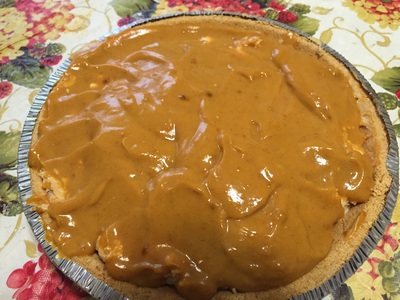
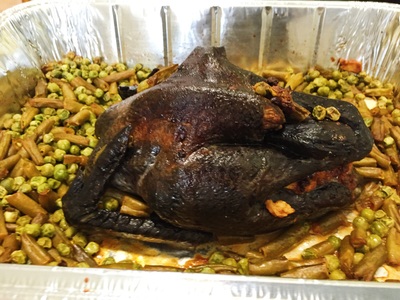
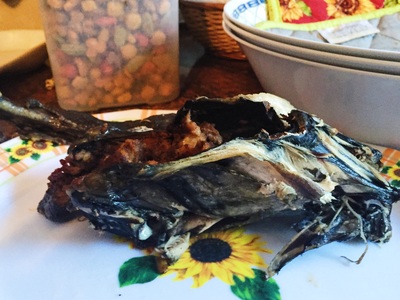
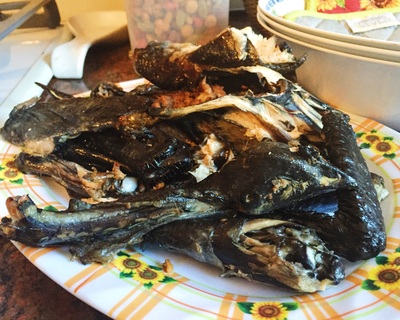
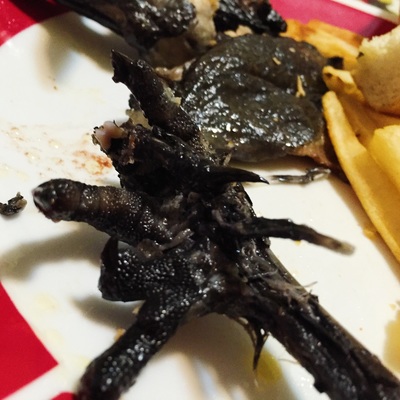
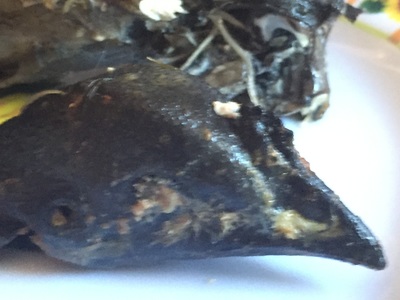
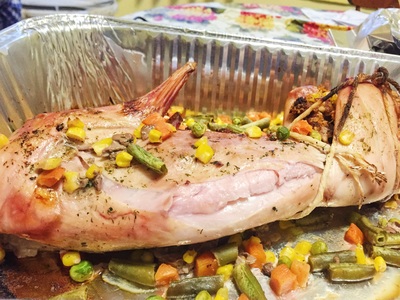
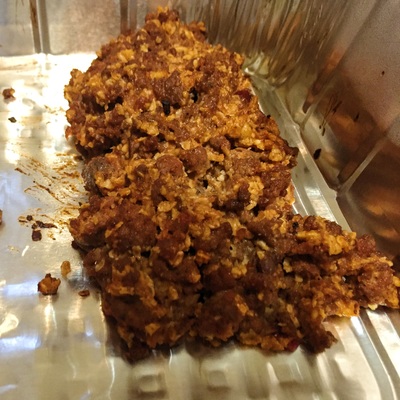
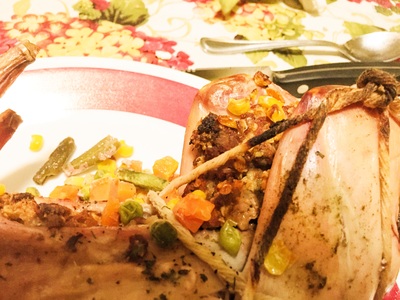
Out of all those desserts, mine was by the far the most original. As for best tasting, I'd still say it would be this pudding pie, with the fruit salad and rainbow cookies close runners-up(but I'm partial to rainbow cookies, which are my favorite type of cookie). My grandpa even raved about this pie days after he ate it! If this video gets the same amount of dislikes as the stuffed black chicken, then I don't know how to please you people because this channel is not about unoriginal recipes. It's about experimenting with food. But I guess art isn't meant to be appreciated. You will need: For the cooking equipment: A lasagna pan to hold the pie together after the fourth layer has been laid. A large bowl for mixing the peanut butter layer and strawberry pudding whipped cream layers For the pie: 1 pre-made graham cracker crust 1- 5 oz. box of Oreo pudding mix 1/2 cup of smooth or creamy peanut butter 1/3 cup of confectioner's(powdered) sugar 6 oz. of plain whipped cream cheese 1- 3.4 oz. box of pumpkin spice pudding mix(see helpful link) 1- 3.4 oz. box of pistachio pudding mix 1- 3.4 oz. box of strawberry pudding mix(see helpful link) 8 oz. of Cool Whip Wonton strips for garnish 1. Prepare the Oreo pudding mix according to package directions. Pour prepared Oreo pudding into pie crust. Put pie in fridge for 30 minutes to let this second layer set(the first layer is the graham cracker crust). 2. In a large bowl, combine the peanut butter, confectioner's sugar(granulated sugar won't do for this recipe because it's too grainy to mix with the peanut butter), and whipped cream cheese until you get a frosting-like consistency that is a peanut butter color. Spoon peanut butter layer on top of set Oreo pudding(see picture #1 for guidance- it's not going to completely cover the Oreo layer but try your best). Put pie in fridge for 60 minutes to let this third layer set. 4. Prepare the pumpkin spice pudding mix according to package directions. Pour prepared pumpkin spice pudding on top of peanut butter layer(see picture #2 for guidance). Put pie in fridge for 30 minutes to let this fourth layer set. 5. At this point, put pie in a lasagna pan so that it catches excess pudding. The pie will be very heavy in weight at this point. 6. Prepare the pistachio pudding mix according to package directions. Pour prepared pistachio pudding on top of pumpkin spice pudding layer. Put pie in fridge for 30 minutes to let this fifth layer set. 7. Prepare the strawberry pudding mix according to package directions. Combine prepared strawberry pudding with Cool Whip and put whipped cream on top of pistachio pudding layer. Put pie in fridge for 30 minutes to let this sixth and final layer set. 8. Garnish whipped cream with wonton strips to taste. 9. Bon appetit! This is another longer video that took 9 hours in the making for me to edit and upload. I wanted to explore all iMovie has to offer in terms of their built-in audio effects so a lot of time editing this video was spent trying to decide which sounds or songs fit the mood of the particular clip. But I finally uploaded this video! Now about the food itself. I bought the black chicken, which, according to the packaging it came in, originated from Canada(even though black silkie chickens are normally found in China, India, and Southeast Asia). I also didn't notice the words on the label that said "head and feet attached". The black silkie chicken in its defrosted state looked like a whole chicken you'd usually find at a supermarket- without a head or its feet. But it wasn't until my aunt informed me that the chicken had a head, which creeped her out(it creeped out everybody but myself who even took a glance at it). I didn't discover the chicken still had its feet attached until I had leftover black chicken for dinner the next day. Did you know black silkie chickens have 5 toes instead of the usual four? I didn't until I saw a black chicken foot up close and personal. You might be wondering where you can procure such an unusual chicken. I bought mine at a Korean supermarket that I traveled one county over for(it's called H Mart, the same location I bought the rabbit that I stuffed a meatloaf in). As I mentioned in the video, I served this chicken last week on Mother's Day when my extended family got together for a BBQ(hence the need to deconstruct the chicken into bite size pieces). I thought this was going to be a sit-down dinner, which is why I kept the chicken intact until I got to my aunt's house. It turns out the vegetables I surrounded the chicken with weren't eaten. But that's because there were plenty of better side dishes served than those vegetables, like macaroni salad, potato salad, egg salad, and some sort of cucumber mayonnaise(or ranch dressing) dish. I warmed up the chicken in a 325 degree Fahrenheit oven for 10 minutes but then my aunt insisted on keeping it in the oven for 30 minutes at 250 degrees F(my relatives were fighting over what food was going to be served in which order), thereby drying out the vegetables. But the chicken was the star of the dish, not the vegetables. So what did I decide to do with the chicken head(still with it's eyes and brain intact)? I ate all the edible parts of the head(the skin, brain, eyes, and what little meat was on the head). The taste of the brain and eyes was juicy and salty. It was delicious. If you're going to eat a chicken head(I salute you just for contemplating doing that), you need to watch out for the tiny bones of the chicken's skull. I had to spit out some of those bones on more than one occasion when I ate the head. How are black chickens traditionally served? In Chinese cuisine, they're served in the form of a chicken soup that is said to have healing properties, especially for pregnant women and new moms(I wish I could've told my pregnant sister that but she probably still would've said "No thanks" in that passive aggressive tone of hers). Here on the Meatloaf Princess channel, I don't stick to tradition. When I was researching how to cook this black chicken, I read somewhere the meat isn't normally eaten like most chickens because it's too lean. Well, my family couldn't tell the difference and neither could I. But unlike with most non-black chickens, you can't tell if the meat is cooked by color alone. With non-black chickens, it's pretty obvious if your chicken is still pink inside or pink in color. This is why you need a meat thermometer for this recipe. Even though I said the recipe would take 60-75 minutes, at the 75 minute mark, the internal temperature of the chicken thigh was 143 degrees Fahrenheit, which is considered raw chicken. My dad almost insisted on serving at this temperature but I told him in my best culinary judgment that I don't want to get people sick from my food(salmonella, anyone?). As for my uncle's raw/rare burgers cooked outside in 60 degree weather(unseasonably cold for May)... I said in the video that I poured sriracha on the green beans and garlic Parmesan sauce on the peas. That's half-true- I used Birds Eye Steamfresh Falvor Full bags Sriracha Green Bean and Garlic Parmesan Peas. But I suspect most of you viewers can't access those particular products at your local supermarkets. However, pouring sriracha on top of green beans and garlic Parmesan sauce on top of peas will suffice. You will need: For the cooking equipment: A frying pan A large bowl 2 lasagna pans Nonstick cooking spray A pastry brush A meat thermometer For the meatloaf: 12 ounces of ground beef Olive oil for browning the beef 2/3 tbsp. of onion powder 2 beaten and whisked eggs 1/2 cup of ketchup 2-3 cloves of black garlic(see helpful link) 2 pieces of tamarind, de-shelled and de-seeded Pinch of paprika Pinch of cayenne pepper Pinch of thyme Pinch of black pepper Pinch of salt 1 cup's worth of crushed up cinnamon raisin bagel chips(about 20 chips) For the chicken and everything else: 1 black silkie chicken, washed Pinch of paprika Pinch of cayenne pepper Pinch of thyme Pinch of black pepper Pinch of salt 2 cups of green beans in sriracha 2 cups of peas in garlic Parmesan sauce Olive oil for brushing the outside of the chicken 3/4 cups of sake cooking wine(the basting liquid) 1. Pour olive oil into a frying pan. Spread the oil throughout the pan and heat the oil up on a stovetop. 2. Once the oil is heated up, put your ground beef into the frying pan. 3. Brown the beef by moving it around the pan and turning it over until it's completely brown in color and no longer red or pink(which signifies raw beef. Raw poultry and raw beef don't go together in terms of food safety). 4. Put your browned ground beef into a large bowl. 5. Add the rest of the meatloaf ingredients into the large bowl. 6. Mix all the ingredients together until all the ingredients are distributed evenly among the meatloaf mixture. 7. Find the hole for where to stuff the chicken with meatloaf by separating the chicken's legs. 8. Season the inside of the chicken with paprika and cayenne pepper. Rub the spices as much as possible throughout the inside of the chicken. 9. Spoon as much of the meatloaf mixture as possible into the chicken(see step 7 on where to find said hole). I only managed to spoon 2 ounces of the meatloaf mixture into the chicken. 10. Spray a lasagna pan with nonstick cooking spray. 11. Put the stuffed chicken into the lasagna pan. 12. Surround the chicken with the green beans and peas. 13. Brush the outside of the chicken with olive oil, using a pastry brush. 14. Season the outside of the chicken with thyme, black pepper, and salt. 15. Pour the sake cooking wine onto the chicken. 16. Spray a second lasagna pan with nonstick cooking spray. 17. Form 1 loaf from the remaining meatloaf mixture. 18. Cook the meatloaf in a 375 degree Fahrenheit preheated oven for 10-15 minutes to cook the egg. Cook the chicken in a 375 degree Fahrenheit preheated oven for 60-75 minutes, or until the internal temperature of the meat of the chicken thigh is 165 degrees Fahrenheit. 19. Serve the chicken whole or break apart into smaller pieces. Eat the head and feet, if you dare(I mean, please). 20. Bon appetit! Some famous filmmaker(Stephen Spielberg, maybe?) once said it takes at least one hour to edit one minute of video. This saying cannot be more true than with this video- it took me over 10 hours over the course of 4 days to edit and upload this extra-long video for you all to see. But you probably don't care about that- you only care about wasting(or utilizing, hopefully) 10 minutes of your life watching this video. This video was supposed to be an Easter video, what with the creepy idea of eating the Easter Bunny. But alas, that wasn't meant to be as the aunt who hosts Easter dinner came down with the flu, along with the rest of her household(not including the dog). So Easter dinner was rescheduled to a Mother's Day Dinner(which is ironic considering my own mother passed away 7 years ago. :( But at least my other cousins have living mothers.). If you look at the date of when this video was uploaded(May 6), you'll notice it's before Mother's Day. Therefore, this isn't a Mother's Day video! I got two extra special videos in the pipeline for Mother's Day dinner coming up so stay tuned! Besides, my extended family probably wouldn't have warmed up to the idea of eating rabbit anyway. One of my aunt's mothers has traumatic childhood memories of bunnies being slaughtered on her family's farm(no joke!). This is why she refuses to eat rabbits. Of course, one of my aunt's best friends has cooked rabbits before, so I guess both relatives cancel each other out. The only people that ended up eating the rabbit was my dad and I(although if my grandma was still living with me, I probably would've pranked her by giving her a piece of rabbit meat and telling her it was chicken. After she would've eaten it, I would've told her she just ate a rabbit. Then she would've proceeded to call me a little stinker). When I ate some of the rabbit after finishing recording this video, I gave my dad a piece of rabbit meat. He put it in his mouth and then spat it into the trash can. But the next day, when I ate some leftover rabbit meat for lunch, he liked the rabbit meat. Conclusion: he didn't wanted be reminded of the source of the meat- a stuffed, headless rabbit. But that's OK, for most people would rather eat meat that is detached from the actual animal from where the meat came from(with the exception of turkeys on Thanksgiving). I got my rabbit from H Mart(that Korean supermarket chain) and I have to admit that even I was a little apprehensive about cooking this rabbit. I thought it would be super hard to find the abdominal cavity of the rabbit, but all you need to do is open the hindlegs(if you got the rabbit from a butcher. Otherwise, I can't help you on this one. Sorry.) and voila! You have the location of where to stick your meatloaf in(I apologize for any sexual innuendos this sentence may have triggered in your gutter minds.). I wanted to use rabbit sausage in the meatloaf, but when I went to the local gourmet supermarket where it's usually sold, they didn't have it. So I bought the next craziest type of sausage- wild boar sausage, which ended up tasting like Thanksgiving stuffing for some reason. If you have been following my videos, you may notice I usually use 93% ground beef. Yet in this video, I used 90% ground sirloin. That's because that was the leanest type of ground beef I had at the same supermarket I bought the wild boar sausage. You could use 93% ground beef and you'll still be fine. There will just be less fat from the beef during the necessary stovetop browning process. As for the apple cranberry oatmeal packets, I used those in the meatloaf as an homage to the very first entree I made for my extended family during Easter 2015- a beef meatloaf with the apple cranberry oatmeal packets as the meatloaf binder. In fact, the beef meatloaf that I stuffed inside the rabbit was almost the same as that Easter 2015 meatloaf, save for different spices I used(the Easter 2015 meatloaf used paprika and cayenne pepper instead of basil, oregano, sage, and cilantro). It's Cooking 101 not to cross contaminate raw meat with raw poultry. This is why I browned both the ground beef and the sausage(which came raw) before making the meatloaf and stuffing the rabbit. Important basting technique: When you are roasting or cooking a whole animal(like a turkey, rabbit, or chicken), you don't want it to dry out in the oven, so you should pour wine on top of the meat before putting it in the oven. Then every 10 or 15 minutes, you should baste the meat, which basically means taking the meat out of the oven and spooning the liquid on top of the meat. At some point all the wine will have evaporated during the cooking period, which is why you should surround the meat with vegetables. These vegetables provide extra moisture to the dish when the wine has evaporated. Besides, a whole meat by itself in a pan is pretty lonely, in my opinion. My initial plan was to surround the rabbit with canned yucca but the can was dented, so I had to dispose of it. Luckily, I had some frozen vegetables in the freezer. But I didn't want to cook it before putting it in the oven, which is why you should use the raw vegetables that come in those steamer packets. Those vegetables will cook anyway in the oven from a frozen state without the need of the a steamer bag. This was also the first time I used butcher's twine(here's a helpful link on where to get it: http://www.amazon.com/Librett-Durables-Butchers-Cotton-185-Feet/dp/B000I1WNV0). Side note: butcher's twine makes for a great cat toy. At first, my dad thought butcher's twine couldn't be subjected to the high heat of an oven. Logically though, there's no point in using the twine if it can't be used in the oven, since you can't eat raw meat without getting sick(except for steak tartare). The butcher's twine blackens in the oven but it doesn't catch fire, so it's therefore oven-safe. As for the taste of the rabbit, I can describe it as a leaner cut of chicken(if that is such a thing, considering chicken is considered to be a lean meat). But think of the taste as a watery, buttery version of chicken. That's how I would describe it to someone who has never ate rabbit meat. Here's the recipe: For the cooking equipment: A frying pan A spatula A large bowl 2 lasagna pans A pastry brush Butcher's twine(see helpful link) Meat thermometer For the meats: 1 pound of 90-93% ground beef 0.8 pounds exotic, raw sausage links of your choosing(I used wild boar, but you could use rabbit sausage. Just don't use frankfurters. That would be gross.), cut up into 1-inch pieces Olive oil for browning the meats A 1.5-3 pound rabbit, washed, skinned, cleaned, and headless Other meatloaf ingredients: 2/3 tbsp. of onion powder 2 beaten and whisked eggs 1/2 cup of ketchup Pinch of dill weed Pinch of sage Pinch of oregano Pinch of basil Pinch of cilantro Pinch of black pepper Pinch of salt 2 packets of instant oatmeal(I used apple cranberry-flavored oatmeal, but you could use whatever flavor you like) Spices inside the rabbit: Oregano Basil Black pepper Ingredients surrounding the rabbit: 3/4 cups of a cooking wine(1 1/2 cups if your rabbit is over 3 pounds)(I used sake cooking wine, but white wine works too) 1 bag's worth of steamer frozen vegetables that have been removed from the bag(drained canned vegetables work too) Basil Sage Dill weed Black pepper Salt 1. Heat olive oil in a frying pan. Once the oil is heated up, put your ground beef into the frying pan(I usually just take pieces of ground beef and put them in the frying pan so that they brown faster, rather than just putting the whole block of ground beef into the frying pan at once). Brown your ground beef by moving it around the frying pan, making sure the meat isn't pink or red at all! The meat has to be completely brown. Once that happens, put the browned, ground meat into a large bowl. 2. Either use a 2nd frying pan or rinse and wash your sole frying pan really well. Make sure the pan is completely dry because oil and water don't mix! 3. Pour olive oil into the dry, clean frying pan and heat the oil up. Once the oil is heated up, put the cut up sausage into the frying pan. Brown the sausage links by moving it around the frying pan and make sure none of the sausage pieces are pink in color. Once your sausage is browned, put that also into the large bowl. 4. Put all other meatloaf ingredients into the large bowl. Mix all the ingredients together until they are all distributed evenly among the cohesive mixture. Crumble the browned sausage links into a ground meat-like consistency when you're forming the meatloaf mixture. 5. Season the inside of the rabbit(just spread out the hindlegs of the rabbit) with oregano, cilantro, black pepper, and salt. Rub the spices into the meat. You want the spices rubbed into as much of the inside of the rabbit as possible. 6. Spoon your meatloaf mixture into the abdominal cavity of the rabbit and between the hindlegs. Reserve any remaining meatloaf mixture that doesn't fit into the rabbit(you definitely won't be able to put the entire mixture inside the rabbit). 7. Using butcher's twine, sew the hindlegs of the rabbit shut by making a knot with the twine. Think of it as tying shoelaces. 8. Spray a lasagna pan with nonstick cooking spray. 9. Put the stuffed rabbit into the lasagna pan. 10. Surround the rabbit with the canned or frozen vegetables of your choosing(I used a mixture of green beans, carrots, and corn). 11. Brush the outside of the rabbit with olive oil using a pastry brush. 12. Season the outside of the rabbit using basil, sage, dill weed, black pepper, and salt. 13. Pour the cooking wine on top of the rabbit. 14. Spray a second lasagna pan with nonstick cooking spray. 15. Form 2 loaves from the reserved meatloaf mixture. 16. Bake the meatloaves in a 400 degree Fahrenheit preheated oven for 10-15 minutes, just to make sure the raw egg is fully cooked. Any longer and the meatloaf will dry out. Yuck! 17. Cook the stuffed rabbit and vegetables also in a 400 degree Fahrenheit preheated oven, but for 60-90 minutes, or until the internal temperature of the hindlegs(using a meat thermometer) reaches 160 degrees Fahrenheit. 18. Baste the rabbit every 15 minutes until it's done. 19. Let the rabbit rest at room temperature for 5-10 minutes. 20. Bon appetit! Today is exactly 366(or 367, considering 2016 is a leap year) since I uploaded my very first video to YouTube(https://www.youtube.com/watch?v=8IWg8VBLMMY). So I consider April 30 to be the Meatloaf Princess channel's birthday, and in honor of that milestone, I decided to make "champagne" jello(the "champagne" being white sparkling grape juice, but you could use actual champagne if you wanted to in this recipe).
I have learned a lot in this first year as a YouTuber(but no so much that I could write a whole Medium post about it). Skills I have learned:
Skills I haven't mastered:
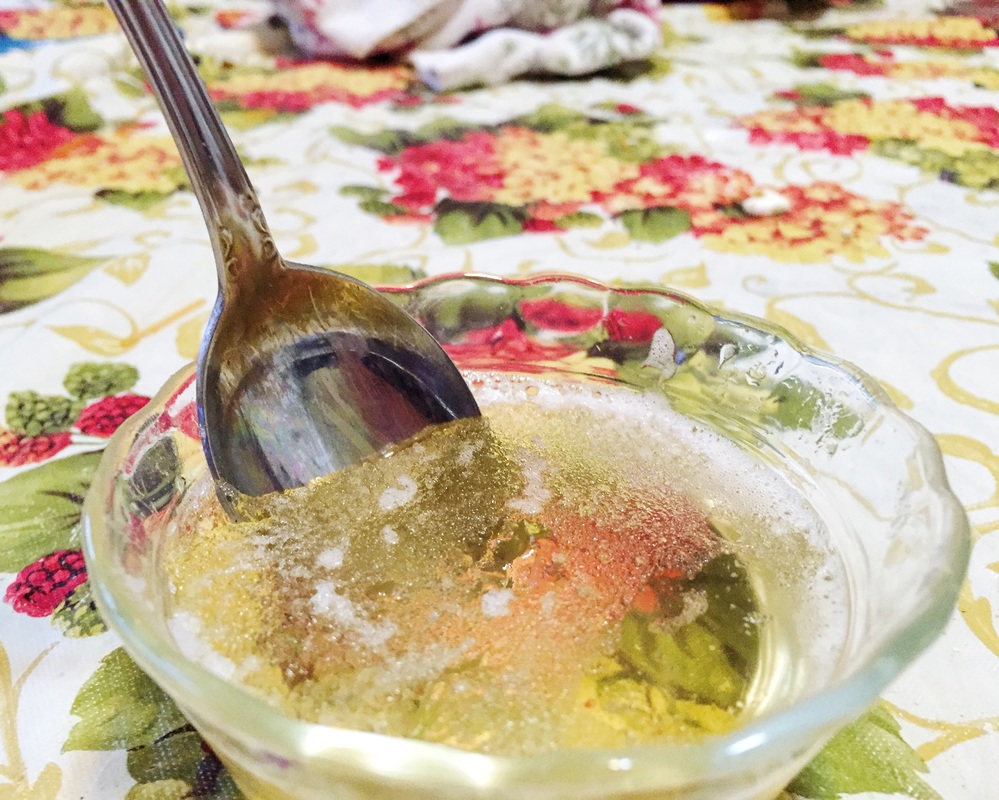
I was going to make a champagne jelly, using actual champagne, but that would require me purchasing a jelly maker(because I have no clue how to use a water bath since I've never canned anything in my life). Besides, I have prior experience making my own gelatin, so this wouldn't be any different, or so I thought. I followed the recipe from http://sprinklesomefun.com/2012/12/sparkling-jello-jigglers-new-years-eve-party.html for the most part, and the end result was some white stuff on top of each of the small bowls of jello. Mind you, the white stuff is perfectly harmless(I'm pretty sure it's just foam from the carbonation of the white sparkling grape juice), but it still bothered me. Even I thought the recipe was not so aesthetically pleasing to the eye. In fact, I ate one of the 4 bowls of jello and I almost threw away the rest of the jello since I was dreading eating it, so I forced myself to eat it- by putting 2 of the 4 bowls of jello in my lunchbox at my day job that I usually eat from after the end of my work day. The only food in that lunchbox was the jello bowls. The 4th bowl tasted weird after three days of it being in the fridge, but that's what happens with homemade gelatin- as it gets older, the taste gets worse. So unlike cheese or wine, homemade jello doesn't improve with age. The taste of the jello was OK, it tasted like a solidified version of white sparkling grape juice that was slightly sweeter due to the granulated sugar that I put in. This is actually a pretty simple recipe- you only need 3 ingredients. Even I got to admit the chemical reaction of the sugar dissolving into the juice was cool. It was like I was back in 10th grade chemistry class again(or freshman year chemistry in college). Makes 4 small bowls. You will need: For the cooking equipment: A microwave-safe dish with a lid 4 small bowls Plastic wrap For the jello: 2 cups of "champagne"(white sparkling grape juice) 2 tbsp. of granulated sugar 2 packets of unflavored gelatin 1. Put all the ingredients inside the microwave-safe dish. Mix all the ingredients together. There will be white stuff on top of the liquid, that's not going to go away during the cooking process. 2. Let the gelatin mixture sit at room temperature for 3 minutes to let the gelatin bloom. 3. Cover the dish with its corresponding lid and microwave the mixture on high for 3 minutes. 4. Pour the mixture into 4 small bowls. Be very careful as you may lose some of the gelatin mixture during the transferring process, as most microwave-safe dishes don't pour liquid easily into smaller bowls! 5. Cover each small bowl with plastic wrap. Refrigerate the small bowls with the gelatin mixture in the fridge for at least 2 hours, or until it sets. 6. Bon appetit! |
Archives
October 2019
Categories
All
|
 RSS Feed