|
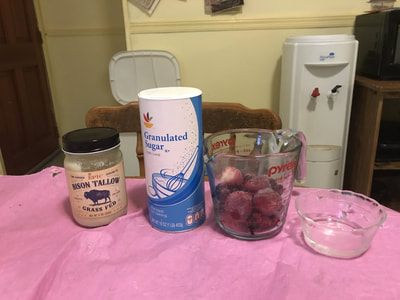
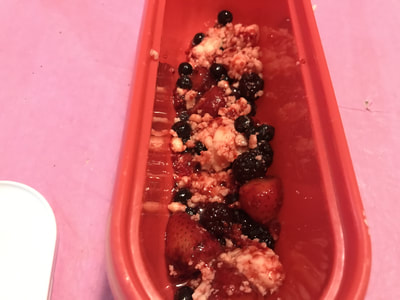
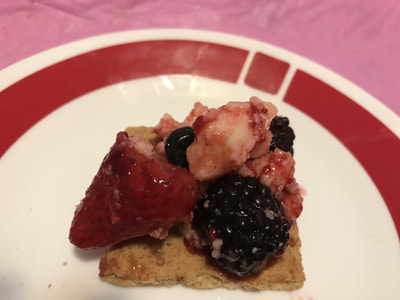
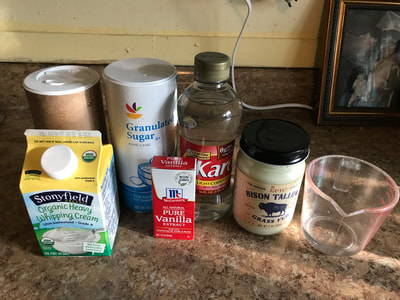
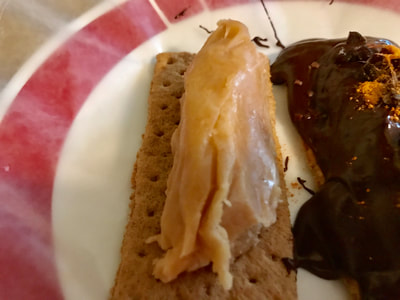
You can eat your animal fat in the form of akutaq(Eskimo ice cream), but instead of reindeer fat, we're going to use bison tallow! There's even berries in the ice cream, just like in traditional akutaq. This is a pretty easy recipe, with only 5 ingredients needed, but it is one of the most unusual dessert recipes I've done on this channel. I've never eaten pure tallow before. So what does bison tallow taste like? The flavor of any pastry made with shortening basically with the texture of Bunch a Crunch candies(without the chocolate, of course). But let me tell you, combining all the ingredients can get pretty greasy- I had to wash my hands 5 or 6 times before they're were no longer greasy. It's best to only have 1 tbsp. of akutaq at a time, as each tablespoon has 14 grams of fat and 130 calories, especially if you don't have a gallbladder like myself. I find my stomach really hurts if I eat too much roasted coconut butter or any fat. But even though 1 tbsp. sounds paltry, putting it on a graham cracker square makes the dessert more sizable and filling. I got two tips for you guys about this recipe: 1. If you keep your tallow in the fridge, it's best to let it thaw out at room temperature with the lid off for 2 hours. That way spooning out the tallow is easier. 2. Let the akutaq sit at room temperature for 30 minutes with the lid off to soften it and that way spooning out the akutaq is easier. My dad tried the akutaq and he said the tallow tasted like pastry. HELPFUL LINK: Bison Tallow: epicbar.com/animal-oils-detail/39 Makes 1/2 pint of ice cream You will need: For the cooking equipment: A large bowl A whisk An ice cream tub For the akutaq: 1/4 cup bison tallow(see HELPFUL LINK) 1/4 cup granulated sugar 2 tbsp. water 1 cup mixed berries Graham cracker squares to serve the akutaq on 1. Mix the tallow and sugar together by making the tallow chunks smaller, using the handle of a whisk. Add the water and mix everything until it's fluffy. 2. Fold in the berries and shape the akutaq with your hands until it looks like 1 blob of ice cream. 3. Transfer the akutaq to an ice cream tub and freeze the akutaq overnight. Bon appetit!
0 Comments
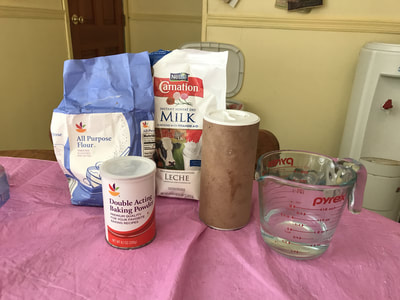
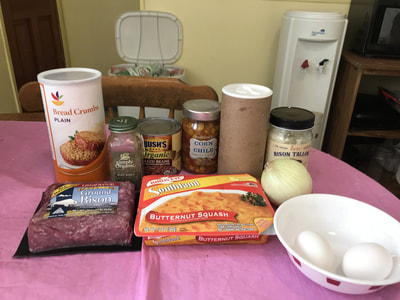
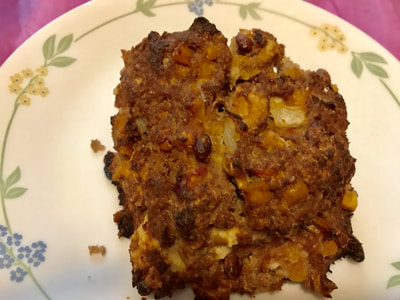
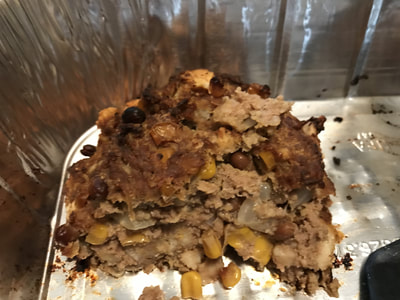
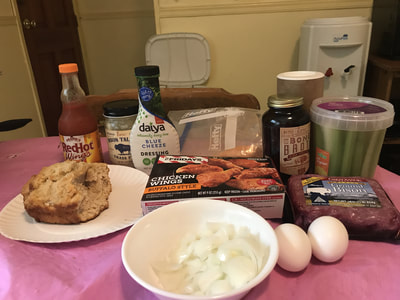
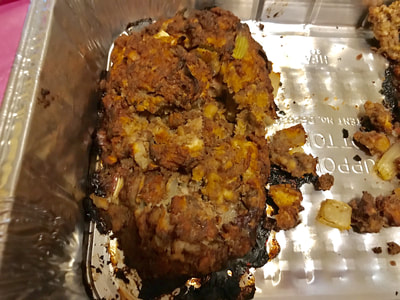
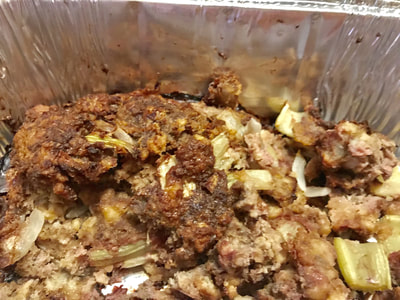
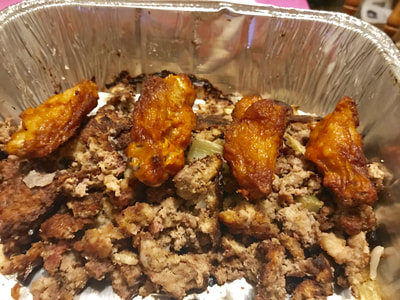
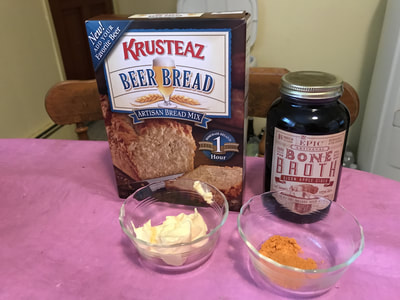
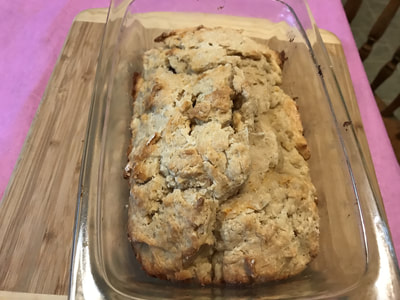
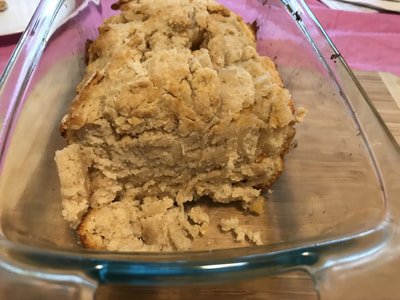
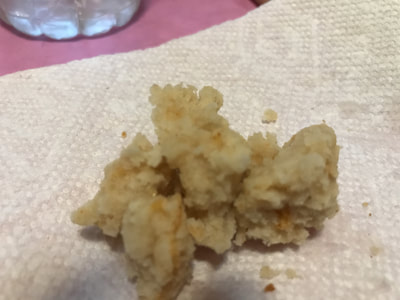
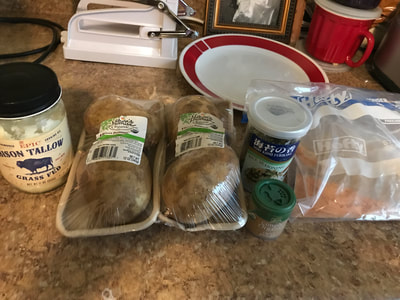
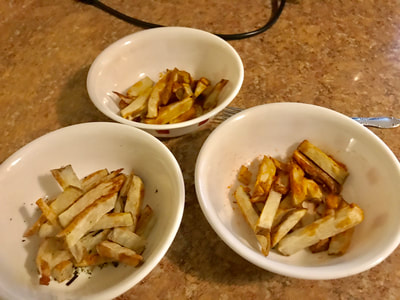
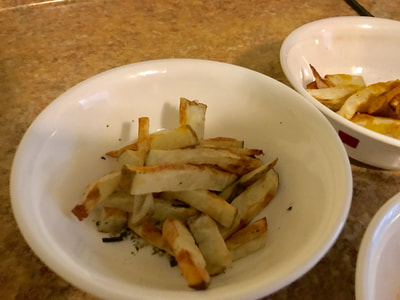
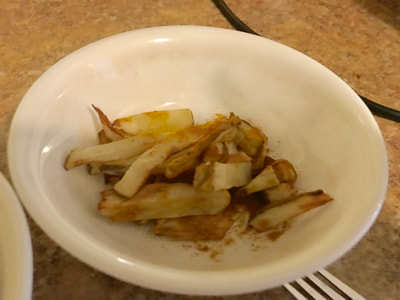
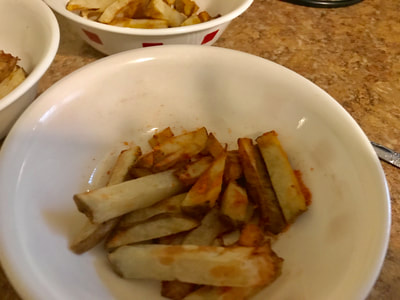
This meatloaf combines a national symbol of America(bison) with the three main agricultural crops of various Native American groups: corn, squash, and beans; with a version of Navajo fry bread holding it all together. Perfect for Thanksgiving if you're planning that far ahead! I would've made this meatloaf around Thanksgiving but my jar of bison tallow expires in September. Fry bread is notoriously known for being unhealthy(according to Wikipedia, a plate of it is 700 calories!), but that's not why I followed this recipe to make baked fry bread- I just didn't want to have to deal with a pot of hot oil. The fry bread was crispy like a biscuit but didn't have any flavor to it, but I only made fry bread to make the meatloaf more authentically Native American. I added plain breadcrumbs to the meatloaf because i knew the fry bread, even when crumbled up, wasn't going to hold the meatloaf together on its own. You don't even need any extra spices besides salt and pepper since the corn salsa provides all the spices. The meatloaf tasted spicy from the salsa but also sweet and crunchy from the bison. My dad liked the meatloaf, though I didn't know what he meant by saying it was a "classic bison meatloaf", since he's never had anything like that before. HELPFUL LINKS: Bison Tallow: www.amazon.com/Buffalo-Tallow-Grass-Pasture-Raised/dp/B01N7CQ12Y/ref=sr_1_5_a_it?ie=UTF8&qid=1501362924&sr=8-5& Corn Salsa: www.amazon.com/Trader-Joes-Chile-Tomato-less-Salsa/dp/B00QXZWF9A/ref=sr_1_2_a_it?ie=UTF8&qid=1501362897&sr=8-2& You will need: Baked Fry Bread Makes 5-6 slices For the cooking equipment: A large bowl A baking sheet Parchment paper Nonstick cooking spray For the bread: 1 cup all-purpose flour 1 tsp. powdered milk 1 tsp. baking powder 1/4 tsp. salt 1/2 cup water 1. Mix the first 4 ingredients in a large bowl, then add the water. Mix all the ingredients until you get a dough, but be careful not to overmix it. 2. Place a sheet of parchment paper on top of a baking sheet and spray the paper with nonstick cooking spray. 3. Spoon the dough onto the parchment paper to make 5-6 slices. Flatten each slice of dough with the back of a spoon. 4. Bake the bread in a 350 degree Fahrenheit oven for 10 minutes, or until the center is no longer doughy. Native American Meatloaf You will need: For the cooking equipment: A frying pan A spatula A large bowl A lasagna pan Nonstick cooking spray For the meatloaf: 1/2 chopped onion 2 tbsp. bison tallow(see HELPFUL LINKS) 2 beaten and whisked eggs 1/2 cup corn salsa(see HELPFUL LINKS) 1/2 cup baked beans 1/2 cup butternut squash puree Pinch of salt Pinch of black pepper Baked fry bread(see above) Enough plain breadcrumbs to hold the meatloaf together 1 lb. ground bison 1. Put the bison tallow into a frying pan. Turn the stove on. Using a spoon and fork, spread the tallow around the pan until it's all melted. 2. Once the tallow has melted, put the chopped onion into the frying pan and sautee the onions by moving them throughout the pan and coating them in the melted tallow with a spatula. Sautee the onions until they're translucent. 3. Put the sauteed onions into a large bowl, along with the next 6 ingredients. 4. Crumble up the baked fry bread and put the crumbled bread into the large bowl, along with some breadcrumbs and the ground bison. 5. Mix all the ingredients up until you get a firm meatloaf mixture. If the mixture still isn't firm, add more breadcrumbs until firm. 6. Spray a lasagna pan with nonstick cooking spray. Form 2 loaves from the meatloaf mixture. 7. Bake the meatloaves in a 350 degree Fahrenheit oven for 90 minutes, or until the internal temperature of the meatloaves reaches 160 degrees Fahrenheit. Bon appetit! If an ingredient has the word "buffalo" in it, than it's probably in this bison(buffalo) meatloaf, where every ingredient is either made from bison or has something to do with buffalo wings! This recipe was almost a complete disaster. I don't know what happened but after the meatloaf was done cooking for 90 minutes, I opened it up and I saw pink meat inside. So I put it back in the oven for another 30 minutes and it was still pink. I wanted to use my meat thermometer to check the internal tempeature of the meatloaves but it (in)conveniently died on me when I was filming, so not wanting to risk eating raw buffalo meat, I dissected both meatloaves and got rid of the pink meat. All that was remaining was a really ugly pile of stuff that from a distance, looks like stuffing you'd have on Thanksgiving. But that's where the buffalo chicken wings come in. I wanted to use them in some fashion in this meatloaf, so I cooked one wing in the microwave to see if it had bones in it(it did) and bones aren't edible. I could've dissected the wings and put the chicken meat in the meatloaf, but first of all, it couldn't be deboned in its frozen state, which means I'd have to cook the wings before deboning them and the chicken would become overcooked in the meatloaf mixture after 2 hours. So instead of putting the wings in the meatloaf, I put them on the meatloaf(or remnants of it anyway) to make it look presentable. But you may be wondering why I suddenly decided to care about how I presented my food- I just wanted something that resembled a meatloaf. So how did the meatloaf taste? Dry from being in the oven so long. Buffalo meat is very lean anyways so becomes dry faster than beef. But a dry meatloaf is best remedied by lots and lots of ketchup and in my book that's better than potentially consuming a raw meatloaf. Surprisingly, the wings were a lot spicier than the actual meatloaf. Granted, I only put 1 tsp. of buffalo wing seasoning in the mixture but it's always better to underseason than overseason. The celery, even after 2 hours in the oven, were still crunchy(which is pretty much all this vegetable is good for, as they have no flavor whatsoever). My dad doesn't like spicy food, so he didn't try this meatloaf. But the truth is, I wanted to take one for the team in case this meatloaf made me sick and not my dad. It's just so disconcerting when I see pink meat, which is why I always order my steaks and burgers medium. HELPFUL LINKS: Bison Tallow: www.amazon.com/Buffalo-Tallow-Grass-Pasture-Raised/dp/B01N7CQ12Y/ref=sr_1_10_a_it?ie=UTF8&qid=1500836676&sr=8-10& Bison Broth: epicbar.com/bone-broth-detail/43 You will need: For the cooking equipment: A frying pan A large bowl Nonstick cooking spray A lasagna pan For the meatloaf: 1/2 chopped onion 2 tbsp. bison tallow(see HELPFUL LINKS) 2 beaten and whisked eggs 5 chopped up celery sticks 1 tbsp. blue cheese dressing 3.5 oz. bison broth(see HELPFUL LINKS) 1 tbsp. buffalo sauce 1 tsp. buffalo wing seasoning Pinch of salt 1 1/2 cups crumbled up Bison Broth Bread(see www.meatloafprincess.com/recipes--blog-posts/bison-broth-buffalo-bread) 1 pound ground bison 4 cooked buffalo chicken wings per meatloaf 1. Put the bison tallow into a frying pan. Turn the stove on and melt the tallow by moving it around the pan with a fork and spoon. Make sure all the tallow chunks melt. 2. Once the tallow is completely melted, put the chopped onion into the frying pan and saute it by moving the onion pieces throughout the pan, coating them in the tallow. Saute until the onions are translucent in color. 3. Put the sauteed onions into a large bowl, along with the next 7 ingredients. 4. Crumble the bread with your fingers by rubbing the bread in between 2 fingers to get breadcrumbs. 5. Put the ground bison into the large bowl and mix all the ingredients up until you get a firm meatloaf mixture. If you still see some liquid in the bottom of the liquid mixture, add some more crumbled bread to the mixture and if you don't have any more of that bread, just use plain breadcrumbs. 6. Spray a lasagna pan with nonstick cooking spray. Form 2 loaves from the meatloaf mixture. 7. Bake the meatloaves in a 350 degree Fahrenheit oven for 90-120 minutes, or until the internal temperature of the meatloaves reach 160 degrees Fahrenheit. 8. Top the meatloaves with the wings. Bon appetit! Here's an ingredient you normally don't put into a loaf of bread- bone broth, specifically bison bone broth! Plus the loaf is seasoned with buffalo seasoning in the dough to make it extra buffalo-ey. The only reason I made this bread is for an upcoming video where it's pretty much a meatloaf with a huge emphasis on the word buffalo and I needed a bread that can hold the meatloaf together, so I flavored this bread with buffalo wing seasoning(which in it of itself doesn't come from actual bison). My favorite way to make any sort of quick bread is with beer bread mix, because you can pretty much use any liquid you like in place of water, like bison bone broth(which is a thing). The bread surprisingly tasted mild, with only a faint hint of buffalo wing seasoning(if you want the bread to actually be spicy, use 1 tbsp. instead of 1 tsp. like I did). Even my dad liked the bread and he doesn't like spicy foods! What I like about the bison broth is how it smells like apples(well the actual name of the broth is "Bison Apple Cider") and it makes the bread sweet. You wouldn't even know there was bison inside the bread if I didn't tell you! This is a pretty easy recipe, with only 4 ingredients needed. HELPFUL LINK: Bison Broth: epicbar.com/bone-broth-detail/43 You will need: For the cooking equipment: A large bowl Nonstick cooking spray A loaf pan A small bowl For the bread: 19 oz. beer bread mix 12 oz. Bison broth(see HELPFUL LINK) 1 tsp. buffalo wing seasoning 2 tbsp. melted butter(makes the top of the loaf crunchy) 1. Put the first 3 ingredients into a large bowl and mix all the ingredients together until you get a dough. 2. Spray a loaf pan with nonstick cooking spray. Put the dough into the loaf and shape the dough so that it touches the bottom of the pan completely. 3. Melt the butter in a small bowl for 30 seconds in the microwave. Pour the melted butter on top of the bread. 4. Bake the bread in a 375 degree Fahrenheit oven for 45-55 minutes, or until the dough is fully cooked(just poke a toothpick through the center of the loaf and if it comes out clean, the bread is done). Bon appetit! The next few videos I'm posting on this channel all involve bison tallow, in case you're wondering! The picture of your needed ingredients has 4 potatoes in it, but I ultimately only used 1(and that one wasn't even that picture- it was my dad's), as upon inspection, all 4 potatoes had sprouted just 5 days after I bought them(sprouted potatoes are purple and poisonous!). You may have also noticed a sweet potato in the video that I didn't use but that was because 1 large potato's worth of fries was enough for me, along with some chicken nuggets on the side. Judging by the pictures of the fries, you wouldn't even notice all the fries came from just 1 potato! But why did I air-fry the potatoes instead of deep-frying them? Well, for starters, I needed to hold onto my limited quantity of bison tallow over for several other videos(you only need 1/2 tbsp. of an oil or melted fat to air-fry potatoes)and to boot, even if I did have enough tallow to deep-fry the potato, it's just messier having to heat fat up just for deep-frying. Plus air-frying is healthier than deep-frying! The fries turned out better than I imagined- they were crispy and golden(to an extent but not like McDonald's fries), just like they would be served at a restaurant, with the curry powder-spiced fries reminding me of Bombay Potatoes that I once had as part of a frozen dinner(or maybe it was at the Asian restaurant at my alma mater). My dad(who tried the furikake fries) liked the fries. He even said we should open up a fast food joint with these fries- yea that's not going to happen, for many reasons:
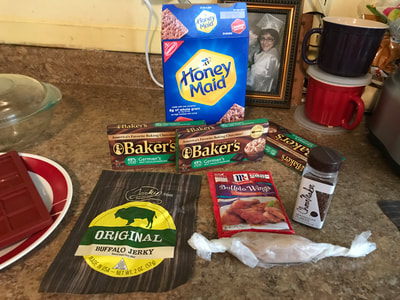
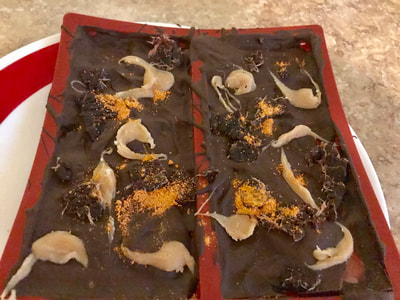
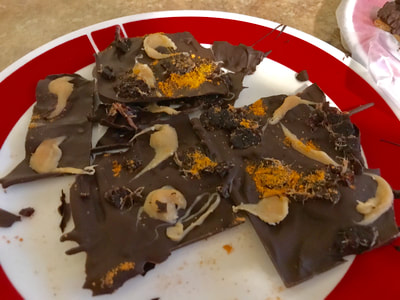
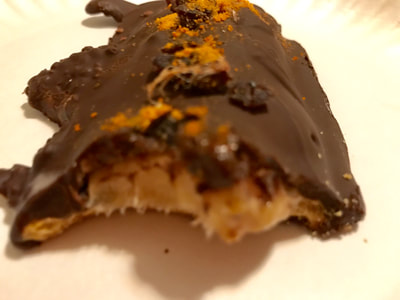
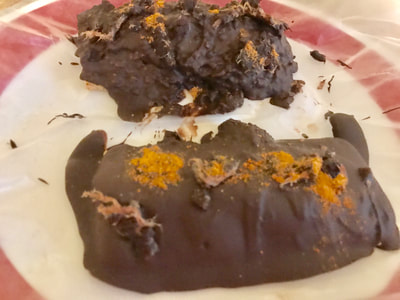
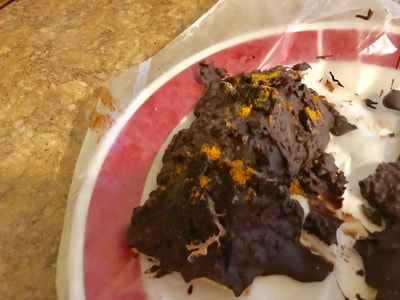
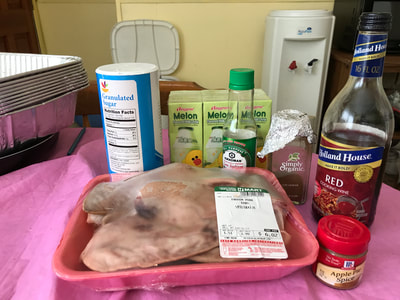
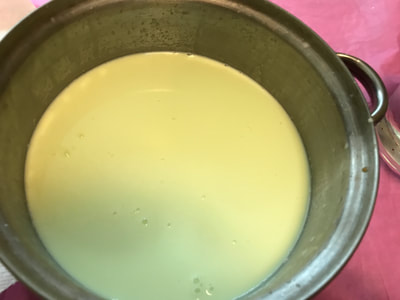
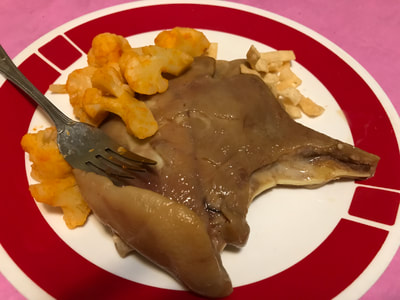
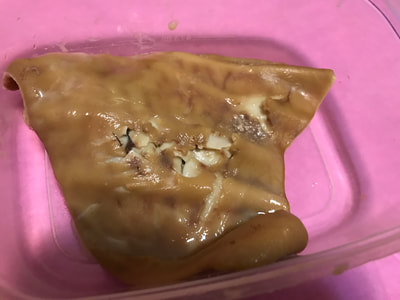
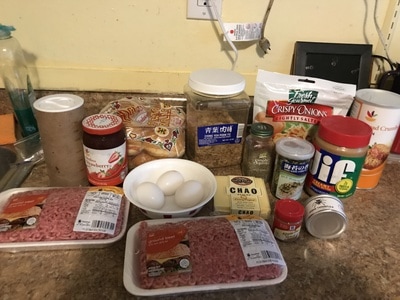
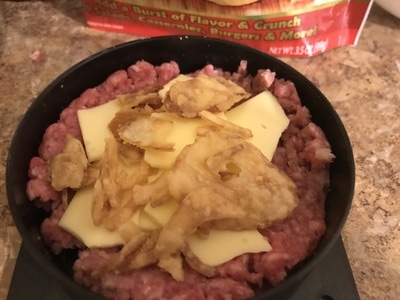
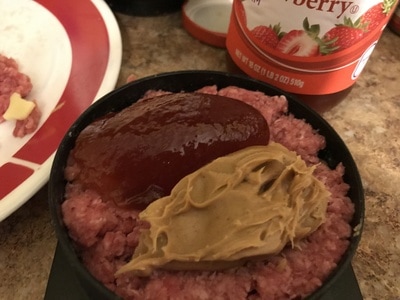
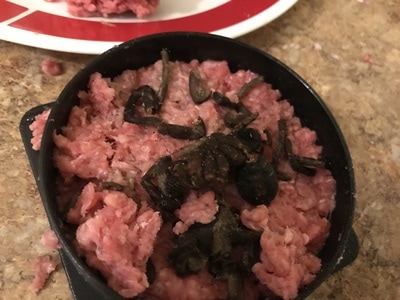
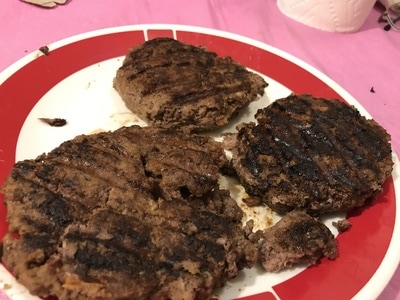
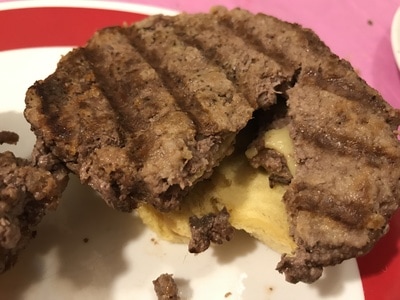
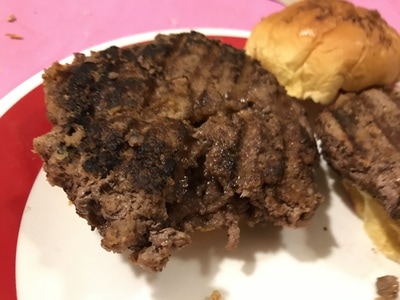
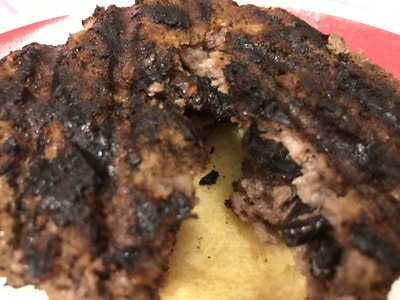
But I'll take that as a compliment any day of the week! HELPFUL LINKS: French Fry Express: www.surlatable.com/product/PRO-1416536/Sur+La+Table+French+Fry+Cutter Bison Tallow: www.amazon.com/Buffalo-Tallow-Grass-Pasture-Raised/dp/B01N7CQ12Y/ref=sr_1_9_a_it?ie=UTF8&qid=1500232019&sr=8-9& You will need: For the cooking equipment: French Fry Express(see HELPFUL LINKS) An air-fryer 3 small bowls For the fries: 1 large potato 1/2 tbsp. bison tallow(see HELPFUL LINKS) Furikake 1/4 tsp. curry powder 1/4 tsp. buffalo wing seasoning 1. Cut the potatoes into slices or quarters(maximum), as the French Fry Express is really tiny. 2. Insert the potato slices or quarters into the French Fry Express and pull the lever down really hard until fries come out of the blades. This step requires a lot of elbow grease! 3. Melt 1/2 tbsp. bison tallow in a small bowl in the microwave for no more than 40 seconds. If the tallow is still solid, just mash it up. 4. Pour the melted tallow onto the fries and toss the fries in the melted tallow. 5. Once your air-fryer is done preheating, put the fries into the cooking basket, put the basket back in the fryer, and either press the French fry button on your machine or set the temperature to 400 degrees Fahrenheit for 13-20 minutes. Then press start. 6. Take the basket out every 5 minutes to check on the fries and shake the basket before returning it to the machine. Repeat until the fries are golden brown(only took me 13 minutes). 7. Pour the fries onto a large plate and put the fries into 3 small bowls. Coat the first bowl of fries in furikake, the second in curry powder, and the third in buffalo wing seasoning by tossing the fries in the seasonings. Bon appetit! When I have tallow, I turn it into caramel, and then put it into homemade chocolate bars along with other toppings. The theme for these recipes can best be described with one word: buffalo/bison. There's the bison tallow, bison jerky, and buffalo wing seasoning. There's a reason I don't make my own caramels very often: it's time consuming. I didn't mention this in the video but the time it took to get that candy thermometer to reach 248 degrees Fahrenheit from the second I simmered the caramel mixture was about 45 minutes, which is just as long as it takes for the caramel to harden. And don't get me started on cutting the caramel into pieces- I ended up piercing the aluminum foil pan and cut myself in the process. Of course, all the nonstick cooking spray in the world can't help the caramel from sticking to the pan. On the other hand, I do love making chocolate bars(and not just because I work at a chocolate factory as my day job)- there's always chocolate left over in the bowls that I get to lick(only at home, of course)! There was a little fly in the ointment with the amount of chocolate I had available to melt for the twix bars- I thought I had 4 oz. of baking chocolate when in actuality I only had 2. However, I had some chocolate sprinkles, so I thought that would make up the difference, except the sprinkles didn't melt, which is why one of the twix bars doesn't look very smooth. Bison Tallow caramel tastes like other caramel, but compared to beef tallow caramel(see www.meatloafprincess.com/recipes--blog-posts/caramel-made-from-beef-tallow), the former is less greasy than the latter. Bison tallow is leaner than the kind that comes from a cow. My dad didn't try anything in this video, as caramel is too sticky for him and chocolate keeps him up at night. HELPFUL LINKS: Bison Tallow: www.amazon.com/Buffalo-Tallow-Grass-Pasture-Raised/dp/B01N7CQ12Y/ref=sr_1_10_a_it?ie=UTF8&qid=1500143321&sr=8-10& Bison Jerky: www.amazon.com/Original-Natural-Buffalo-Jerky-Preservatives/dp/B00TYTIRY4/ref=sr_1_3_a_it?ie=UTF8&qid=1500143408&sr=8-3& Candy Bar Mould: www.amazon.com/Freshware-CB-607BR-Silicone-Break-Apart-Chocolate/dp/B00CBGPPTC/ref=sr_1_1?ie=UTF8&qid=1487534466&sr=8-1& Bison Tallow Caramels You will need: For the cooking equipment: A medium saucepot A large 3-4 quart saucepot A candy thermometer A square 8-inch baking dish Nonstick cooking spray Wax paper 1 cup heavy cream 5 tbsp. bison tallow(see HELPFUL LINKS) 1 tsp. salt 1/2 tsp. vanilla extract 1 1/2 cups granulated sugar 1/4 cup water 1/4 cup light corn syrup 1. Put the first 4 ingredients into a medium saucepot. Bring the contents of the saucepot to a boil. 2. Once the contents are boiling, turn the flame off completely and move the medium saucepot to a cool burner. 3. Attach a candy thermometer to a large saucepot and put the rest of the ingredients in there. 4. Bring the contents of the large saucepot to a boil, stirring the mixture until the sugar completely dissolves. 5. Gently swirl the boiling mixture with a spoon. Let the mixture boil until it turns a light caramel color. 6. Once the mixture is a light caramel color, pour the bison tallow mixture in the medium saucepot into the sugar mixture. Be very careful, the bison tallow mixture is still hot! The mixture will bubble, so at this point, reduce the heat to a simmer. 7. Let the mixture simmer until the temperature on the candy thermometer reads 248 degrees Fahrenheit exactly, stirring occasionally. If the temperature goes down, stir it. 8. Spray a square 8-inch baking dish with nonstick cooking spray. Pour the caramel mixture into the baking dish. The caramel is very hot! 9. Let the caramel cool at room temperature for 45 minutes. 10. Spray a sharp knife and fork with nonstick cooking spray. Cut the caramel into 1-inch squares(ideally). Try not to pierce the aluminum foil! Put each square onto a large sheet of wax paper(given that the caramel is greasy). 11. Wrap the wax paper around the caramel horizontally. Twist each end of the wax paper. 12. The caramel should last 2 weeks at room temperature. Use it in a chocolate recipe, dip it in melted chocolate, or eat it as is. Bon appetit! For the chocolate bars: You will need: For the cooking equipment: A large, microwave safe bowl with lid A candy bar mould(see HELPFUL LINKS) Wax paper A large plate For the chocolate bars: 8 oz. Baker's semisweet chocolate Bison Tallow Caramel(see above) Bison Jerky(see HELPFUL LINKS) Buffalo Wing Seasoning For the Twix bars: 4 oz. Baker's German's chocolate(using chocolate sprinkles in place of some of it isn't recommended) 1-3 cinnamon graham cracker sheets Bison Tallow Caramel(see above) Bison Jerky(see HELPFUL LINKS) Buffalo Wing Seasoning Meatloaf Chocolate Bars 1. Break apart the Baker's chocolate into pieces. If it's hard to break apart, just put the chocolate against your chest to break it. Put each piece into a microwave-safe bowl. Put the lid on the microwave-safe bowl and microwave in 30 second intervals, until the chocolate is melted. Stir after every 30 second interval(it took me 90 seconds to melt all the chocolate). 2. Spoon the melted chocolate into a clean, completely dry candy bar mould. 3. Once the chocolate is in the mould, work quickly to put the toppings on: remove the wax paper from 1-2 bison tallow caramels. Then, break apart the caramels and bison jerky into flat pieces. Put the toppings on the chocolate. Sprinkle buffalo wing seasoning on top of the chocolate. 4. Rap the chocolate a few times to remove the air bubbles from the chocolate by banging it against a counter or flat surface. 5. Put the mould in the fridge to let the chocolate set for 45-60 minutes. 6. Demould the chocolate by bending the mould to get the chocolate bars out of it. 7. Bon appetit! Meatloaf Twix Bars 1. Put wax paper on top of a large plate. 2. Break apart the Baker's chocolate into pieces. If it's hard to break apart, just put the chocolate against your chest to break it. Put each piece into a microwave-safe bowl. Put the lid on the microwave-safe bowl and microwave in 30 second intervals, until the chocolate is melted. Stir after every 30 second interval(it took me 60 seconds to melt all the chocolate). 3. Place 1 whole cinnamon graham cracker sheet on the wax paper. Remove the wax paper from a large piece of bison tallow caramel. Place the caramel on top of the graham cracker. 4. Top the caramel with the melted chocolate. You want all the chocolate to fully coat the caramel and graham cracker! 5. Once the bar is fully coated in chocolate, break apart some bison jerky into bits and put the bits on top of the chocolate. Sprinkle the bar with buffalo wing seasoning. 6. Repeat steps 3-5 to make 1-2 more bars. 7. Place the bar in the fridge to let the chocolate set for 45-60 minutes. 8. Once the bars have set, leave them out at room temperature; otherwise the caramel will become too hard to chew!. Bon appetit! So how in the world did I discover milk that is flavored(and tastes) like melon? I found it at an Asian supermarket and if I lived in the Southern Hemisphere(where it's currently winter in July), I probably would've used the melon milk in some sort of stew. But 'tis not the season for stew up here in the Northern Hemisphere and serendipitously, I had to figure out what to do with the 6 pig ears i bought for just 6 bucks! After doing my online research on how to cook pig ears, I discovered one of the ways to cook it is to braise it in water for 2 1/2 hours. Instead of all of the liquid being water in this video, I used melon milk instead! Ultimately, the pig ears didn't taste like the melon milk it was braised in but it did taste like bacon(which also happens to come from a pig) in the form of a thin steak, with the fatty parts of the ears being reminiscent of the richness that is beef bone marrow. Surprisingly, my kitchen smelled like popcorn as the pig ears were braising, even though the ears didn't taste like popcorn. But popcorn isn't a bad smell either! You just can't eat pig ears for dinner(because that would be boring), so I had some veggies in the form of buffalo cauliflower to serve as a color contrast to drab brown that is braised pig ears, along with some wonton strips for a textural contrast and Korean BBQ sauce for dipping the pig ears in. Preparing the ears was very interesting, to say the least. In case you didn't know, pig ears are hairy, so you have to shave the hair off with a disposable razor. Do not use shaving cream- that stuff isn't edible! Speaking of shaving cream, I think of the reboot of The Gong Show when I think of shaving cream, with "Albert Sing-a-Long" singing Benny Bell's 1946 song "Shaving Cream" halfway throughout each episode. These lyrics stick in my head: "Last night when I walked into my bathroom I stepped in a big pile of ...shhhhh . . . aving cream, be nice and clean. . . . Shave ev'ry day and you'll always look keen." If the singer stepped into a pile of shit instead, that would be hilarious, but then one has to wonder why there was a pile of shit on the floor in the first place. #philosophicalrant I'm pretty sure you couldn't say the word "shit" back in 1946 though. You may notice I only cooked 4 ears in the video when I mentioned I had 6. Well that's because my largest saucepot only had room for four ears. But I didn't waste the other 2, for I used them in Korean pancakes the following night. Note to self: pig ears don't like to be sauteed! But I don't blame them because I wouldn't want to pour hot oil over my ears either. My dad initially said he was going to try a piece of the pig ears, but he chickened out at the last moment. :( HELPFUL LINK: Melon Milk: www.amazon.com/Binggrae-Melon-Flavored-Drink-6-pack/dp/B00PXDYZZA/ref=sr_1_1_a_it?ie=UTF8&qid=1499540898&sr=8-1& You will need: For the cooking equipment: Disposable razors A large saucepot with lid For the dish: 4-6 pig ears(available at many Asian supermarkets) Enough water to fill 60% of your large saucepot At least 24 oz. melon-flavored milk(see HELPFUL LINK) 1/4 cup red cooking wine 3 tbsp. soy sauce 2 tbsp. granulated sugar Pinch of apple pie spice or star anise Pinch of cinnamon Serve with: Veggies(I used buffalo cauliflower) Wonton strips Korean BBQ sauce 1. Thaw the ears out in the fridge for 24 hours. If there's still ice on the ears after that, just remove it with your fingers. Shave all the hair of the pig ears with disposable razors by shaving up and down the ears. You want the pig ears to feel smooth to the touch. 2. Pour enough water to fill 60% of your large saucepot and bring that water to a boil. Once the water is boiling, carefully drop the pig ears into the boiling water. You want the water to ideally submerge the ears. 3. Parboil(partially boil) the ears for 5-10 minutes to get rid of any impurities. Note: the water will stop boiling once you put the pig ears in, as the ears are at room temperature by this point. Count down from 5-10 minutes once the water starts boiling again. 4. After parboiling, take the ears out of the boiling liquid and drain the water. Clean the saucepot. 5. Once the saucepot is cleaned, pour the melon milk into it. If there's not enough milk to fill the saucepot 60% of the way, add water until you reach that point(I needed 2 cups of water). Pour the wine, soy sauce, granulated sugar, apple pie spice or star anise, and cinnamon into the large saucepot and mix all the ingredients up. 6. Place the pig ears into the saucepot and bring everything to a boil. 7. Once the melon milk mixture is boiling, reduce the heat to a simmer, put the lid on the pot, and let the ears simmer(braise) for 2 1/2 hours. Submerge the ears in the liquid every once in a while, as they have a tendency to float to the surface. 8. Once the ears are done braising(simmering), take them out of a saucepot and onto a plate. Place the ears into the fridge for 30 minutes to let them chill to room temperature. 9. Serve with veggies, wonton strips, and Korean BBQ sauce. Bon appetit! So why in the world would I stuff a tarantula inside a perfectly good burger? Because tarantulas are the weirdest edible insects I know of and most people are disgusted by any type of spider. If that is too weird for your liking, I also made 2 other stuffed burgers with sane fillings- chao cheese and french fried onions, and peanut butter & jelly. Plus the buns are decorated too! I kind of enjoy trolling people I know with disgusting recipes- I just love seeing the reactions on their faces when I tell them about my creations. Of course, just making a video with one type of stuffed burger kind of would be boring and short, so I made two other stuffed burgers that sound more appetizing to the mere mortal. And just to be more extra, I decorated the buns! So how did I stuff the burgers: with a Grillaholics Stuffed Burger Press(see HELPFUL LINKS)! It's convenient but you can stuff burgers by hand. Still, the recipe directions below are for if you're using the press. Tip for thawing out 80/20 ground beef: Leave it in the fridge to thaw out for 36-48 hours(the fat in the meat takes longer to thaw out than the actual beef itself). I tried thawing for 24 hours and the meat was still frozen solid. To quickly thaw it, I had to put it in a sealed Ziploc bag and submerge the bag under cold for water for 15 minutes. I don't recommend you do this as you run the risk of the meat getting wet! So the big question on your mind is- what does a tarantula taste like? Here's the blow by blow about it: The legs- first had the texture of a crunchy pretzel which turned into a soft pretzel, which turned into some sort of unpleasant taste I've never experienced before in my mouth. The body- juicy like a cherry tomato(due to the internal organs inside the tarantula being crushed) and tastes like silkworm pupae, which is basically a wet sneaker. Yea, I think I turned you off cherry tomatoes and pretzels for life. Sorry not sorry. The interesting thing about the tarantula, which was in plastic wrapping, inside a can is that the directions on the can say to eat immediately or store inside an air-tight container. My dad didn't let me try to store it but all you got to do to not be chicken like my dad is to just get a plastic container with a lid and seal tightly. So what exactly is chao cheese? It's a vegan, coconut milk, fermented tofu cheese that tastes like muenster cheese or provolone- really delicious! But just stuffing a burger with cheese sounds a little too normal, so I added French-fried onions to the filling and you get a flavorful onion taste in your mouth from the burger it was stuffed in. And of course, putting peanut butter and jelly inside a burger is basically combining a common sandwich filling inside another sandwich(the burger). Though I probably should've followed the directions of this link to ensure the peanut butter and jelly didn't melt during the grilling process... I wasn't originally going to make an apple pie spice bun. In fact my original idea was to top the bun with chocolate sprinkles- but then I realized said sprinkles would melt in the oven and the end result would be a soggy, chocolatey burger bun. Remember what I said about my dad being chicken earlier? Yea, he didn't try the tarantula burger- but he did try a piece of the peanut butter and jelly burger. Unfortunately, all he could taste was beef, but that's not a bad thing either(then again it was a tiny piece I gave him). HELPFUL LINKS: Stuffed Burger Press: www.amazon.com/Grillaholics-Stuffed-Burger-Press-Recipe/dp/B0140PKJUQ/ref=sr_1_4?ie=UTF8&qid=1499188511&sr=8-4& Edible Tarantula: www.thailandunique.com/canned-edible-tarantula-spider Pork Floss: www.amazon.com/Cooked-Dried-Pork-Product-Large/dp/B0086XSQRM/ref=sr_1_2_s_it?s=grocery&ie=UTF8&qid=1499188737&sr=1-2& Furikake: www.amazon.com/JFC-Nori-Furikake-Seasoning-Ounce/dp/B0006G5KEY/ref=sr_1_1_a_it?ie=UTF8&qid=1499188266&sr=8-1& You will need: Makes 3 stuffed burgers For the cooking equipment: Stuffed Burger Press(see HELPFUL LINKS) George Foreman Grill or any grill A meat thermometer A small bowl Basting brush A lasagna pan For the stuffed burgers: 1 lb. 80/20 ground beef Plain breadcrumbs Salt Pepper For the filllings: Burger #1: 1 Slice Chao cheese French-fried onions Burger #2: Peanut butter Jelly Burger #3: 1 edbile tarantula(see HELPFUL LINKS) For the decorated buns: 3 hamburger buns 1 egg white 1 tbsp. water Burger #1: Pork floss(see HELPFUL LINKS) Burger #2: Apple pie spice Burger #3: Furikake(see HELPFUL LINKS) For each of the stuffed burgers: 1. Roll 3 oz. ground beef into a ball and flatten it with your hands. Put the flattened ball into the press and smush it with the lid. 2. Break apart the lid and make a hole in the patty with the stuffer. 3. For burger #1:
For burger #2:
For burger #3:
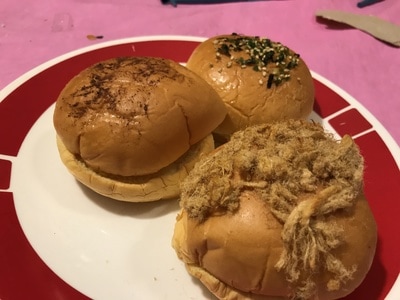
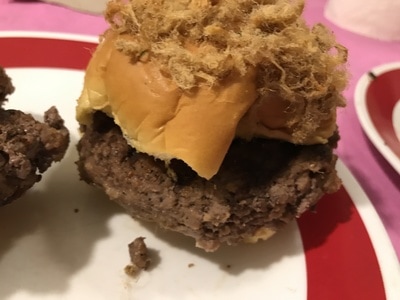
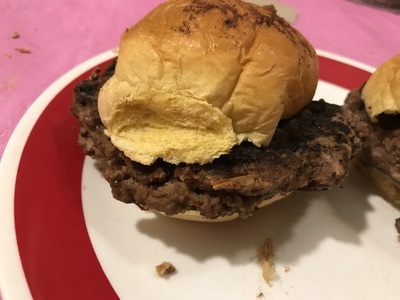
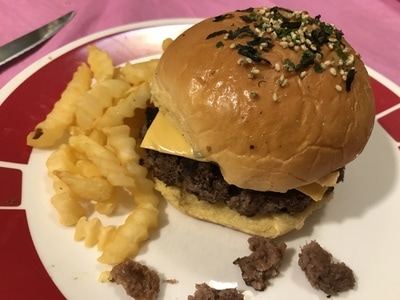
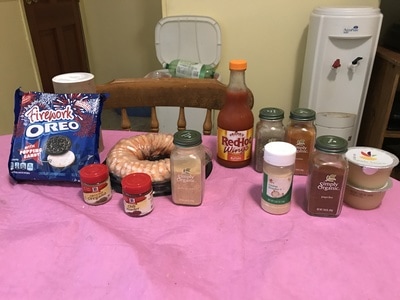
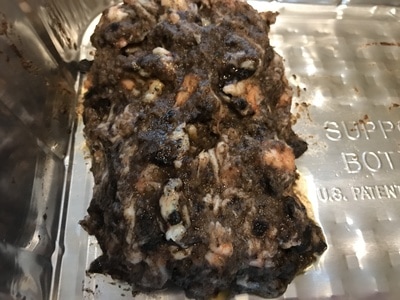
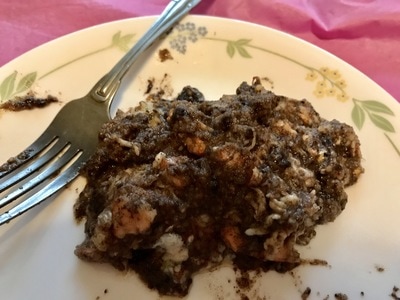
4. Cover the fillings with 2 oz. ground meat, making sure all of the filling is no longer visible. Reassemble the lid and press the patty closed with the lid. 5. Detach the base and put the patty onto a plate. 6. To bind the patties, pour plain breadcrumbs on the patties and rub it in the patty. Season the patties with salt and black pepper & rub it in the patties as well. 7. Preheat your grill and once it's done preheating, place the patties onto the grill. If you're using a George Foreman Grill, cook one patty at a time. Close the lid of the George Foreman Grill and grill the patties until the internal temperature of them reach 140 degrees Fahrenheit(for a medium burger, which is my personal preference). Of course, if you have an outdoor grill, you're going to have to flip the patties halfway through the grilling process. It's important to use a meat thermometer for checking the burgers' temperature as going by visual appearance alone is a terrible indicator as to doneness. For the decorated buns: 1. In a small bowl, mix the water and egg white together. Dip the basting brush in this mixture and brush the tops of the buns with this mixture. 2. Top one bun with apple pie spice, another with pork floss, and the last with furikake. 3. Bake the buns in a 375 degree Fahrenheit oven for 6-8 minutes, or until the egg white on the buns are dry. Assemble the burgers(I paired the chao cheese and French fried-onion stuffed burger with the pork floss bun, the peanut butter and jelly-stuffed burger with the apple pie spice bun, and the tarantula-stuffed burger with the furikake bun). Put American cheese, lettuce, and ketchup in between the top and bottom buns, in addition to the stuffed patties(optional). Bon appetit! I'm always game when it comes to trying new foods, so when I saw on Instagram that Firework Oreos were coming to stores, I knew I had to incorporate it into some sort of meatloaf for the 4th of July. Luckily in my list of meatloaf ideas on my phone there was something called "firecracker shrimp" that I knew would fit with the concept of Firework Oreos. Firecracker shrimp is an Asian appetizer that is basically spicy shrimp. This is actually the 2nd attempt at this meatloaf, as the first one had Pop Rocks in it, but the Rocks made the meatloaf taste artificial. Plus I used canned baby shrimp instead of cocktail shrimp, since they're closer to a ground meat consistency than their larger counterparts. (To me anyway), canned shrimp tasted weird, like it just came from the ocean and was devoid of any shrimp flavor. I knew I should've gotten more shrimp- you see, I was at my local supermarket and I was debating between getting 12 oz. of cocktail shrimp or 1.25 pounds- I should've picked the latter, as 12 oz. of cocktail shrimp is really only a puny 8 oz. when you remove the tails, which is why this meatloaf came out so mushy. My dad tried to make me feel better by saying there was 20 shrimp in each meatloaf and I had 1 entire one per meal just to fill me up, but if we're counting calories, that's only 130 calories(for comparison, 4 oz. of ground beef is 260 calories- double that of shrimp). It's always better to get more meat or fish than you think you need(within reason- that doesn't mean get 5 pounds of it from Costco when you really only need 1 pound for 4 servings of meatloaf!) when it comes to making meatloaf! Firework Oreo Taste Test: When I ate one of these Oreos without anything else, I didn't feel a popping sensation in my mouth- just a really crunchy cream filling(which is not a bad thing either). However, the cream pops just like Pop Rocks when exposed to liquid, as in a meatloaf mixture, both auidibly and gastronomically. It's actually kind of cool to hear a meatloaf mixture sizzle without any exposure to heat. Plus the cream doesn't taste artificial, unlike actual Pop Rocks! Surprisingly, the sweetness of the Oreos pairs well with the spiciness of the buffalo sauce- plus the shrimp flavor was pretty obvious. My dad didn't like this meatloaf- he thought it was too spicy(he doesn't like spicy things) and spit the meatloaf out into the garbage(off-camera, of course- he's only trying to make my food look good even when he hates it). HELPFUL LINK: Firework Oreos: https://www.amazon.com/Oreo-Firework-Sandwich-Cookies-10-7/dp/B072F4LVRJ/ref=sr_1_1_s_it?s=grocery&ie=UTF8&qid=1498933526&sr=1-1& You will need: For the cooking equipment: A large bowl A large plate A lasagna pan Nonstick cooking spray For the meatloaf: 2/3 tbsp. onion powder 2/3 cups unsweetened applesauce 1 tbsp. buffalo sauce Pinch of garlic powder Pinch of oregano Pinch of paprika Pinch of chili powder Pinch of cayenne pepper 14 Firework Oreo cookies(see HELPFUL LINK) 12-18 oz. cocktail shrimp(at least 41 cocktail shrimp) 1. Put the first 8 ingredients into a large bowl. 2. Separate the cookies from the cream of the Firework Oreo cookies. Place the cream into the large bowl. 3. Put the cookies into a Ziploc bag or food processor and crush them up until they have the consistency of breadcrumbs. Put the crushed Oreo cookies into the large bowl. 4. On a large plate, remove the tails from all of the cocktail shrimp and discard the tails. Crumble the shrimp up by twisting the body until you get the consistency of ground meat. Place the crumbled shrimp into the large bowl. 5. Mix all the ingredients up until you get a firm meatloaf mixture. 6. Spray a lasagna pan with nonstick cooking spray. Form 2 loaves from the meatloaf mixture. 7. Bake in a 350 degree Fahrenheit oven just for 5-10 minutes(otherwise the popping candy inside the cream will dissolve). Bon appetit! |
Archives
October 2019
Categories
All
|
 RSS Feed